Well yes orlen I use it a dab inside my boots when I slide the metal connect pin down inside the boots(this is for my cut to fit accel wires) bc they have to be slid on.And yes this white lithium is electrical safe and will not reduce or change anything! I in fact used the same grease on J.masson's doors for the electrical windows tracks and reduces moisture,rust,corrosion and can be used for just about any auto and home grease.Door hinges,key lock holes,etc.On battery terminals just lightly apply a very thin coat over your cable ends and whalaa no junk on batt cables ever!To remove it I normally used a rag with brake clean to remove old grease and reapply bc it attracts dirt,dust..I have my tub or container for lets say a long freaking time and yet to wear out of product yet.Works great on carb linkages and lawn mowers for some things.I could ramble on but I know you get the just of it.I last used on a door in my house pulls hinge pins (squeeeeky) light coat slide down wipe excess done.

Hi folks!! Almost done with the 'bird. All that is left to replace are the Disributor cap/button & plugs! :-)
So I wanted to get a few photos of the dreaded Chevy 2.0 OHV coil location on here. Took me quite a few clicks of the camera to even get some pictures of the darn thing. Thank goodness we don't have to worry about film anymore!!
I got a bunch of nasty grease in these. A couple of years ago, I had an oil problem and couldn't figure out what it was. Gave up and just guessed it was valve stem seals or worn rings. Eventually stumbled upon the valve cover gasket leaking on the back side. Since it was running down the intake side, I didn't have any smoke or smell. Sure was happy to discover that was all it was!! :-) So I didn't realize I had all this gook till I took these...LoL - it's impossible to see back in there. Oh, top tip I learned during this - I used the more expensive neoprene gasket 1st time around and it collapsed inside on the back side again and kept on leaking. The second time I used the good old fashioned cork one and I've been fine ever since!! :-)
So here we go...
.
Down...down....down ...underneath the intake manifold is where this beast lives.
Here is a good photo for a reference point. Gives you a good idea of where this bugger is and why no one can find it - cause you can't even see the darned thing. It has 3 bolts holding it on. Only one of them have to be completely removed tho, the other 2 only need to be loosened and provide you a way to get it in place on the re-install.
.

.
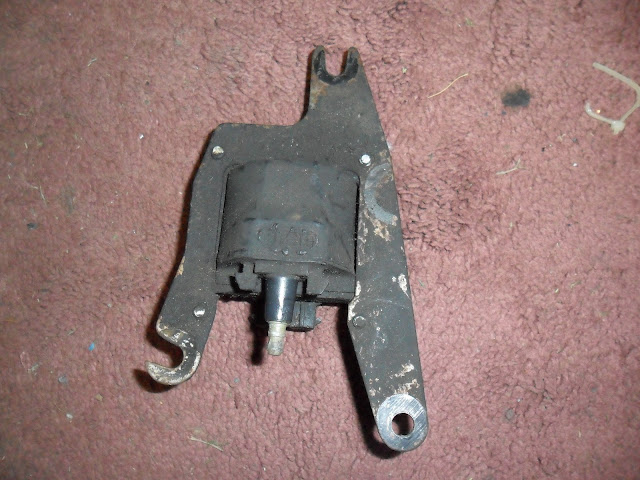
Here is a photo showing the bolt holes. You can see the 2 that are open so you can just loosen those bolts and slide the coil out. Had I not see this,myself, I'd just thought you'd had to remove all 3. The only bolt you have to completely remove is the one closest to the firewall.
.
.
Here is a view from the #1 cylinder , for reference...
.

.
...and now for those gooky photos I warned you of. Does give you a good photo of the coil in it's natural habitat...LoL
.

.

.
Thanks for lookin!! :-)
.

