Here are the instructions for adding or relocating a battery to your trunk.
Use common sense. Here is the basic idea to perform the relocation with the secrets I used in my car; it does not include every minor detail in the process. If you are not electronically inclined, then do not attempt this procedure.
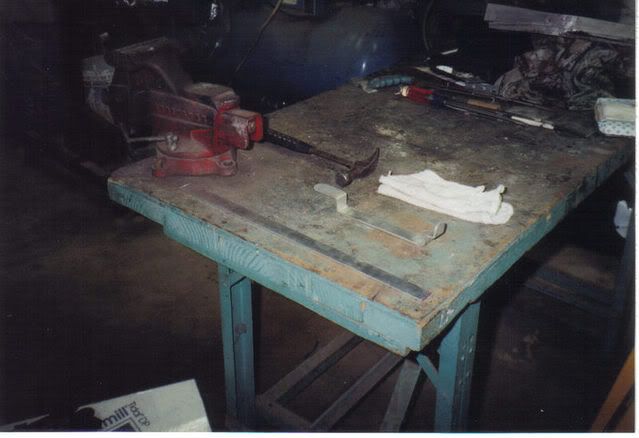
Tools and Supplies:
Battery typically it is recommended to have both batteries be the same age and model if you are adding an extra one in the trunk for stereo needs.
Reciprocating saw
1/8 sheet metal
1 aluminum
Vise
Welder
Undercoating
Foam tape
Silicone
Solder
Butane Torch or large soldering gun
4 gauge wire
One way weather proof vent
Fuse blocks
½ MDF wood
Fiberglass
Body filler
Paint
Instructions:
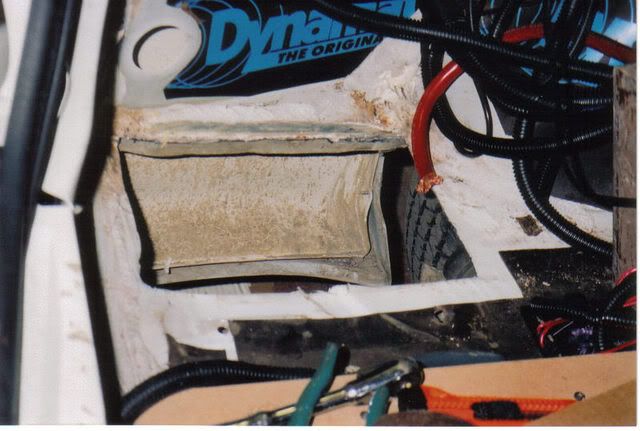
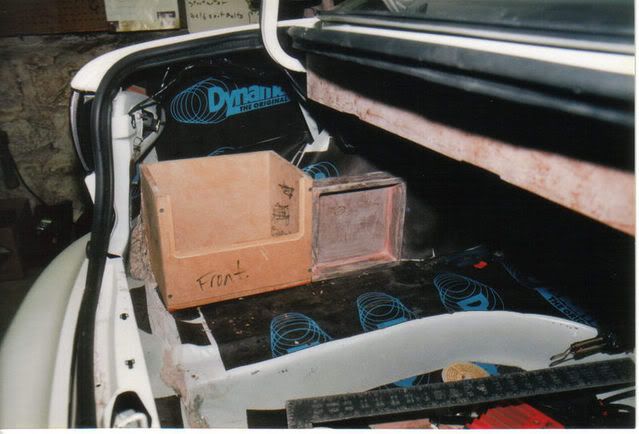
1. Remove all carpeting from the drivers side of the trunk to expose bare metal.
2. Plot the measurement of the hole which needs to be cut out of the floor. Roughly 1 longer and 1 wider than the battery you plan to use. Use the Reciprocating saw to cut the hole.
3. Using the 1/8 sheet metal, plot a 5 sided box by drawing the dimensions on the metal so that there is approximately a 1 flap overlapping the sides for you to weld into a sturdy box. You also want it to be approximately 1 to tall, so you can bend the sides down for welding the box to the car.
4. Using a vise and a straight edge (I used a piece of angle iron clamped down), bend your metal sides into place to achieve a straight even bend.
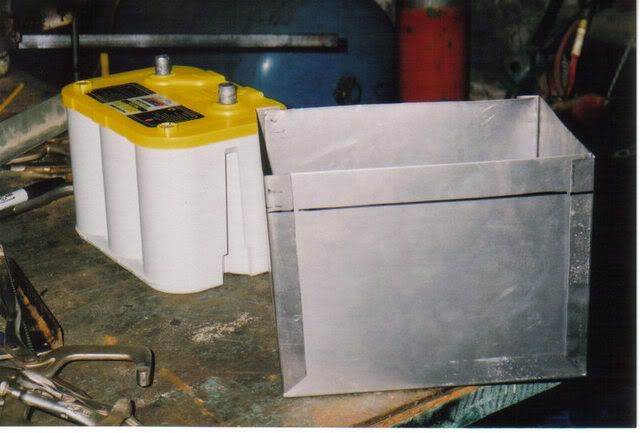
5. Once the flaps are overlapped, weld the sides together to construct your box. Note the black line which signifies the top of the battery posts, the 1 of metal above the line will be bent horizontally so we have tabs to weld the box to the car. It is also recommended that you install a one way weatherproof vent at this stage. Many sanctioning competition bodies require the vent for safety purposes when competing.

6. Clean up the metal around the hole in the car by grinding away any paint so we have a bare surface to weld the box in place.
7. Clean any oils off of the outside of the box and spray it thoroughly with undercoating to protect it from the elements.
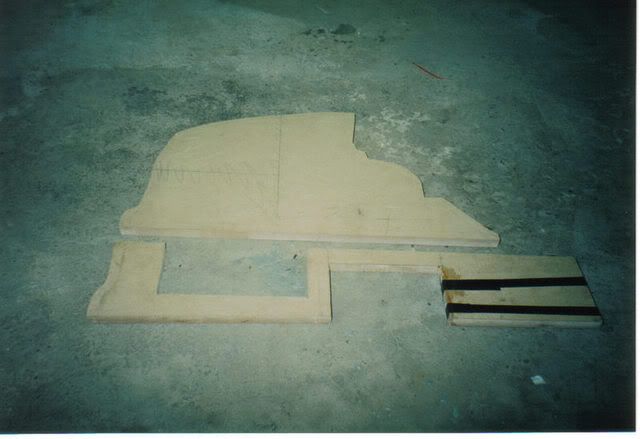
8. Camper Foam Tape was used to seal the outer top edge of the box from the beauty/fusing plate we will construct and install.
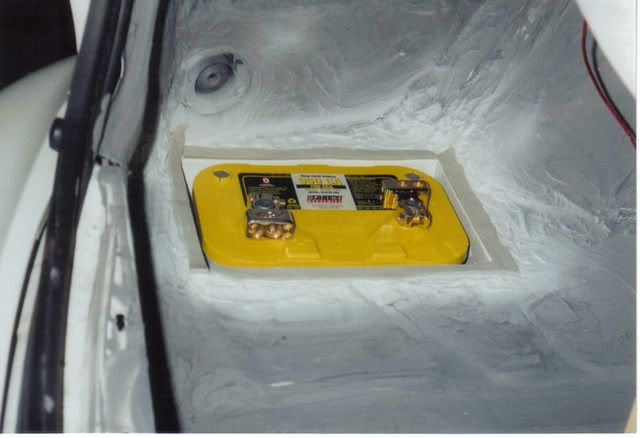
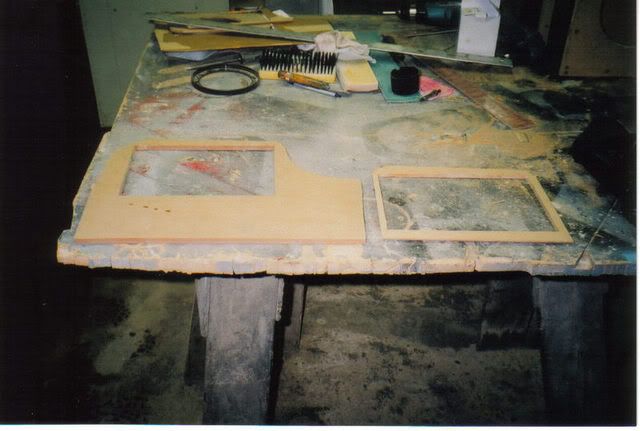
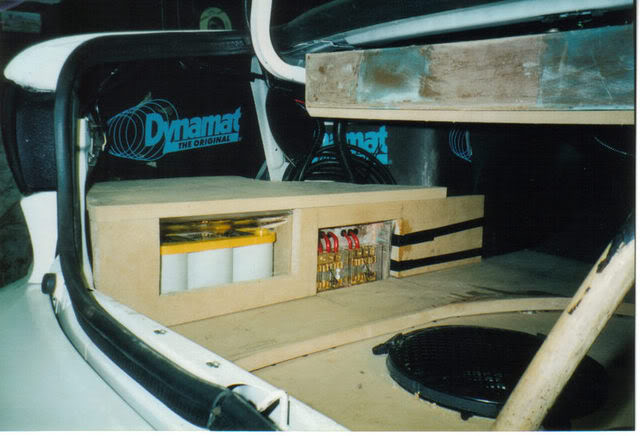
9. Create the shape of your top mounting beauty plate. We chose this shape to allow room for the many fuse blocks we needed to mount. We also created a ½ spacer plate to get the beauty plate mounted higher to sit nice and solid on the contours of the trunk floor.
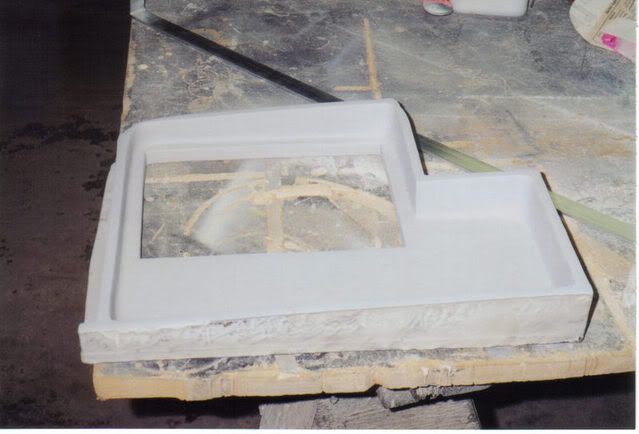
10. Finish the project, prime, and paint to a desired color complimenting the install and the exterior color of the car.
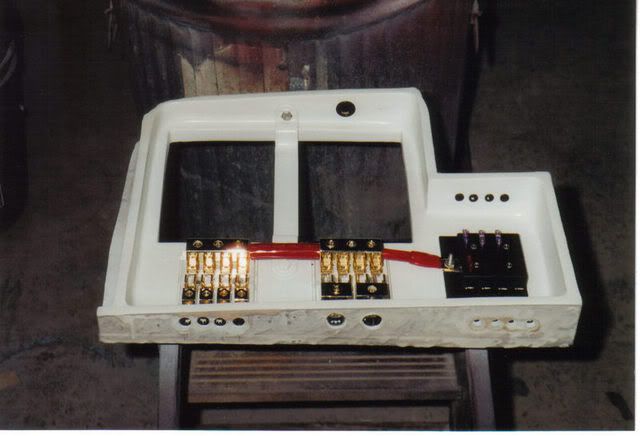
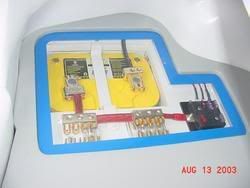
11. The beauty plate is permanently mounted to the trunk floor. The battery can easily be removed for servicing or exchanging. The fuse blocks are mounted to the wood using nut-serts and machine screws for a quality finished appearance. All wires are protected by grommets.
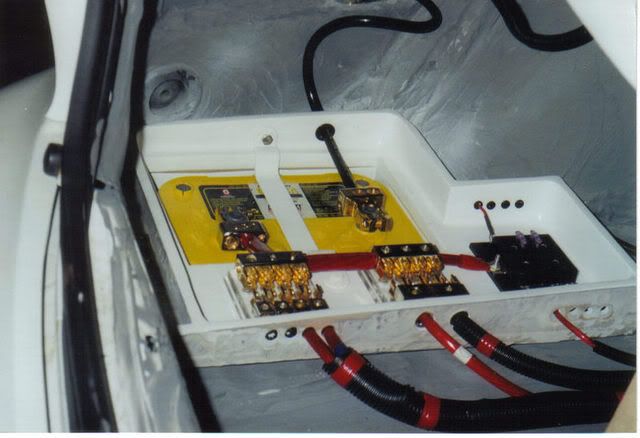
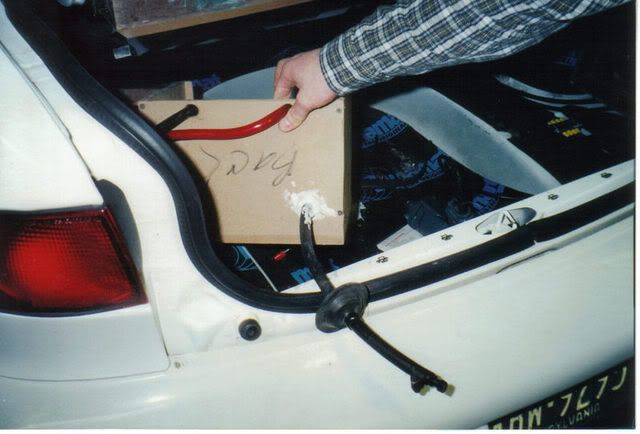
12. Use a piece of 1 aluminum to fashion a bracket to securely hold the battery in place.
13. Fuse all 12 volt leads within 18 inches of their source for safety/industry regulations. This includes the battery under the hood if this battery is an auxiliary battery. Use appropriate sized fuses.
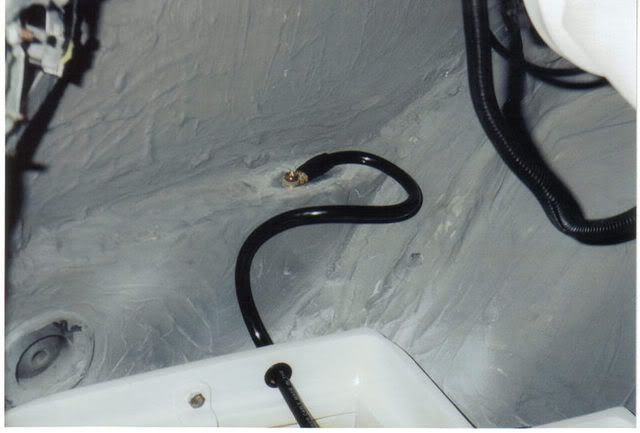
14. The ledge where the rear bumper bolts mount makes a good location for grounding the battery. Clean the metal surface bare. Solder a ring terminal to the end of the wire and bolt it down securely. To prevent corrosion you may want to cover the ground with silicone.
If you do not have access to a welder here are some other ideas for mounting the battery and any system fusing.
Please do not post comments. The purpose of this thread is for people to research. They are not going to want to sort through several pages to find relevant information pertaining to this installation. If you have a question about something that is unclear please email me. If need be, I will update the information to clarify.
Check out my other How Tos: Installing a Remote Car Starter, Building custom trunk panels, Motorizing your trunk lid, Adding/Relocating a battery to your trunk, Going from 9005/9006 to 9007 bulbs (converting your headlights into 2K with OEM functions), etc.

^CLICK ME TO SEE HOW I BUILT EVERYTHING^ How To in Interior Forum
Here is the finished product.

^CLICK ME TO SEE HOW I BUILT EVERYTHING^ How To in Interior Forum