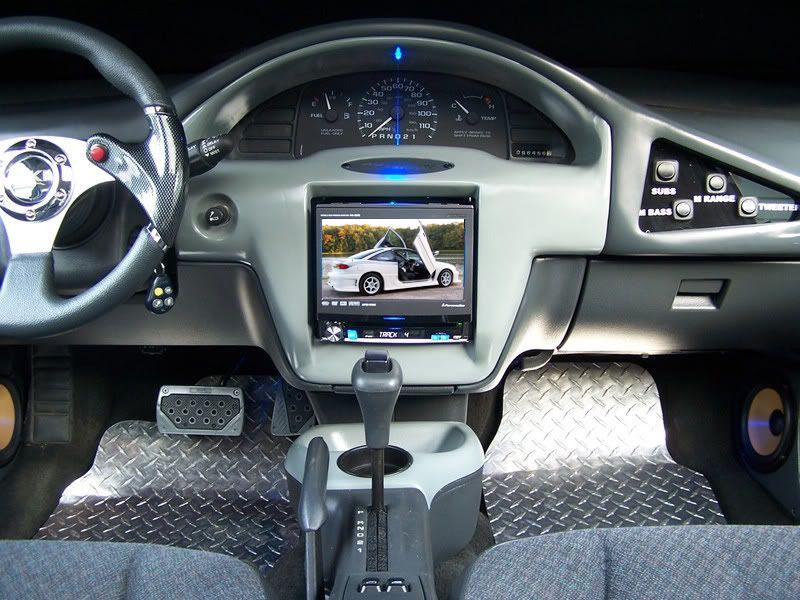
Here are the instructions for relocating your HVAC controls to the center console. If you plan to relocate the controls to the glove box, you should not need to do this as there is enough length to reach that far.
Use common sense. Here is the basic idea to perform the relocation with the secrets I used in my car; it does not include every minor detail in the process. If you are not electronically inclined, then do not attempt this procedure. Take this one step at a time so you don't get confused hooking all these wires up. Use solder and heatshrink!
Tools and supplies:
Soldering gun
Rosin core solder
heat shrink
heat gun (but a butane lighter works just as well)
electrical tape
wire strippers
Mopar windshield washer hose
16 gauge wire, preferably several colors
6 foot bicycle brake cable
Backstrapping
Metric socket set
Screwdrivers
¼ MDF
Body filler
Paint
Instructions:
1. Disassemble your dash. Instructions can be found in the library to do this.
2. Remove your passenger seat by unbolting the 4 legs.
3. Remove your center console. Remove the bolt in the CD tray below the dash by removing the oval shaped plastic cover, remove the cover at the gear shift and remove the bolt, open the consoles door/lid and use an extension to remove the bolts deep at the bottom.
4. Separate the consoles outer shell from the inner shell. You will find 6-8 Phillips head screws holding the pieces together when you flip the console over to access them from the inside.
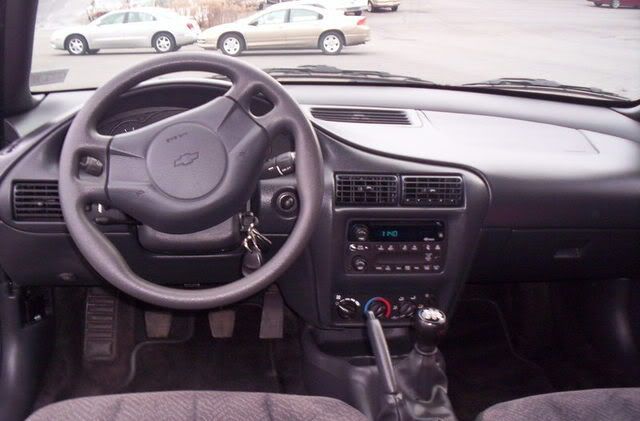
5. Unbolt your HVAC unit and remove the cables and plugs. Set the unit aside where it will not get scratched.
6. Begin to lengthen the wiring. Do this one wire at a time so you do not get confused. Precut your spare wire to the length desired. The wire will run down the dash, under the carpet, and up the back side of the center console. Make sure you give yourself enough slack for when everything is put back together. (I used 6 foot lengths since the brake cable is 6 foot.) Do not cut the HVAC wire too close to the plug. Give yourself enough room to work, and try to stagger your cut wires so there is not one big bulge when the wires are lengthened and reattached.
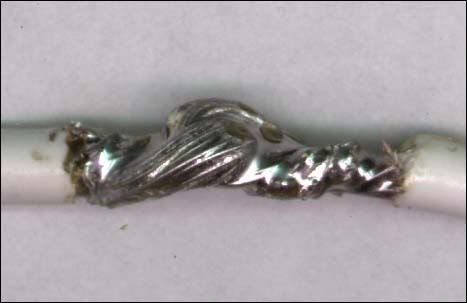
7. Solder* the extension lengths of wire one at a time by connecting one end to the HVACs plug side, and the other end to the HVACs dash/car side. Solder the connections, and heat shrink them for a permanent joint. Move on to the next wire, cut it, and repeat this process.

8. Once all of the wires have been lengthened, move on to the vacuum lines. I have found that Mopar windshield washer tubing fits perfect. You can buy a spool of this from any Chrysler dealerships parts department. Using the same ideas from lengthening the wires you can now lengthen the vacuum lines. Have 6 foot precut lengths. Cut one line at a time. Do not be alarmed by the loss of vacuum in the lines, it will return the next time you start the car. Force the extension over the cars vacuum line. Overlap the HVACs lines by about 1 inch, then heat shrink the connection in place. Be careful not to melt through the hose or vacuum line.
9. For the temperature control knob use a 6 foot bicycle brake cable to extend. If one is not available, the auto parts store will have choke cables, though I do not recommend choke cables because they can be temperamental on humid days. Connect the extension to the factory end of the HVACs temperature control cable. If need be, you can solder these 2 cables together.
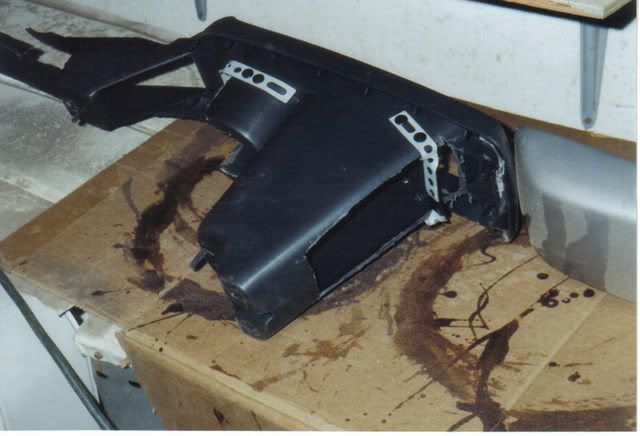
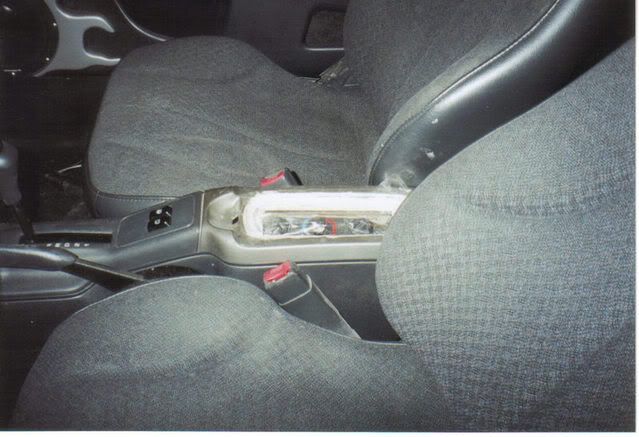
10. Now that all of the cables/wires/lines have been lengthened about 6 feet, it is time to mount the control unit to the center console. Take the top/inside piece of the console. The back section and the front section of the storage pocket must be cut away because it tapers slightly and will not allow the unit to mount deep enough for the door/lid to close. Do not cut too much away as you will want a sturdy mounting location for the backstrapping.
11. Take your time mounting the control unit. This is a finishing step which everyone will see. Make sure the unit mounts solidly and is centered perfectly in the opening. I used speedclips on the backstrapping to screw the HVAC control unit in place after everything is reassembled, and to make servicing easier. Keep in mind there are bolts below the new mounting location deep in the consoles pocket which is another reason not to permanently mount the unit in place.
12. Run your cables/wires/lines neatly under the carpet and under the center console while avoiding pinch points and bolts when the console is reassembled.
13. Reinstall the center console and passenger seat.
14. Install your HVAC control unit in its new home. Plug in all plugs, attach the cable, and screw the unit in place.
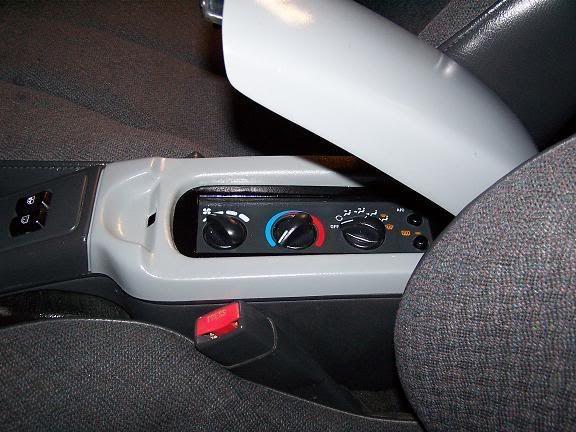
15. Build a beauty plate to trim off the HVAC control unit now that it is relocated to the center console. Use a piece of paper or cardboard to trace the rough shape of the center consoles opening onto ¼ MDF wood. Cut out a rectangular opening in the middle as straight as possible to access the HVAC controls. Tape off the controls and inner edges of the opening, or use plastic wrap, to protect the surfaces. Mix up a small amount of body filler and squash it into the cracks between the outer edge of the wood and the center console. This will make a perfect, show quality, fit of your beauty plate to trim off the HVAC control unit.
16. Once the filler dries solid, gently remove the beauty plate and sand the top side smooth. I coated my top side with fiberglass to seal the wood and get an even base to paint. Use caution not to get any on the sides or your plate will not fit. Finish your project smooth, paint it a color which compliments the interior, and reinstall.
*Anyone who uses this tutorial but refuses to solder their connections will be doomed to installers hell when they die. Here you will be forced to install Bulldog remote car starters without a security bypass for all eternity on Impalas that reek of cigarette smoke, have leaking floor boards, remains of shattered glass under the carpets, in 20 degree weather and no Kerosene for the heater, for men who use their drivers seats as Kleenexes when they drive.
Please do not post comments. The purpose of this thread is for people to research. They are not going to want to sort through several pages to find relevant information pertaining to this installation. If you have a question about something that is unclear please email me. If need be, I will update the information to clarify.
Check out my other How Tos: Installing a Remote Car Starter, Building custom trunk panels, Motorizing your trunk lid, Adding/Relocating a battery to your trunk, Going from 9005/9006 to 9007 bulbs (converting your headlights into 2K with OEM functions), etc.

^CLICK ME TO SEE HOW I BUILT EVERYTHING^ How To in Interior Forum