no @!#$? so I could extend that to the thinner upper nozzle on the option B tank for my heat exchanger set up? although...that's a separate system...but would that work?
ill get pics of the plug/connection im talking about by the oil filter. its definitely a different plug, its just above the starter. so if that's the CPS, I can just get an extension and relocate it to the location where Ill have to do a makeshift bracket for the cps. that's still going to be one of my bigger hurdles...but shouldn't be too bad.
04 Cav. 2dr. 5spd. My DD. 'Nuff said.
Nah man run it to the engine overflow where its suppose to bc it helps the whole engine recirculate some but mainly make sure no air is ever trapted in it, running it to the option b imo would be bad idea since like you said its a completely different system, but not hundred percent positive since never dealt with a supercharger before. And yea get a picture of the plug your talking of, pretty sure its the cps but that way can make sure and yea if it is just extend your harness to trigger wheel than pull sensor off your old engine and mount it and leave lsj one in block so have no leaks right there, thats what im doing to my le5
FuzzMASTA9
OK, the hose barb above the upper rad hose, you can plug it. I think its 1/8" npt, but I have to double check. I also removed the temp sensor there and plugged that as well (m12x1.5 threads if you do so).
Lsj has the oil pressure sensor on the oil cooler, you can either move it to the l61 location or leave it. I left mine on the cooler, and it uses the same plug that's already on your l61 harness.
The other sensor there is indeed the cps. Just extend the wires to reach the trigger wheel...just make sure you twist the new wires like the stock ones are, it helps prevent interference and sensor cross talk
wow..gotta love my work computer...i typed up a response and its all gone when i go to post it.... *SMH....
So I can plug the hose line by the radiator hose...thats good because that thing just is more crap to run along the fuel rail.
Coolant Temp Sensor: Matt, did you just tap the back side for the CTS then and run it to the stock location? I actually wouldnt mind having two so i can run a second gauge and keep the one on the dash as well, but its not dire. If I keep it there i guess Ill have to extend the wiring for the sensor that was in the rear of the engine, dont imagine it'll reach.
Crank Position Sensor: are there extensions to just plug n play and extend the CPS or should I just hit up a pick n pull and look for some spares and splice those? Or are you guys just splicing the sensor itself between the sensor and the plug?
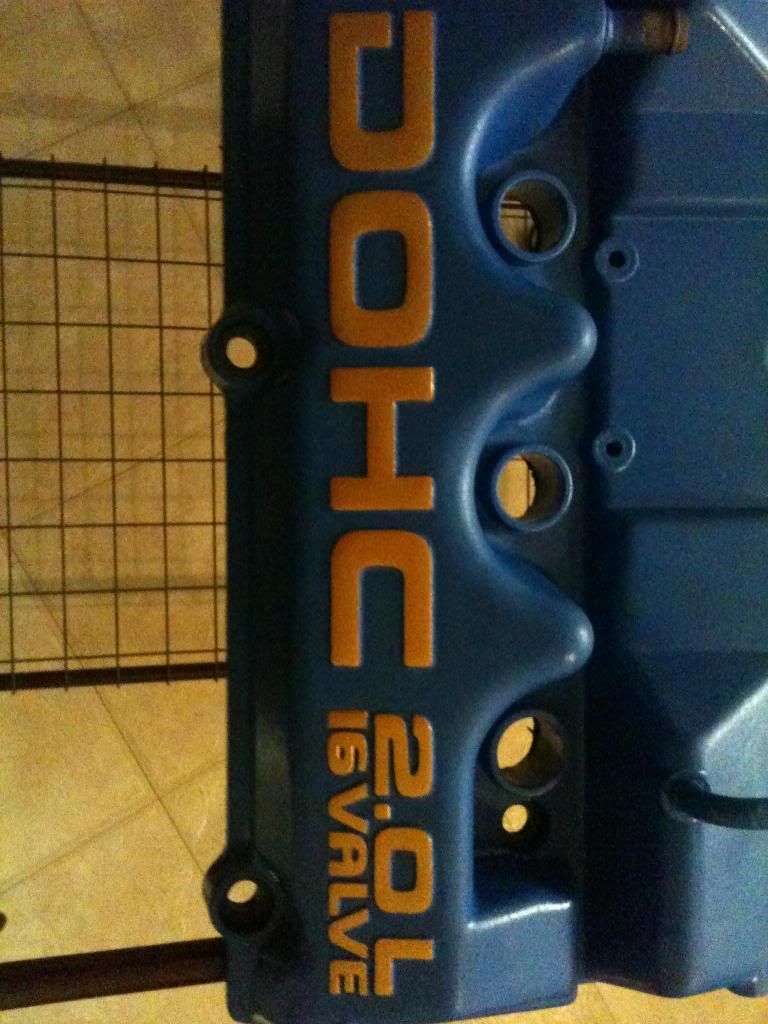
Also...been thinking about the paint options. Will prob do the block, head, and trigger wheel. Im going to use the black valve cover, its got a good paint job on it already. Im going to browse youtube to get some ideas for ways to paint my engine. Ive never done it but since its not difficult and doesnt take a lot of time, i think it'll be a neat thing to do.
04 Cav. 2dr. 5spd. My DD. 'Nuff said.
You could go with gold. The metallic blue and shiny gold would look pretty sweet together. I painted my best friend Daniel's intake and valve cover.. plus did the raised lettering detail. This is on a Neon.
I couldn't find his engine bay pic with the gold intake, but here in the link you can kinda see it.
He's selling it btw
To turbocharge, or not to uh, uh..... eh, that last part don't matter.
Yeah Im not sure if Im going to paint this time around or not. But I was thinking about a black gloss block and an orange head, like on muscle cars of the past. With the blue body and engine bay and a black/orange engine theme limiting the orange, it would be unique. But to be honest its more of a want than a need, and I also don't mind the stock look when its clean (which I keep my engine clean anyways). If anything like Matt said, Im going to at least paint the Trigger wheel to protect it.
got a lot done, lots of little things. Cleaned the tranny and LSJ up. I got a quote for a port job but it takes too long so Im going to pass on that this time around. Having ARP head studs will allow me to remove my head any time without having to replace the bolts, so in the future I might get the spare LSJ head ported or just do mine when I can afford the down time. Apparently even stock LSJs benefit quite a bit from a really good port/polish job.
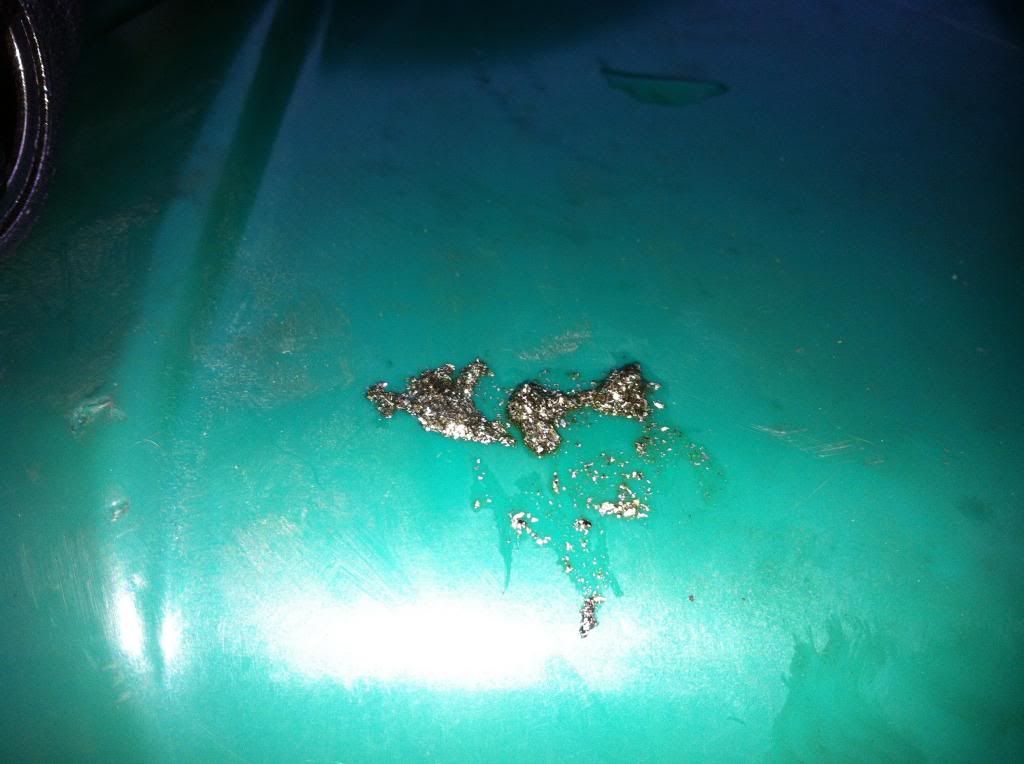
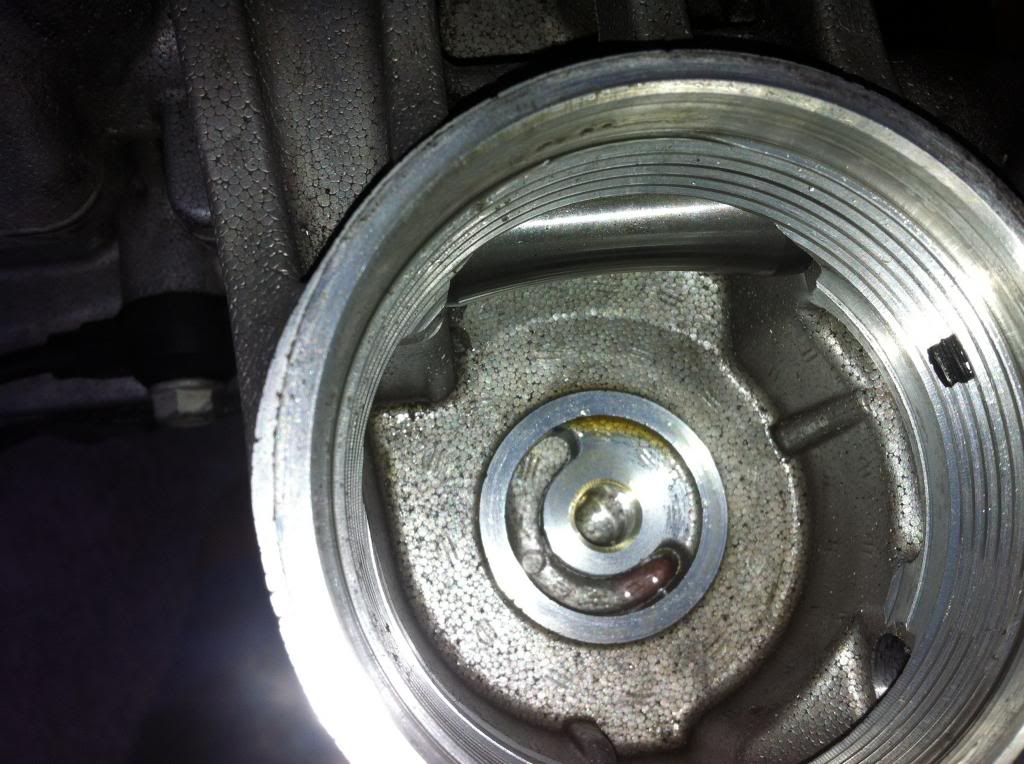
There is one thing that is worrying me. When I removed the plugs from the donor motor, they seemed okay, just a normal burn really. As I removed the oil filter, I noticed quite a bit of metal flakes stuck in the ribs of it. After removing it, there were metal flakes in the oil inside the filter housing. I have yet to remove the oil pan since its being used to hold the motor onto the stand (well one of the bolt locations). Hopefully that's not going to mean troubles.
Oh, and something interesting as well. This low mileage 'stock' LSJ I bought had stage 2, 42.5 lb/hr injectors in it when I removed the fuel rail. That means someone upgraded to a stage 2 directly from GM when they bought it maybe?
I have pics but just of the recent work, cleaning, etc, nothing new. But Ill upload later. Kinda tired and going to watch me some Netflix and relax

04 Cav. 2dr. 5spd. My DD. 'Nuff said.
Pics of flakes??
That is a very bad sign man.
You may be getting that built motor before you were expecting.

"In Oldskool we trust"
yeah this is all i need....04 Cavalier for sale, 2 complete motors, 2 blowers, new set of tires, good paint.... lol
04 Cav. 2dr. 5spd. My DD. 'Nuff said.
One thing I'm trying to remember is WHY the guy removed the head before. But when doing so, the big plug on the passenger side by the motor mount that needs to be removed to remove teh chain guide, he stripped out that threading. So its reemed out as it looks like someone tried redrilling it or something. He had a machine shop do work on the head but they didnt have a machine big enough to get the head in there to fix it. Thats when I bought it knowing about it but was just going to replace the entire head anyways.
Is it possible he tried drilling it out and the shavings got down inside and then made their way to the oil/filter? If so, theres nothing wrong with the rotating assembly but just the shavings were caught by the filter when he tried to fix the bolt hole.
Wishful thinking lol...maybe none of that makes sense. Im going to email the guy and ask whats up...pics are on my phone but i never uploaded them onto photobucket yet, so ill do that later.
04 Cav. 2dr. 5spd. My DD. 'Nuff said.
Seems to me like the motor would had to have been run for the debris to end up in the filter. Even if that's where they came from it still means they traveled through the motor :/
dibs on the ported m62

Edited 2 time(s). Last edited Monday, August 26, 2013 7:25 AM
"In Oldskool we trust"
lol...Im still waiting to hear back. I know on some cars (went through some porsche forums), small flakes are not necessarily a bad sign. An oil change or two and no more. Im not sure if it has something to do with him messing with the head quite a bit, being off and on and then slappig it all together before he shipped it. The head was off for a while at a shop. Im pretty sure it was never run since the head was reinstalled and the timing was all redone. Im actually using my phone to upload photos to my photobucket account, which ive never done. I always upload to my PC then to the site. This is great as it allows me to upload while at work!
04 Cav. 2dr. 5spd. My DD. 'Nuff said.
....
Edited 1 time(s). Last edited Monday, August 26, 2013 7:59 AM
04 Cav. 2dr. 5spd. My DD. 'Nuff said.
Wow I dunno man that's A LOT of debris to end up in the filter like that. Personally I wouldn't waste my time dropping that motor in without checking it out first. Sux man sorry to see you hit a bump in the road here.
"In Oldskool we trust"
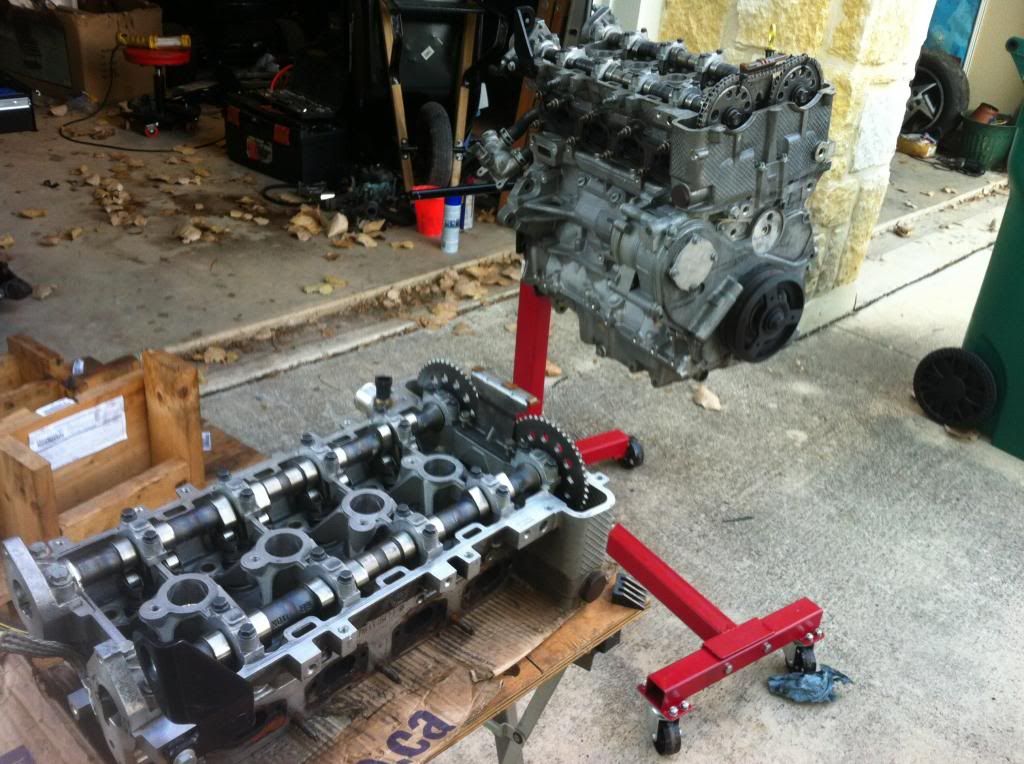
Oh and just for fun, heres a few more pics i took yesterday.
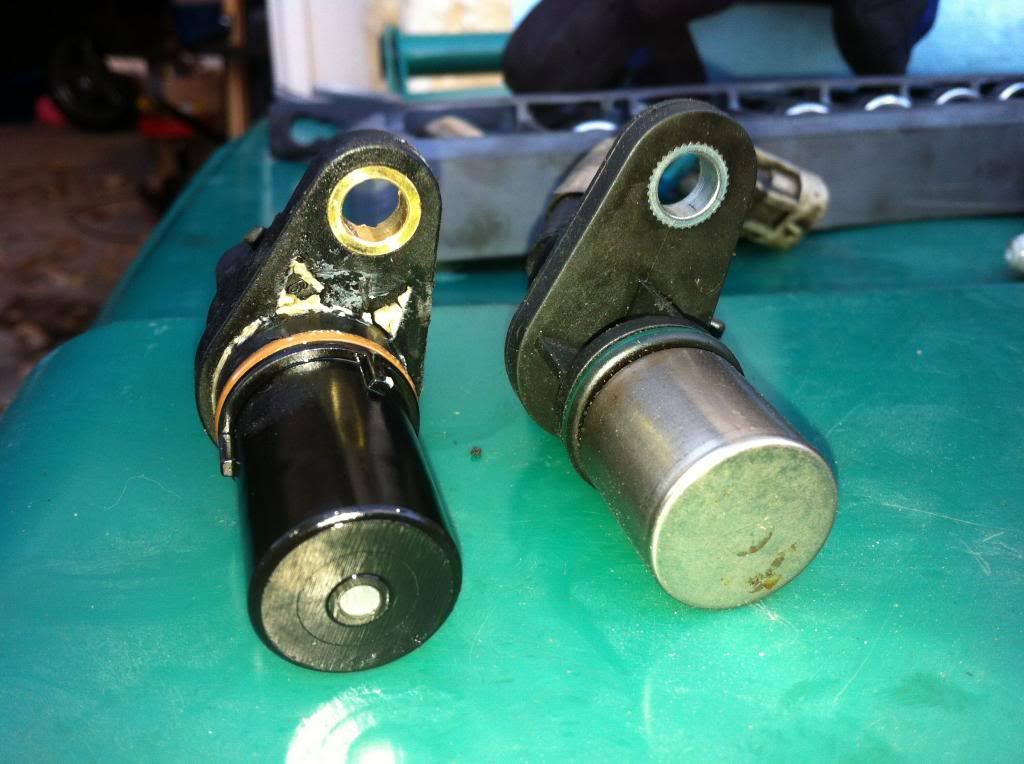
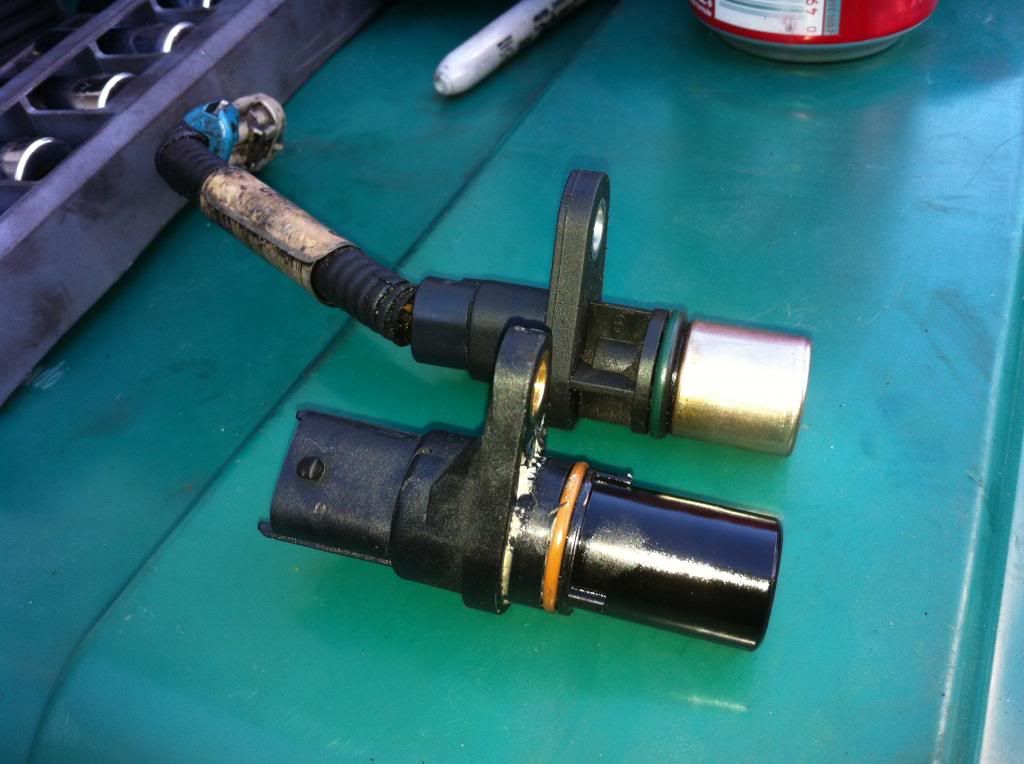
-CPS's, black is LSJ, shiny is L61. Just gotta figure out how to mount the L61 and where. Need to go check the other LSJ/LE5 swaps from you guys to get an idea how to do this.
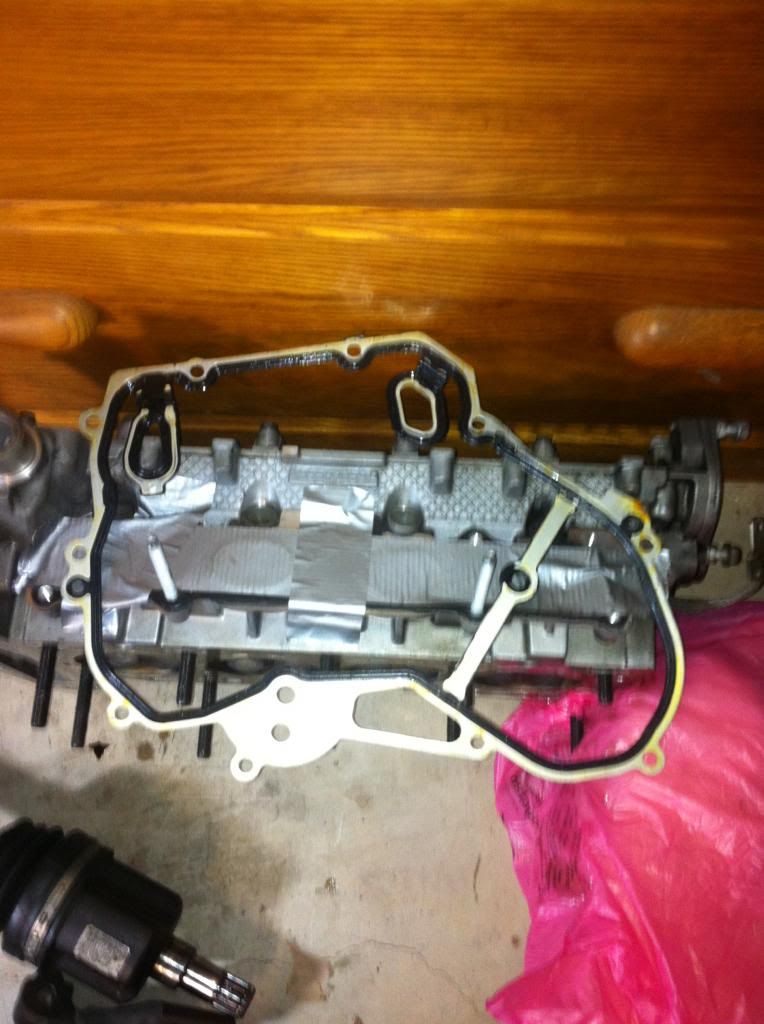
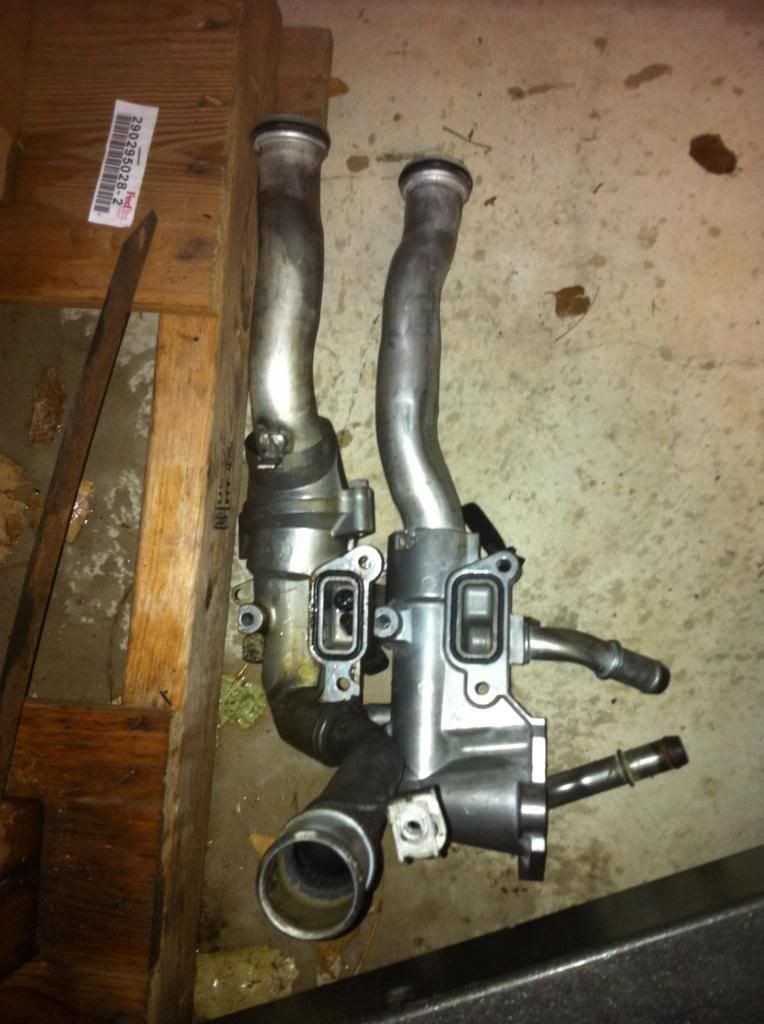
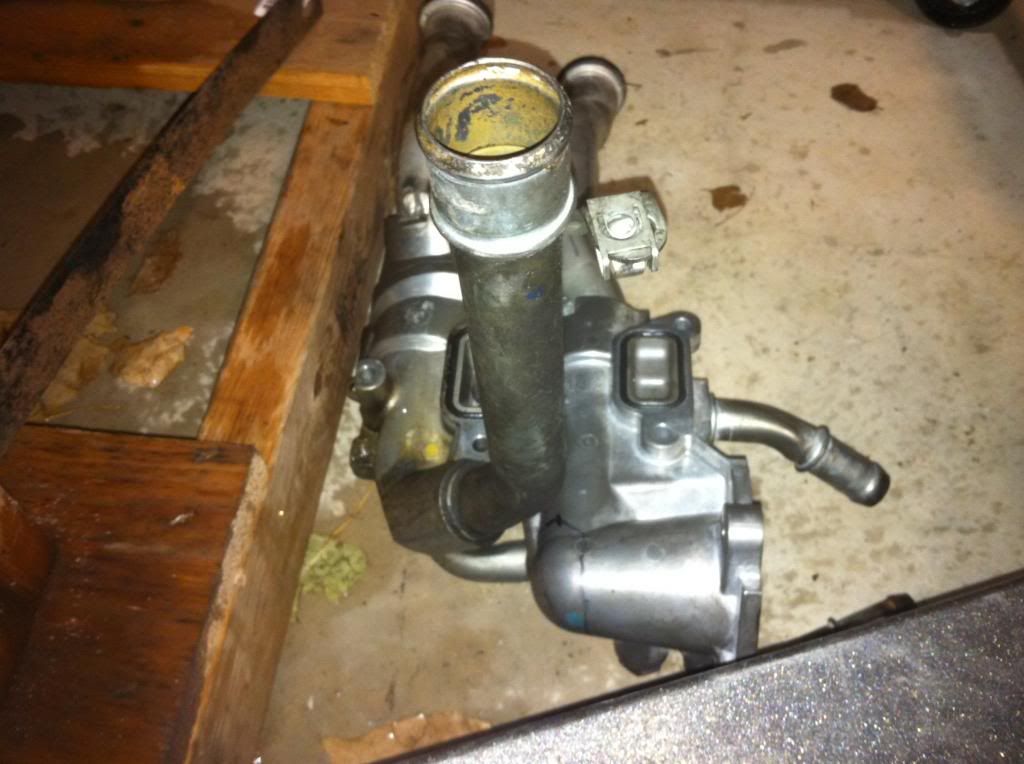
-themostat housings/water pump lines, straighter one LSJ, curvy one L61. I was toying with swapping housings and what not, but then theres modifications required that most likely involve welding, more than its worth compared to just getting the LSJ housing modded (hacked/welded at a 45). I cleaned most of the F23 off and the LSJ block. I was about to swap heads over but it was getting dark and figured Ill do the new head studs/new gasket maybe tonight, get it all ready and mocked up. I need to do some homework on the torque specs on everything and remember which parts need threadlock, what should be lubed (i think the studs are installed using some lubricant, i think there was some in the box).
04 Cav. 2dr. 5spd. My DD. 'Nuff said.
Y3llowCav wrote:Wow I dunno man that's A LOT of debris to end up in the filter like that. Personally I wouldn't waste my time dropping that motor in without checking it out first. Sux man sorry to see you hit a bump in the road here.
Ill get a better pic of the filter with the debris in it today after work.
Im thinking about what you said, about how if he was drilling into the head after it was all removed, it should have never worked its way up into the filter housing. Thats the part that has me worried. He seems like a straight shooter so Ill wait to see what he says. Im pretty sure he removed his engine because the car got totaled and he meant to install it into another one and bought a V8 project instead (which Ive seen). I did also mention that the set of fuel injectors i pulled off the engine were stage 2's...so someone did some upgrading at some point even if it was just GM doing a stage 2 from the dealership.
04 Cav. 2dr. 5spd. My DD. 'Nuff said.
So the guy emailed me back already.
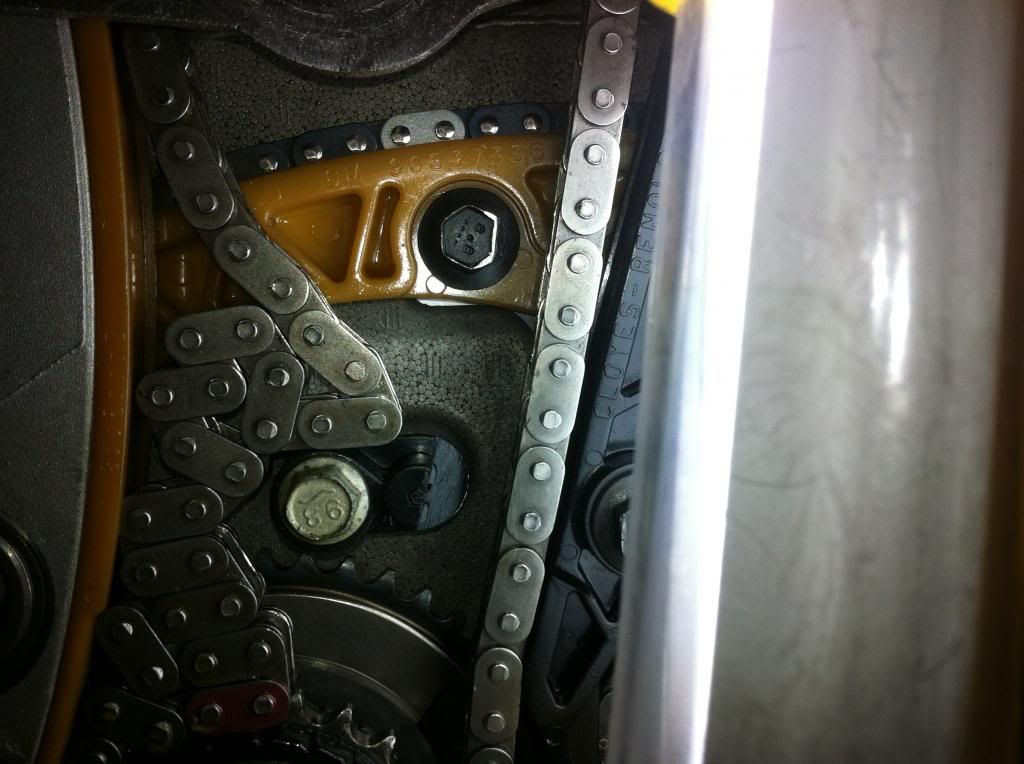
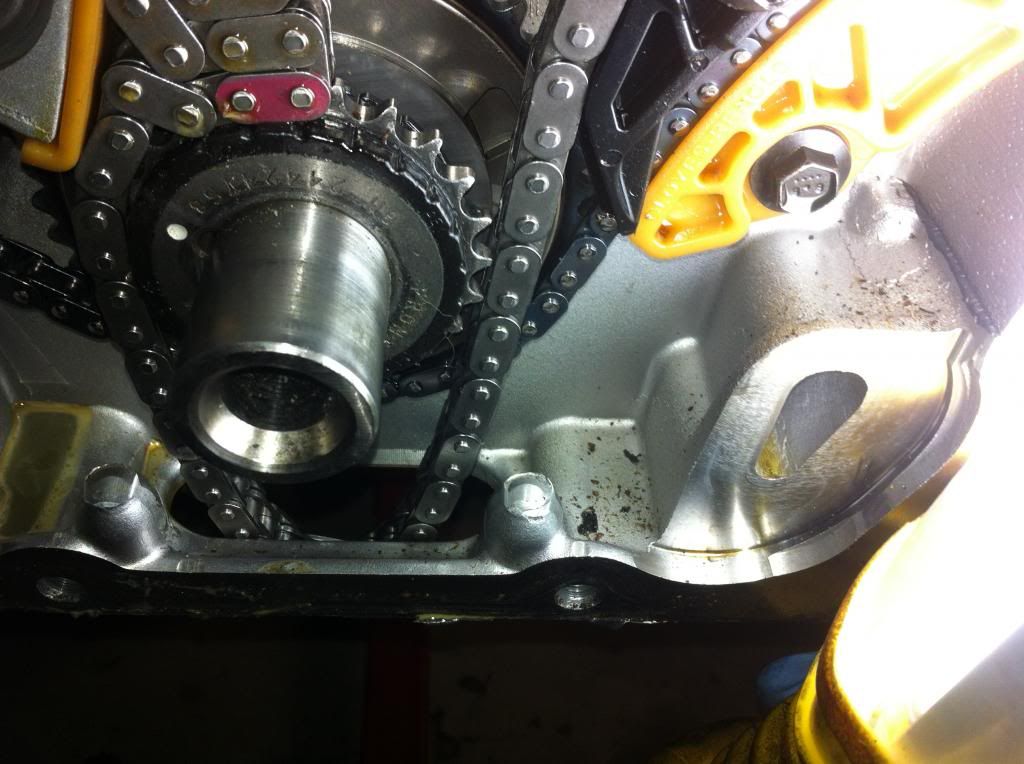
The tensioner deal broke and the bolt that held the guide in place was also broken. He drove it like that for a few miles when he realized the chain was loose. He said the chain was flapping around and could hear it.
This is when it was removed from the car and where he thinks those shavings may have come from. he never thought to check the filter because he was working on the tensioner and guide bolt and did not need to.
He said the shavings in the oil pan would make sense (which Ill most likely discover when i remove it) because the drilling as i suspected was done while the head was on the block. But he did confirm it was never started or running so there should not be any flakes in the filter from that.
He thinks its from the chain or the tensioner parts and said it was never noticed before and it was only driven a few miles before being pulled.
So Im hoping thats all it is.
04 Cav. 2dr. 5spd. My DD. 'Nuff said.
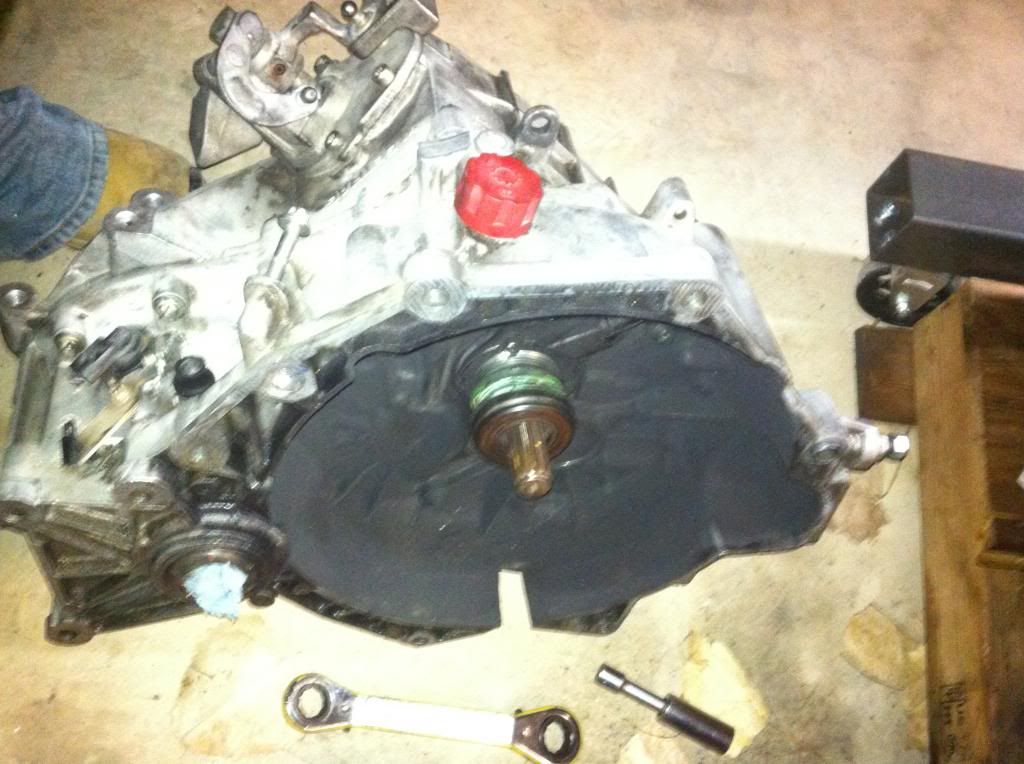
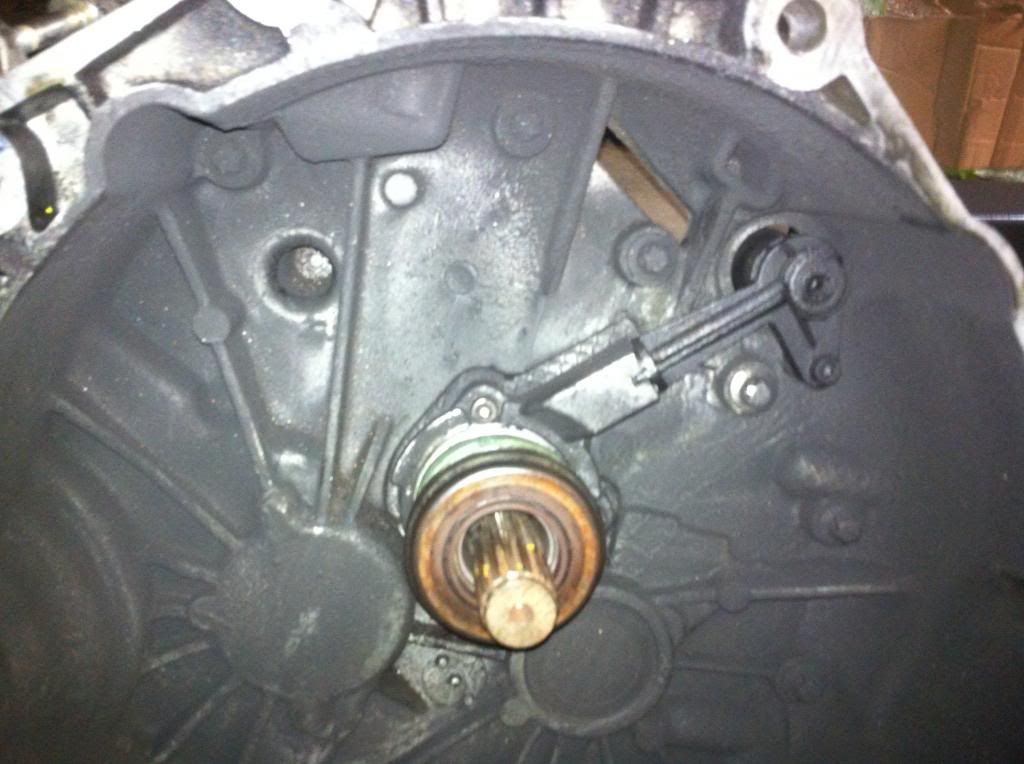
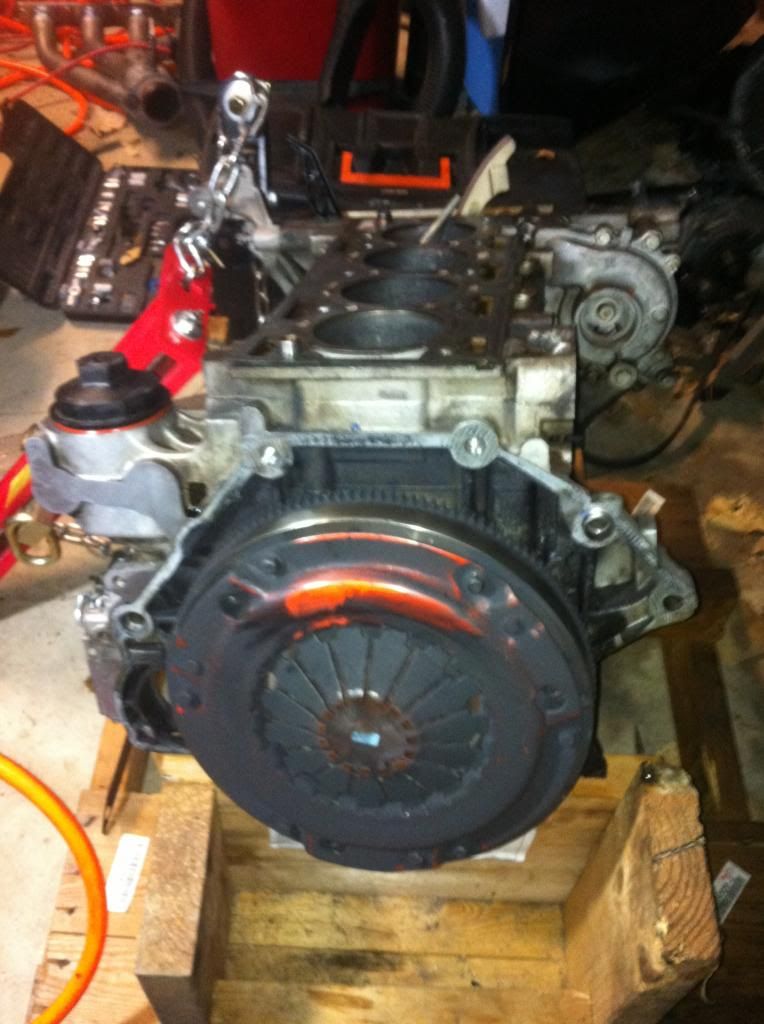
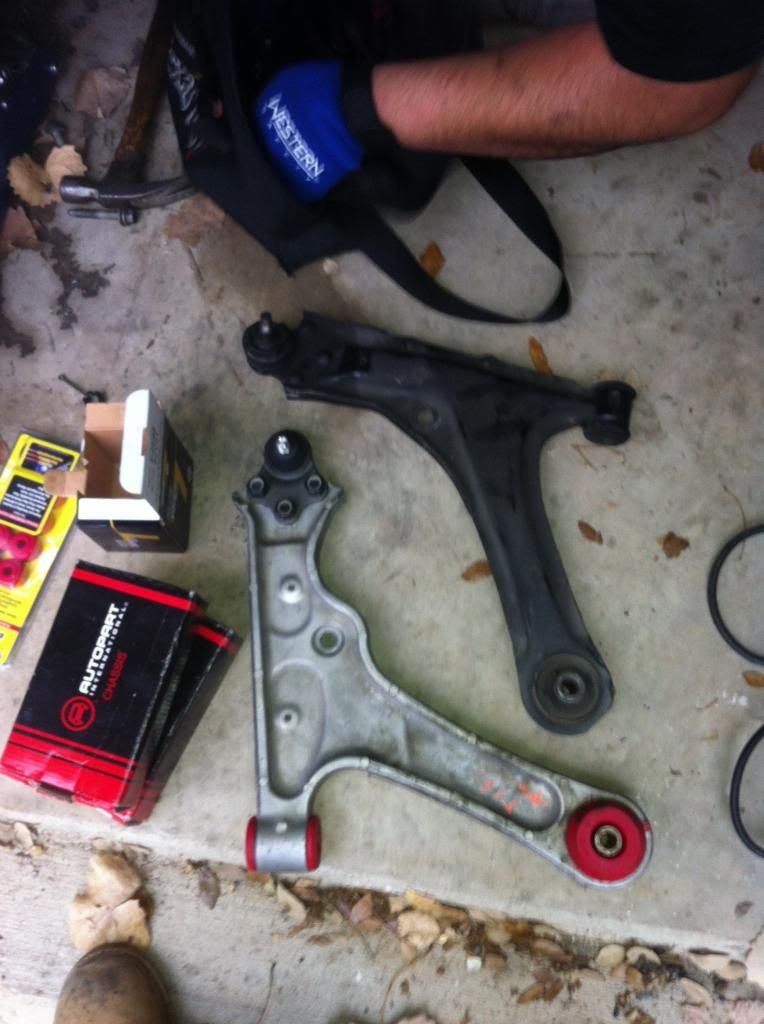
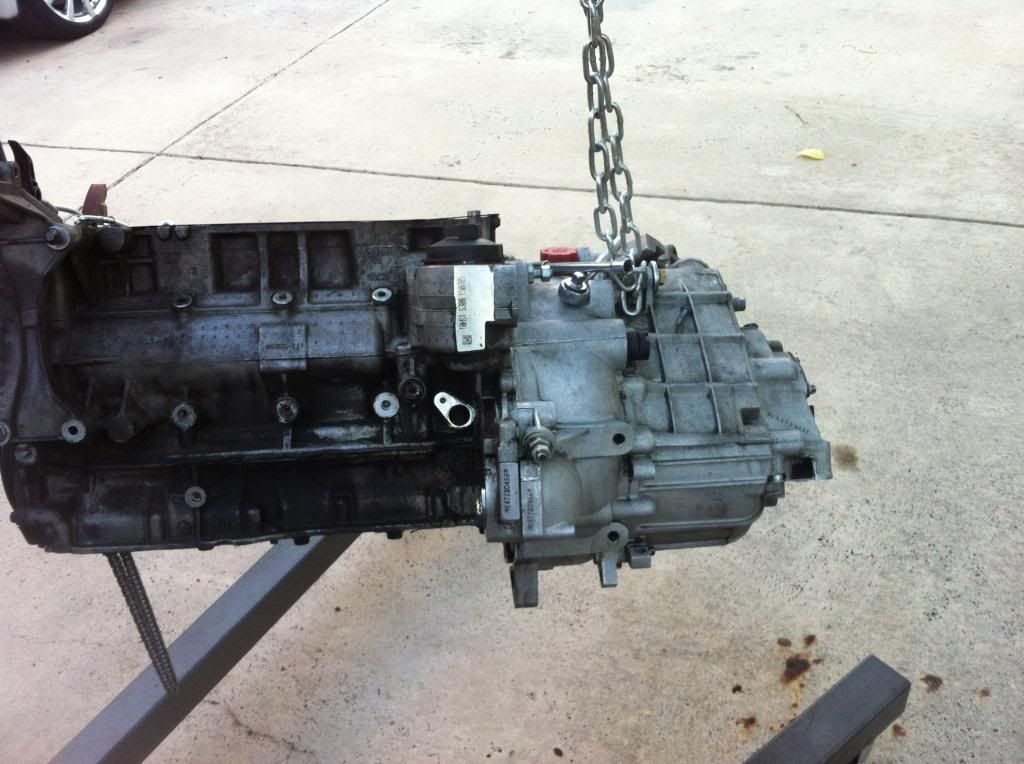
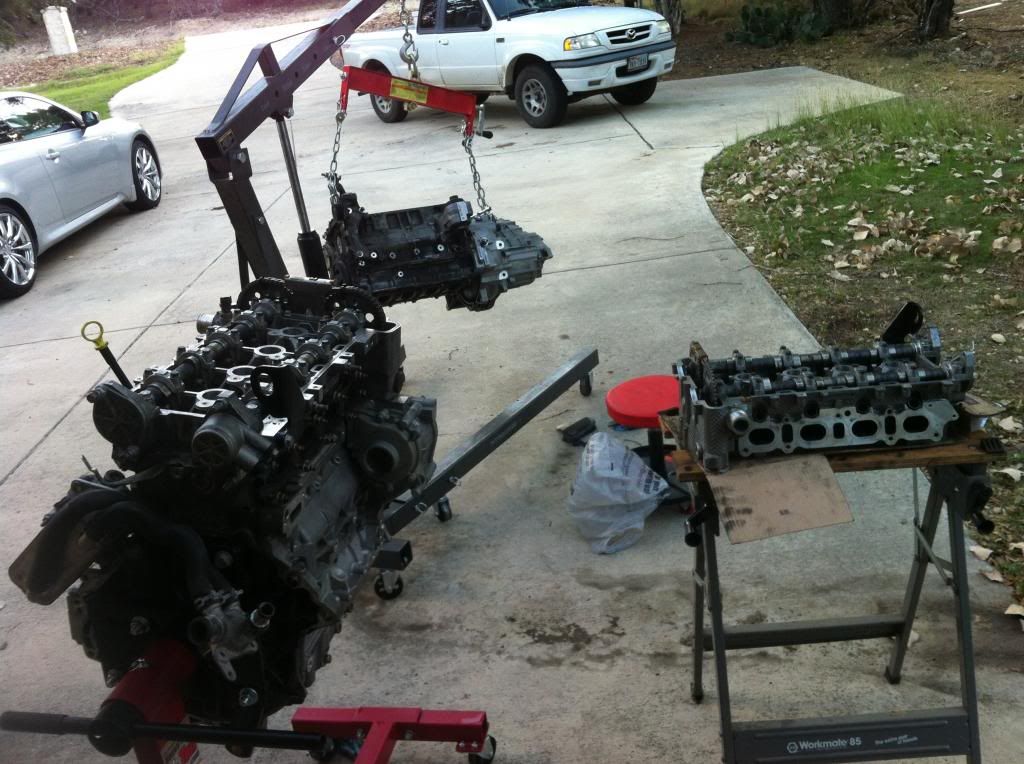
Well. A friend who used to own an 06 SS/SC helped me get my TTR tranny mounts pressed in after work today and they look great! He then followed me to my house so we could work on my engine a little, as he's had some experience with LSJs (he raced his on the Nurnberg ring, lucky bastard!). We removed the transmission, timing cover off the LSJ, oil pan, and then......#drum roll please.....the head.
good news and bad news.
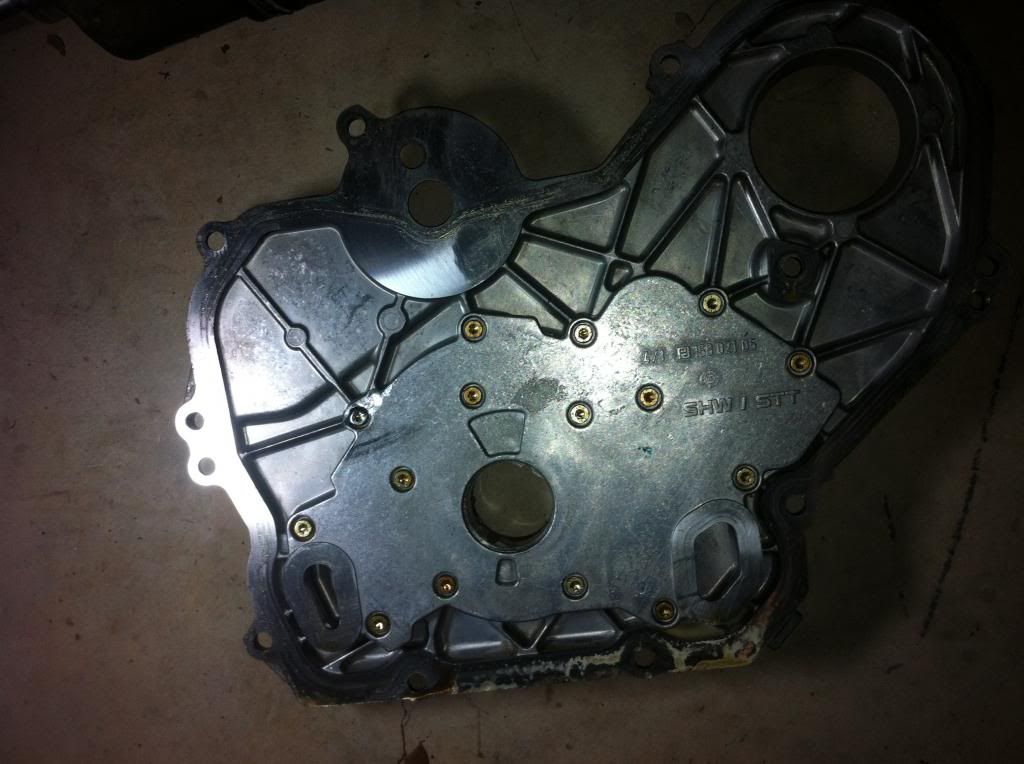
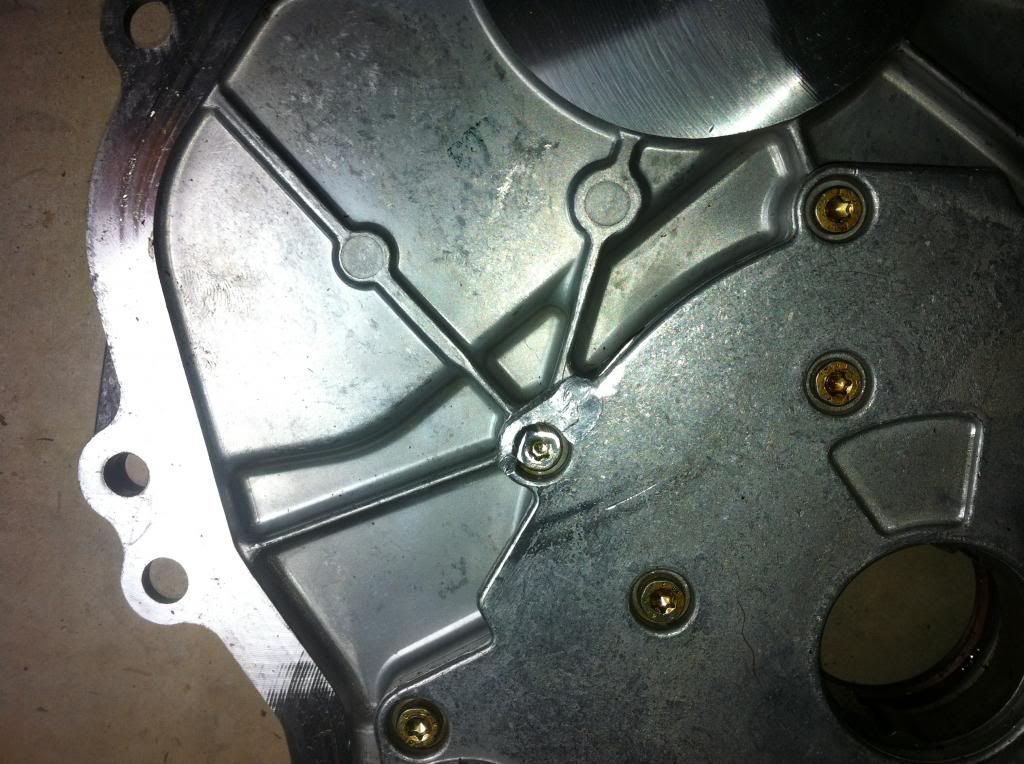
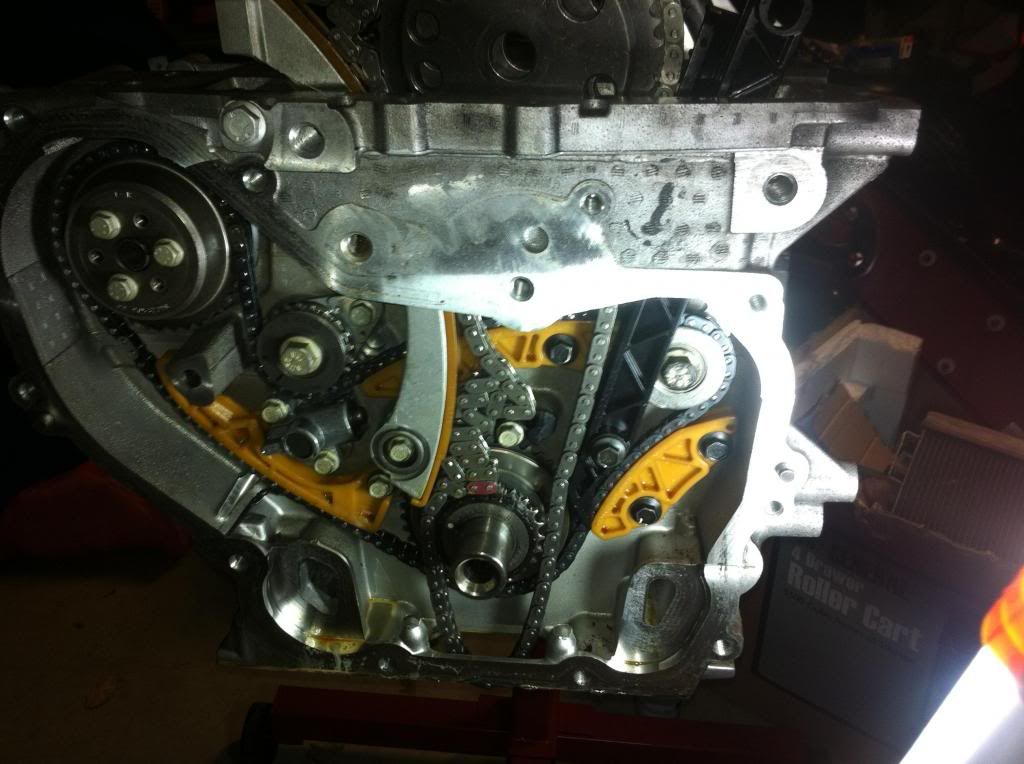
good news is, I found out what those tiny shavings/flakes of metal were in the oil filter. Ive got plenty of pics which ill post later, maybe after I shower and grab a bite. When the chain tensioner broke and the chain flopped around, it rubbed the timing cover slightly, sheered a tiny part of a steel bolt, and even shredded up a small part of plastic that's part of the timing pieces (pics will show all this). So the metal shavings, absolutely a false alarm and no big deal.
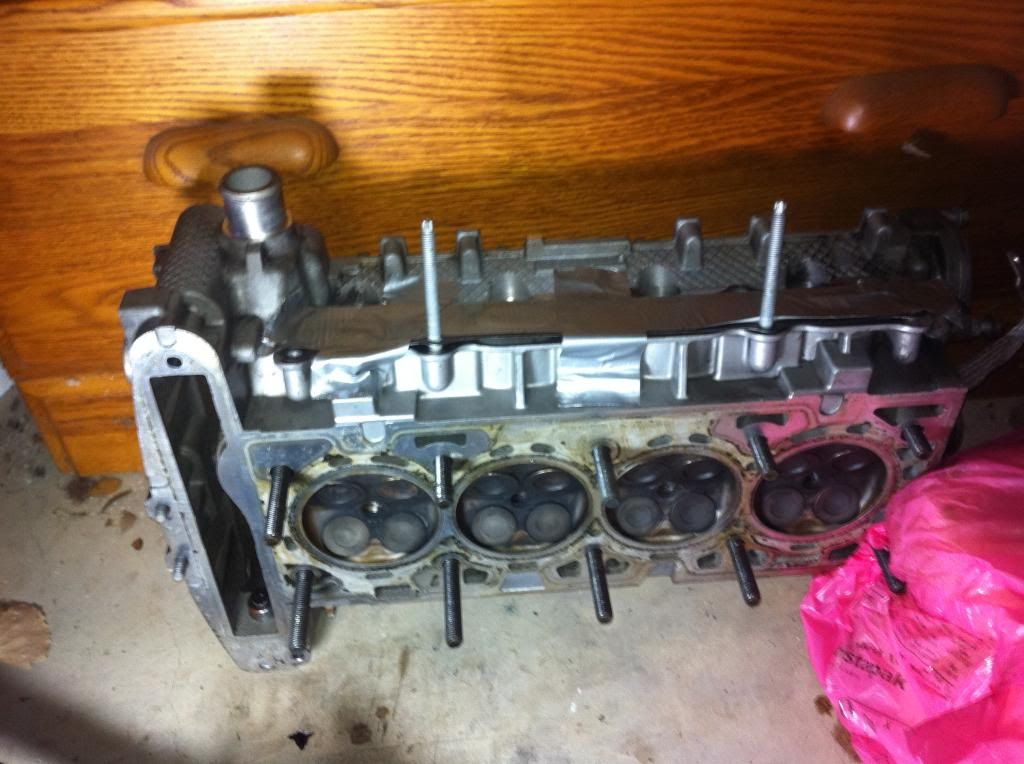
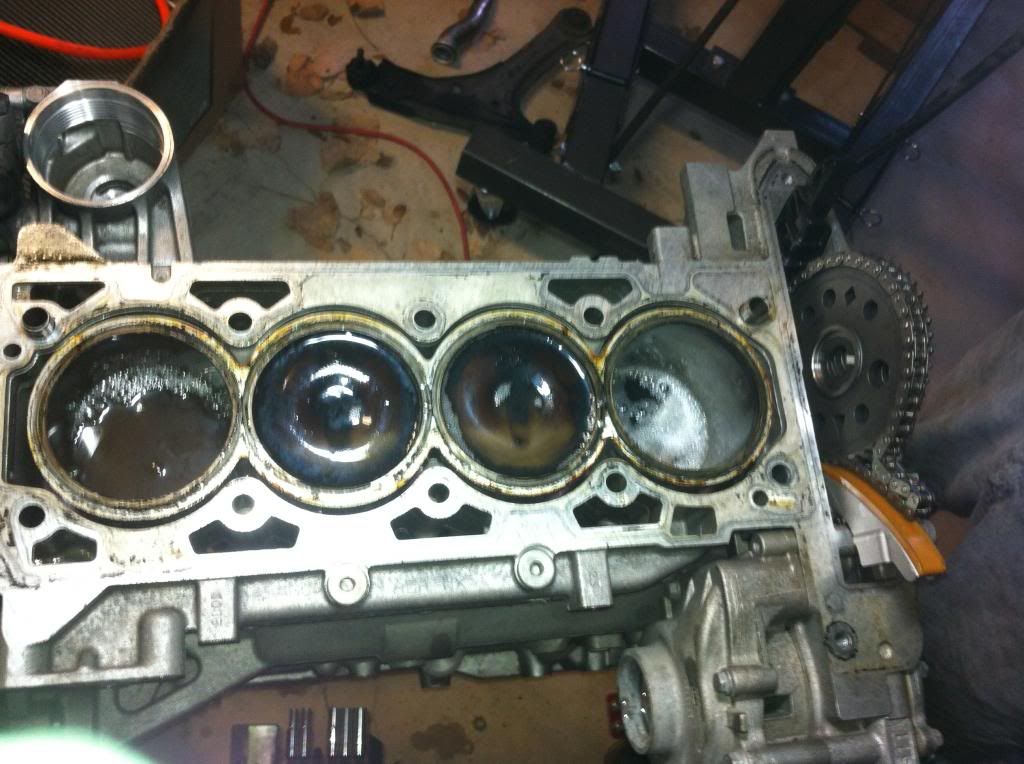
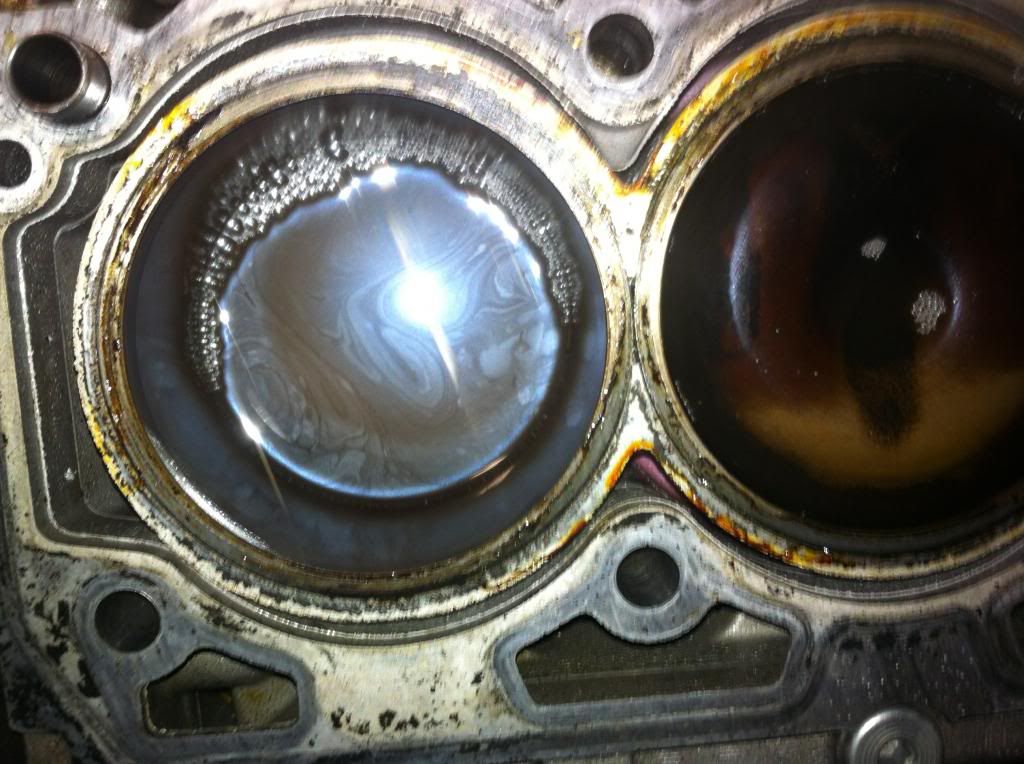
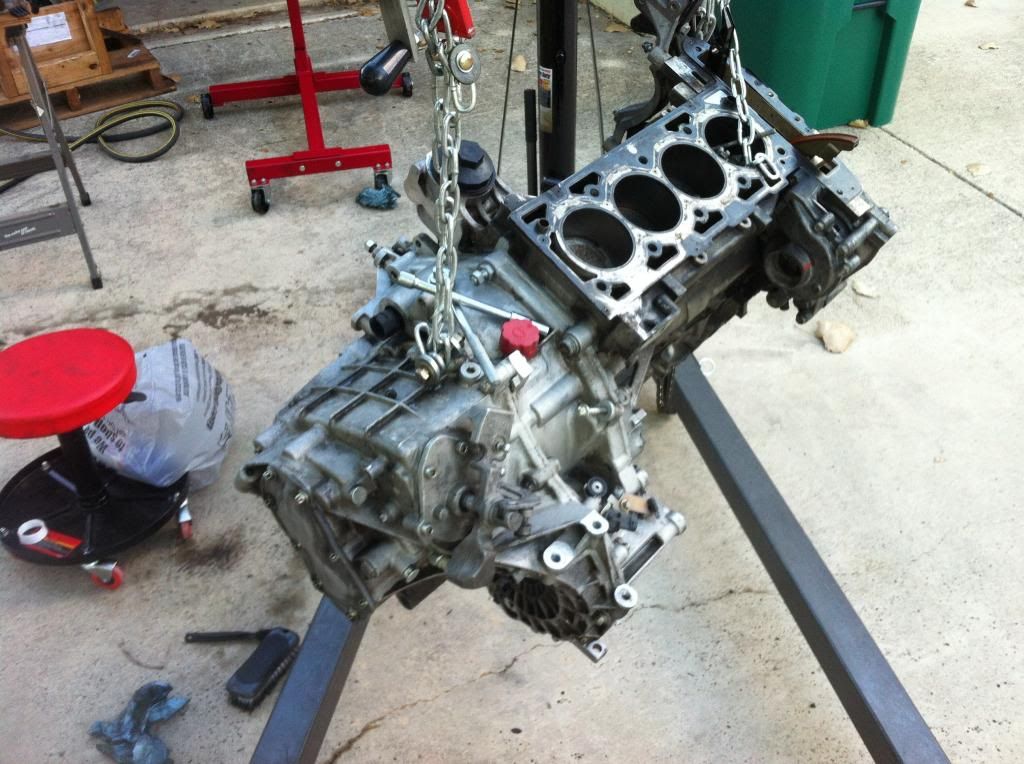
bad news is, I removed the head from the donor engine to swap the good one on after a quick inspection. however, the progress halted once I discovered what was lurking under the head in cylinder #4. Rust/corrosion on the surface inside the cylinder. The 1 and 4 cylinders were on the full down stroke, so there was no way to lower then piston to attempt to clean the stuff off properly. We dumped WD40 into the cylinders and let them sit. Then with a nitrile glove I rubbed around in there. It does not look good. They did not appear to be scored much if at all, but Im guessing the minimum requirement at this point is removing the crank, pistons, and honing them to get the #4 cylinder at a safe point that wont cause compression issues down the road. I COULD try to clean it best I can, then install the engine anyways and hope for the best. That's not smart with it all removed. My friend suggested at minimum removing everything and having a shop hone it or possibly even bore it slightly and doing a piston upgrade.
It never ends. This is from the guy leaving the top end of the motor off (for head work) for so long, letting contaminants get down into the cylinder. What really erks me is, he had to have seen that before reinstalling the head and shipping it back. Anyone would know that is not good and that it was not properly stored for so long. Im pretty pissed at this point, but being mad only makes things worse. Ive laid out a few options in my head and we discussed it over a few beers (the best way to come to any reasonable conclusion)....
1. clean the cylinder up best I can, get her all installed and good to run - risk major issues that require a removal in the near future
2. clean the cylinder up best I can, remove the bottom end, hone it, inspect and reinstall the factory parts (bearings, etc)
3. remove the bottom end, have it professionally worked, if it can simply be honed, reinstall brand new rings/pistons/etc.
4. do the above with upgraded pistons/rods, etc
5. put everything in storage (including the shell), clean up the garage, just drive my truck over the next few months as I buy parts and worry about the build next spring when I have everything including a TVS on a fully built LSJ.
6. put the car, 2 motors, transmission, 2 blowers, 3 hoods, 2 sets of wheels/tires, leather Camaro and Vette seats, rear disc conversion, spare set of ZZP valve springs, meth kit, and every spare part all totaling easily $8,000 in value on a trailer and burn it all as I squeal with joy and move on with my life.... hmmm
04 Cav. 2dr. 5spd. My DD. 'Nuff said.
How bad is the rust? An easy trick is to spray some wd40 in there and turn the engine over a couple times, let it sit and do it again, it should really clean it up, maybe do it a couple times. or try some coke(seriously though) coke really breakes up rust, pour some in let it soak and then crank it over. By hand of course.
It has WD40 sitting in it now, been there for at least what, 2 hours or something? I figure it'll sit over night and after work tomorrow Ill check it.
So you think it'll be okay to crank it and it wont risk scoring the walls?
04 Cav. 2dr. 5spd. My DD. 'Nuff said.
Well...
That is super super ghey.
That being said.
I dont know if id run it like that. Pics will help decide. A scored cylinder wall though I would not run for any reason.
If your going to build a motor then just build your 2.2. Way easier then the LSJ in the long run.
funny part is, the L61 is in great shape. remove the lower end components and it could be built just as much as the LSJ.
maybe soaking will do its job and as stated, if its being removed and honed anyways, I might as well crank it and see if it cleans itself...

04 Cav. 2dr. 5spd. My DD. 'Nuff said.
I think cranking it will be fine, it's prolly just surface rust and it will come off. Pics would be very useful though. Besides your rings and the actual cylinder will be stronger then the rust.
No, the oil cooler is not a must. There is a company PJ referred me to that actually makes an adapter plate, I can't remember their name at the moment, but it bolts in place of the cooler and has 2 -AN fittings, and you could just loop them together. You do need flow there or you will have pressure issues. Or you can do like Newt, and cut out the passage that is down inside the housing, then plug the holes on the side. But it can't be just simple capped off.