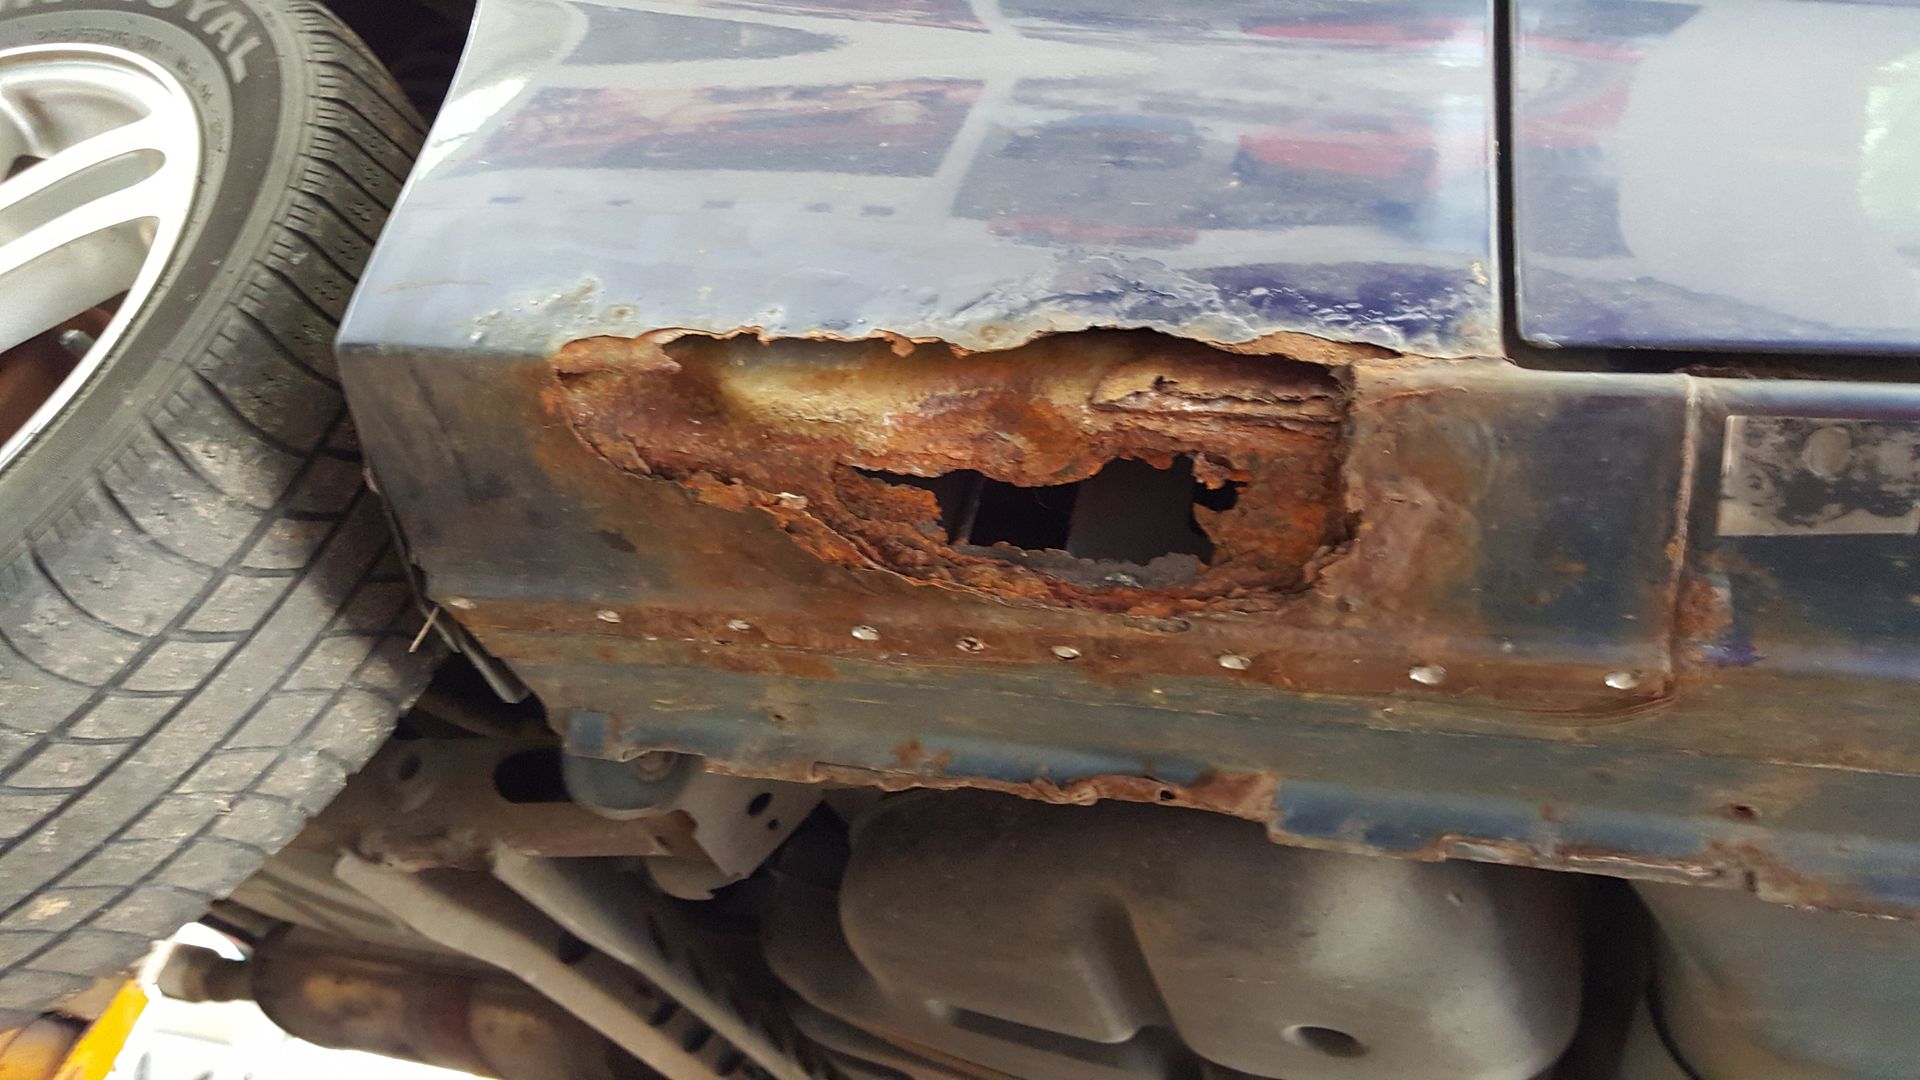
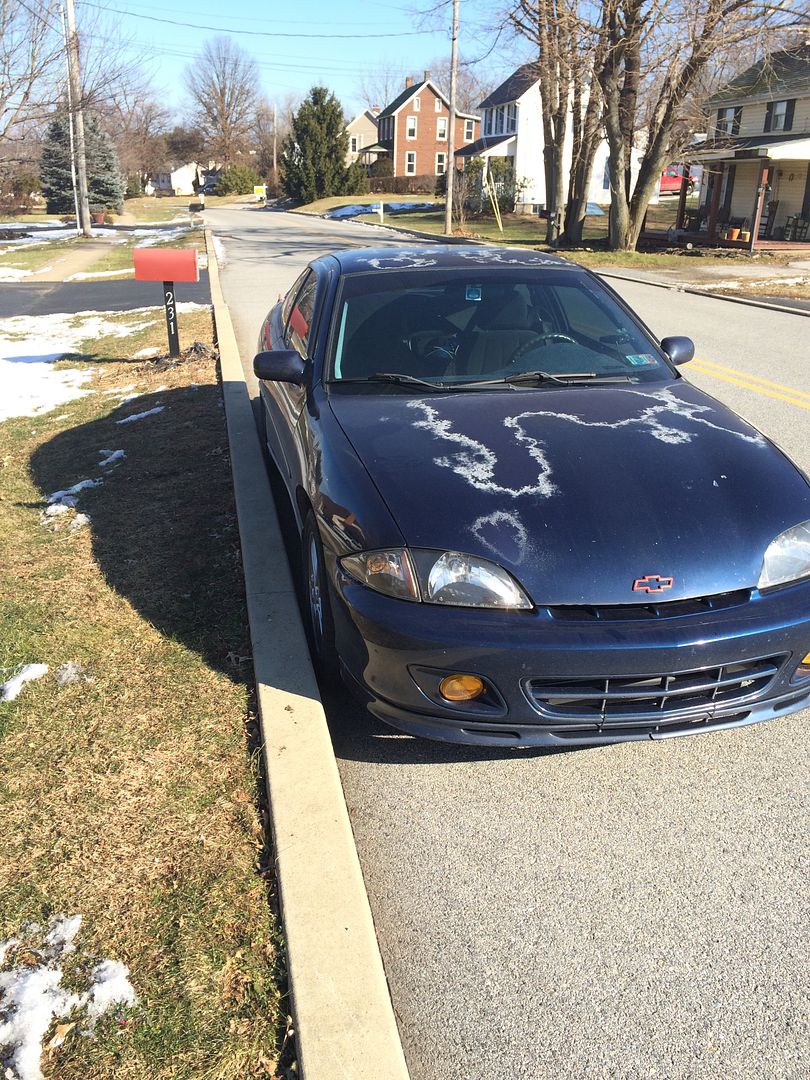
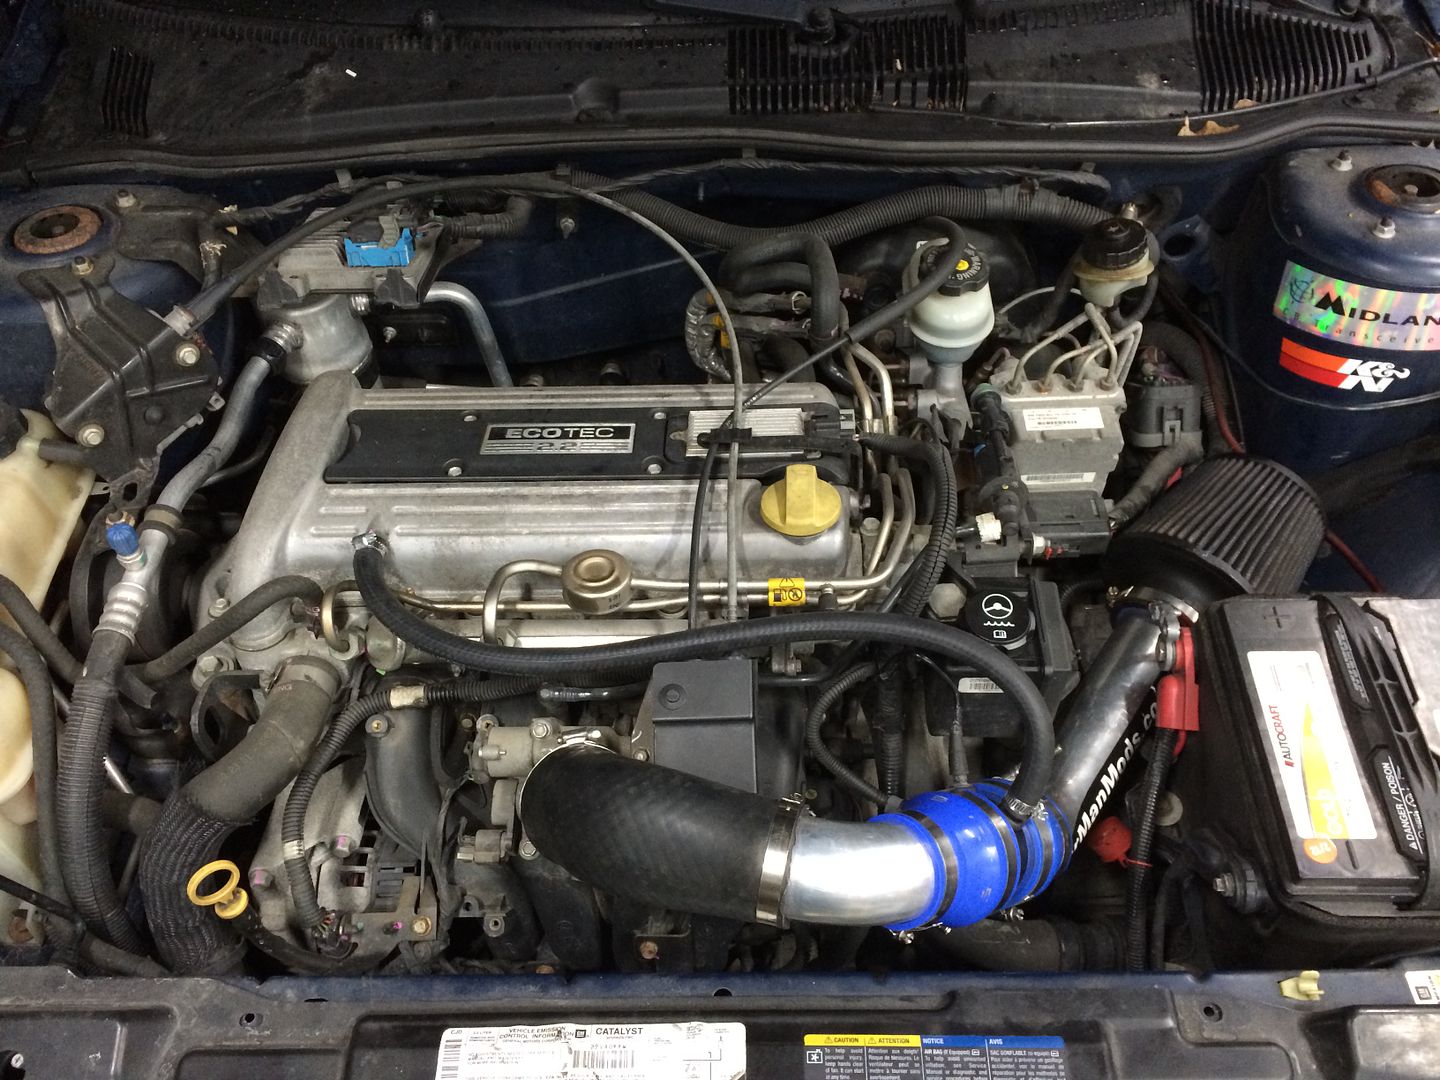
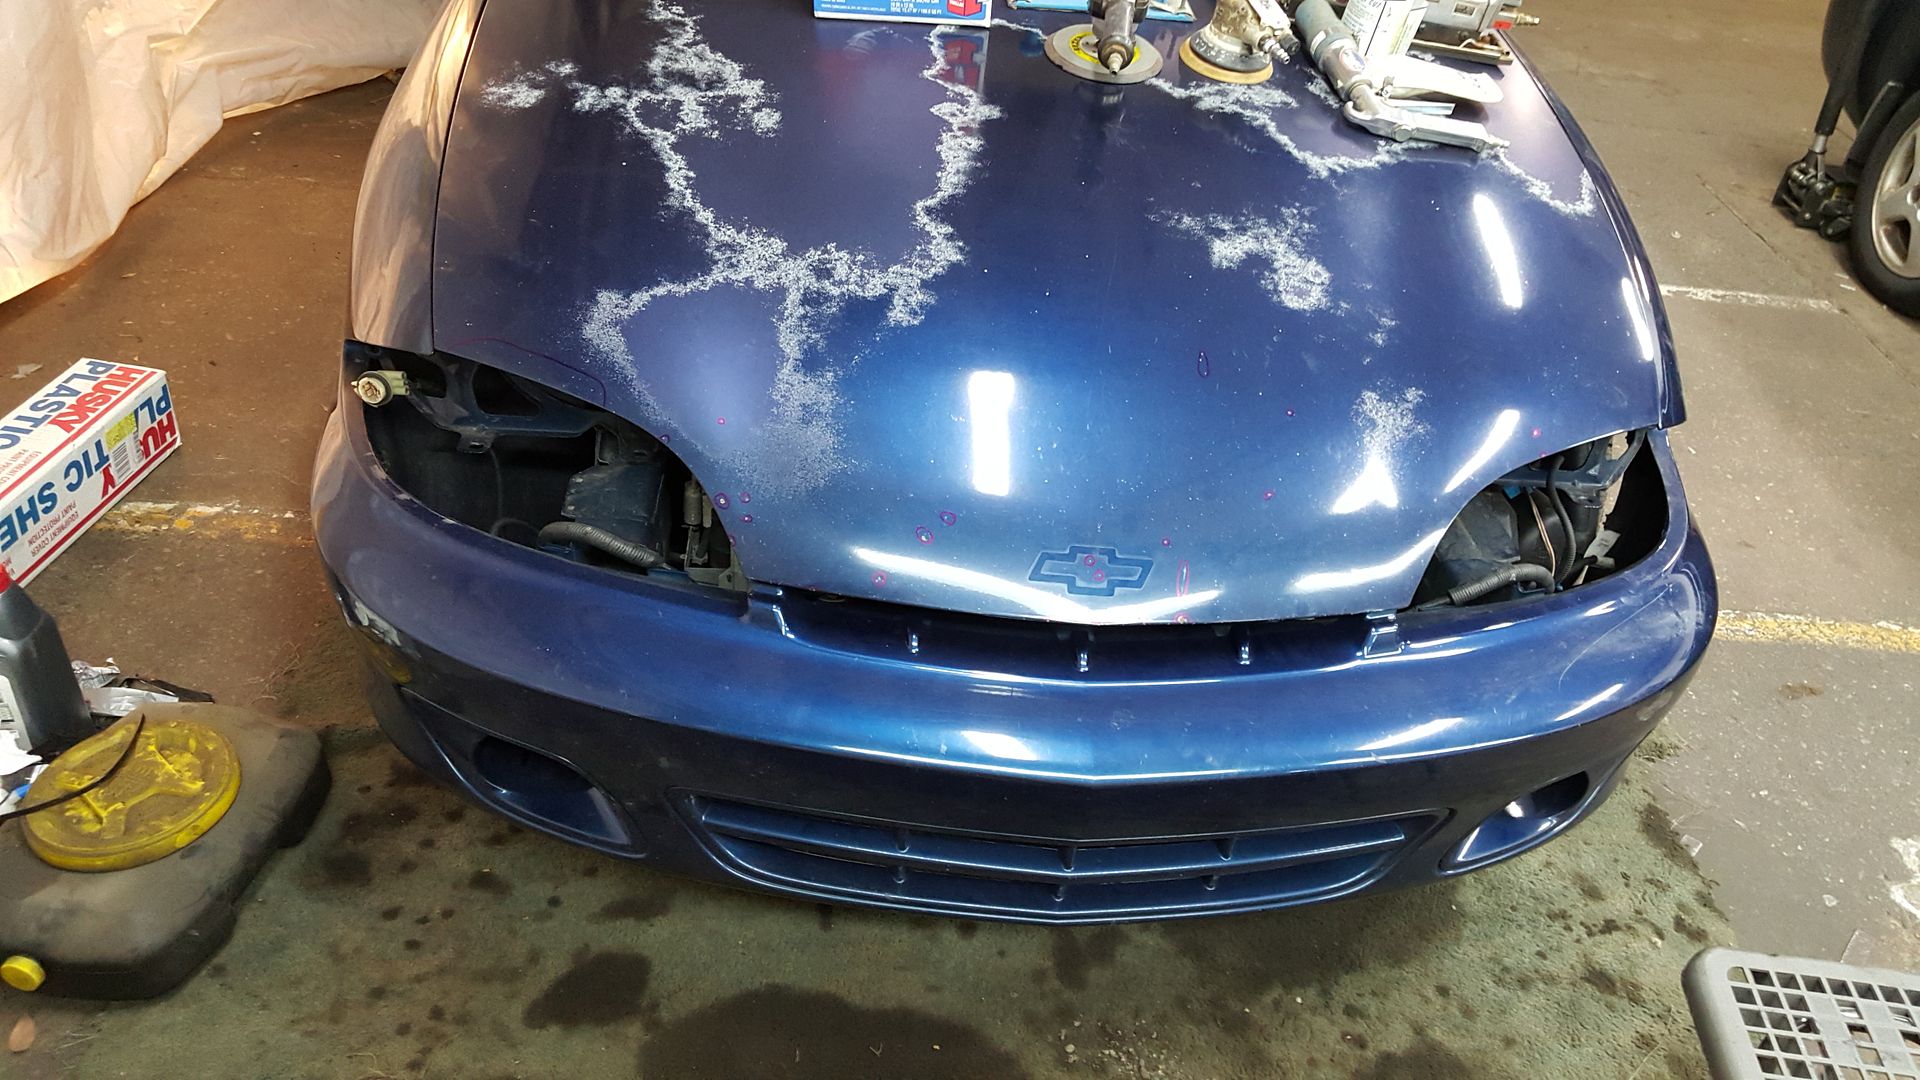
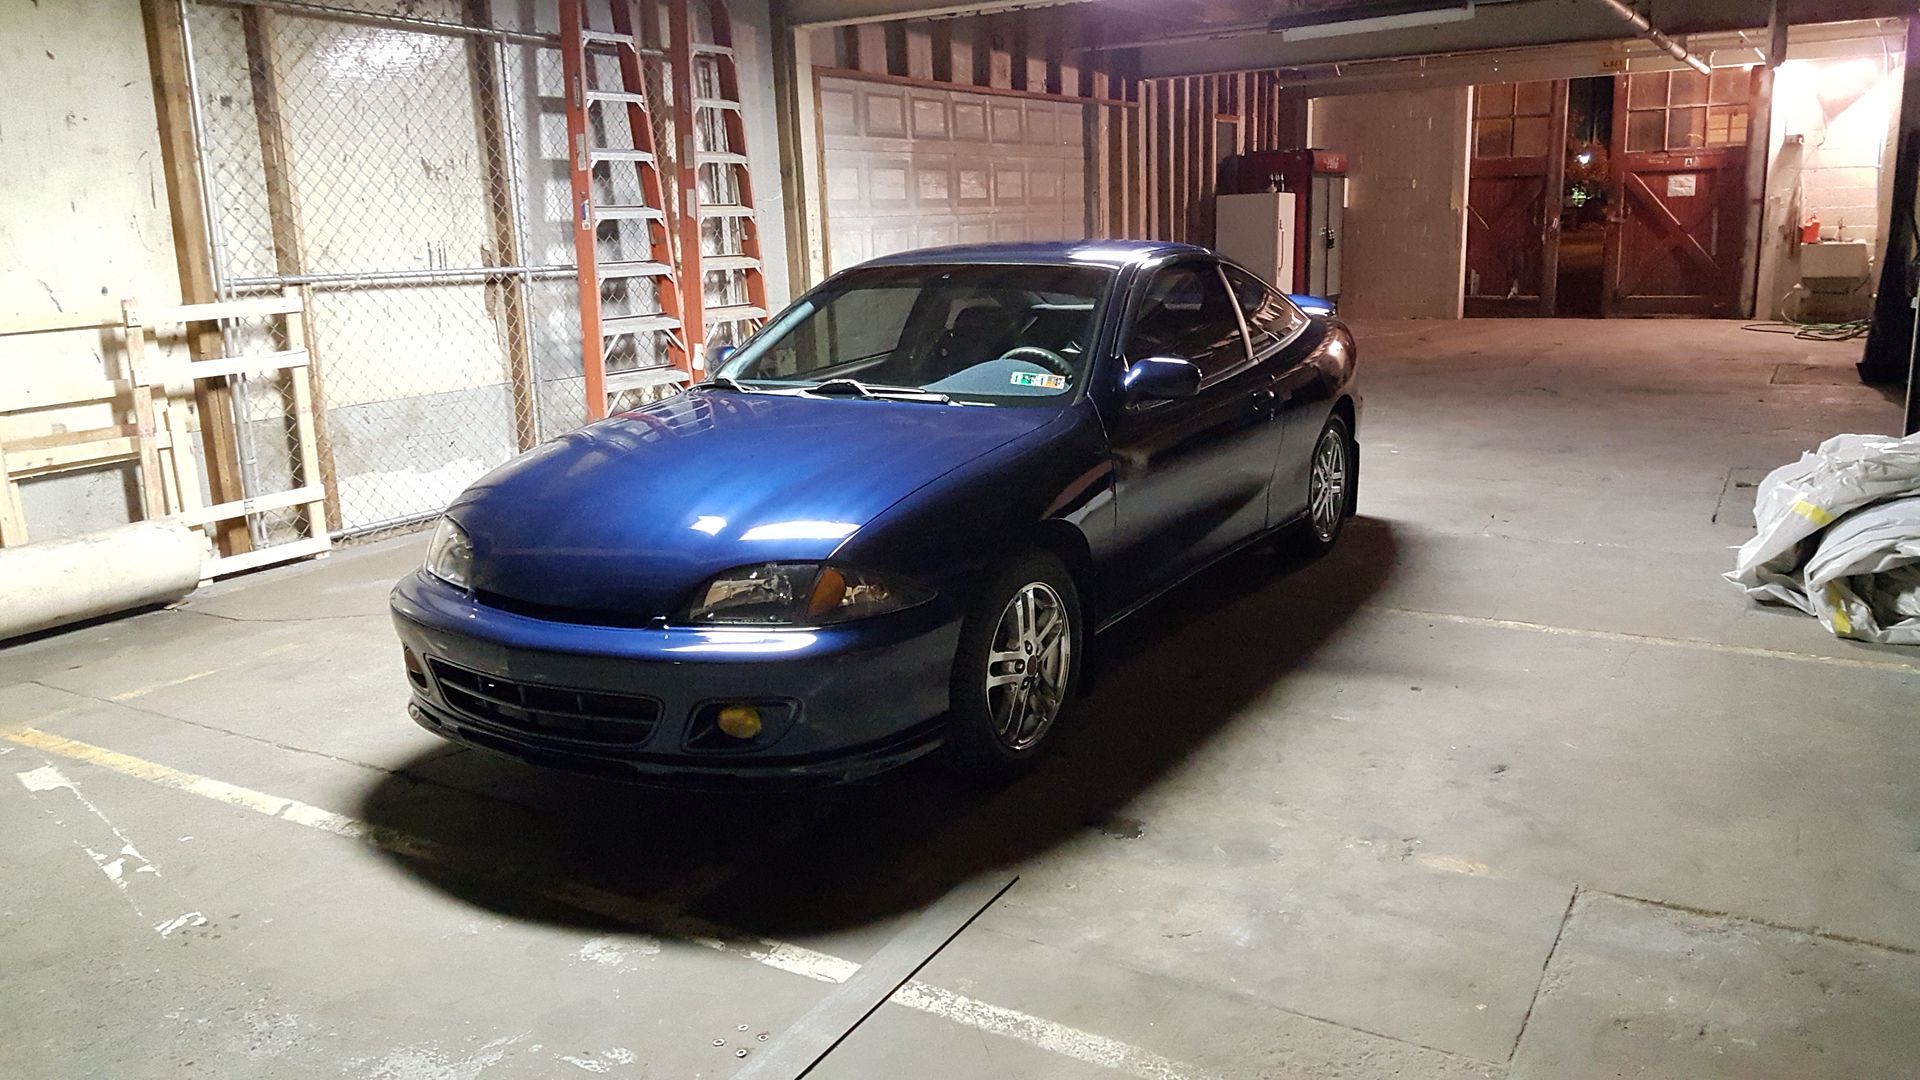
Hey guys I don't post much on here but I've found this forum and many others to be very helpful throughout the years in helping me find information so I figured I would go ahead and contribute. I've got an '02 LS Sport coupe 5-speed that's got the wonderful clear coat peeling/cracking/disappearing issue that we all know about. It's got 20% tint all the way around and a 5% windshield visor, rain guards, Ralco RZ short shifter, homemade ram air intake with a K&N cone filter, blue carpeted dash cover, and some other custom suede upholstery on the interior. The car is sadly worth about $1000 as it sits with 193k miles but the motor and trans are strong and I'm the second owner having put the last 120k miles on it myself. Knowing that it should go another 100k or so before completely self-destructing (and having some sentimental attachment to the p.o.s) I've decided to paint the car myself with the hopes of using this opportunity to learn a lot about prep for and painting and hopefully ending up with a Cavalier that looks half decent. I really feel like it would be a sharp car having the LSS extras if the paint wasn't so horrific. There is some significant rust on the front lower of the rear quarter panel behind the doors on both sides so that will be a challenge as well. Anyways, let's get to the meat and potatoes.
My plans are to:
- Remove and repair plastic LSS lip kit and spoiler (front lip is cracked and everything else is scratched and weathered)
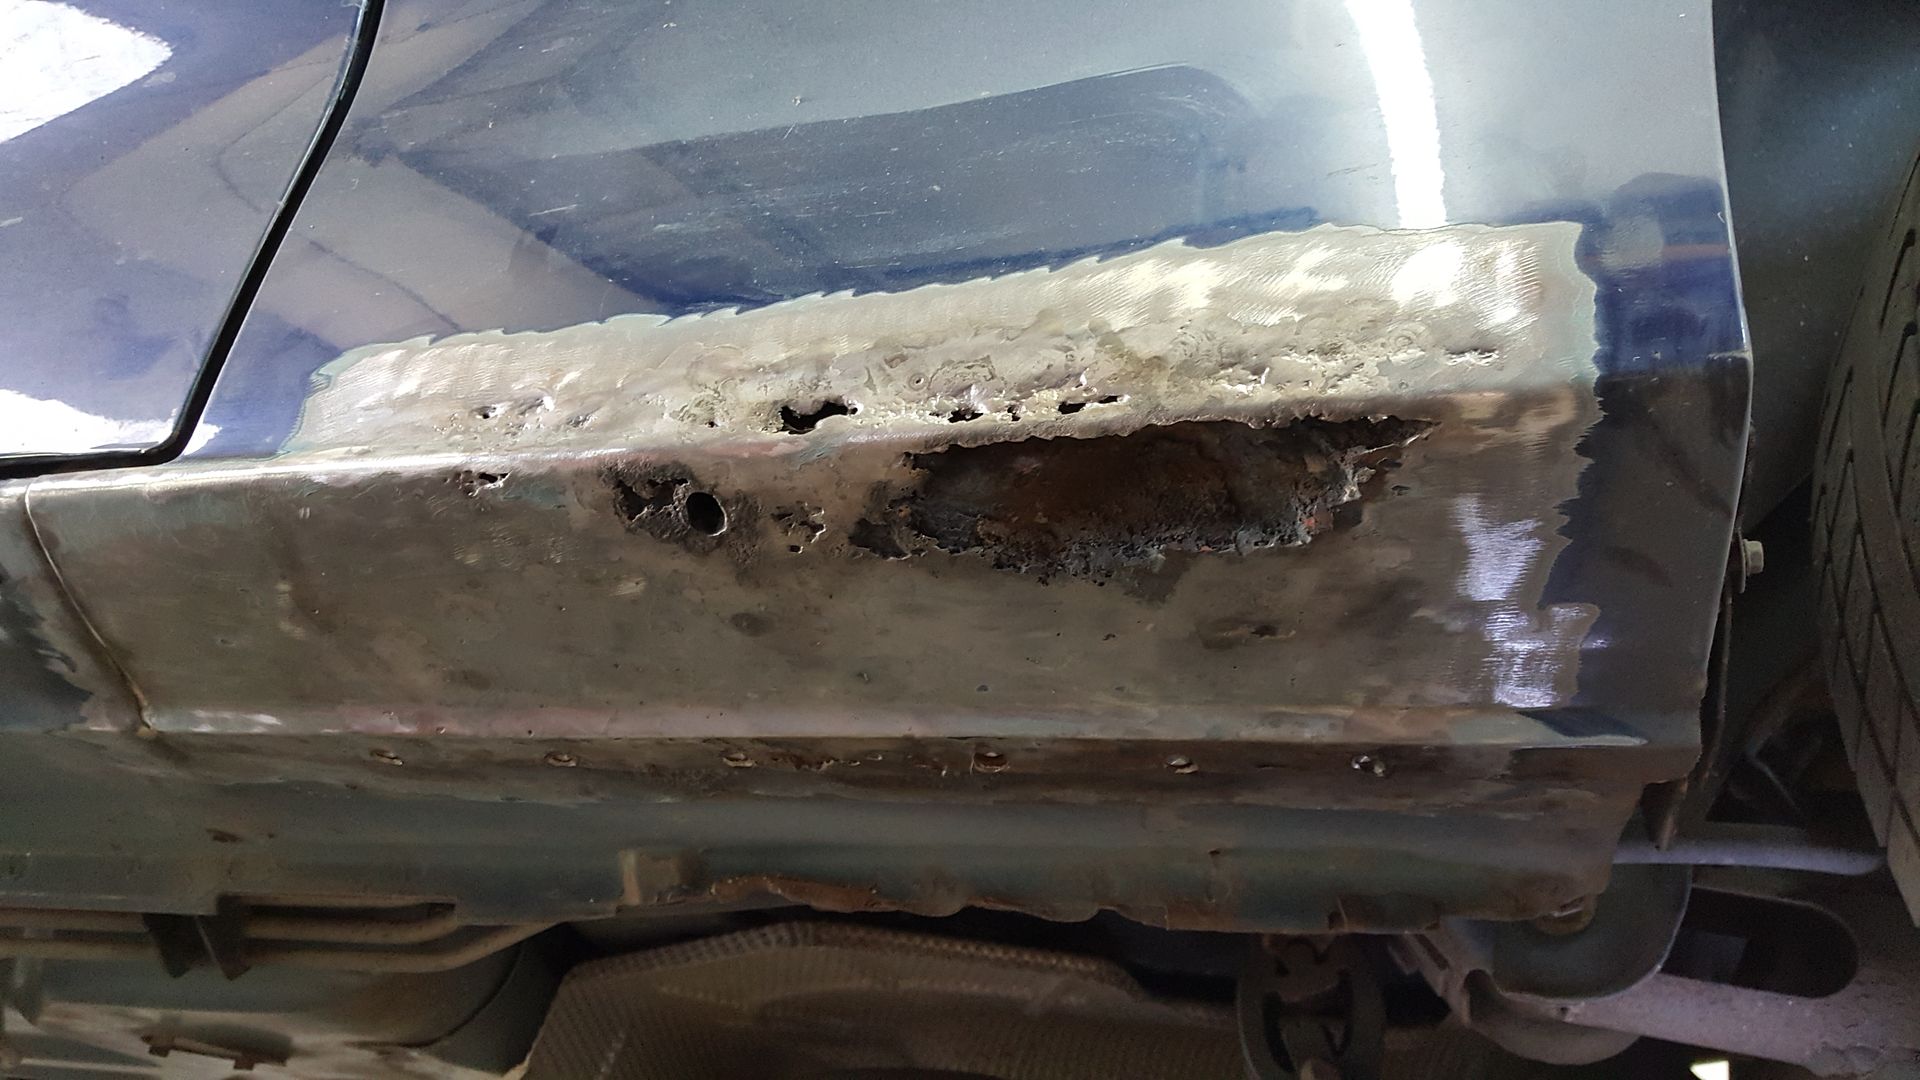
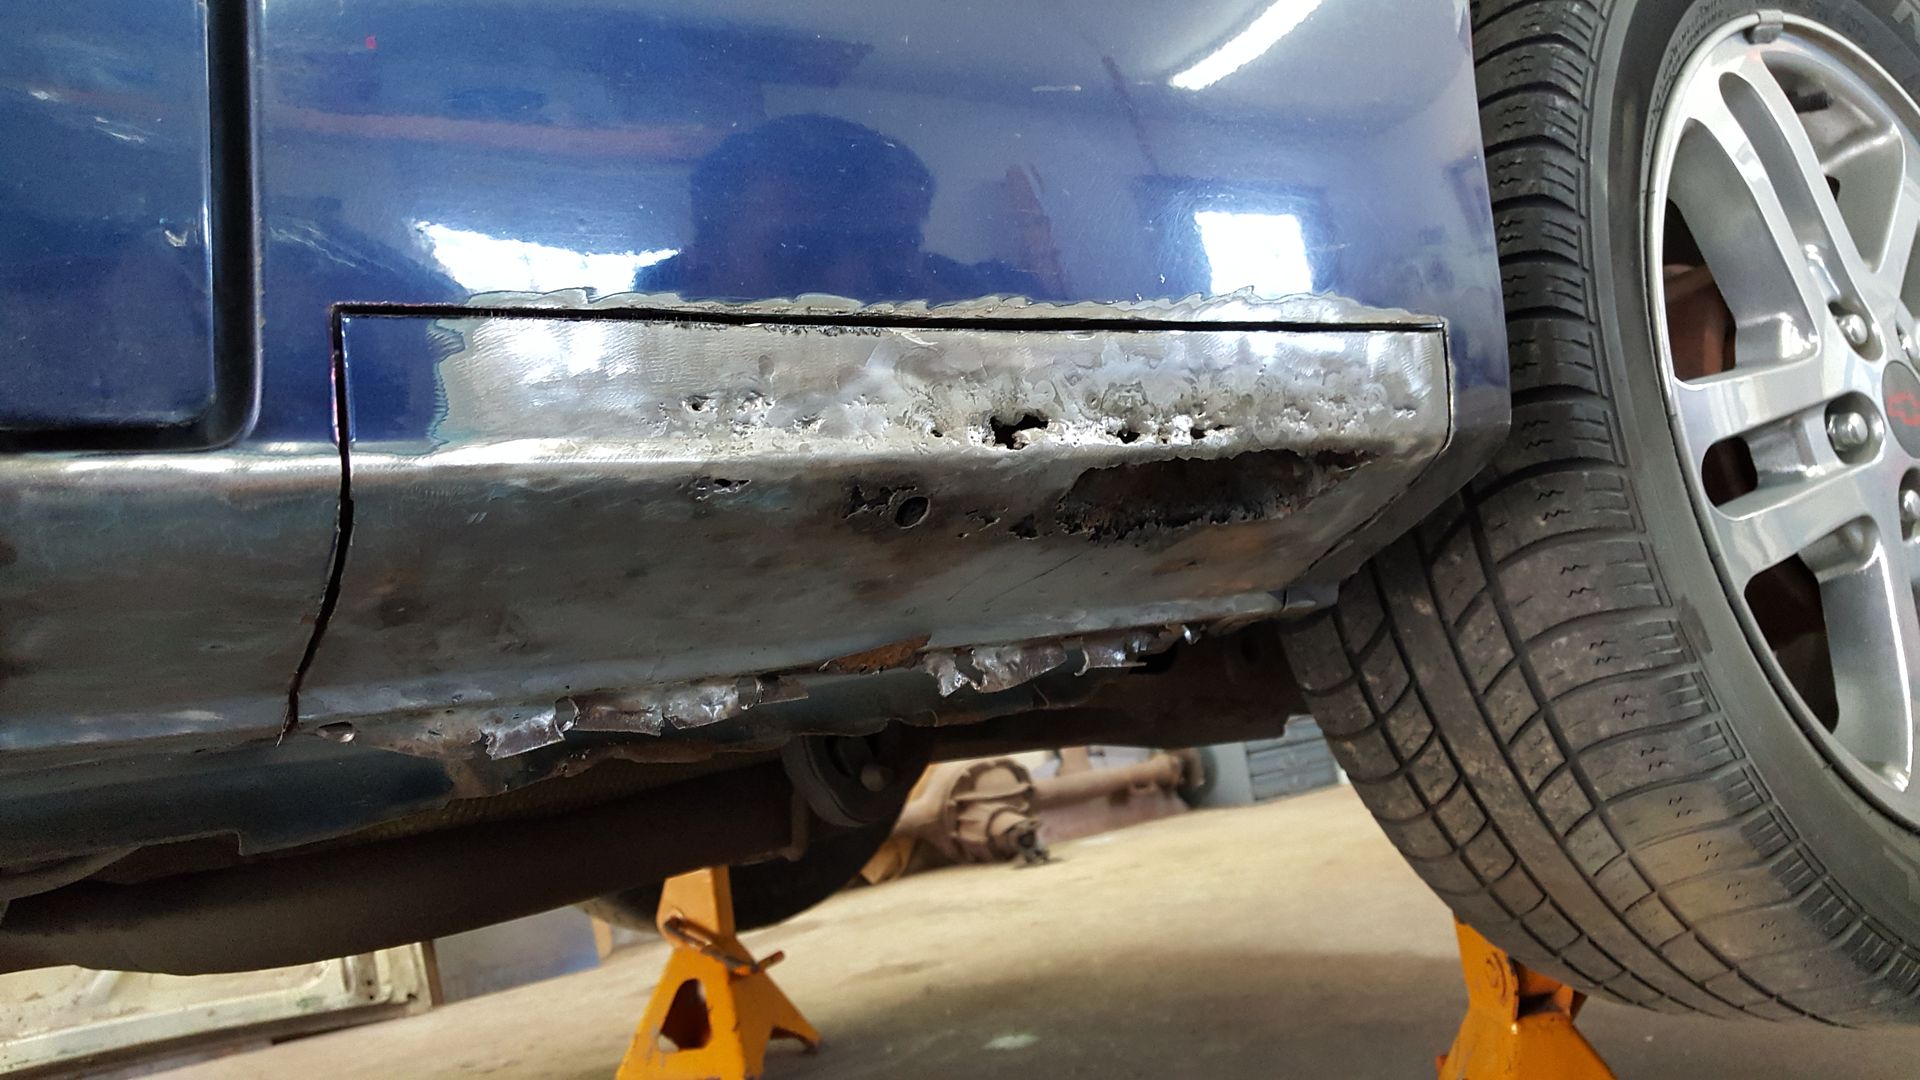
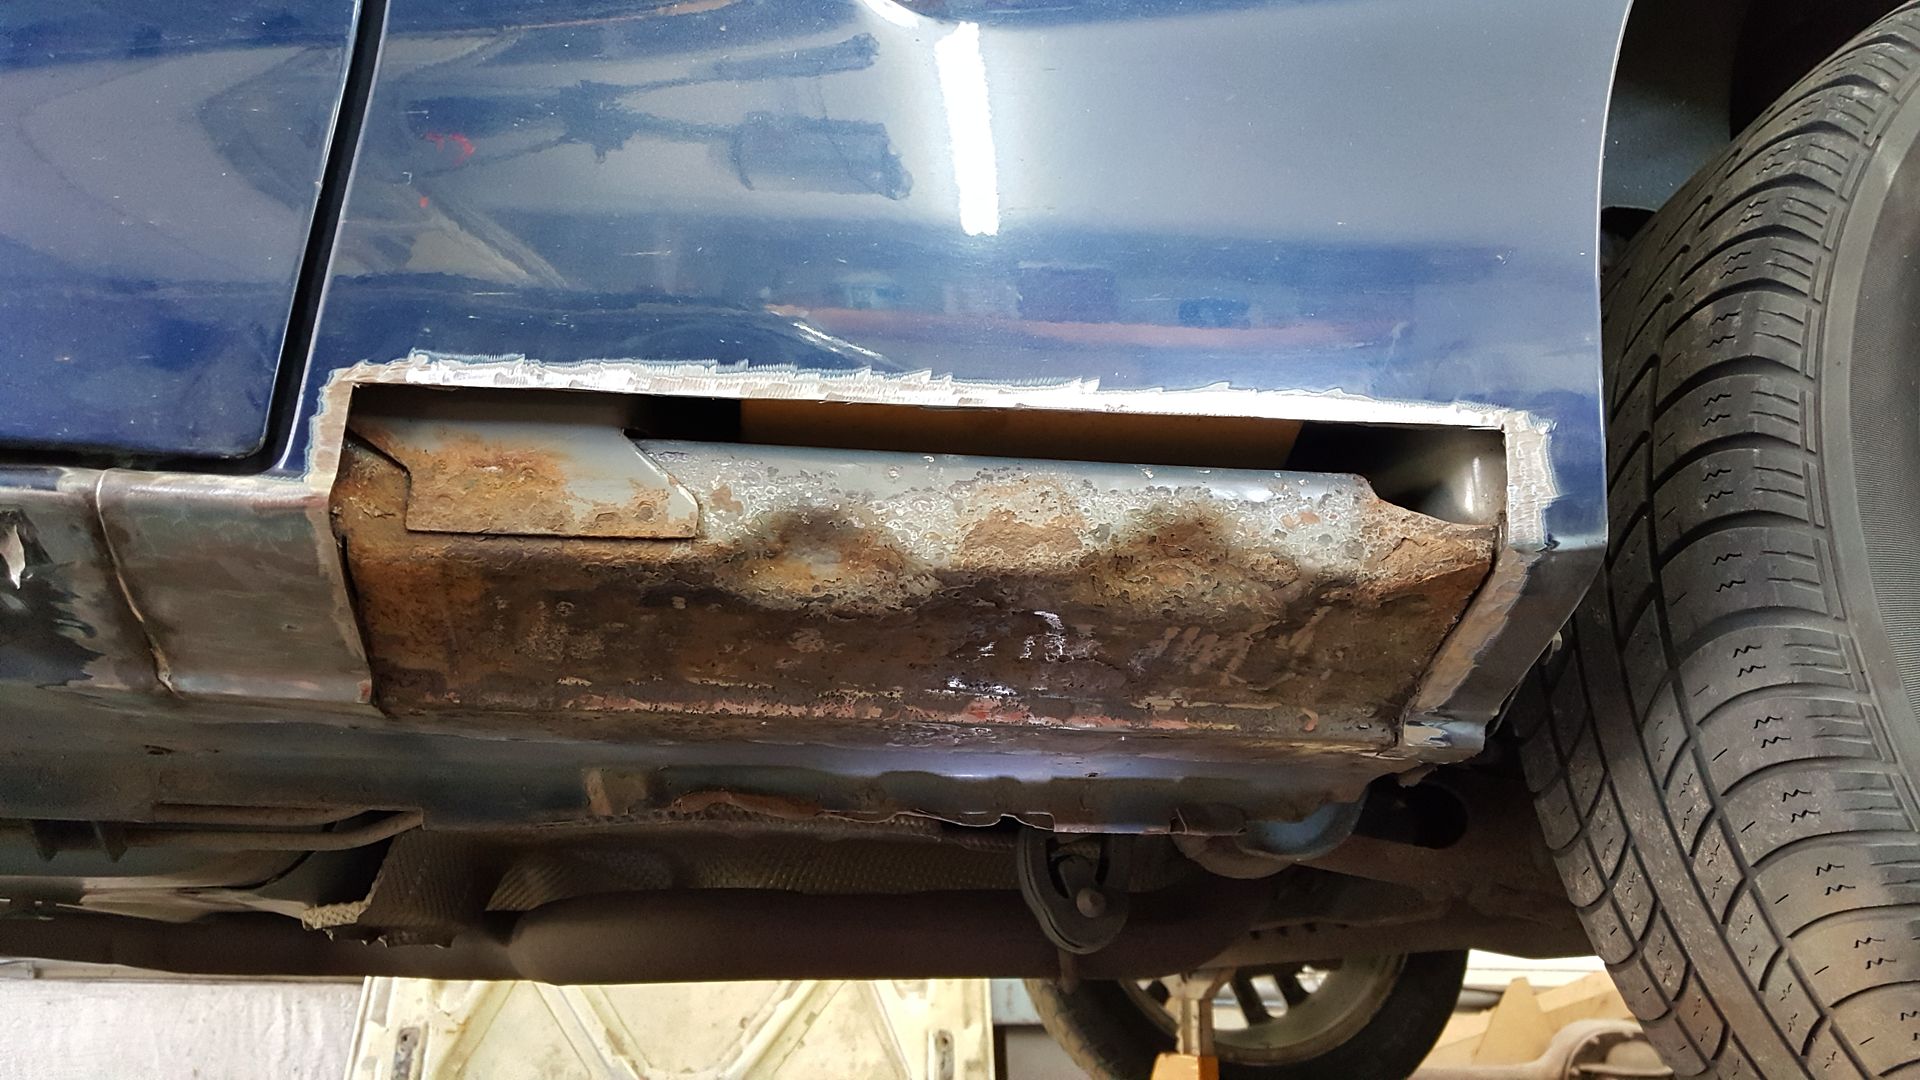
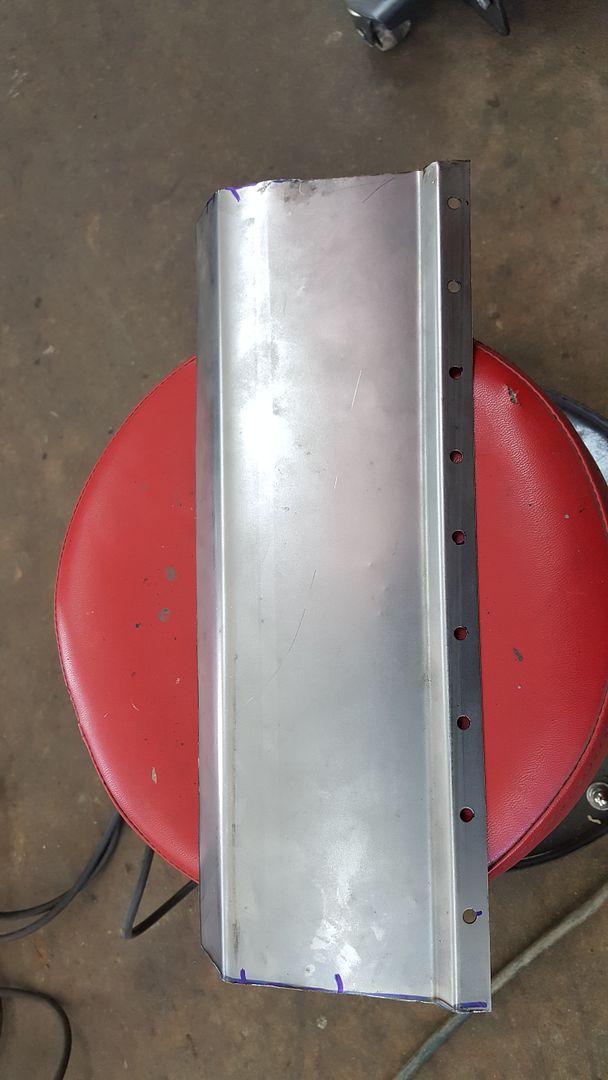
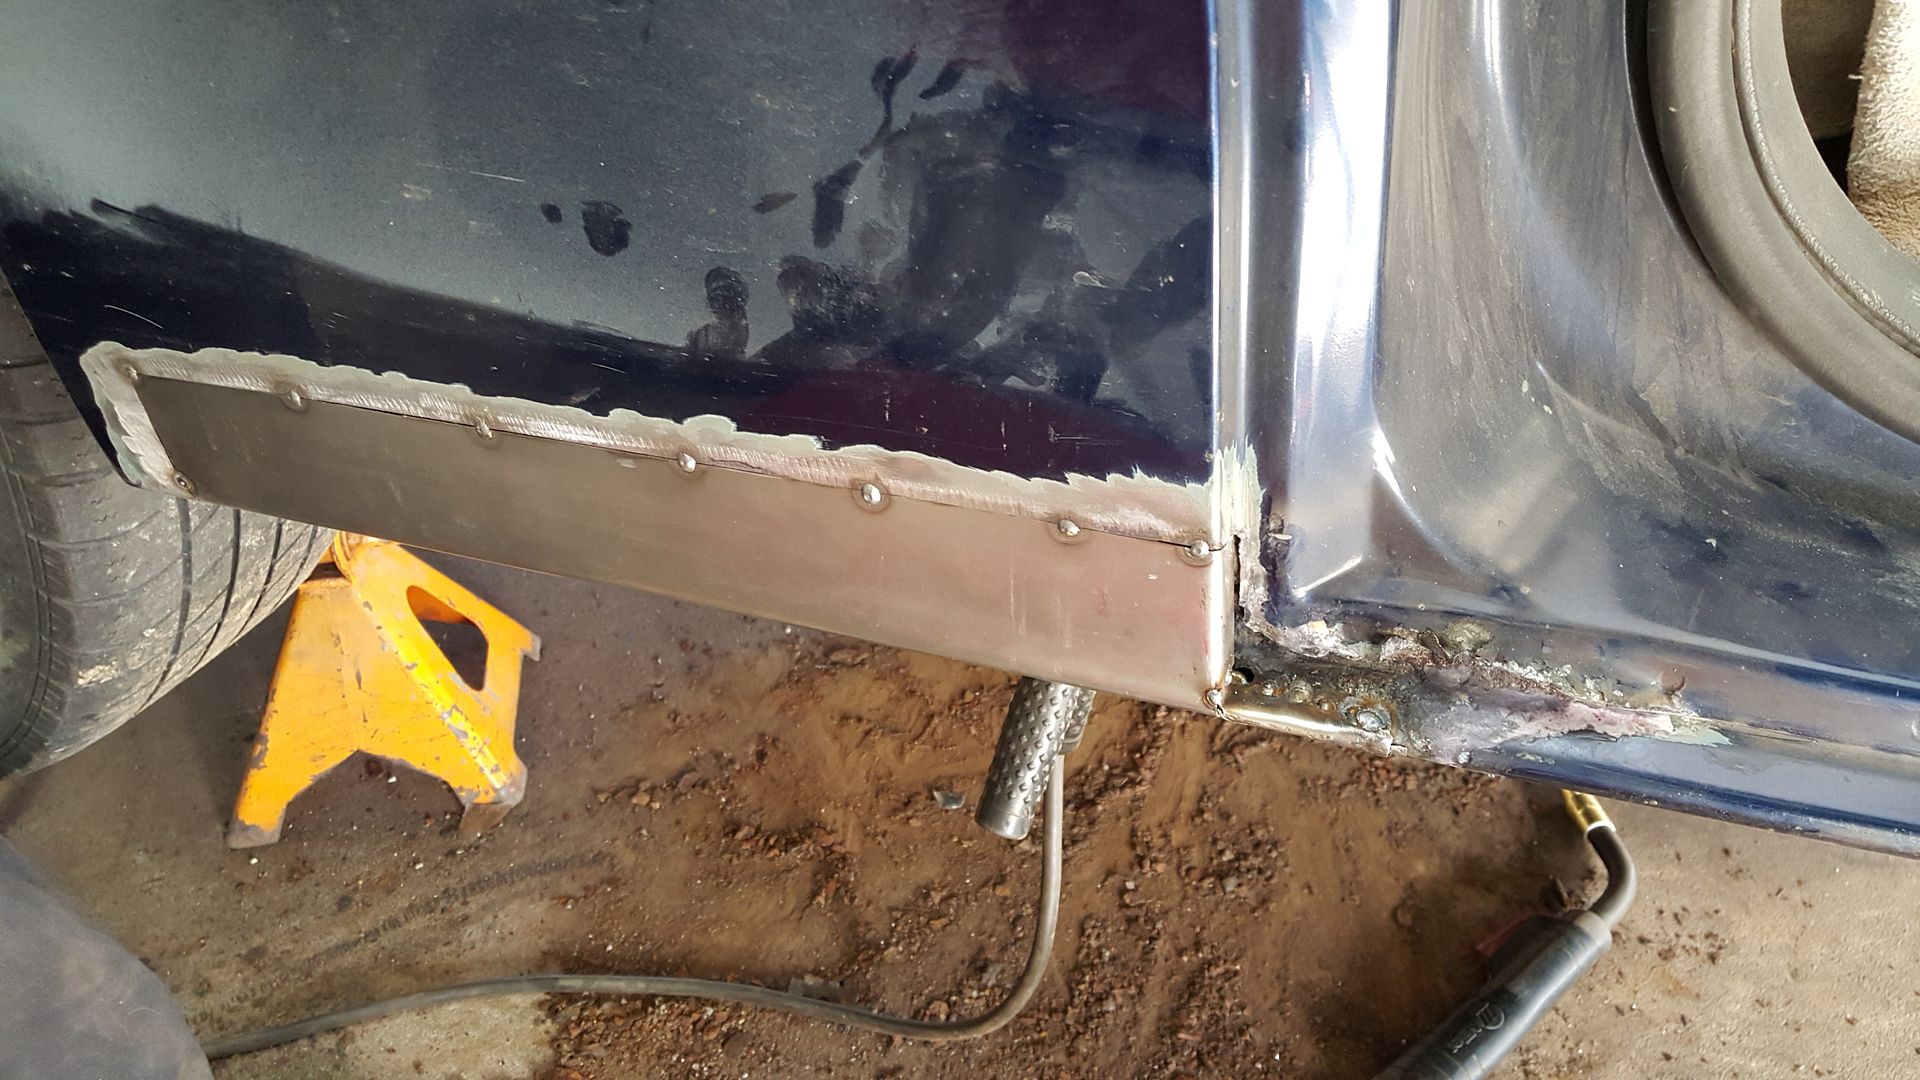
- Partial replacement of lower rear quarter panels to fix rust
- Remove plastic door/quarter panel moldings
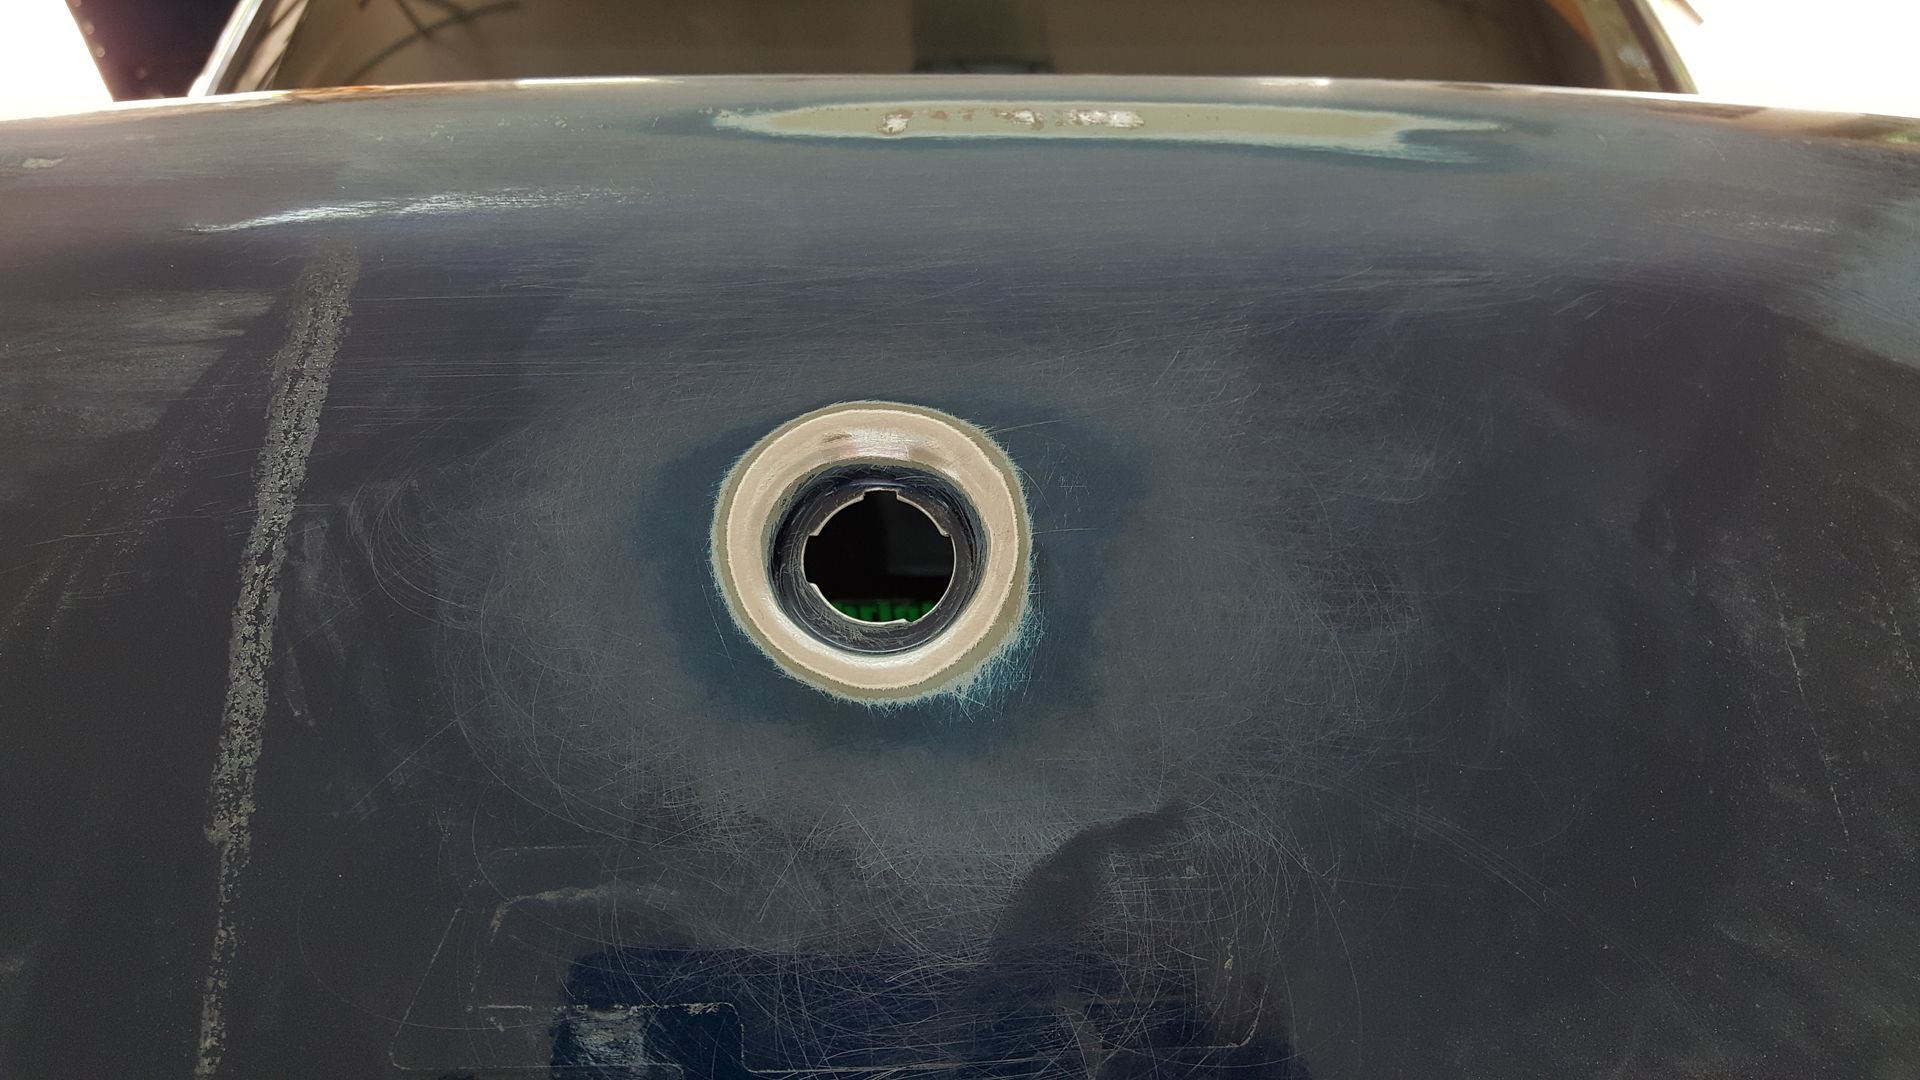
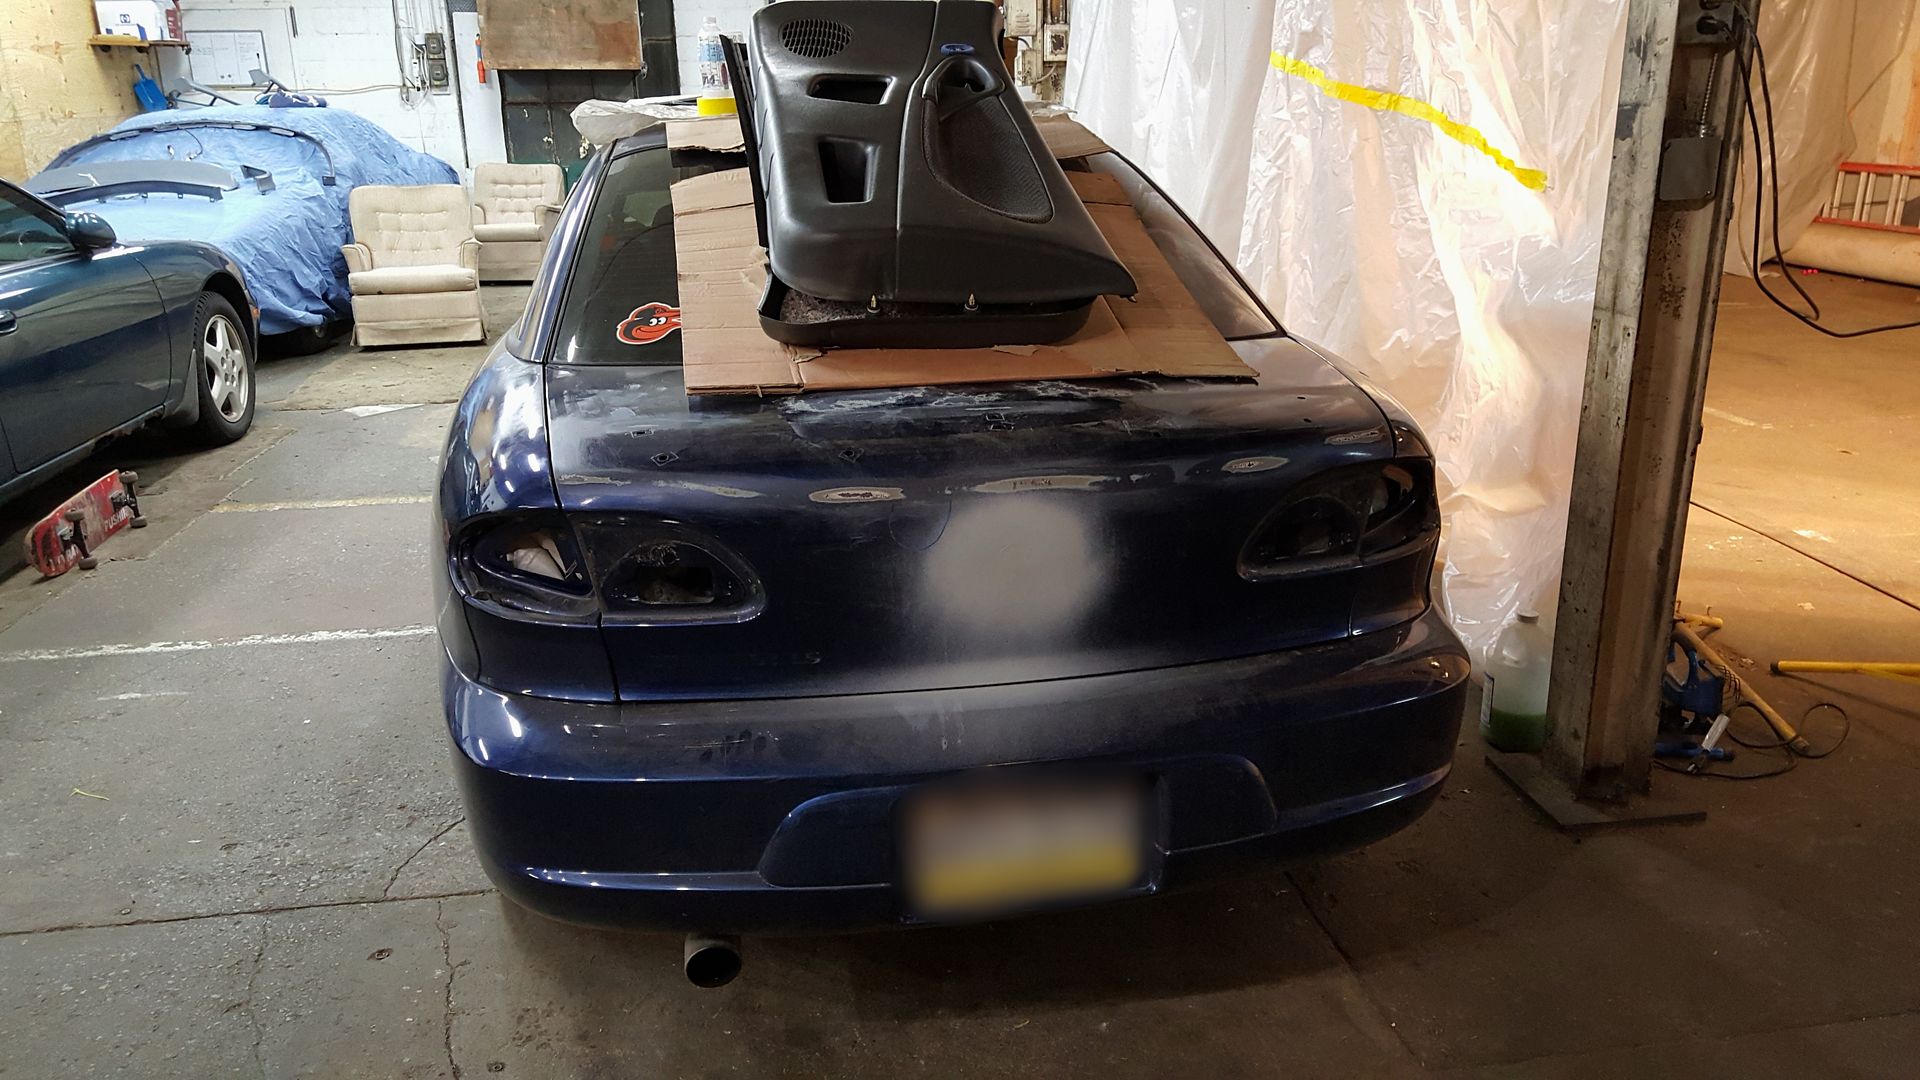
- Shave trunk key hole
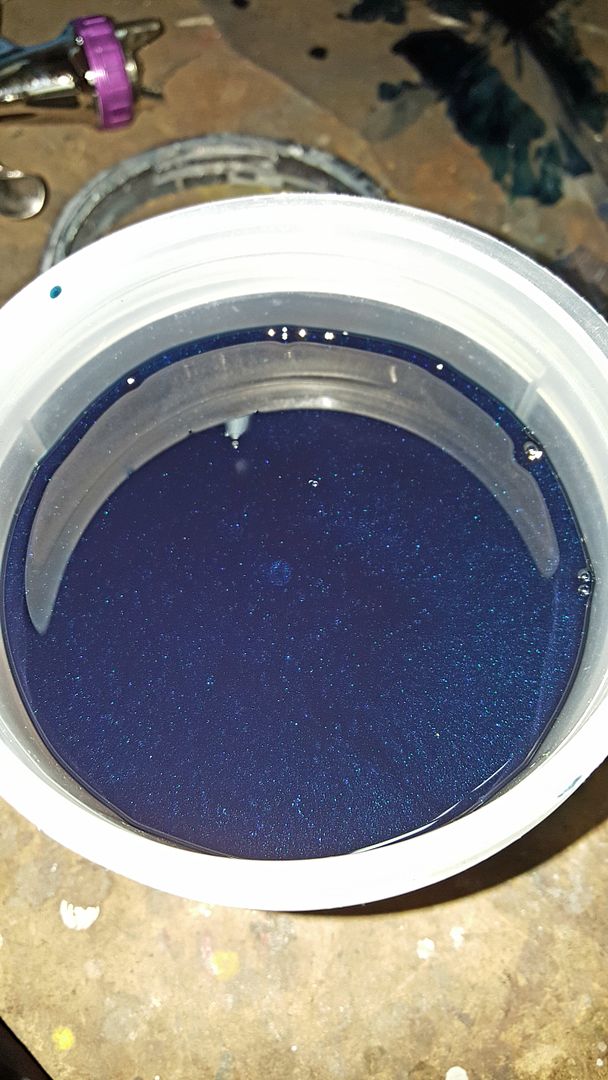
- Paint the car with a color match (indigo metallic), 2 stage urethane enamel
- Color match the mirrors and mirror trim (black plastic where mirrors bolt to door)
- Debadge and remain debadged with the exception of a red bowtie on the hood and trunk
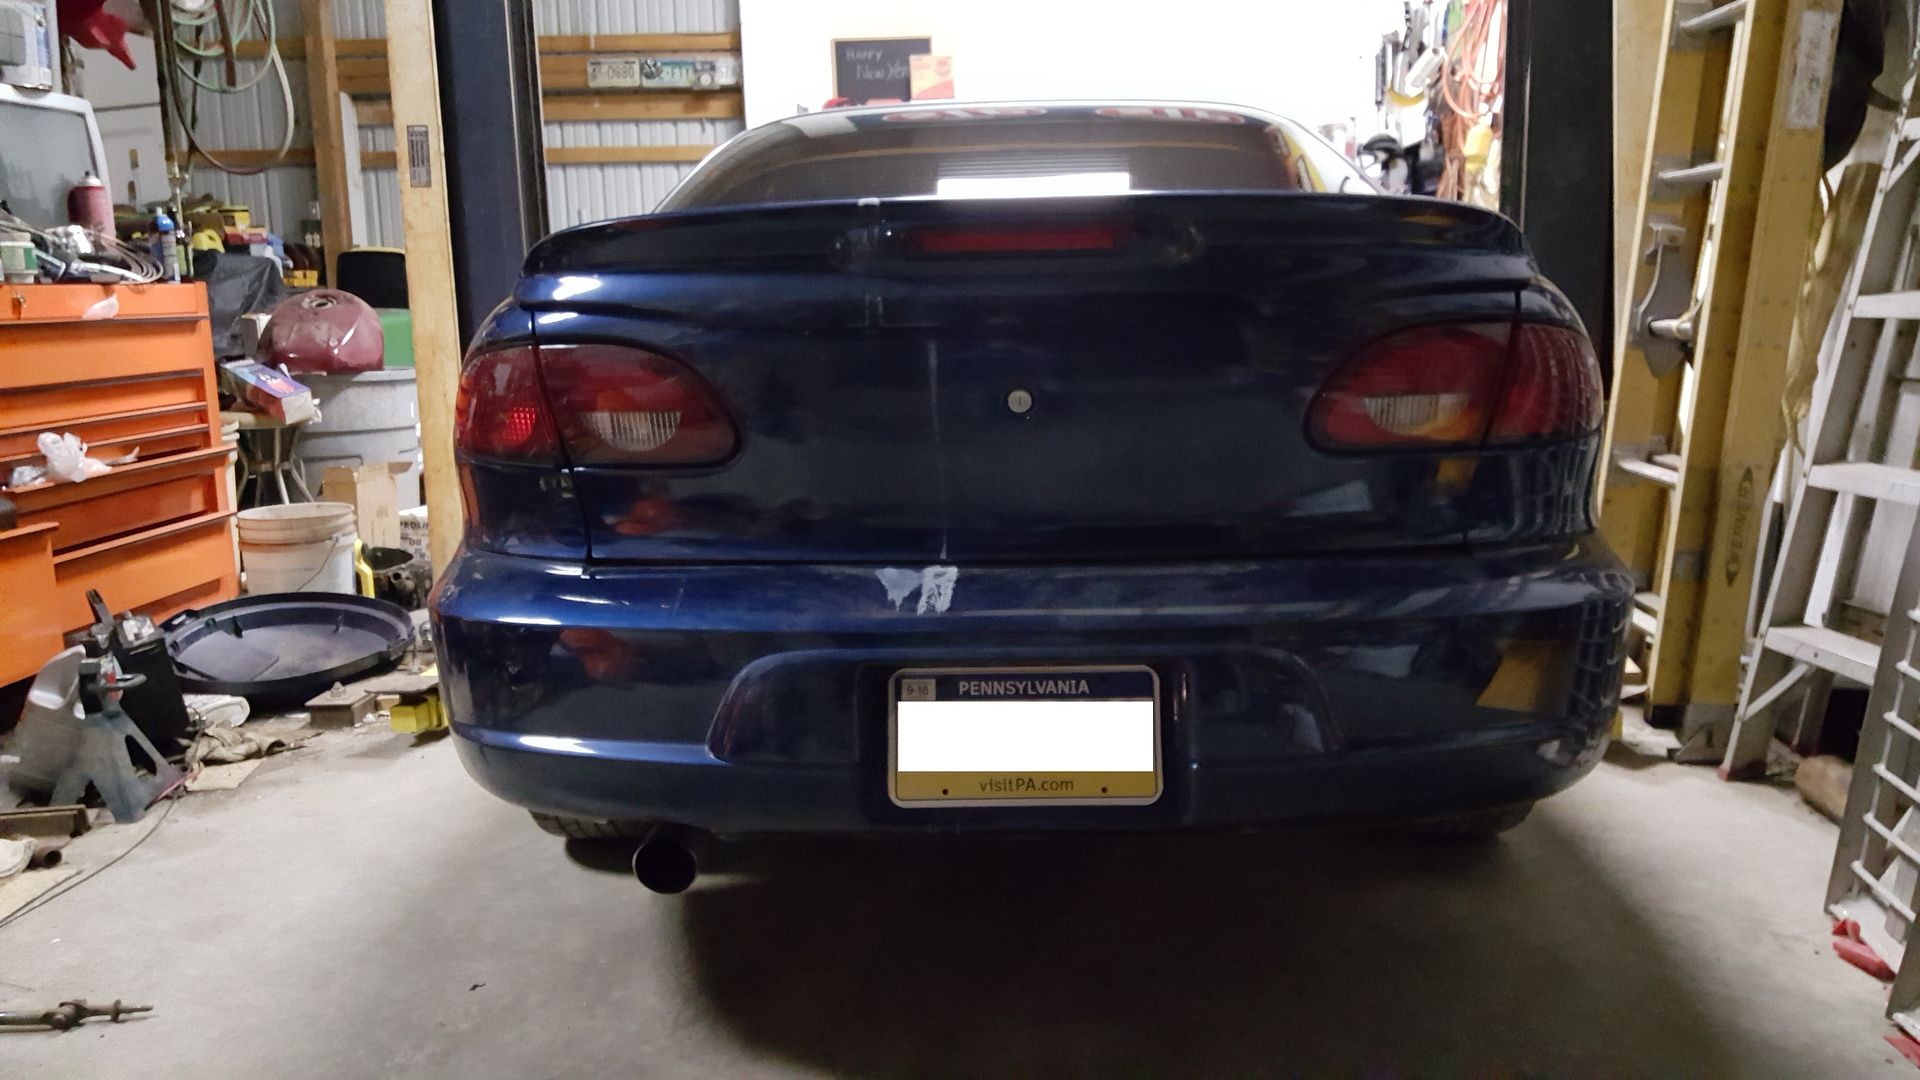
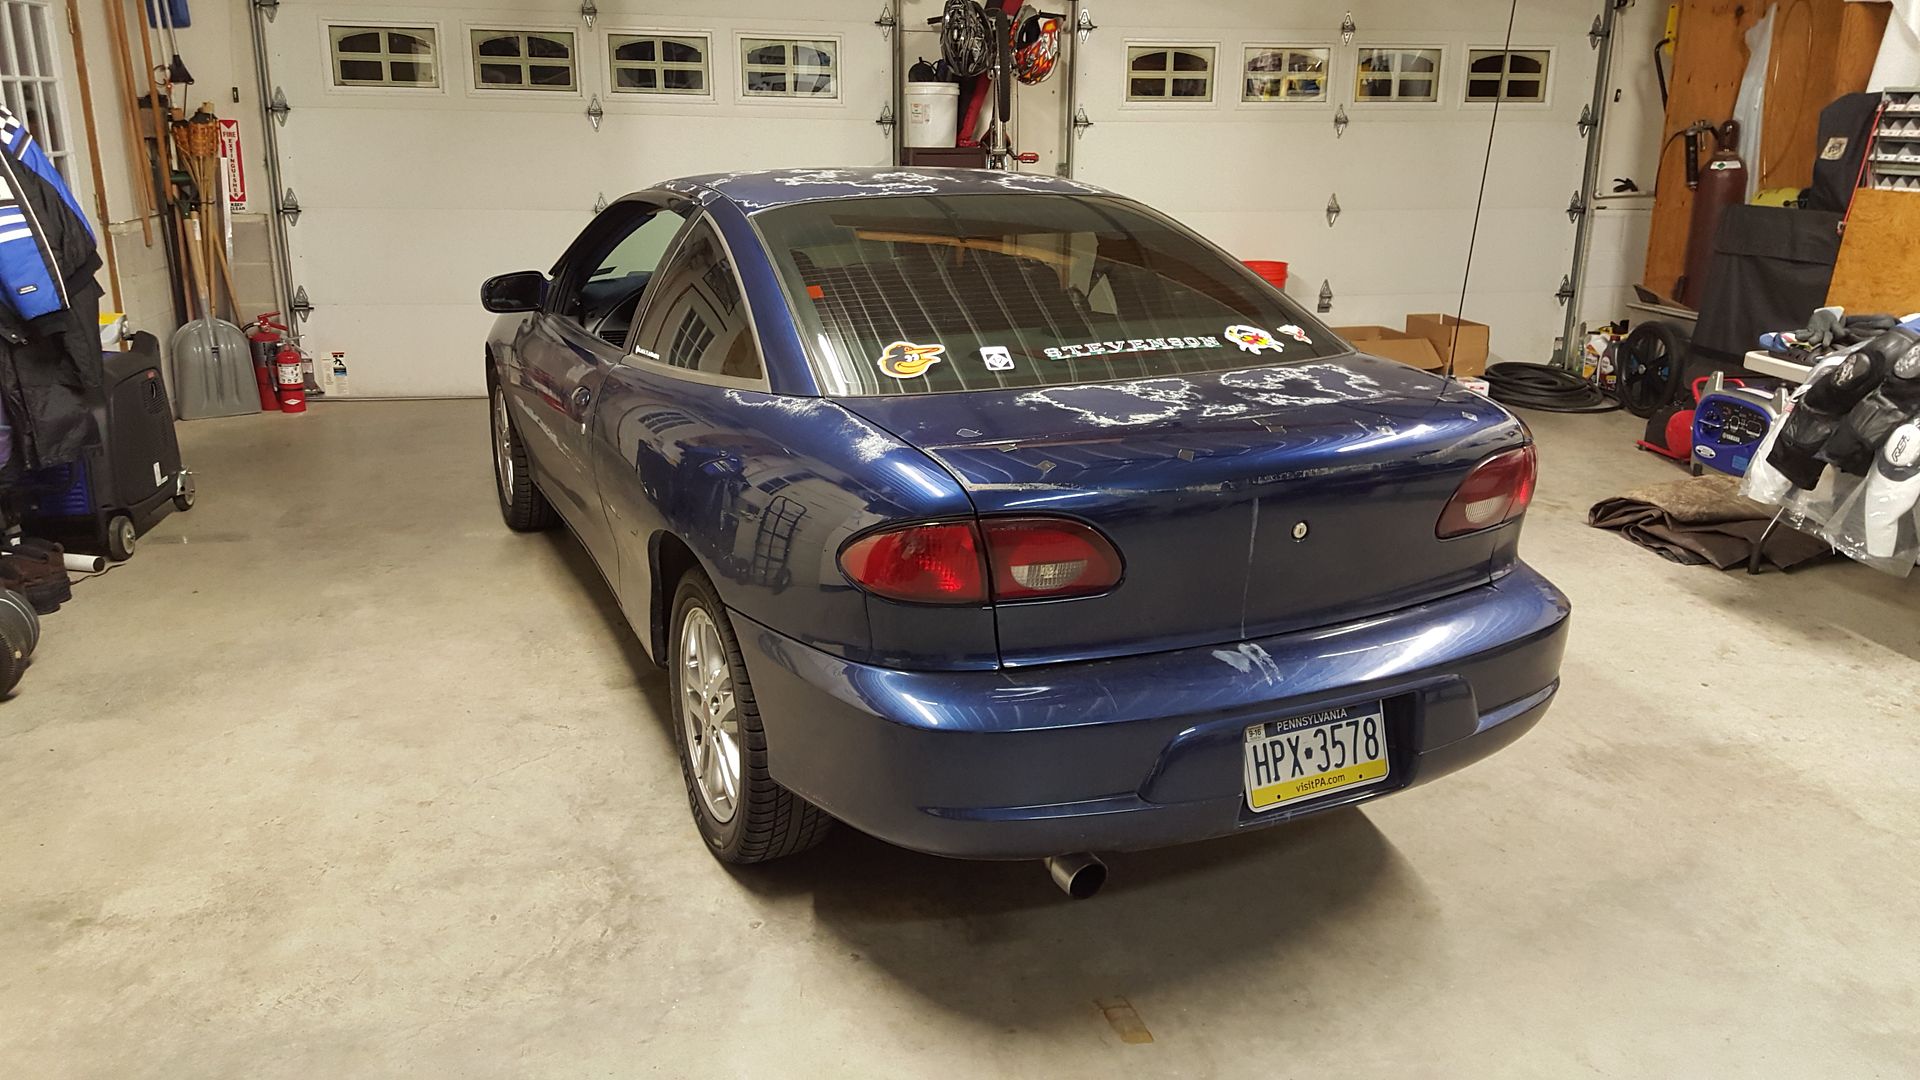
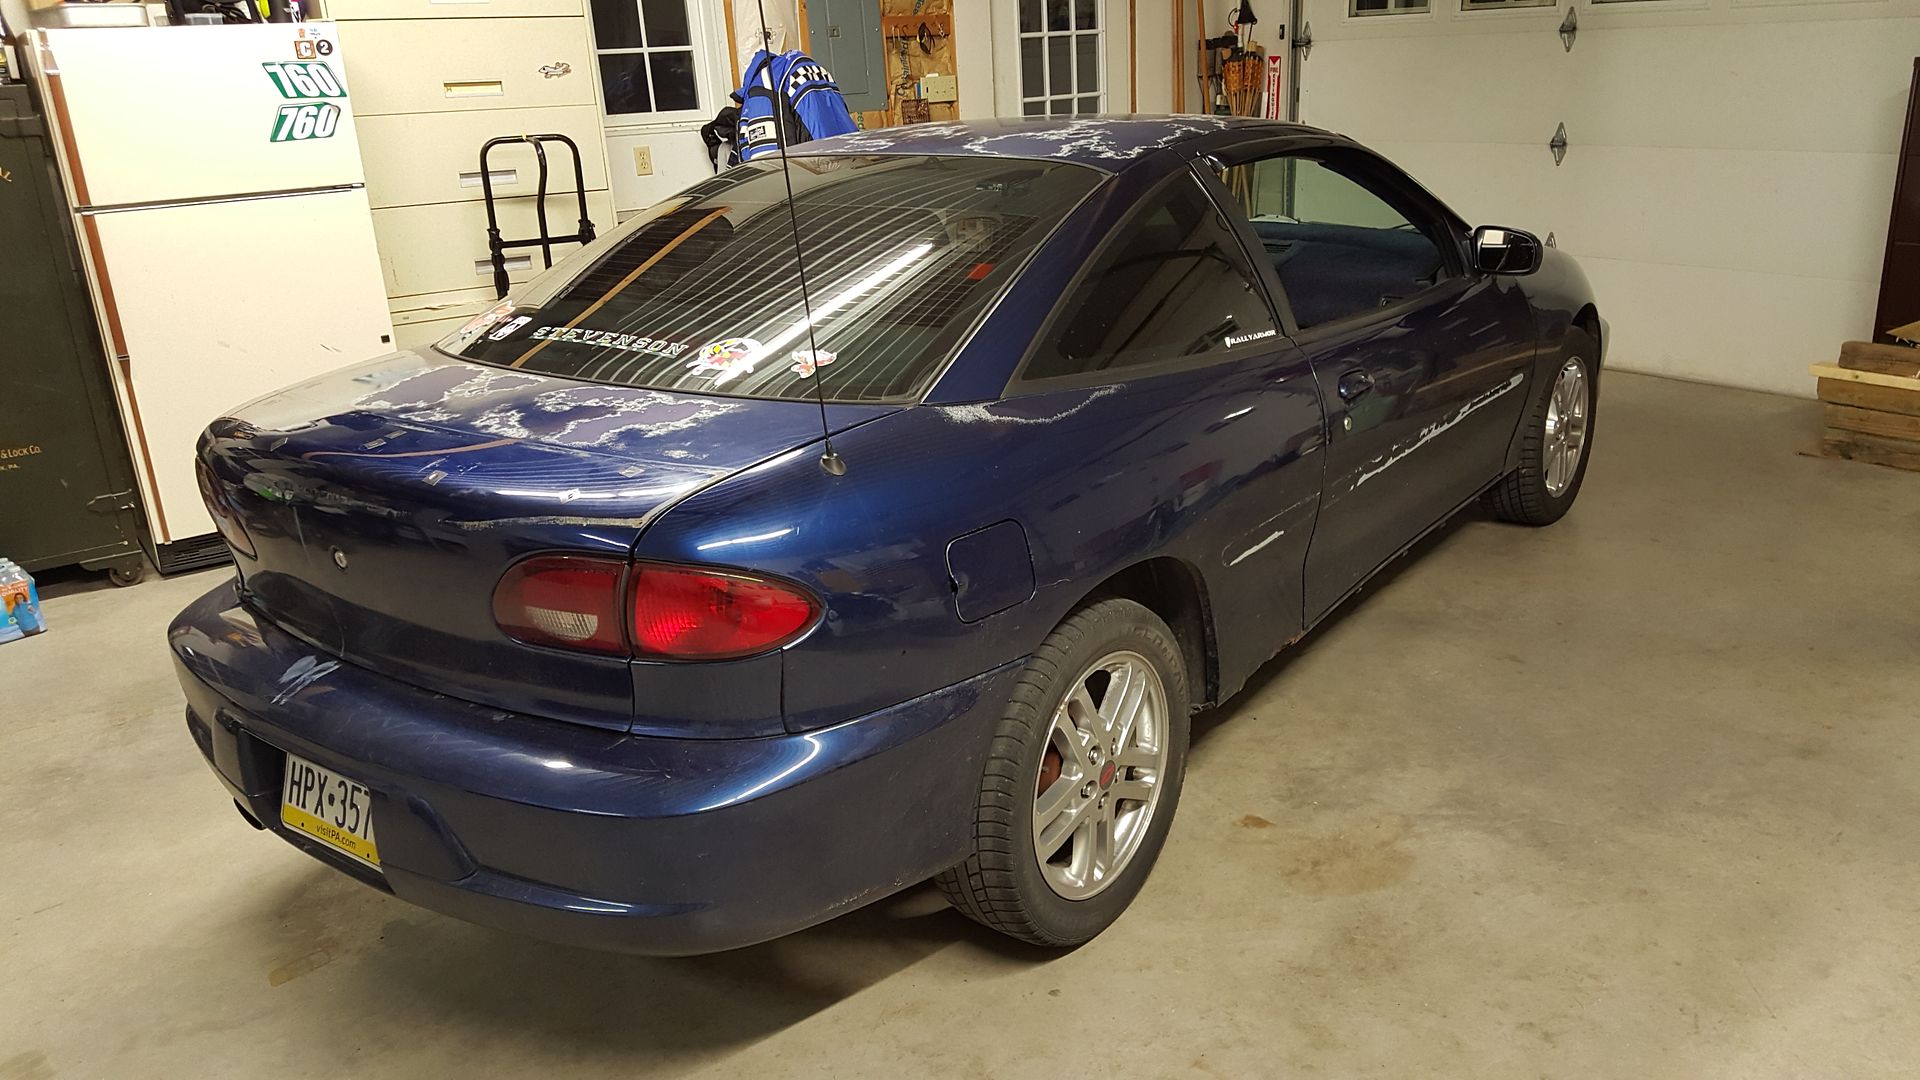
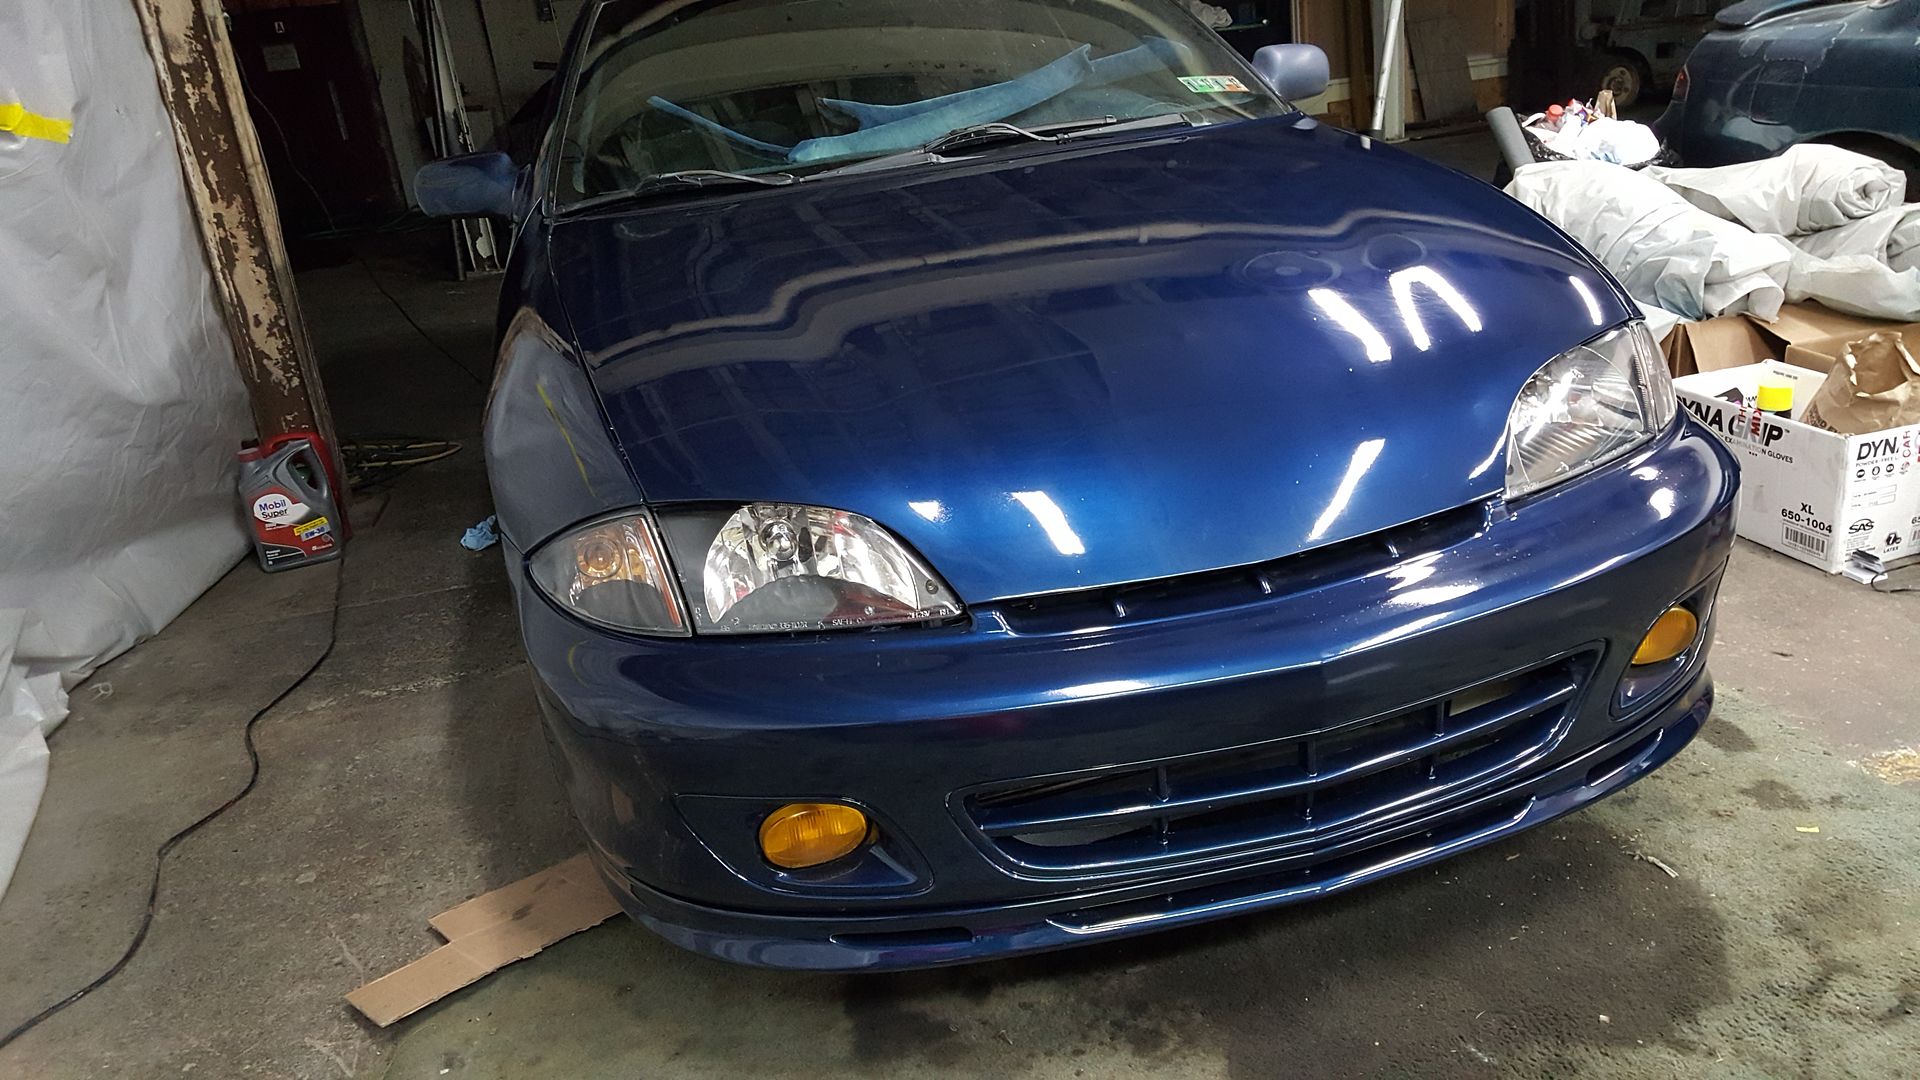
This will be a fairly quick project as I'd like to get it done and over with before the weather gets too hot so I can use a faster curing paint reducer and cut down drying time. I also will be parking the car for a week and borrowing a friends car so I need to make that as short of a period of time as possible. I'll be making my own paint booth in a warehouse that a buddy of mine occupies for his "garage area" and will be recruiting a few friends of mine to help- a mechanical engineer to help with the body work and a professional painter to help with the spraying of the color and clear coats. Everything else I will be doing myself. My skill level overall is "advanced beginner" when it comes to paint and bodywork but I have my Master's degree in IT so I know how to research and follow instructions LOL. Here's a few pictures of the car both back in the day before the paint was bad and a few that are more recent. Feel free to post your thoughts, opinions, tips, observations or whatever else besides being rude that will improve the quality of this thread for those looking to paint their own cars in a somewhat cheap manner. Lots to come in the near future. Cheers.

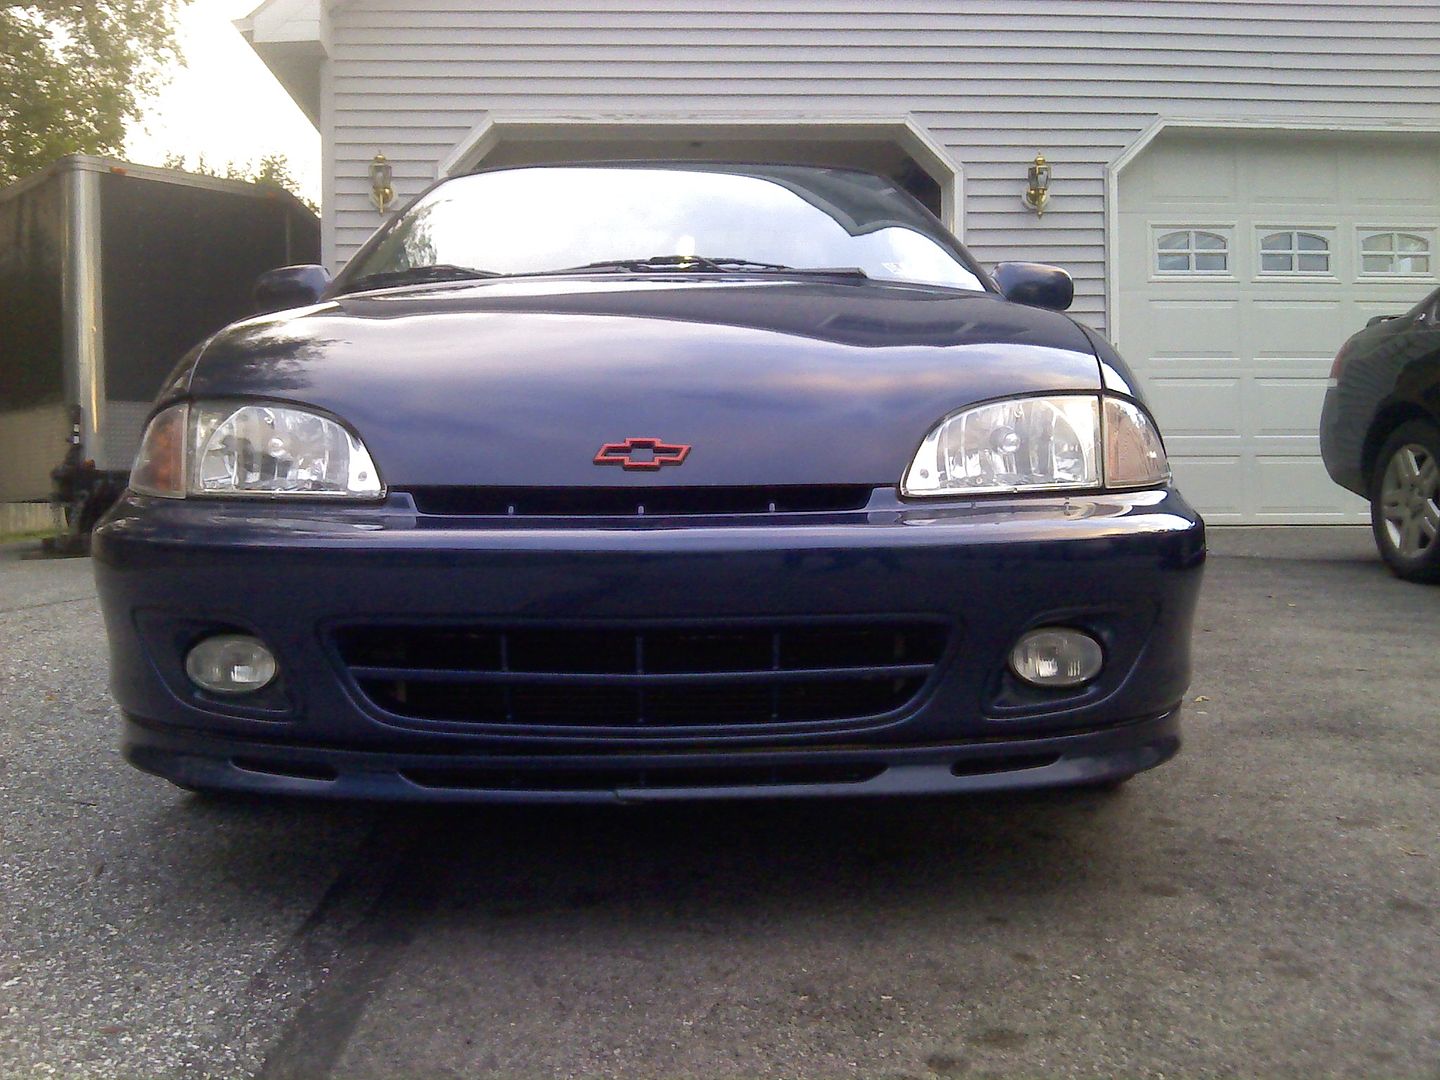
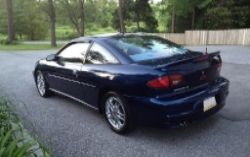
First day I got it in 2010

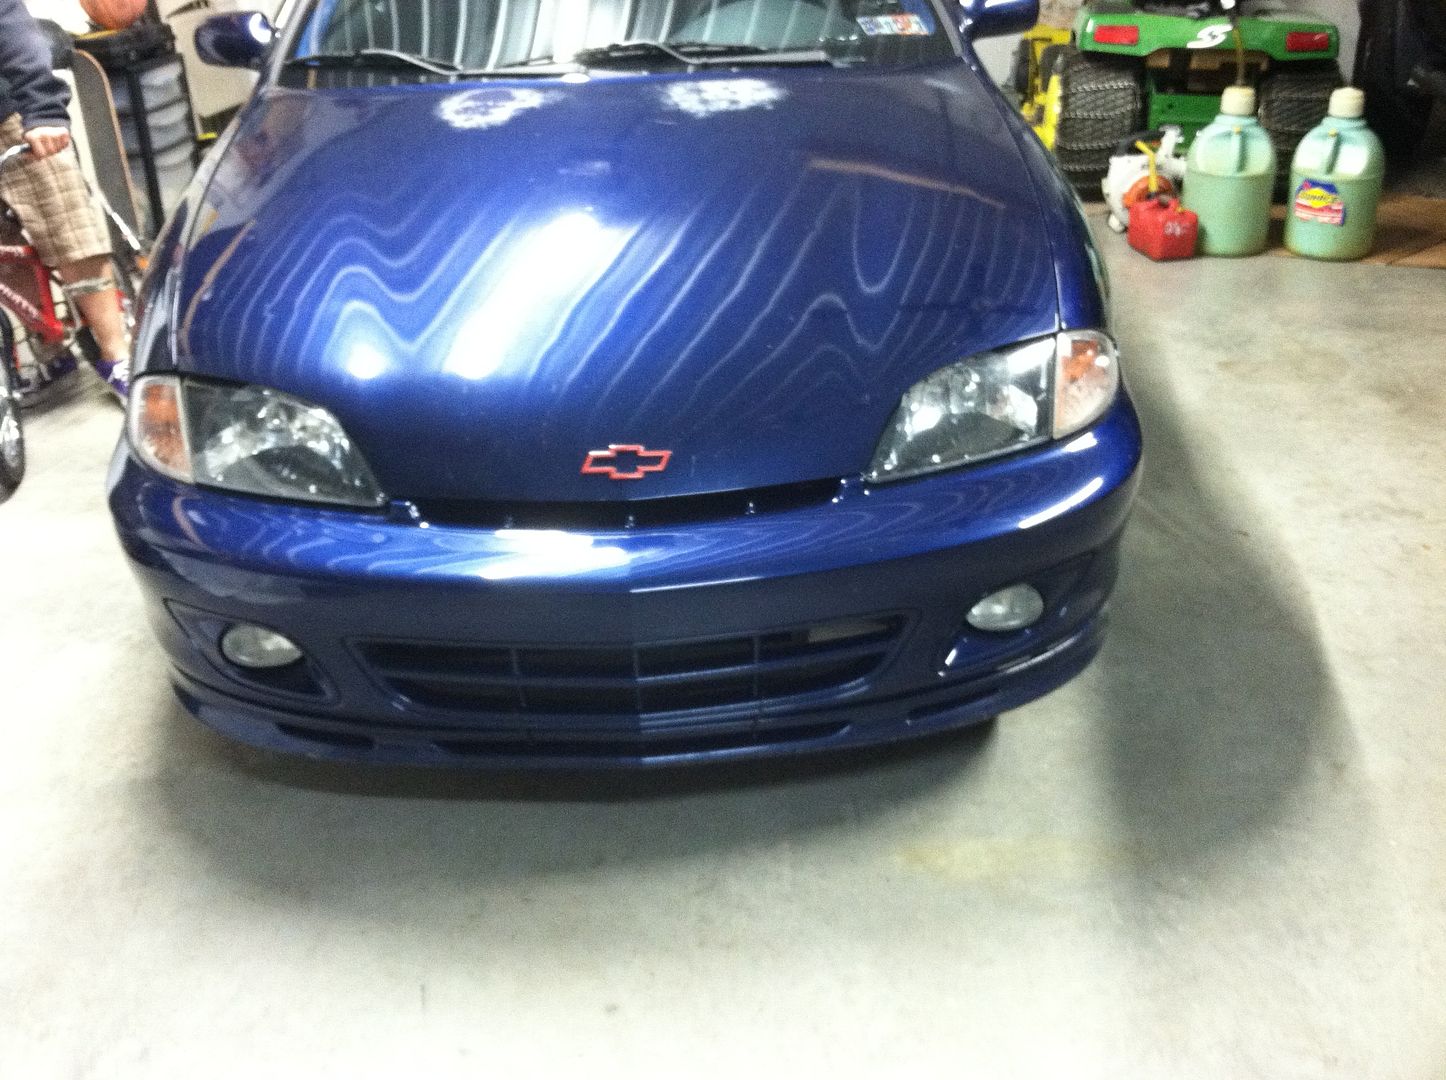
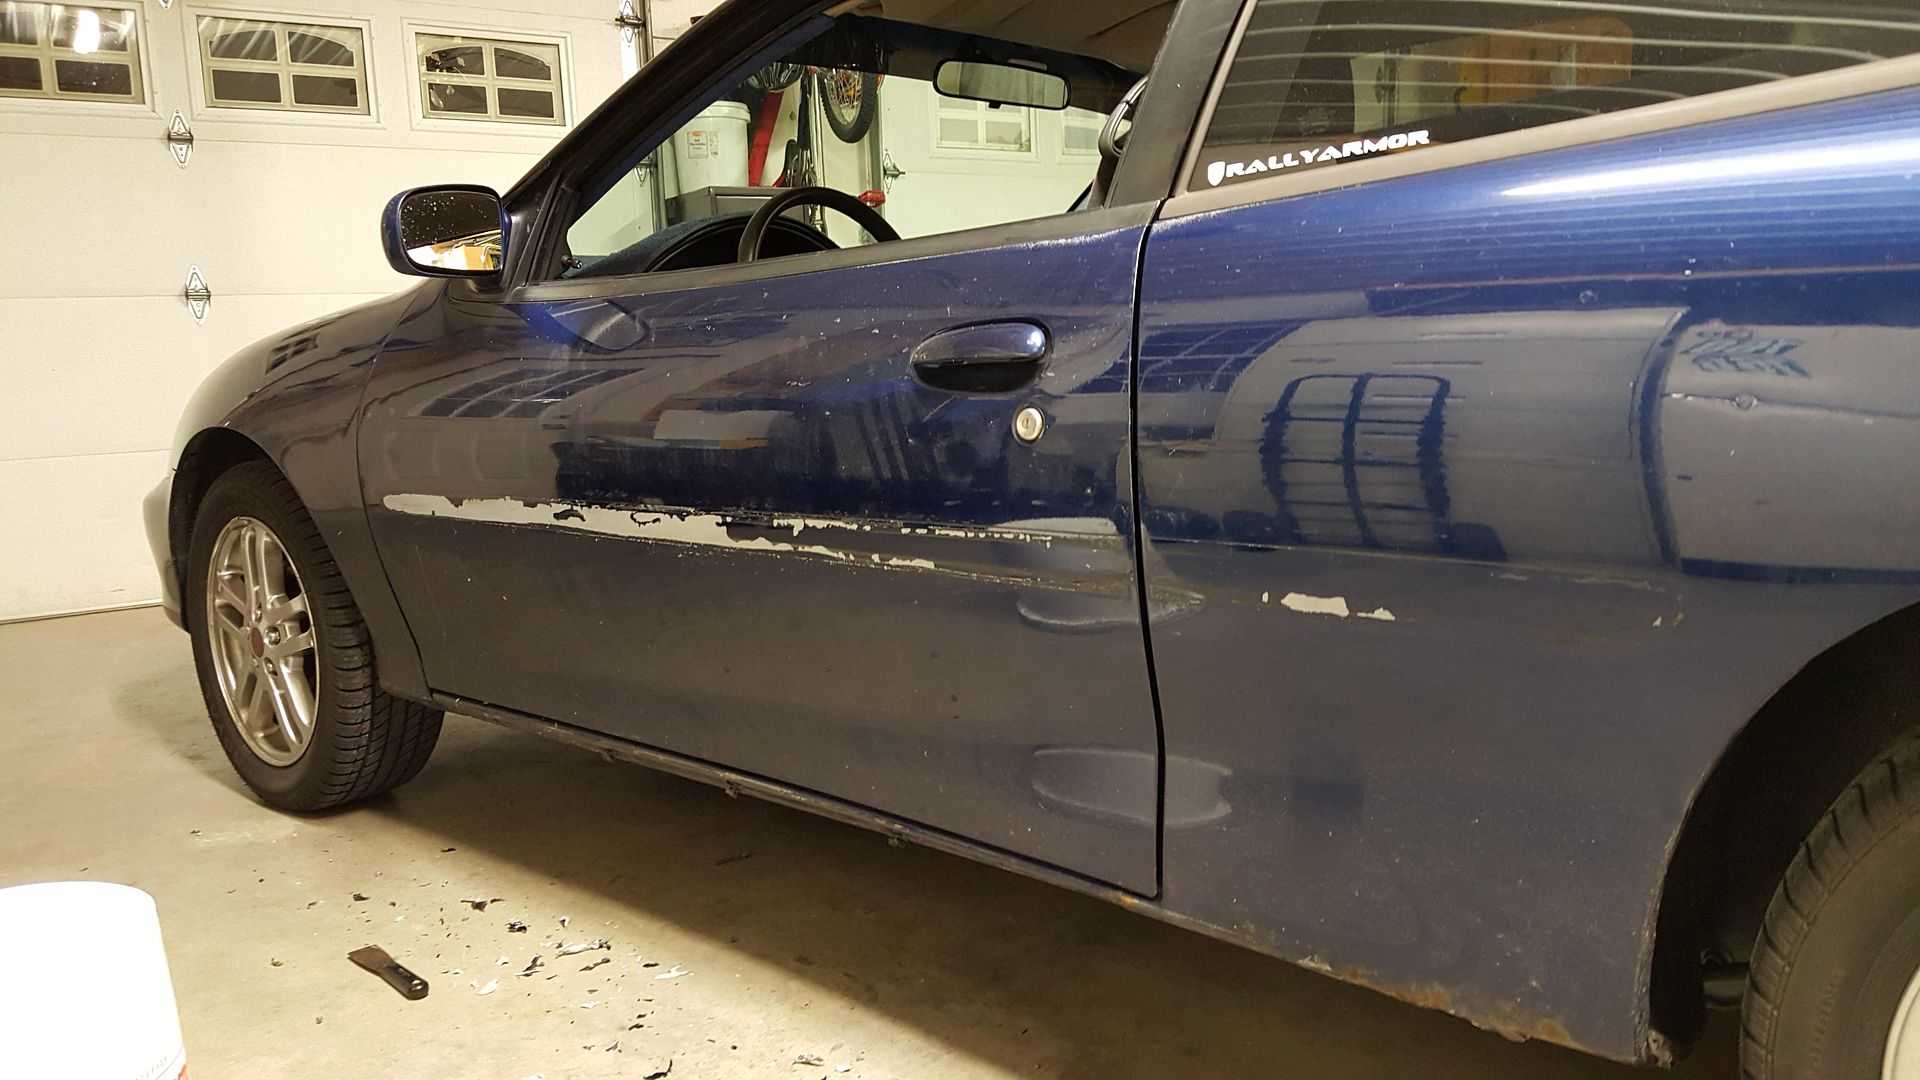
Starting to crack and peel
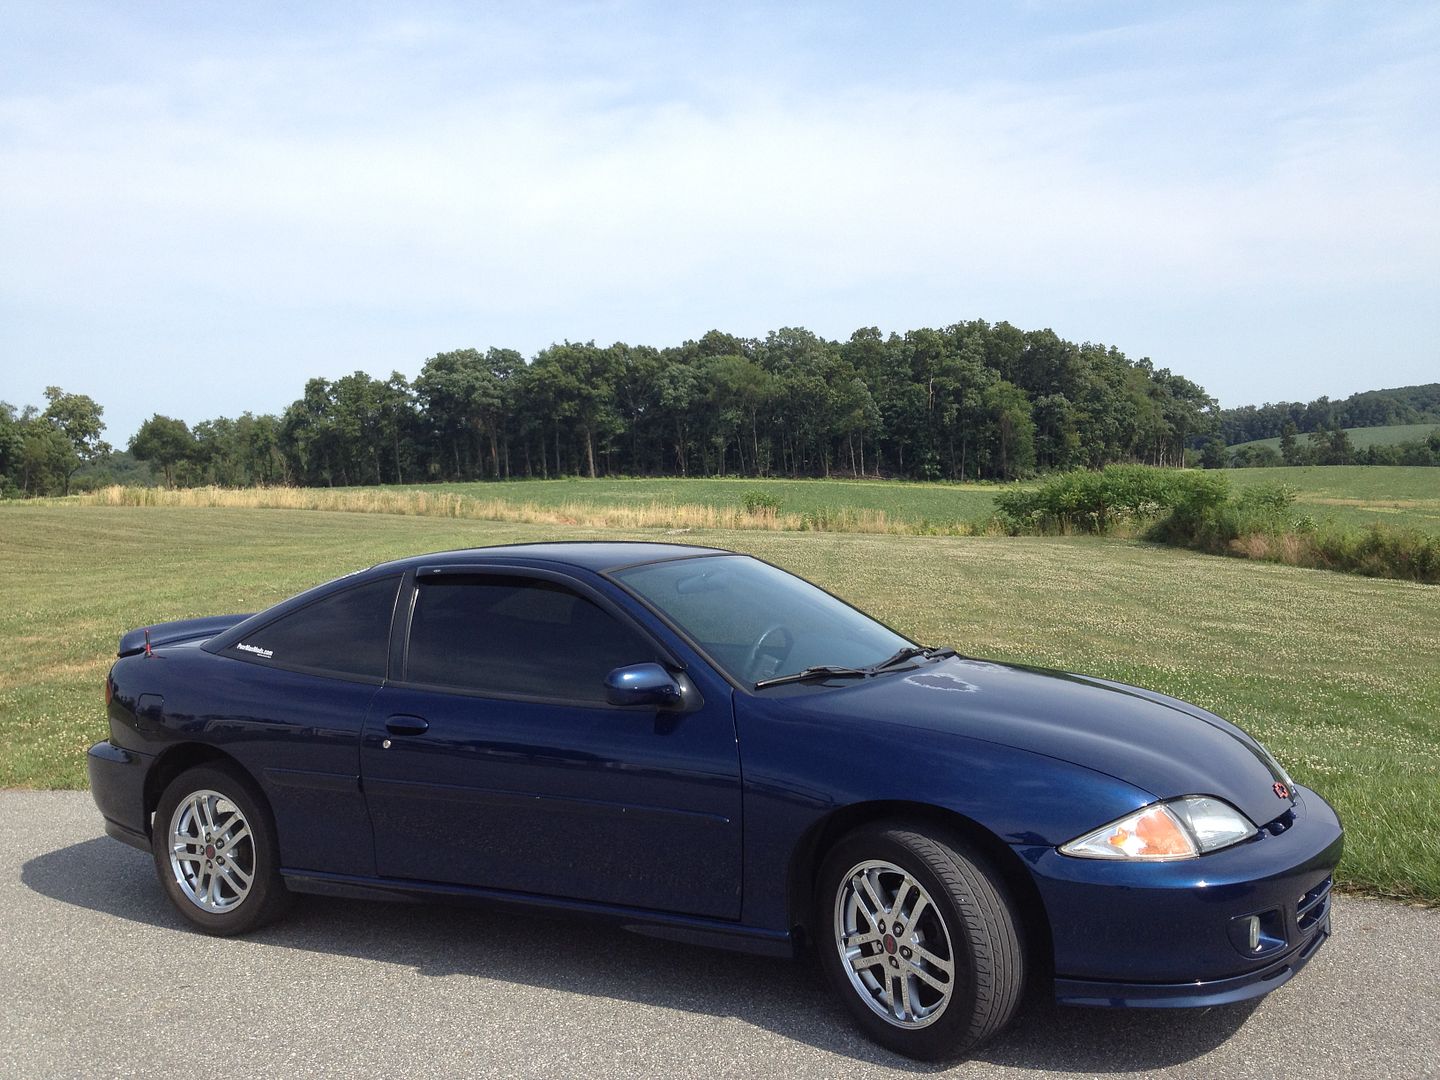
Day I got tint installed
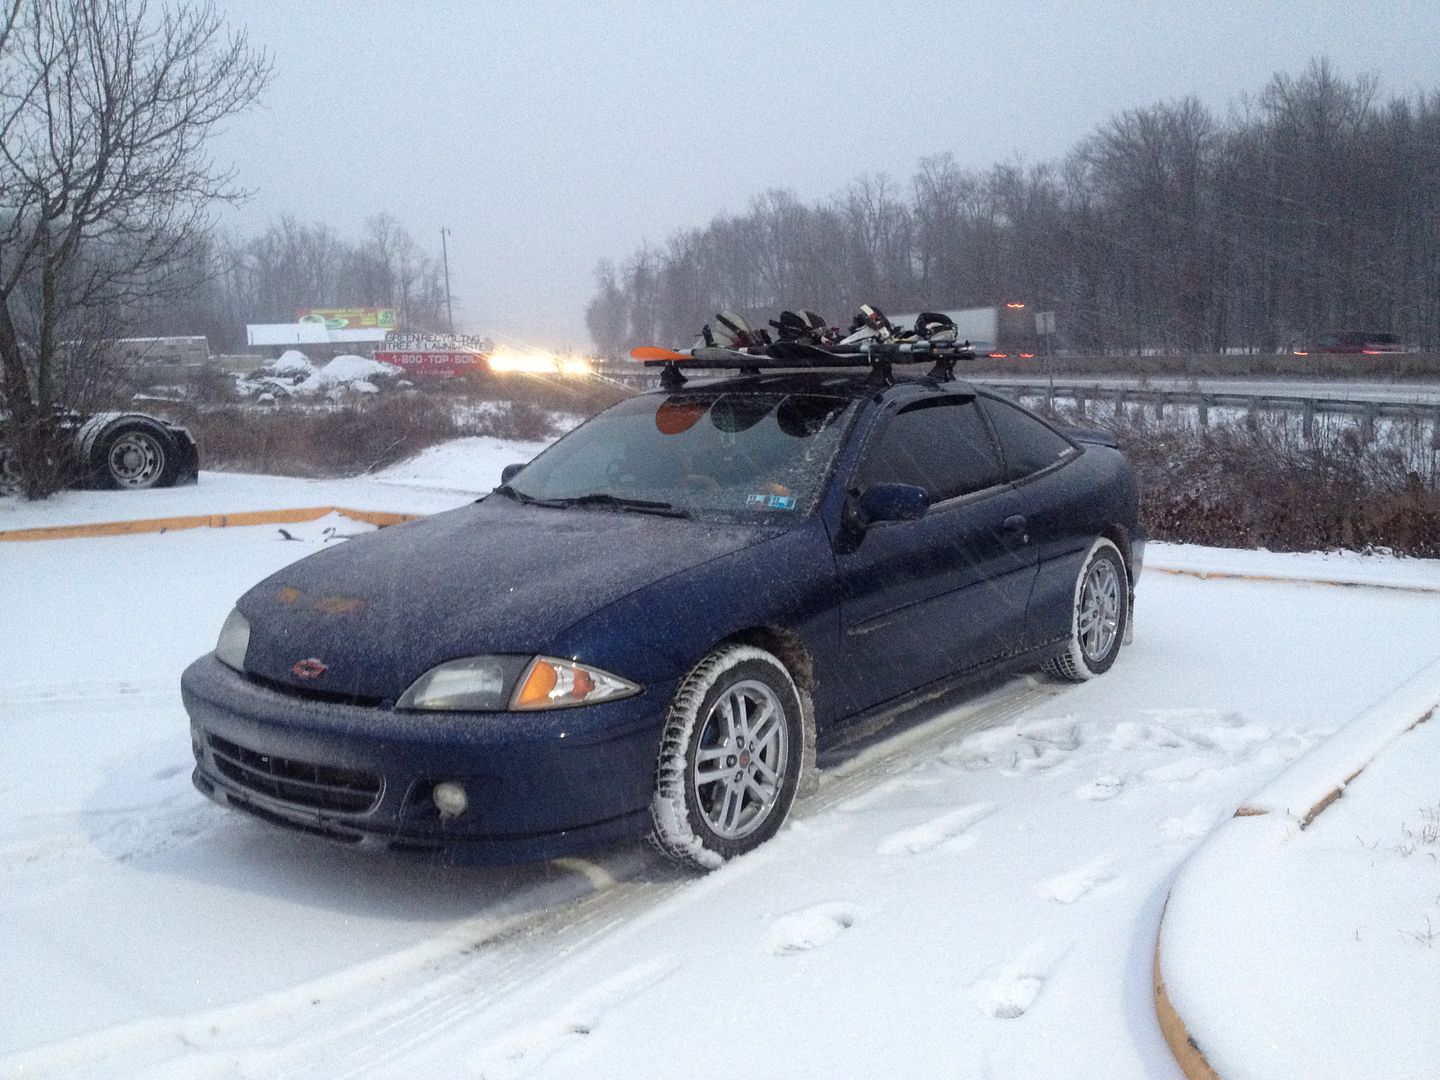
Beginning of this winter
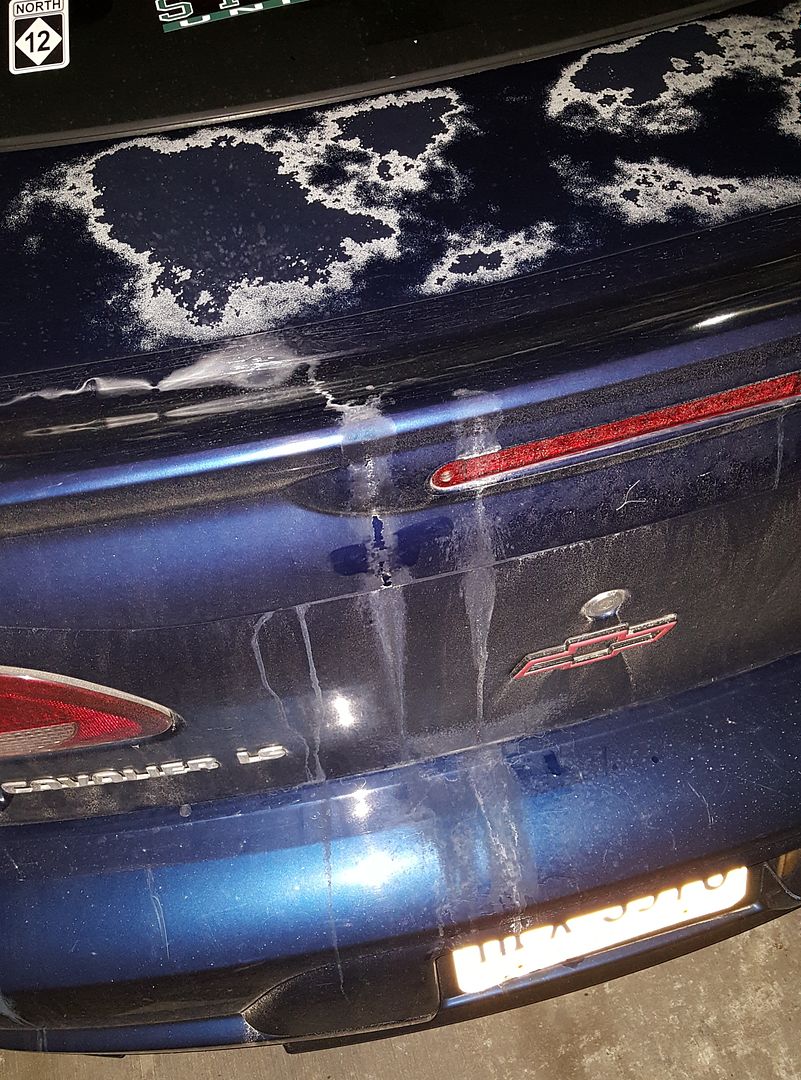
Last month after having salty water from snow melt in a parking garage eat away the paint on the trunk
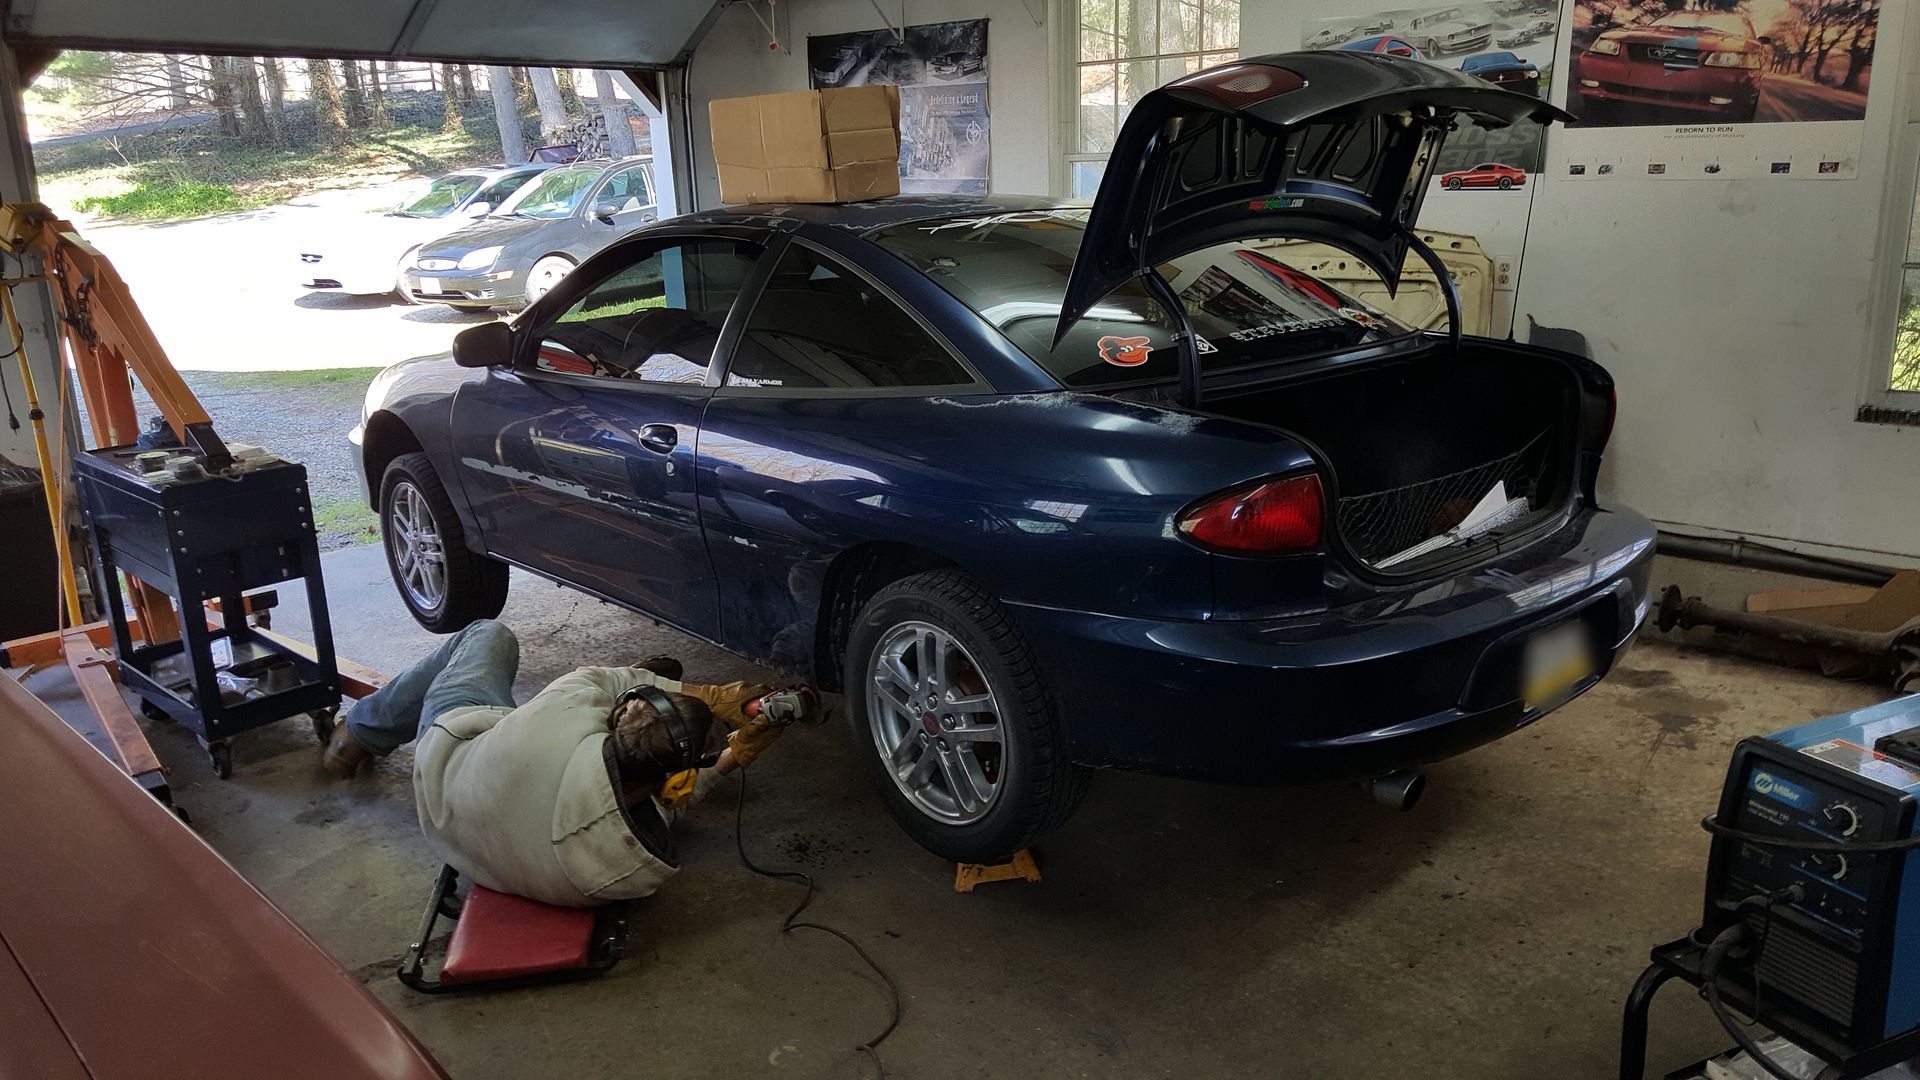
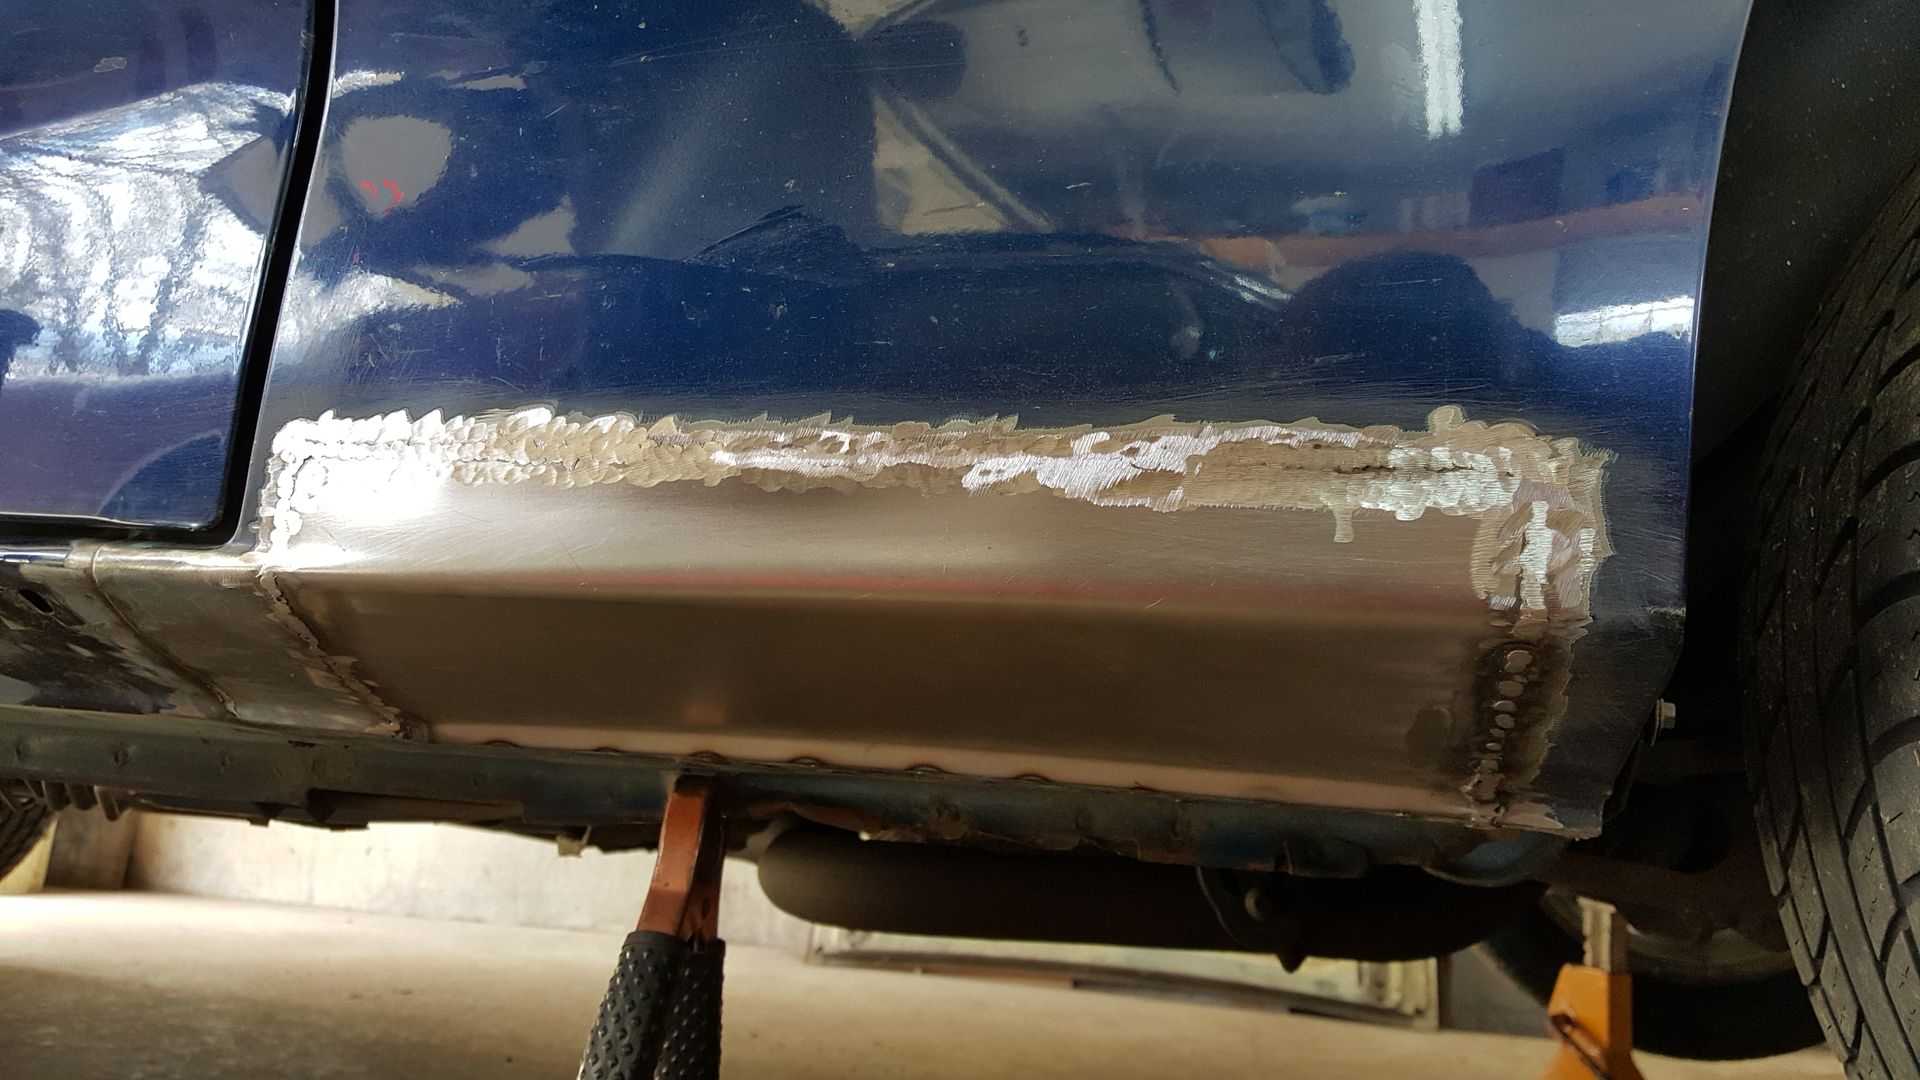
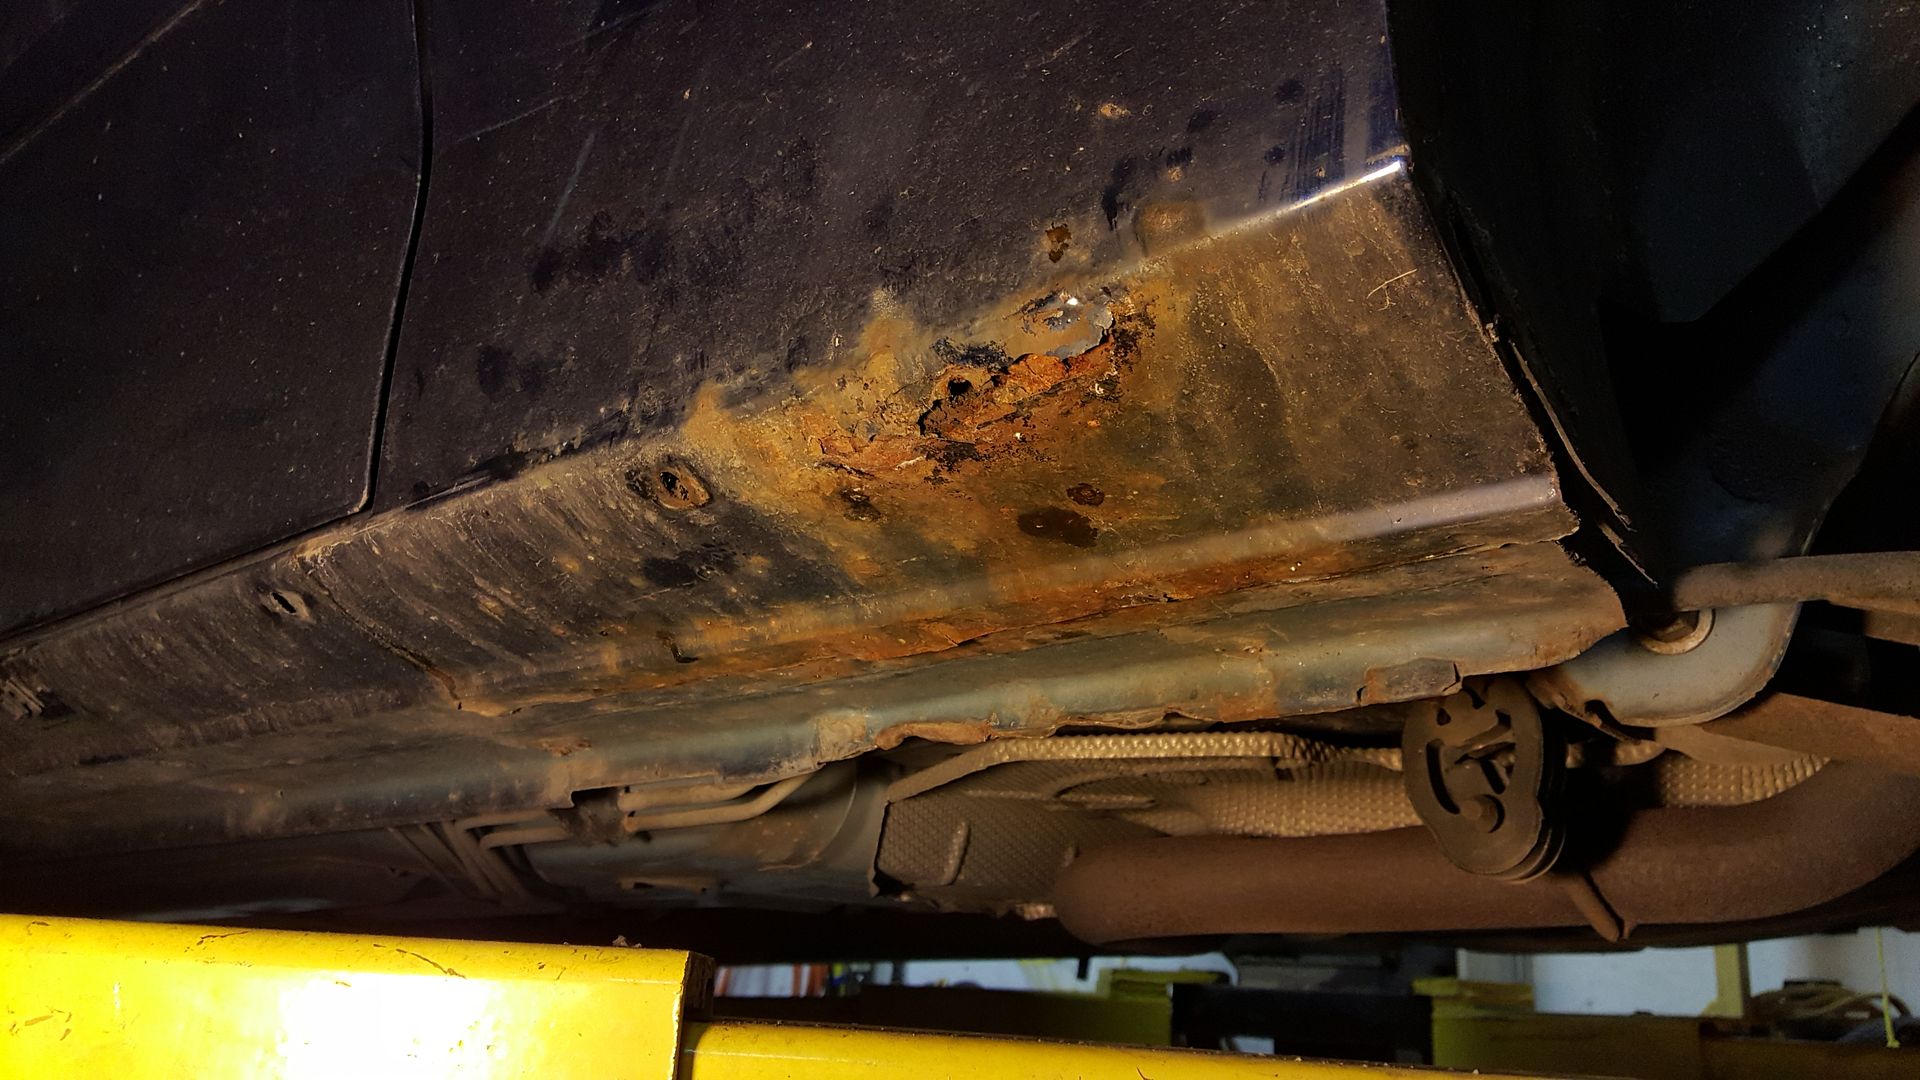
Last week I got the car on my buddy's lift and we removed the lip kit and badges. After removing the side skirts we realized how bad the rust is. So I've got new panels arriving this week to be repaired this coming weekend.
Driver's side
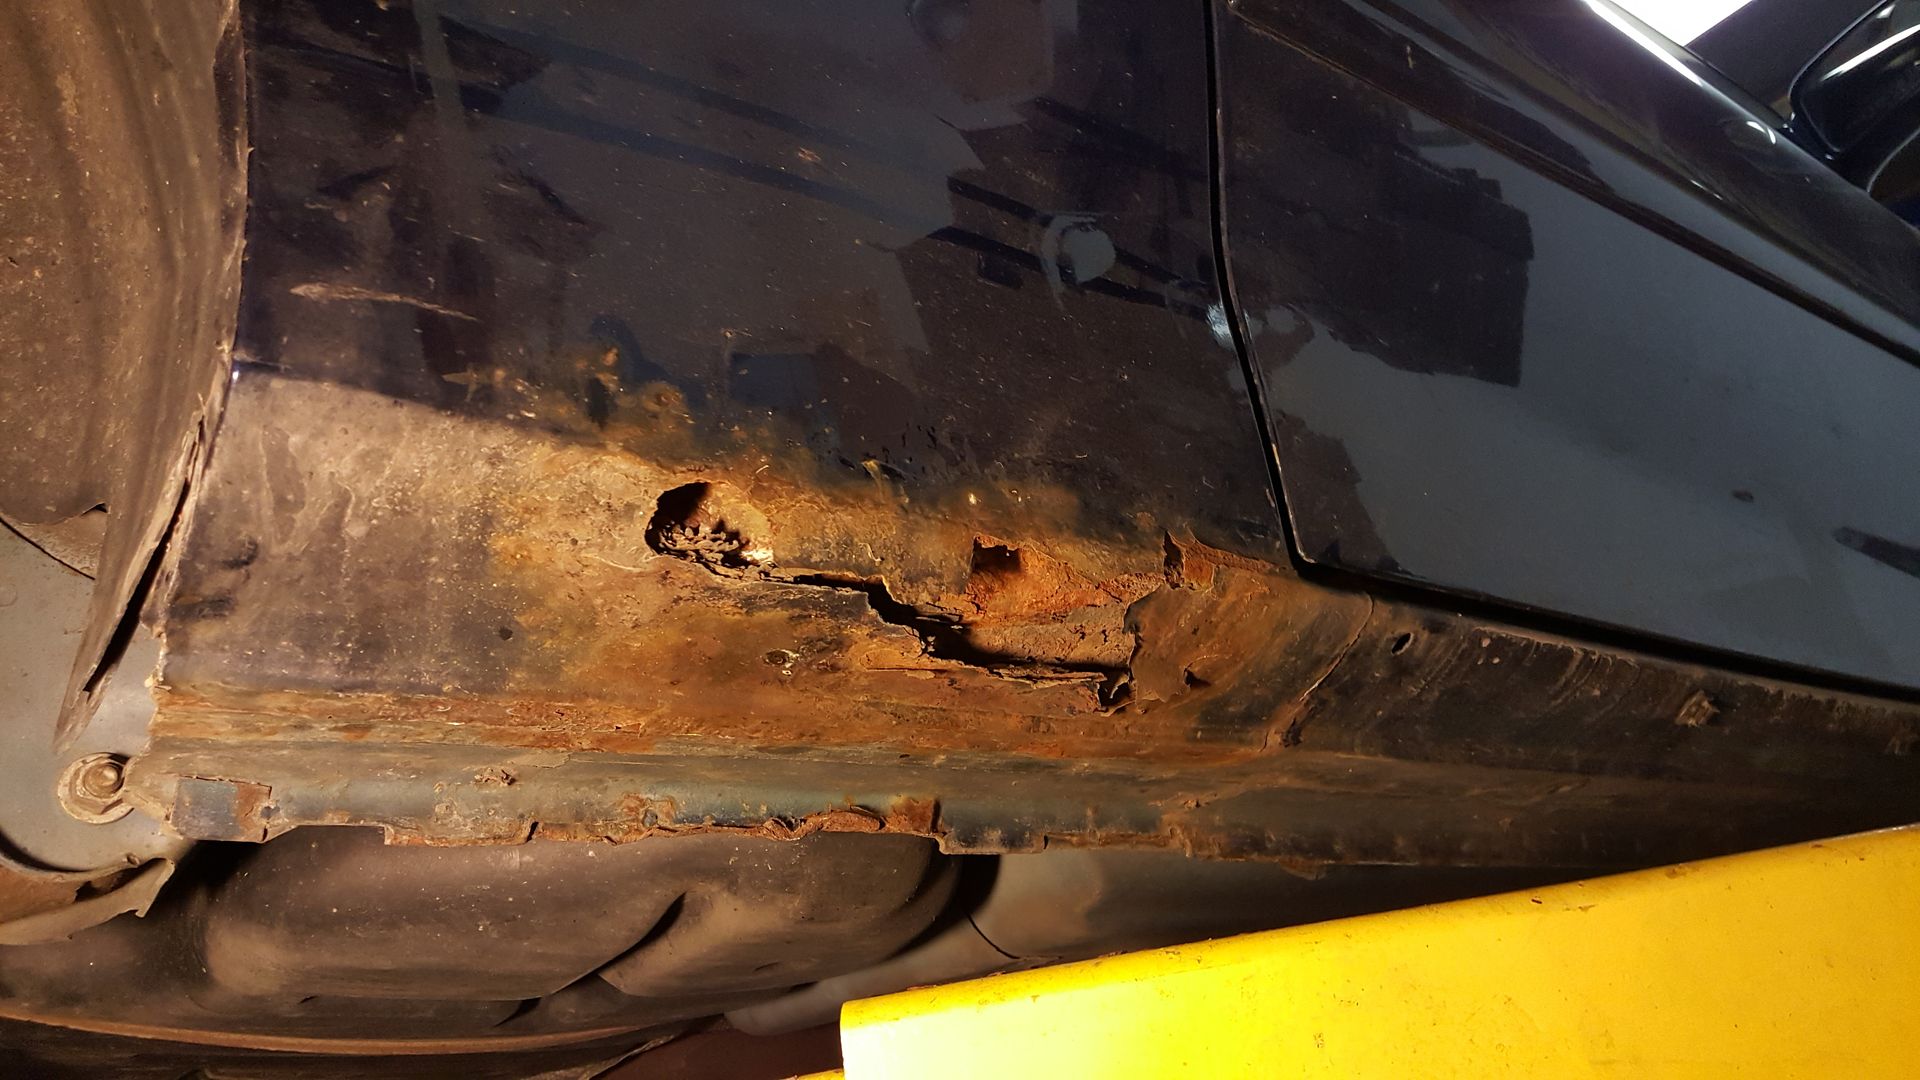
Passenger's side
Badges removed
So far I've sanded all the lowers starting with 80 and going through a progression to 150, 220 or 320, 400, and 600. Many will say that the 80 and 150 are too coarse for these plastics but trust me they needed it. The front lip was scratched like crazy and the side skirts were basically sand blasted where they protrude after years of abuse from road debris. I did all of this by hand so far.
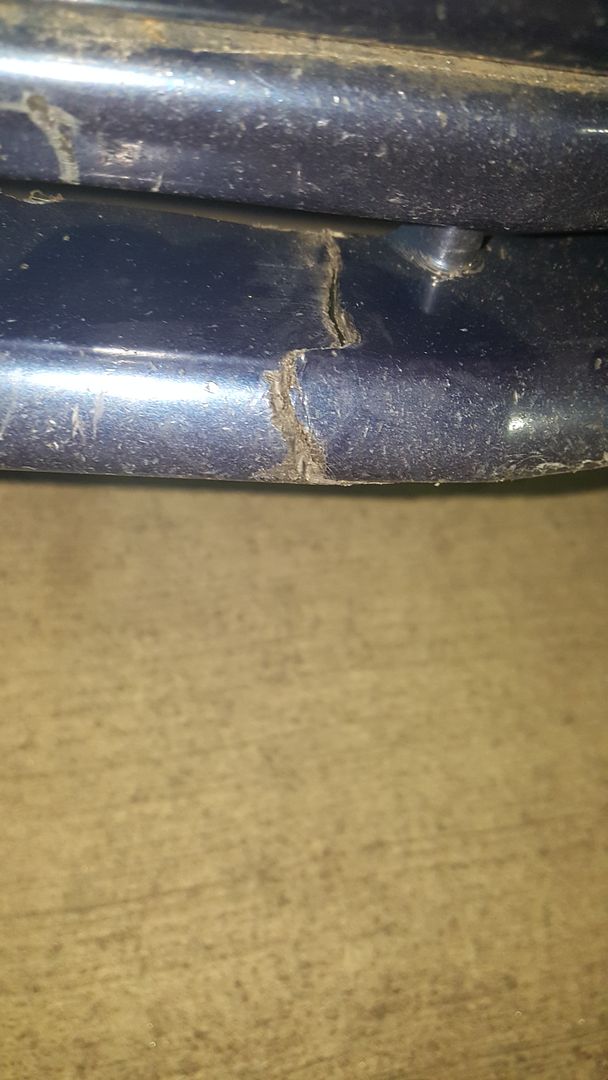
Cracks to the front lip
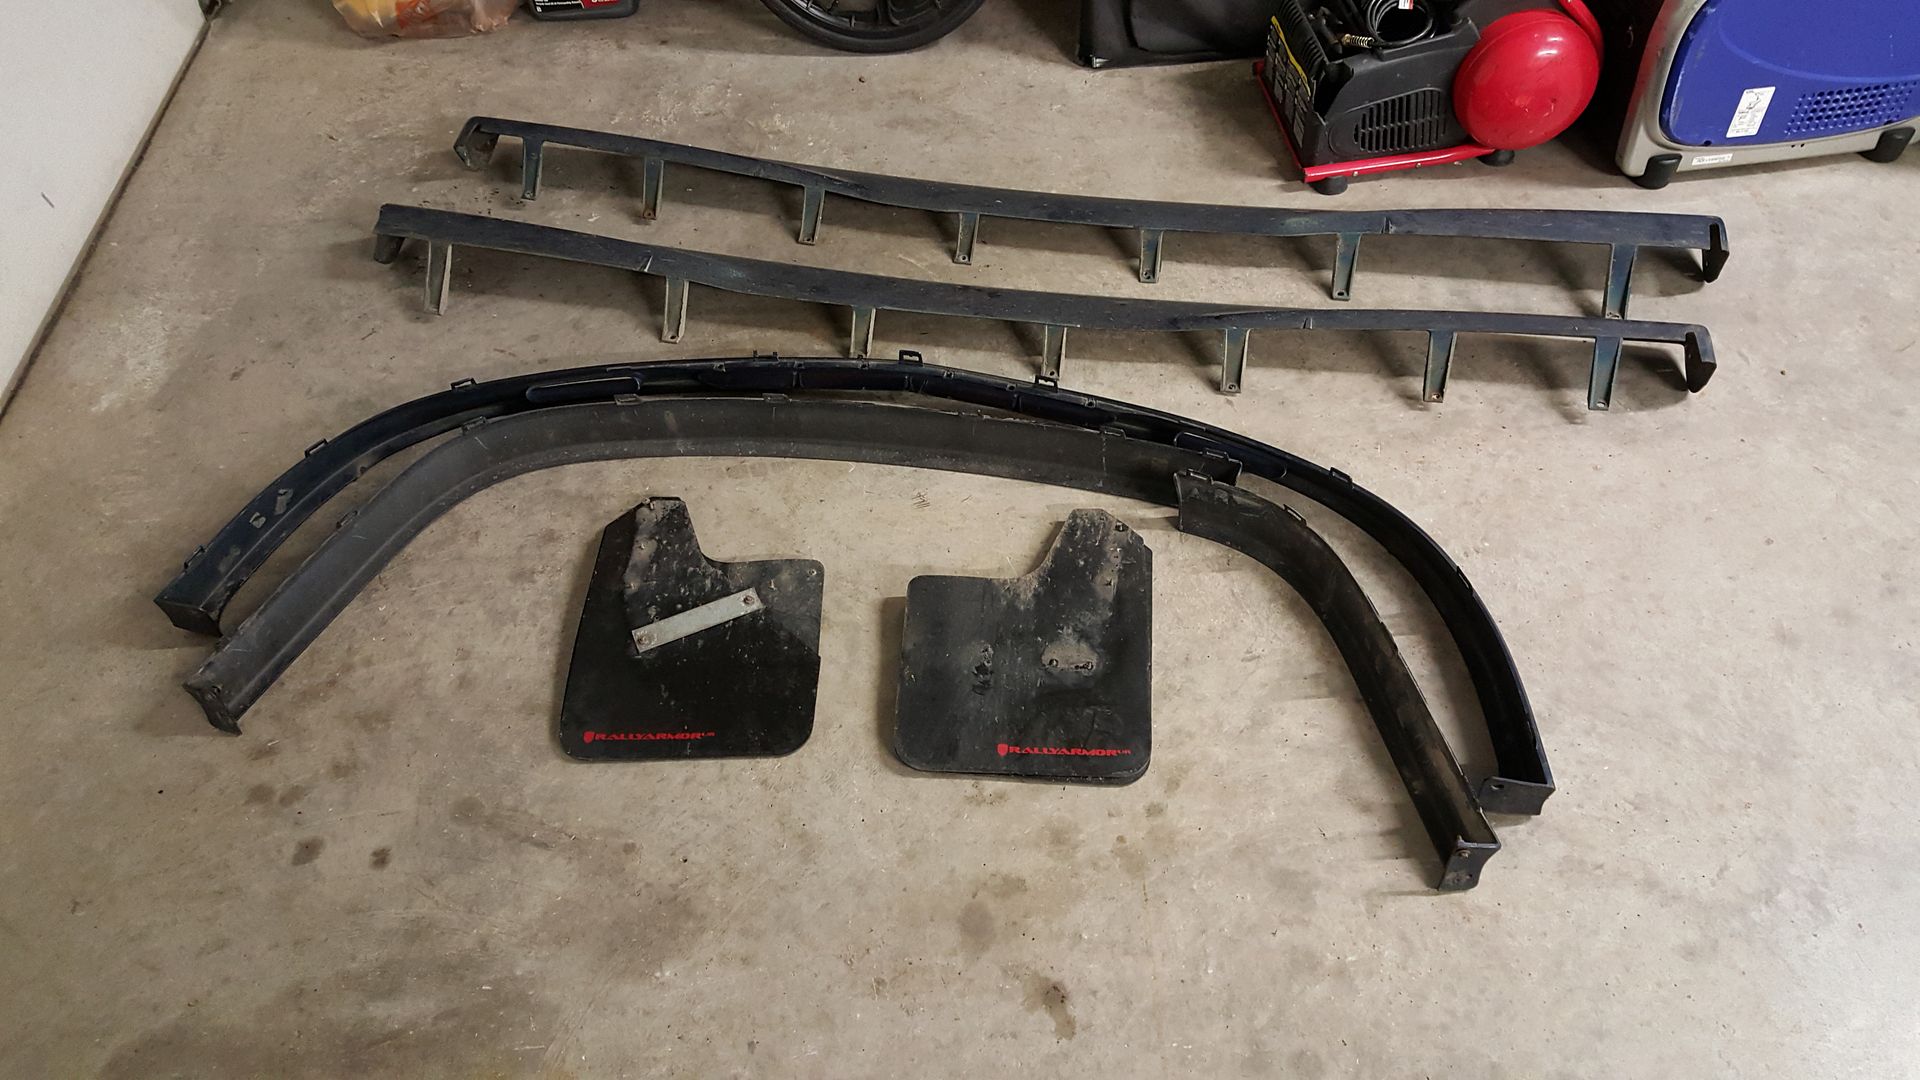
Lowers and mud flaps removed
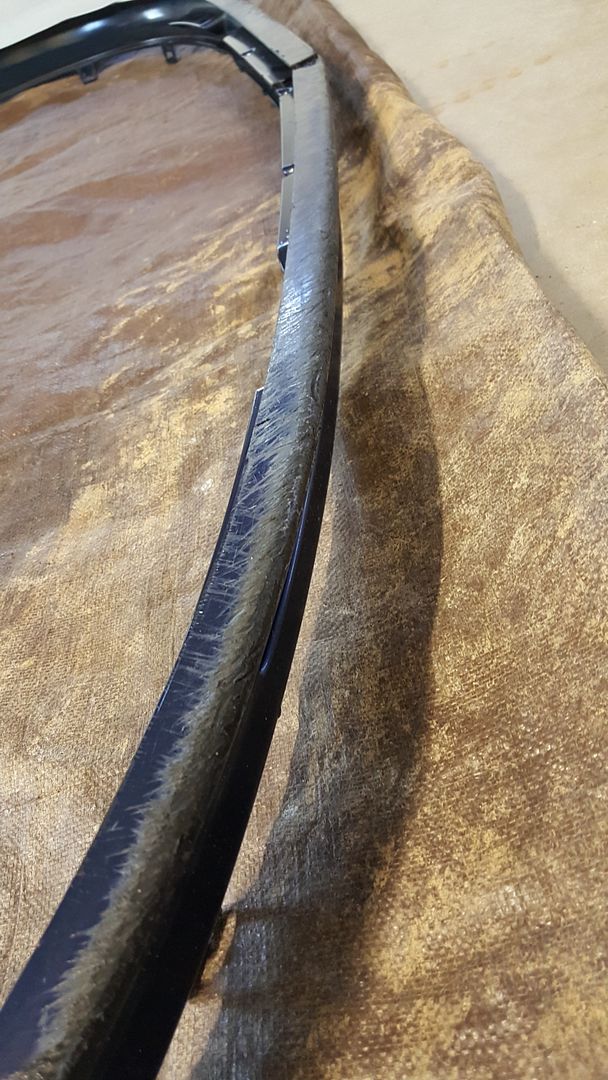
Half way sanded, you can see how bad it was scratched

Super windy this weekend in PA but outside is still better than having to clean the garage
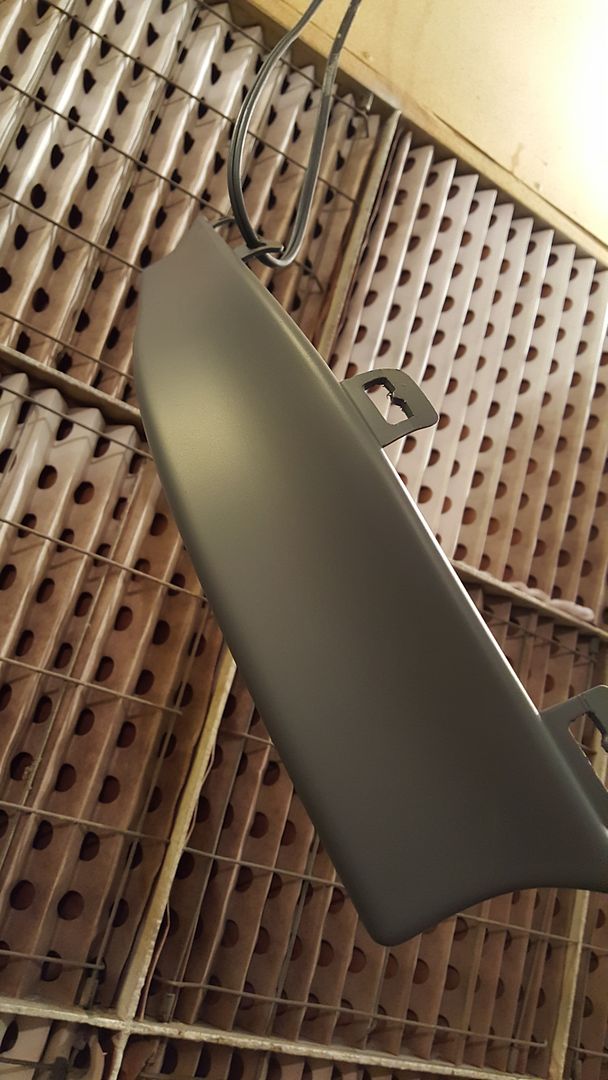
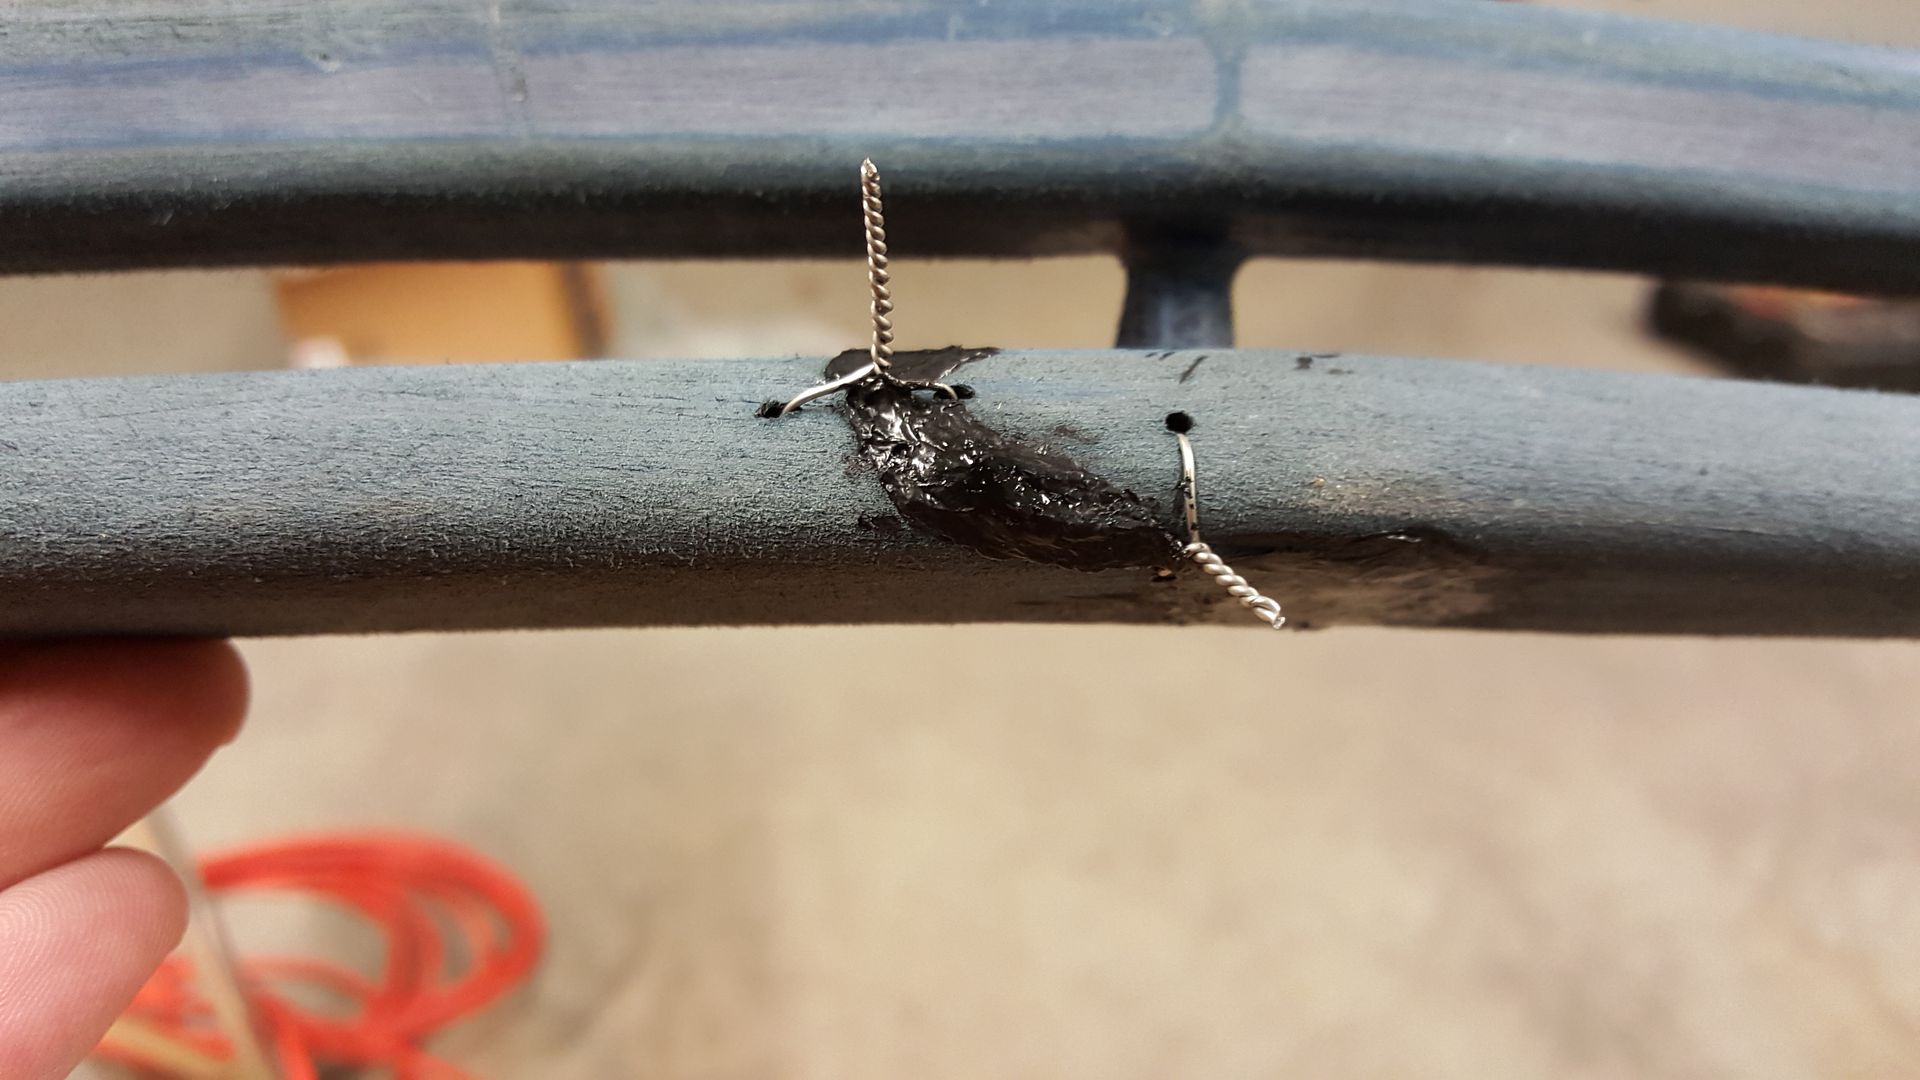
Braced the lip with safety wire so it can be repaired from the back side
Removing the body moldings and rear spoiler tonight, fixing the front lip, and continuing to sand to get everything up to 800 grit before primer. I'm going to use a sandable primer (two to three coats if necessary) to fill the small scratches that wouldn't come out by sanding. Will update tomorrow.
I'm in the same boat right now, will be watching the progress maybe learn something new
ReD RaiN
T!M8!T wrote:I'm in the same boat right now, will be watching the progress maybe learn something new
Yeah once I got the rust coming up and I could see it above the side skirts it was game on. I've been talking about doing it forever and thought so much about it and it was literally just putting it all down on paper and spending the money. One thing I've noticed already is there is definitely a recoverable cost with something like this. I've spent some extra money on things but many of them are things that I will be able to use indefinitely in the future. For example: 1/4 sheet black&decker sander, 3M respirator, paint gun regulator, plastic paint mixing containers, 12ftx100ft plastic sheeting (paint booth). All of these things will still be useable after this project. I guess I'm trying to justify my spending but I see it as a good investment kind of project.
I'll try and cover the project the best I can.
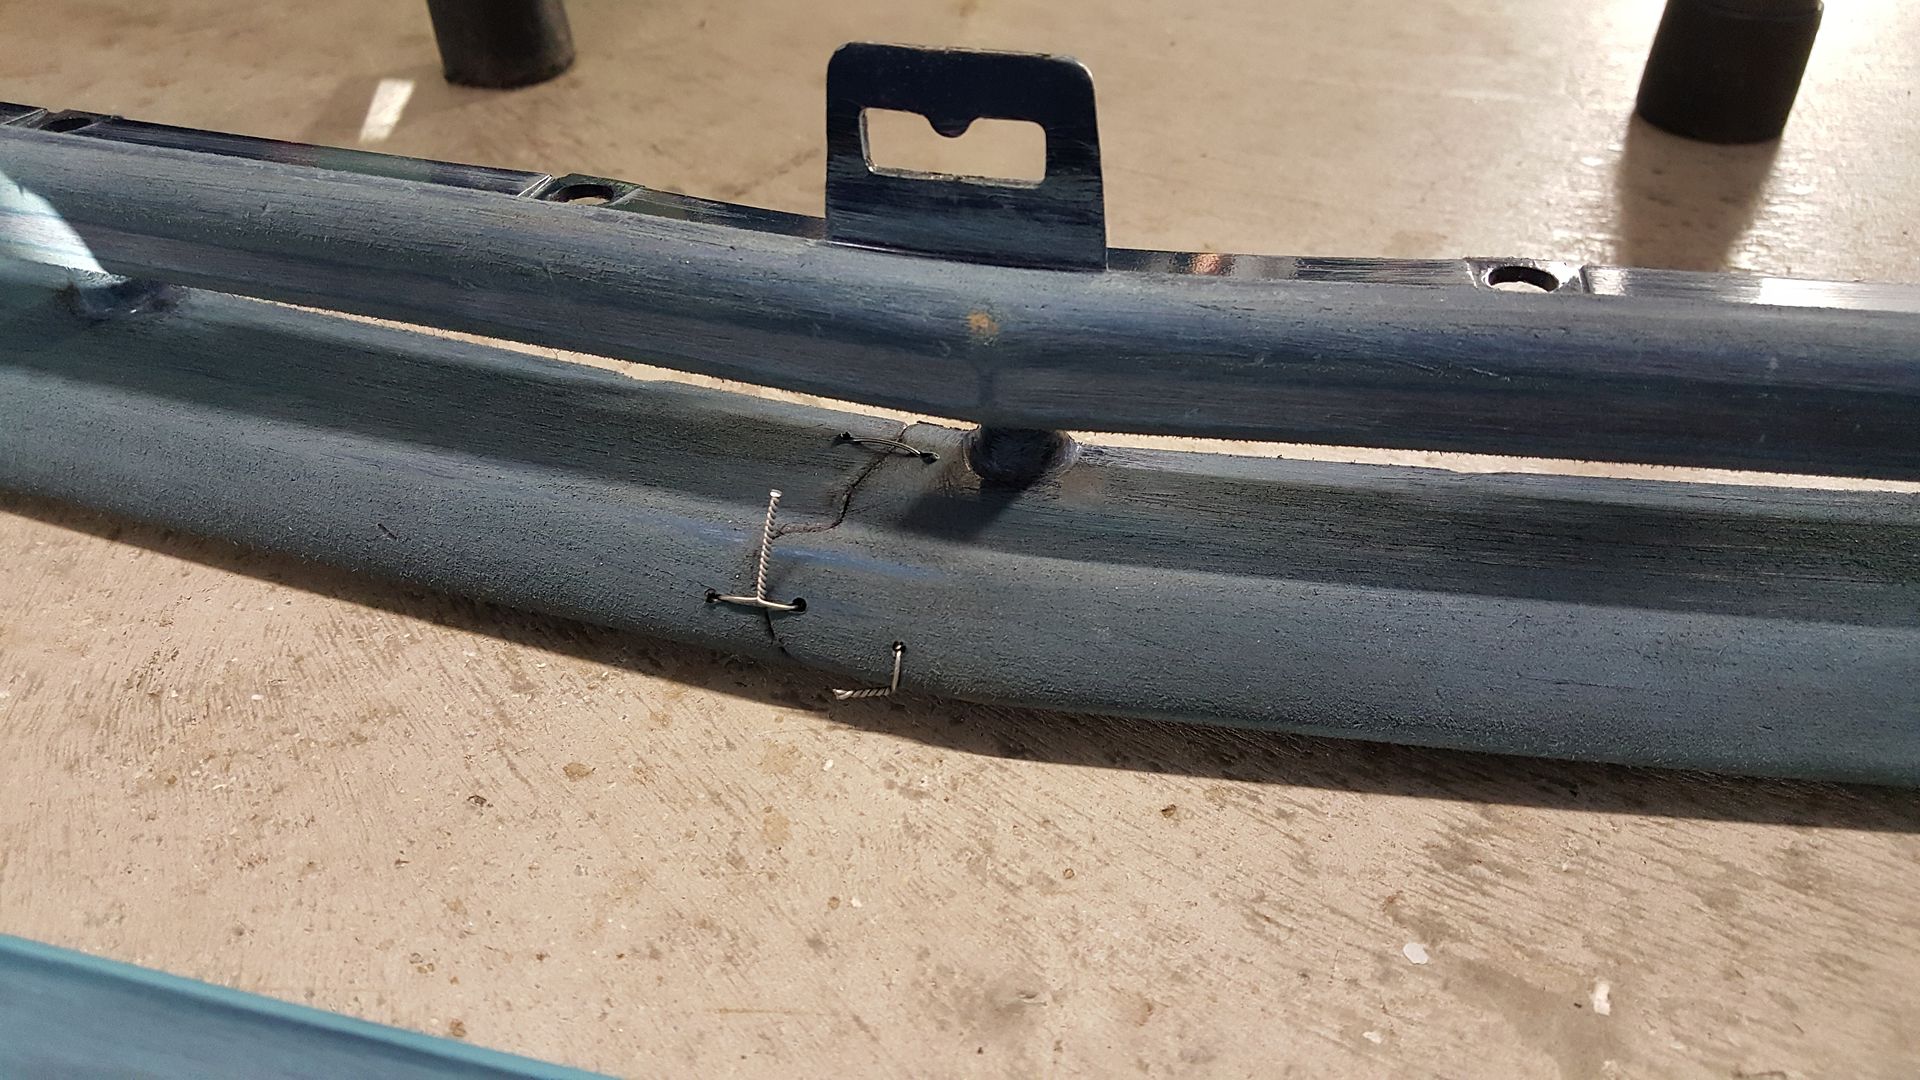
Really took my time with this front lip last night as I feel it to be an very important visual part of the car. Especially for pictures and just in general when people look at your car. The lower piece of the lip was cracked completely through but was a clean break and still sort of fit together as you saw in the last picture of the previous post.
I read an old STI build thread on clubWRX forum that a guy in Japan was doing. He presented a genius idea to repairing plastics that I had never thought of before and I had really high hopes of making it work. Turns out its by far the most solid approach to fixing any kind of automotive plastics. Before you start, sand it really well and always clamp, tie, or safety wire your parts together so that your repair is exactly the way it should be and you don't have to worry about trying to hold it in place. (see the last pic again in the previous post)
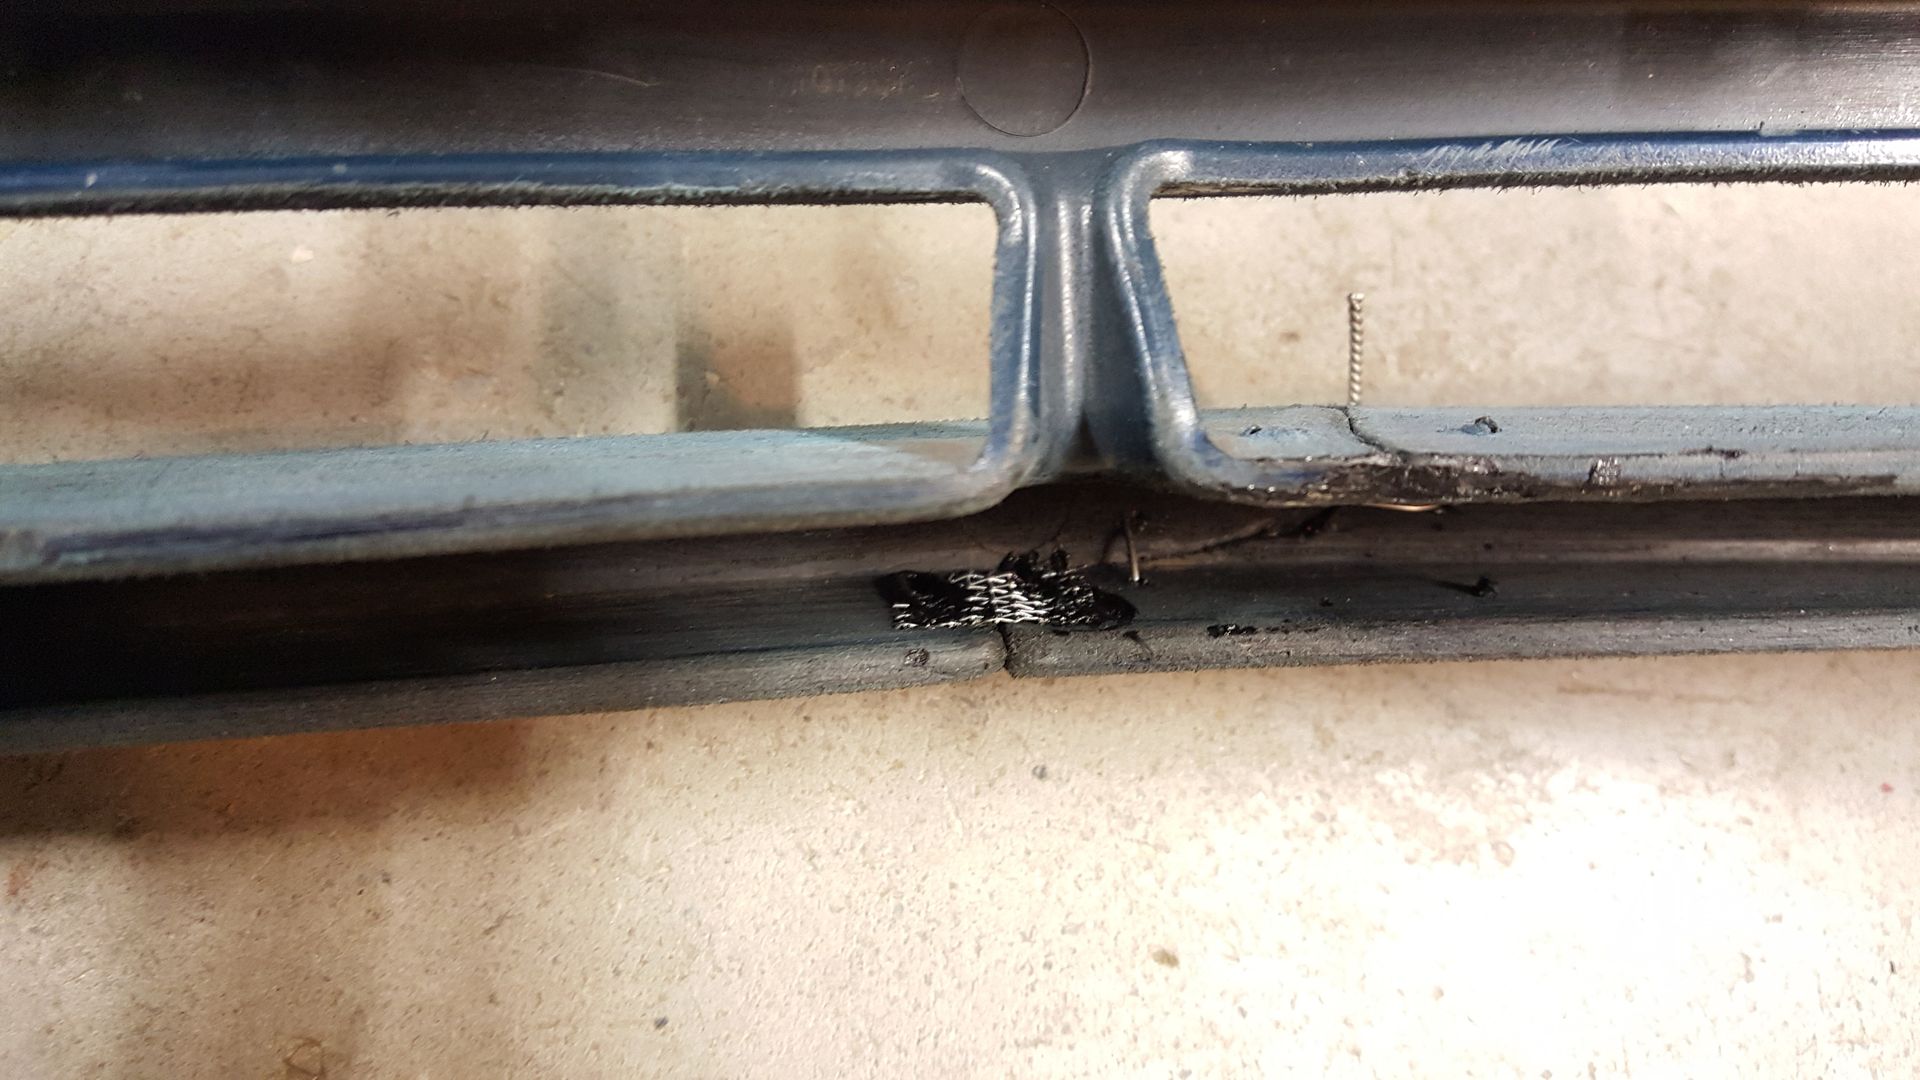
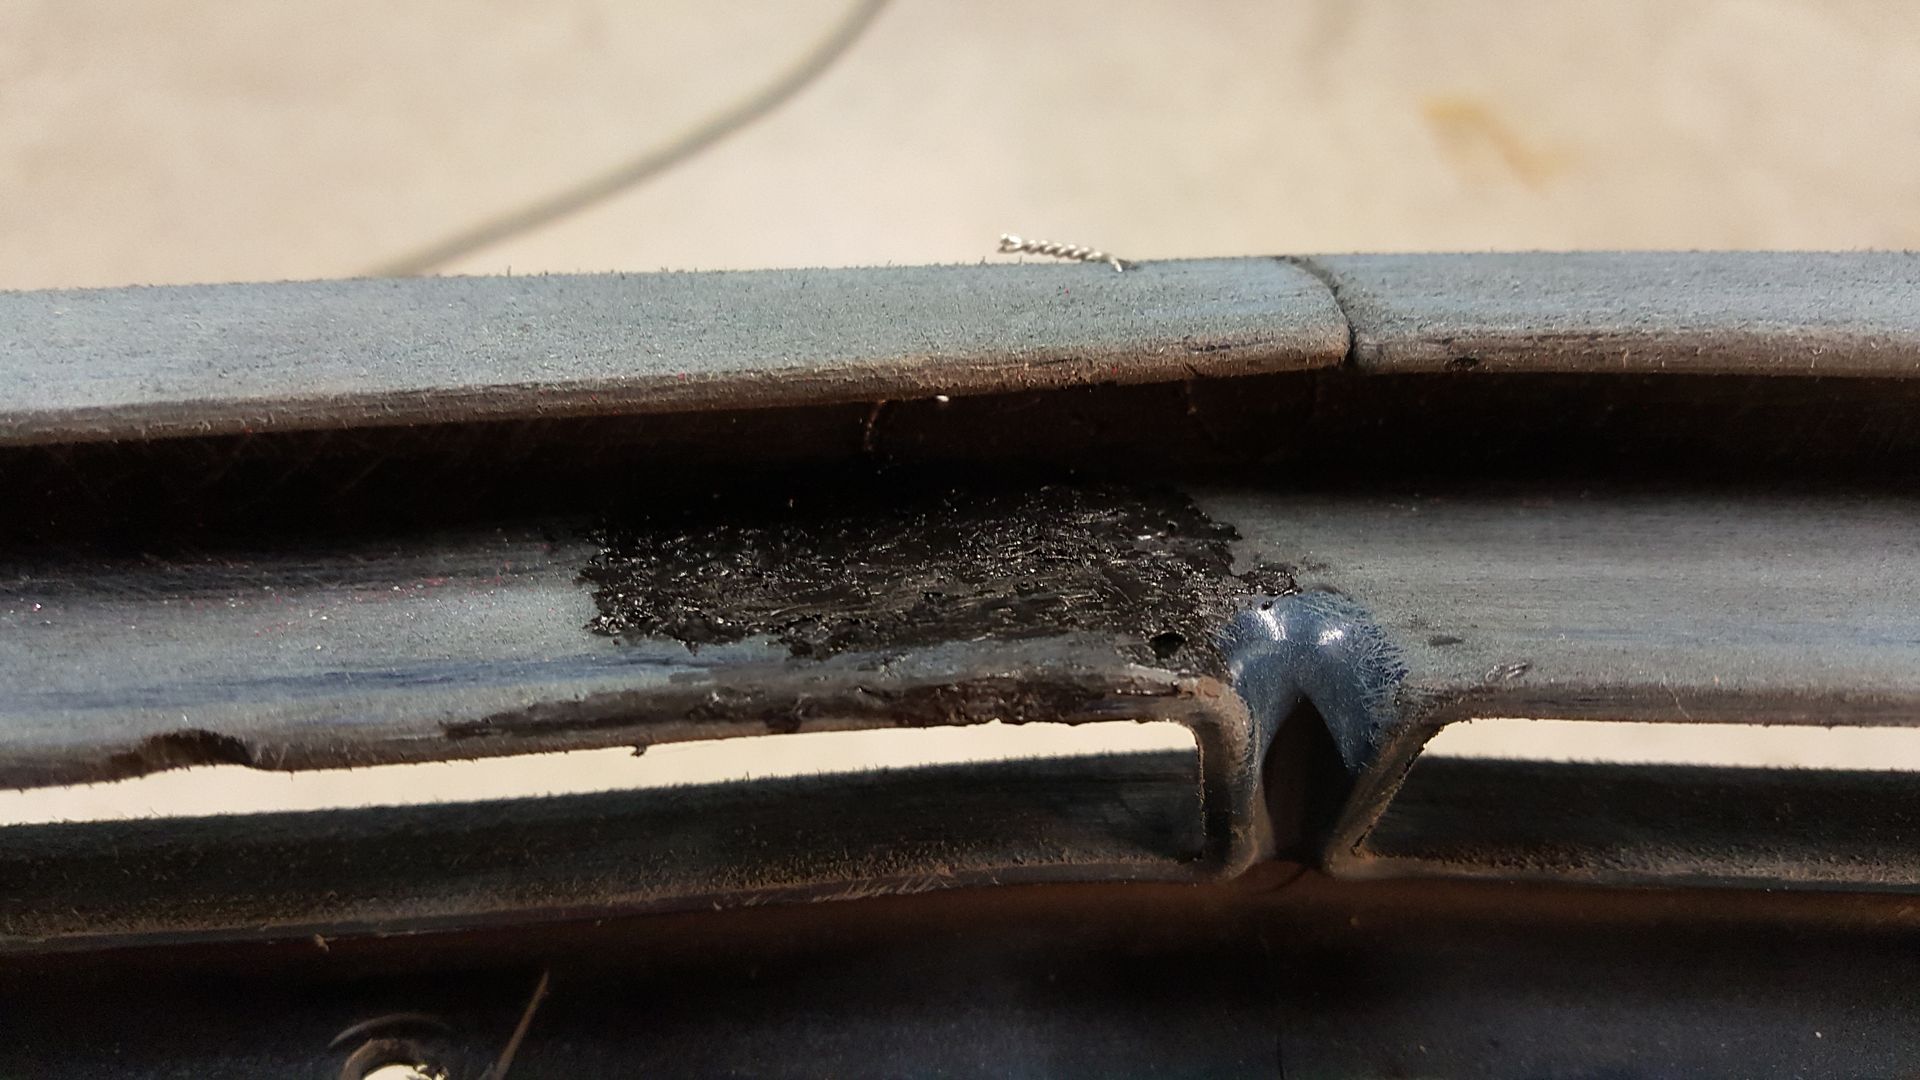
The guy on the WRX forum used fine copper mesh material which was impossible for me to find. Instead I got an aluminum screen patch kit that had a bunch of 3"x3" squares of aluminum screen for like $3 at a local hardware store (TrueValue) You take a standard soldering iron and press the screen into the plastic. As the plastic melts the screen sinks into it. You have to keep moving to avoid too much puddling, but its pretty easy. Definitely do this outside or in a well ventilated area and wear a respirator. Burning plastic is very toxic.
For cracks that aren't thick enough for the aluminum or for areas that you don't feel comfortable manipulating as much just run the soldering iron down the middle of the crack a few times to get the deeper parts of the crack to melt together and bond.
Then push in the edges and fill the "trench"

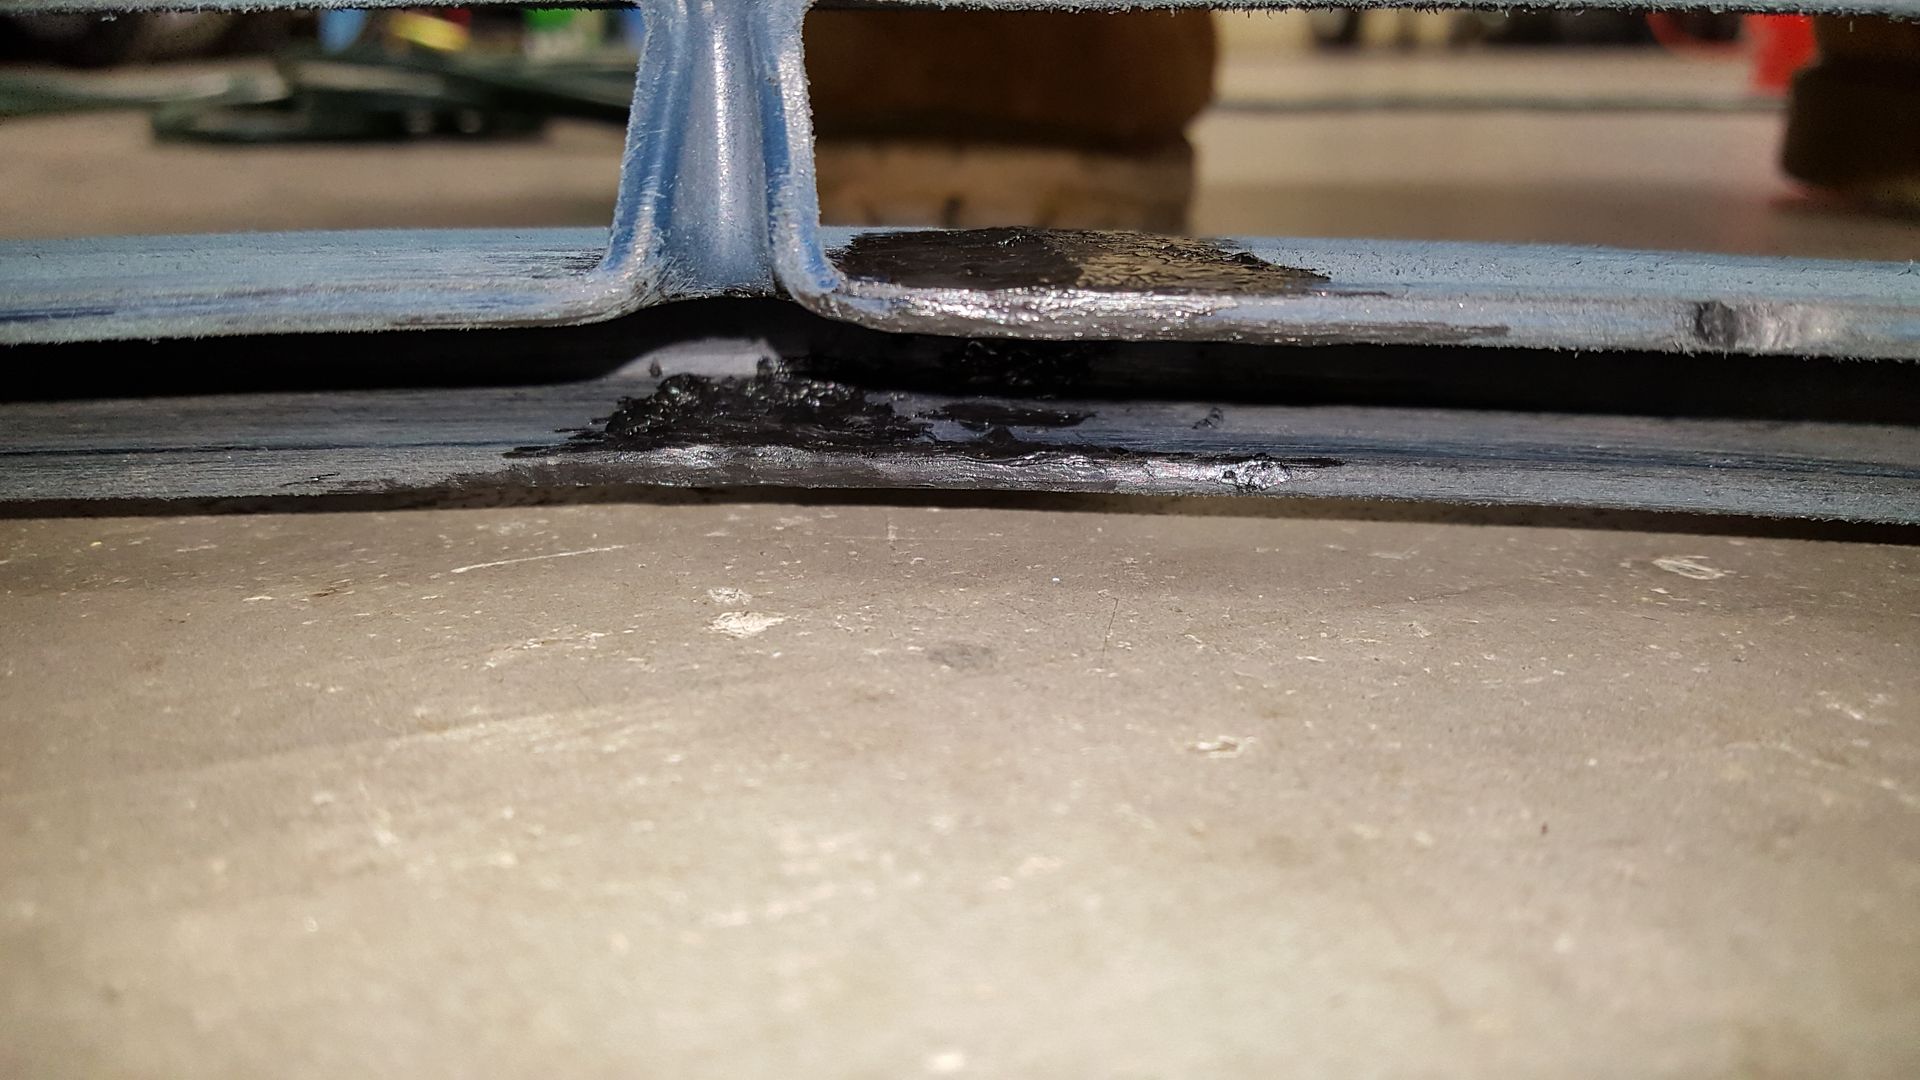
Add some more material if the spot is still low. I have previously converted the front-middle of the lip to be secured with 4 bolts versus the stock slot and clip setup because some of the slots broke when this lip was broken. So I just cut some of that plastic (leaving a little bit to still go in the slot of the bumper to ensure proper alignment) and used it for filler for the crack repair.
Keep moving and keep smoothing it out without creating puddles
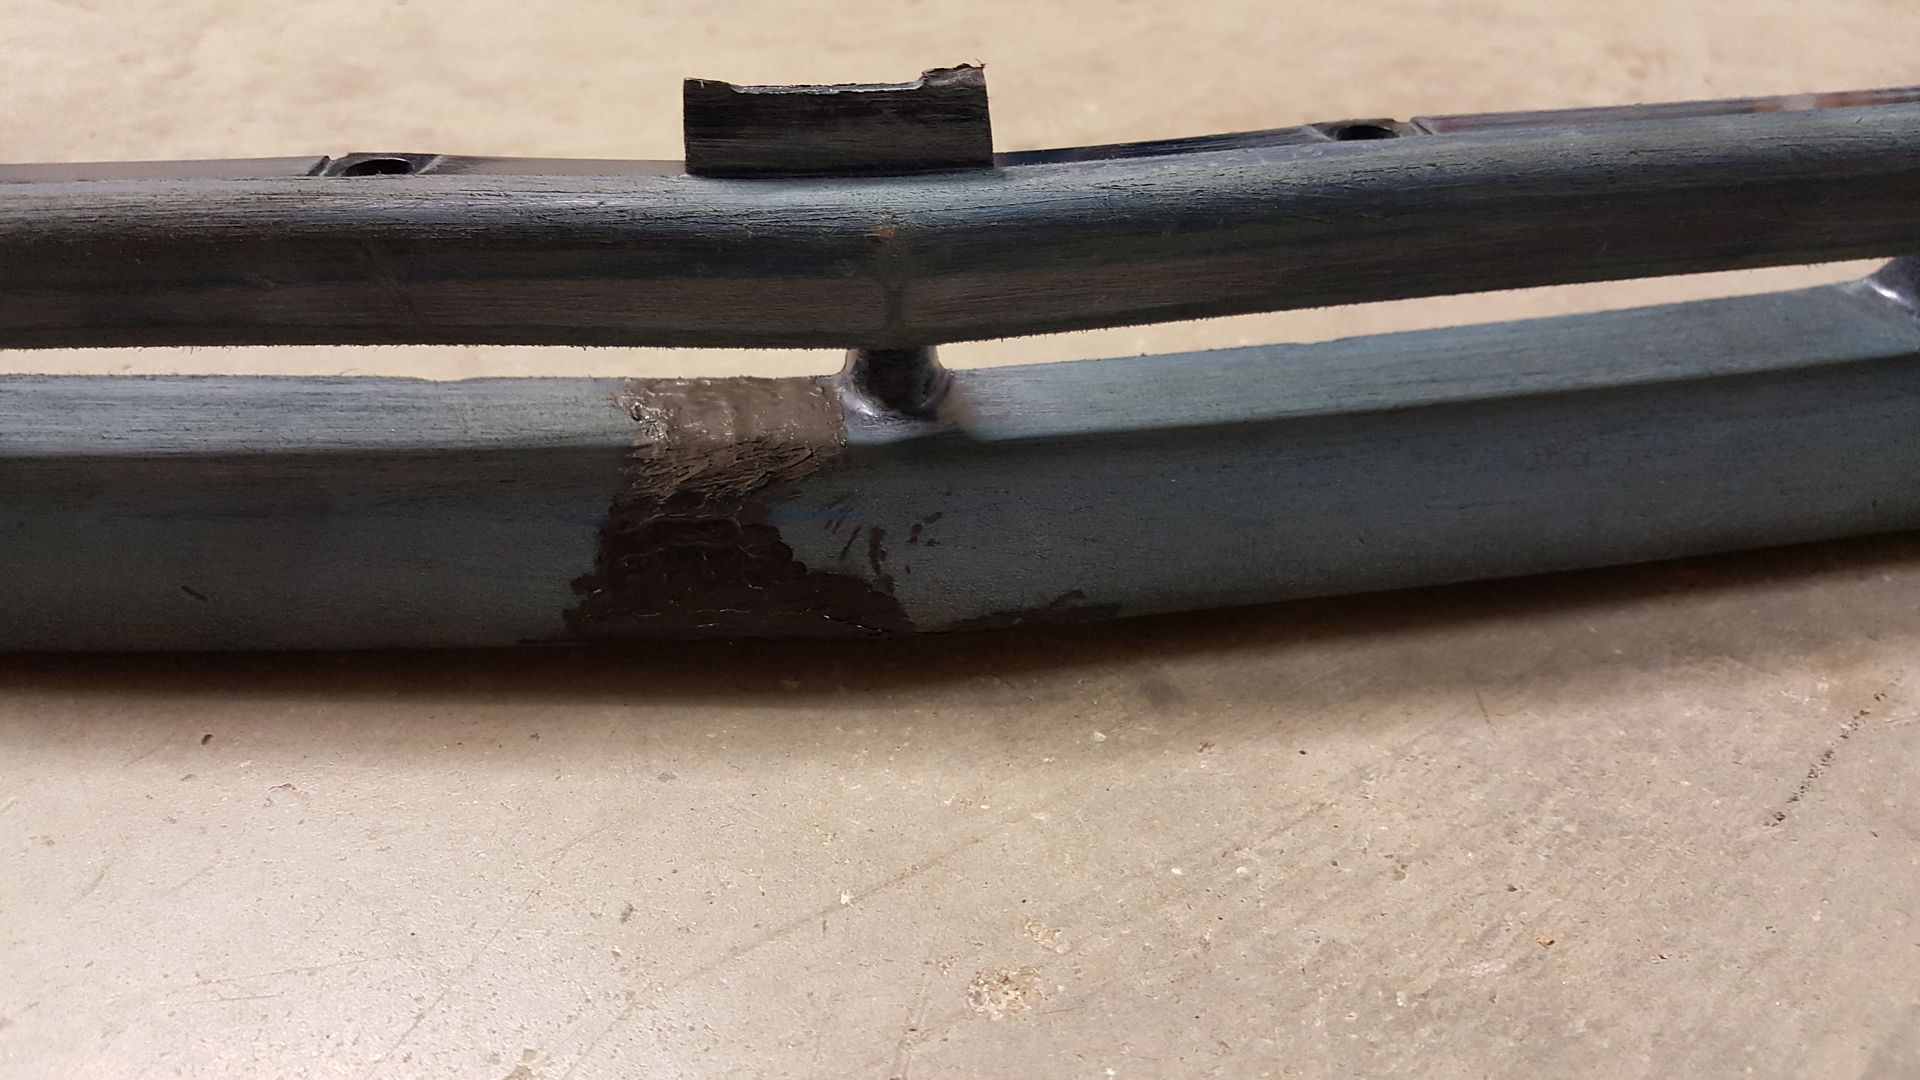
I sanded very very briefly with 220 just to see how it would go and it was behaving just like the original surface. I'm going to use a buildable, sandable primer for plastics after sanding really good to fill in little crevices and imperfections. I've got all week so I'm going to take my time, sand, primer, sand, primer until I'm satisfied.
I can't stress enough to take your time. This took me 3.5 hours to complete. The more patient you are the better it comes out. I'm really impressed with the strength of the repair too.
I can see u made some progress and the bonding of the plastics is a neat idea but im wondering if itll hold the stress of the strong wind force. Did u leave the mesh on to melt into the plastic for strength? fiberglass might be the better route. Let us kno how it holds up.
ReD RaiN
T!M8!T wrote: Did u leave the mesh on to melt into the plastic for strength?
Yes, this was the whole point. If you take the soldiering iron and press it into the aluminum screen the plastic melts underneath of it and the aluminum screen sinks into the melted plastic. You keep working around the piece of mesh until its completely "submerged" into the plastic. I then added some additional plastic across the top to fill in the low spots. The front lip repair has 4 pieces of aluminum screen fused into the plastic. Fiber glass will likely provide the same solution but it's going to be a lot more messy, not to mention that you'll need to wait for it to cure.
2002 Blue LS Sport Coupe 5-speed
My Paint Restoration Project -->
http://www.j-body.org/forums/read.php?f=11&i=170933&t=170933
Last night I got the side moldings and rear spoiler removed. Both were very simple and straightforward.
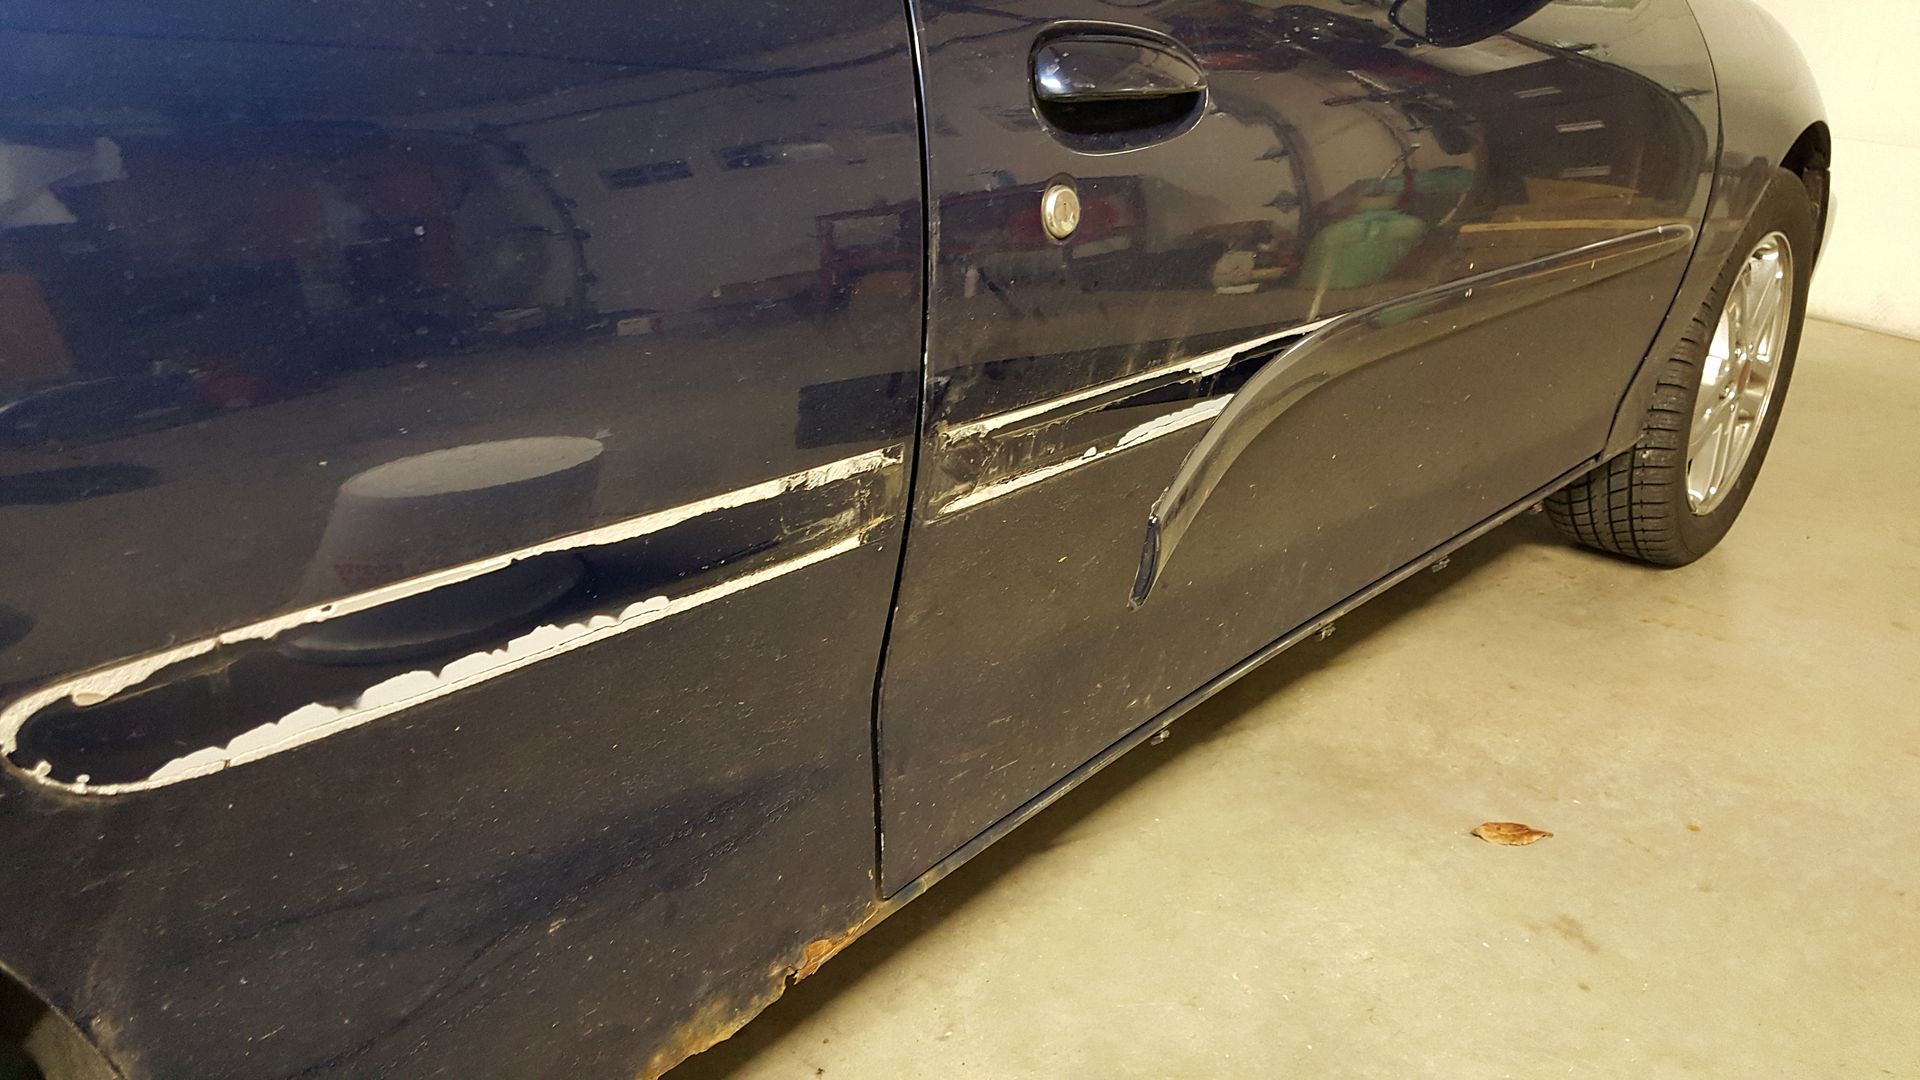
The paint literally peeled off with the molding. I used a heat gun but all it really did was help the molding come off. The majority of the glue stayed on the car. I used the heatgun and a spackle knife to scrape it off. Here's the final product.
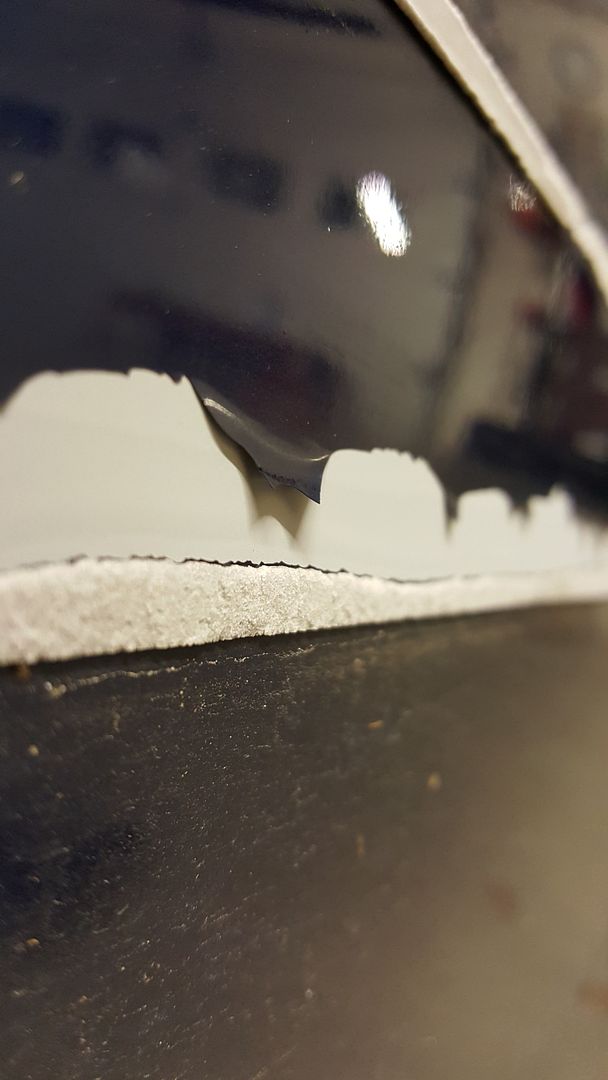
The paint on 00-02 j-bodies really sucks. You can see how thin it is here. You can also see how much of the glue remains after pulling off the molding
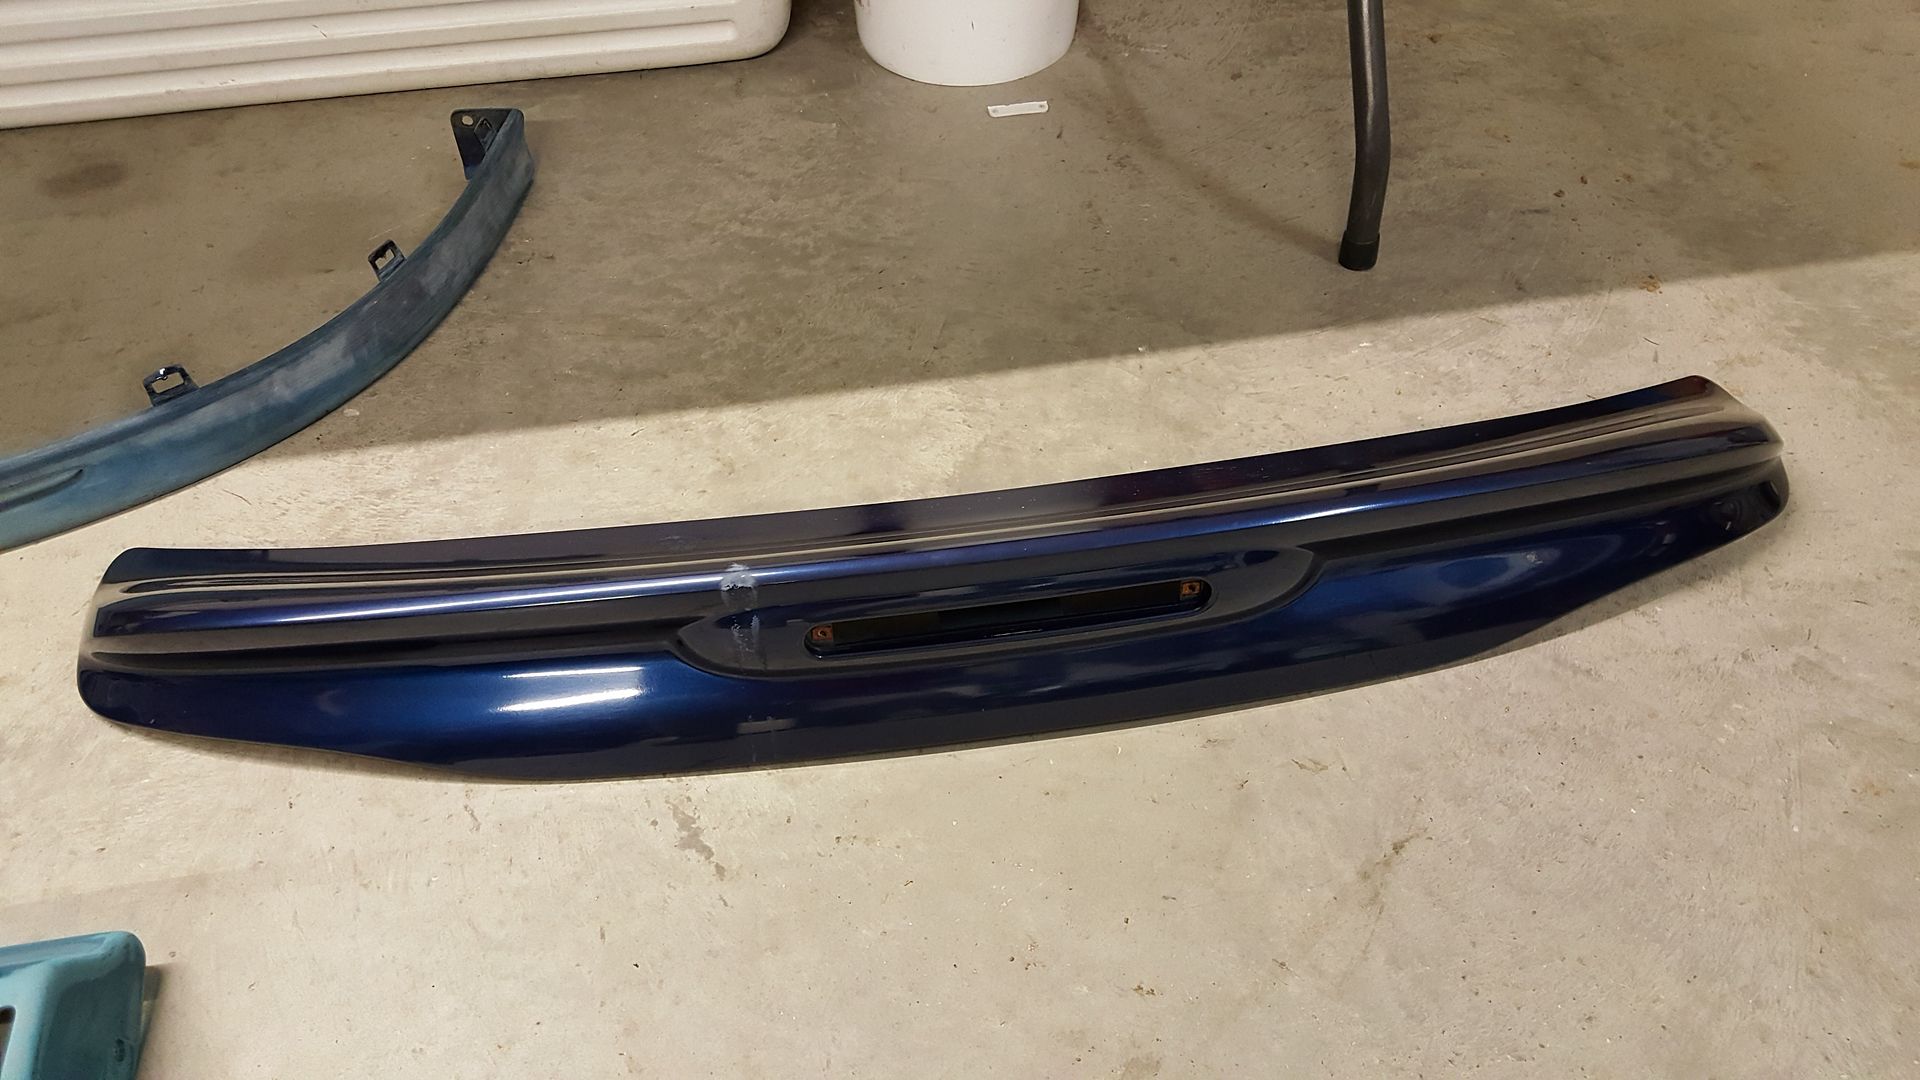
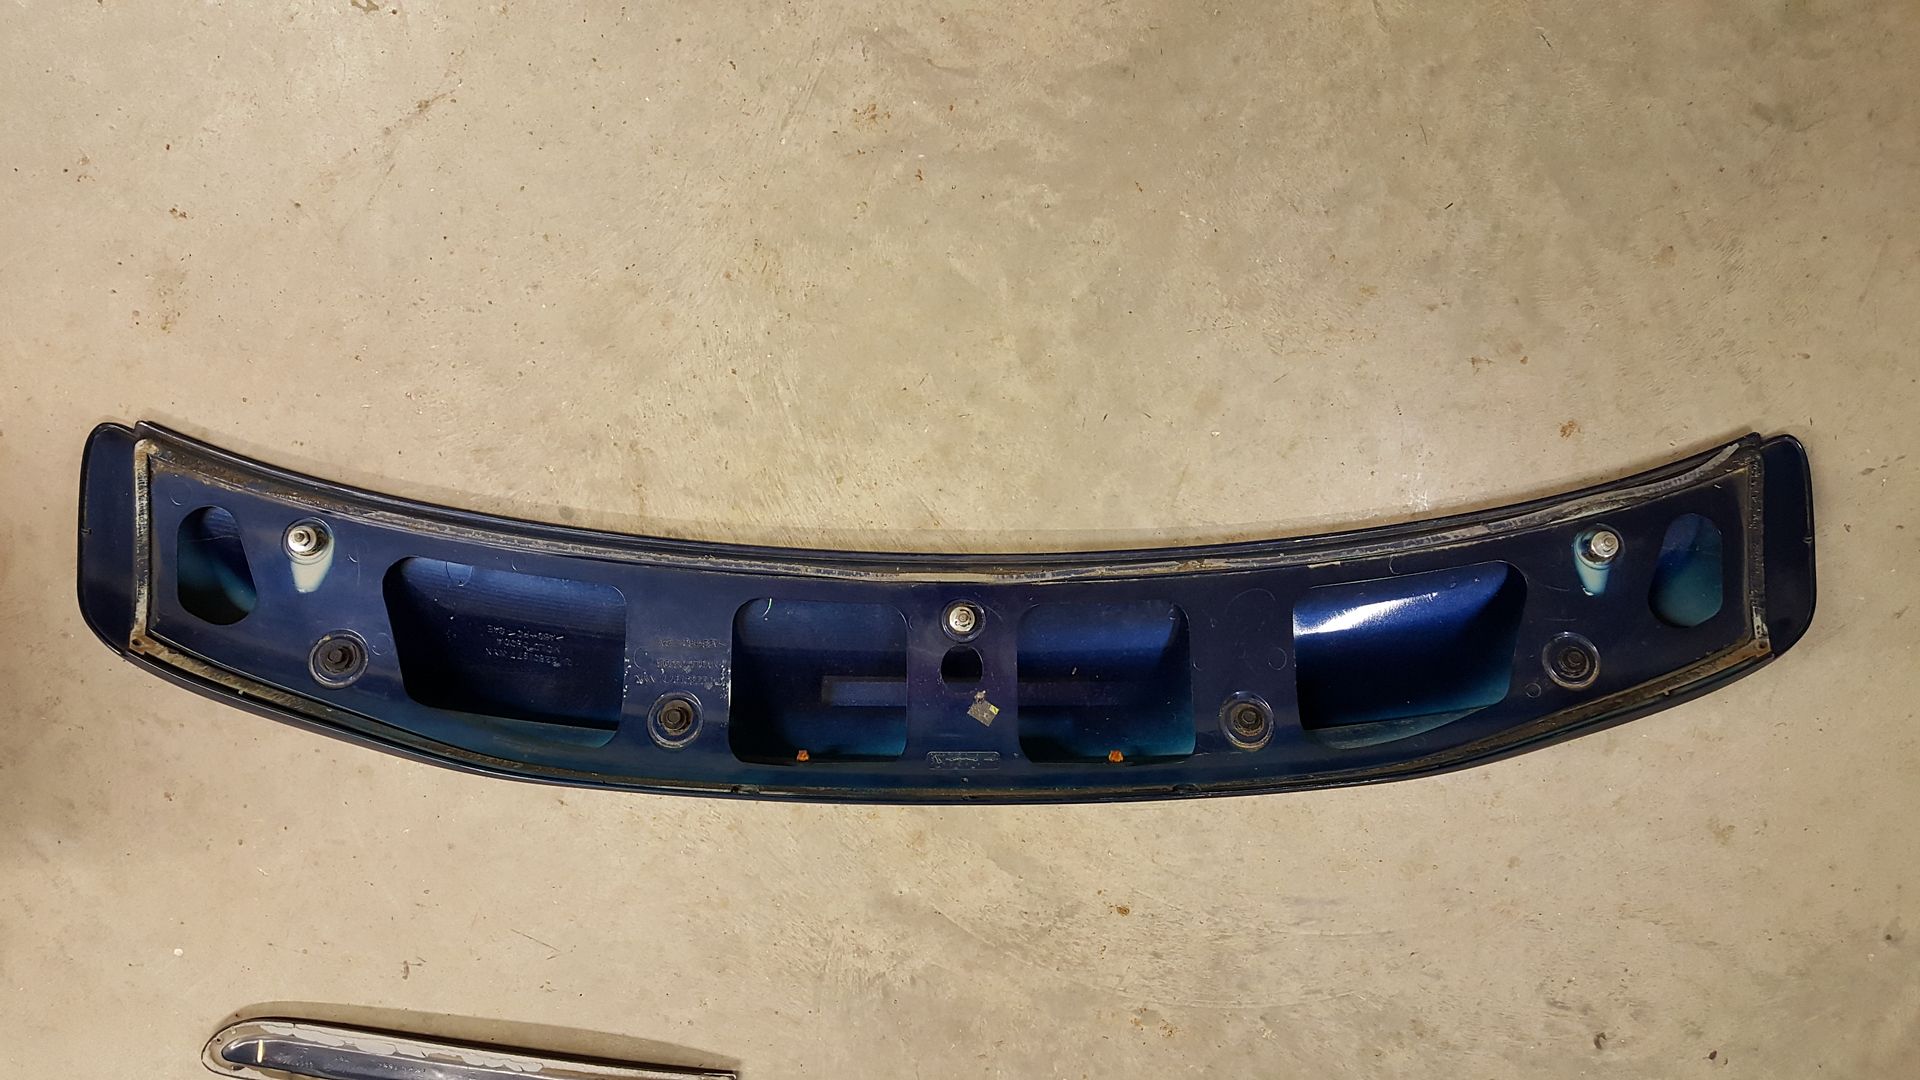
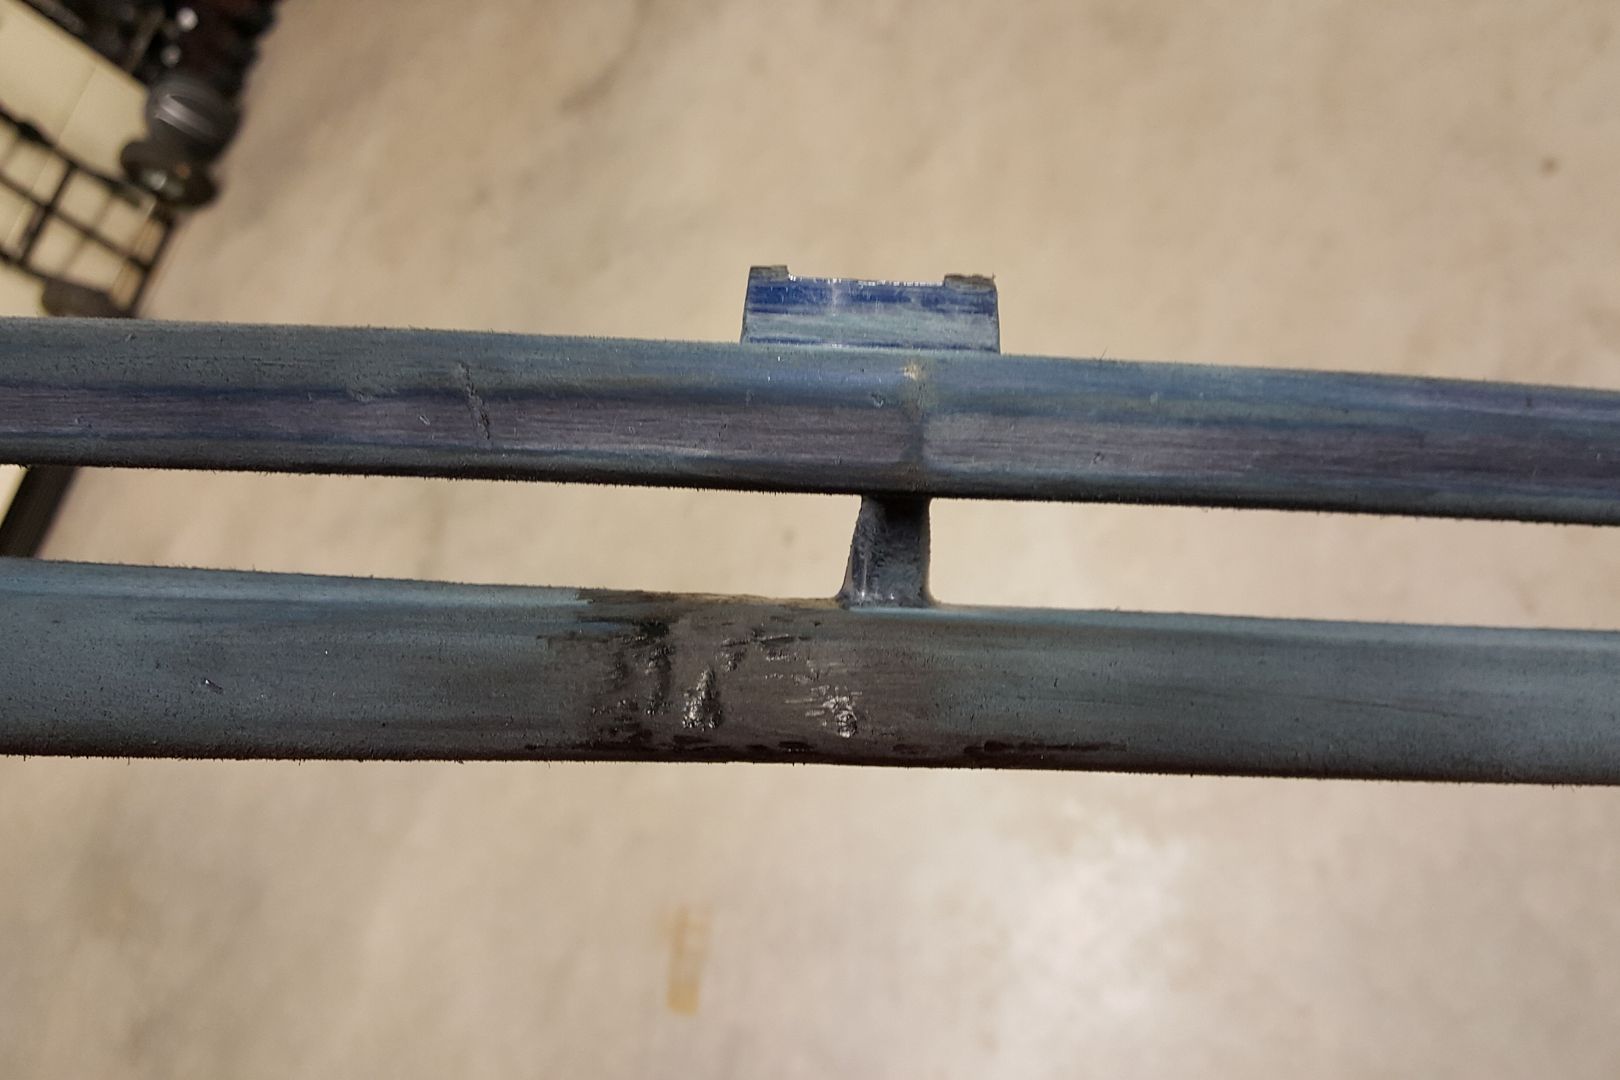
The spoiler is held on with 3 silver nuts that thread onto studs that are permanent to the spoiler and 4 black bolts. All hardware comes off/goes on from the under side of the trunk lid.
]
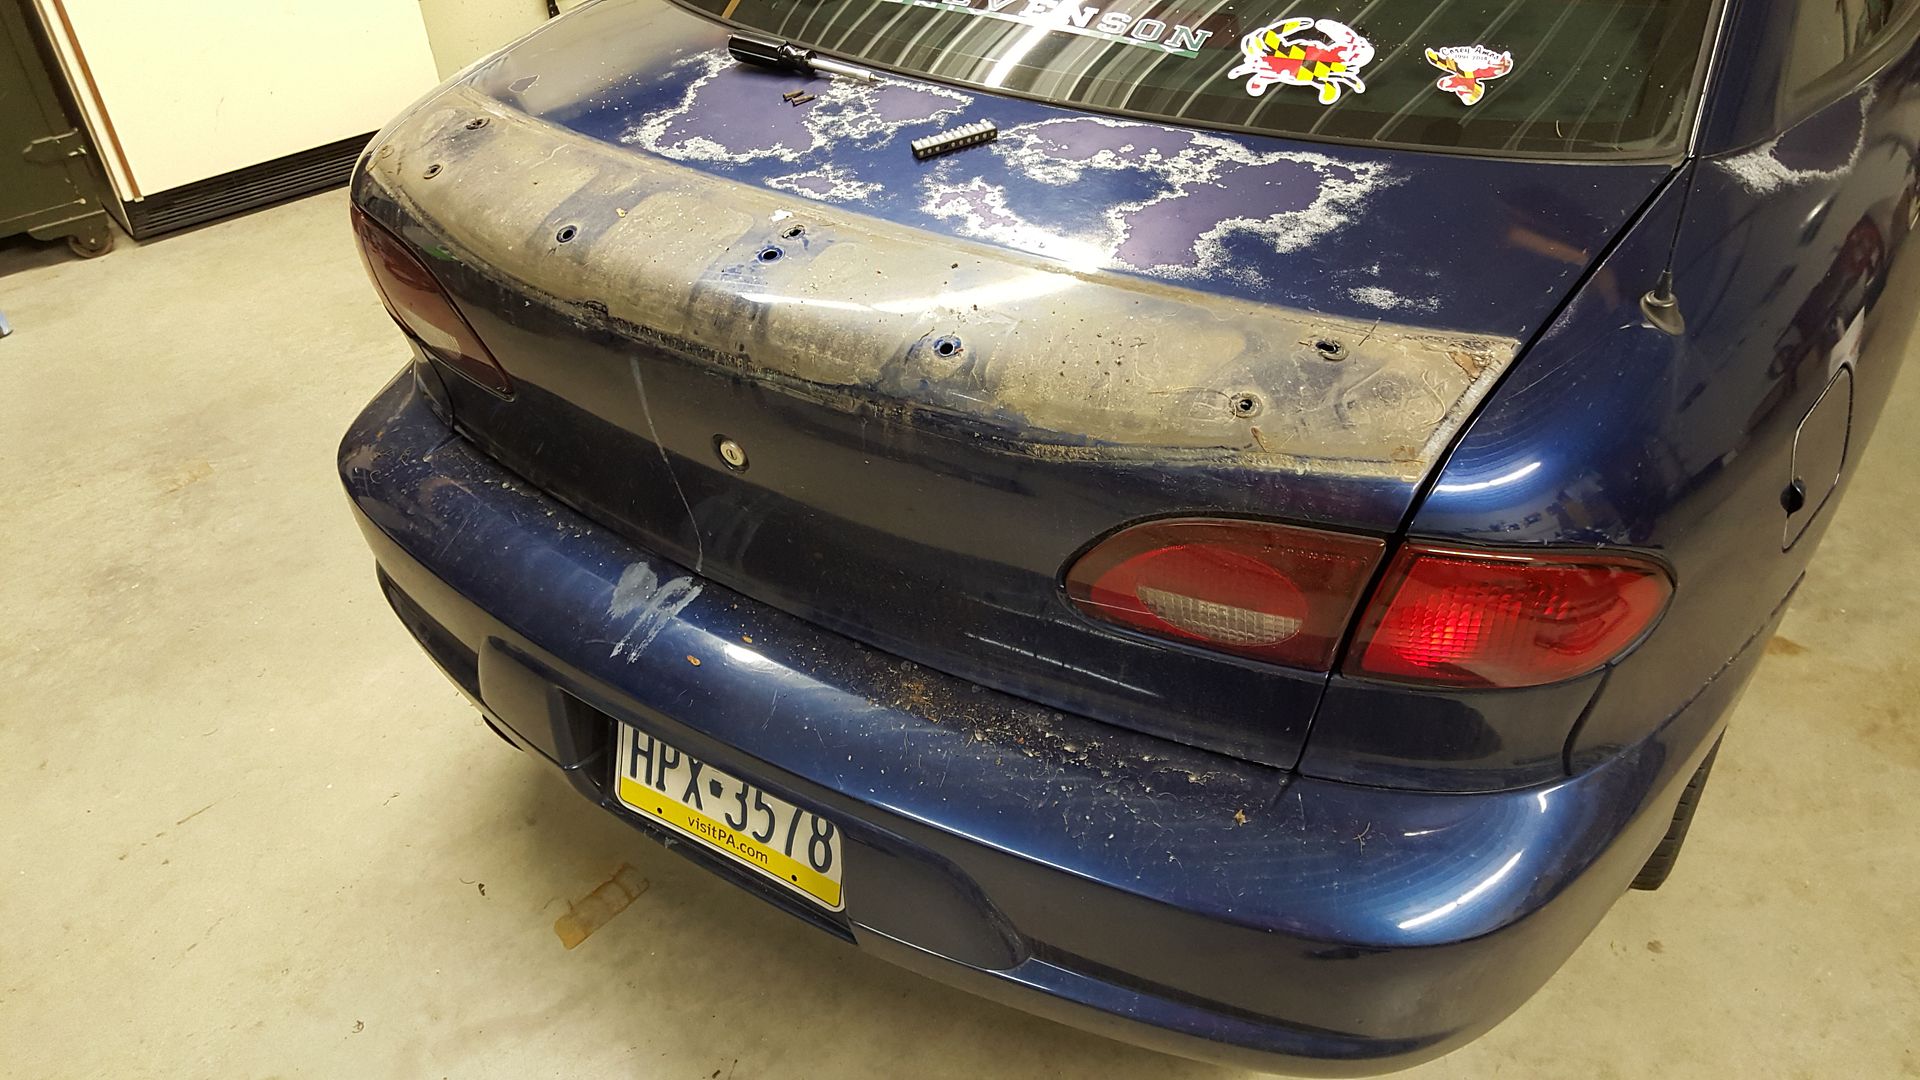
Over time the "gasket" around the bottom of the spoiler dwindled away and allowed the plastic to rub against the trunk and eat away the paint. This was the way it looked before cleaning anything, after the spoiler came off.
You can see the outline left on the trunk in this pic; that outline is actually early stages of rust where the paint had been scratched away.
Next is to sand the spoiler and finish sanding the rest of the lip kit. Rust repair will happen this weekend and then the sanding/prep on the body can begin.
2002 Blue LS Sport Coupe 5-speed
My Paint Restoration Project -->
http://www.j-body.org/forums/read.php?f=11&i=170933&t=170933
So I guess it's time for an update- If you're reading this and thinking about painting your own car, understand that your guesstimate of what will be involved as far as cost, time, resources, effort, etc. is going to come up short. There is a lot more than meets the eye when it comes to a project like this, especially trying to cram it into a two week job. Do your research, purchase stuff ahead of time, and write everything down or you will forget stuff. Hell, you'll forget stuff regardless.
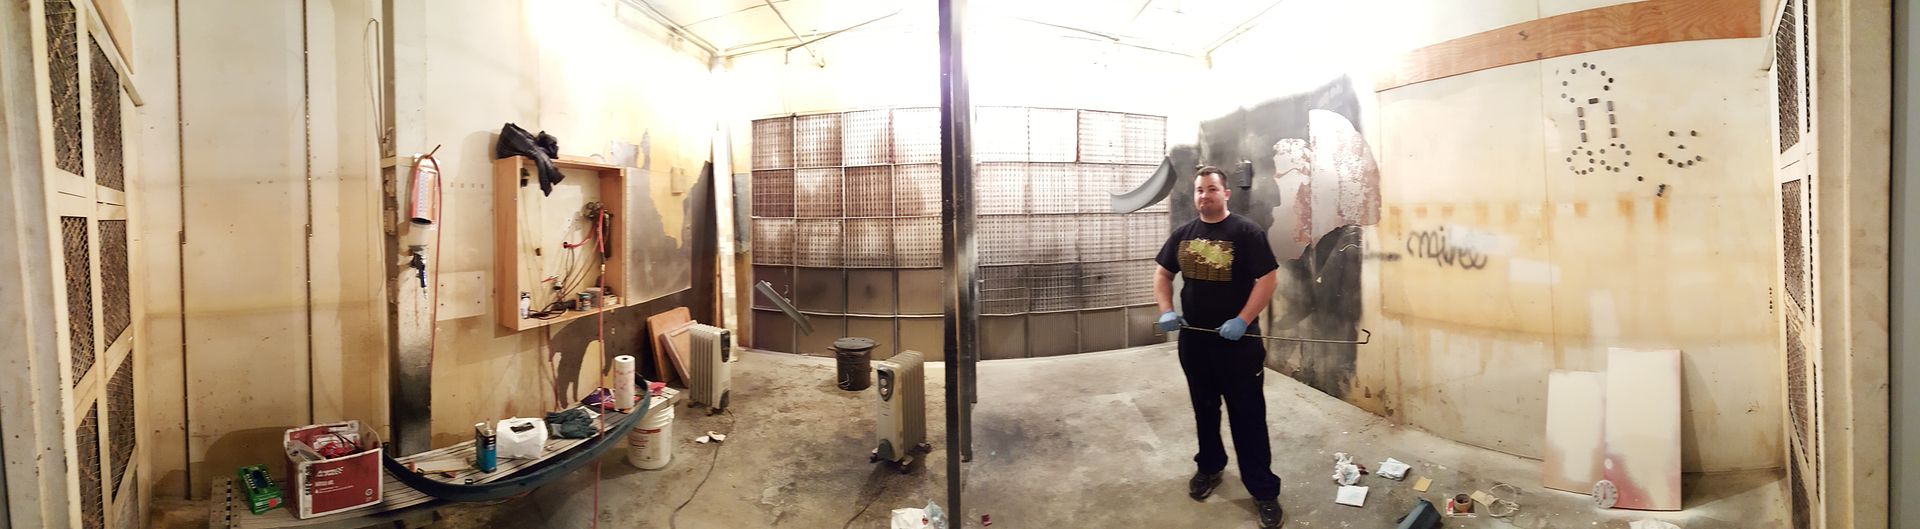
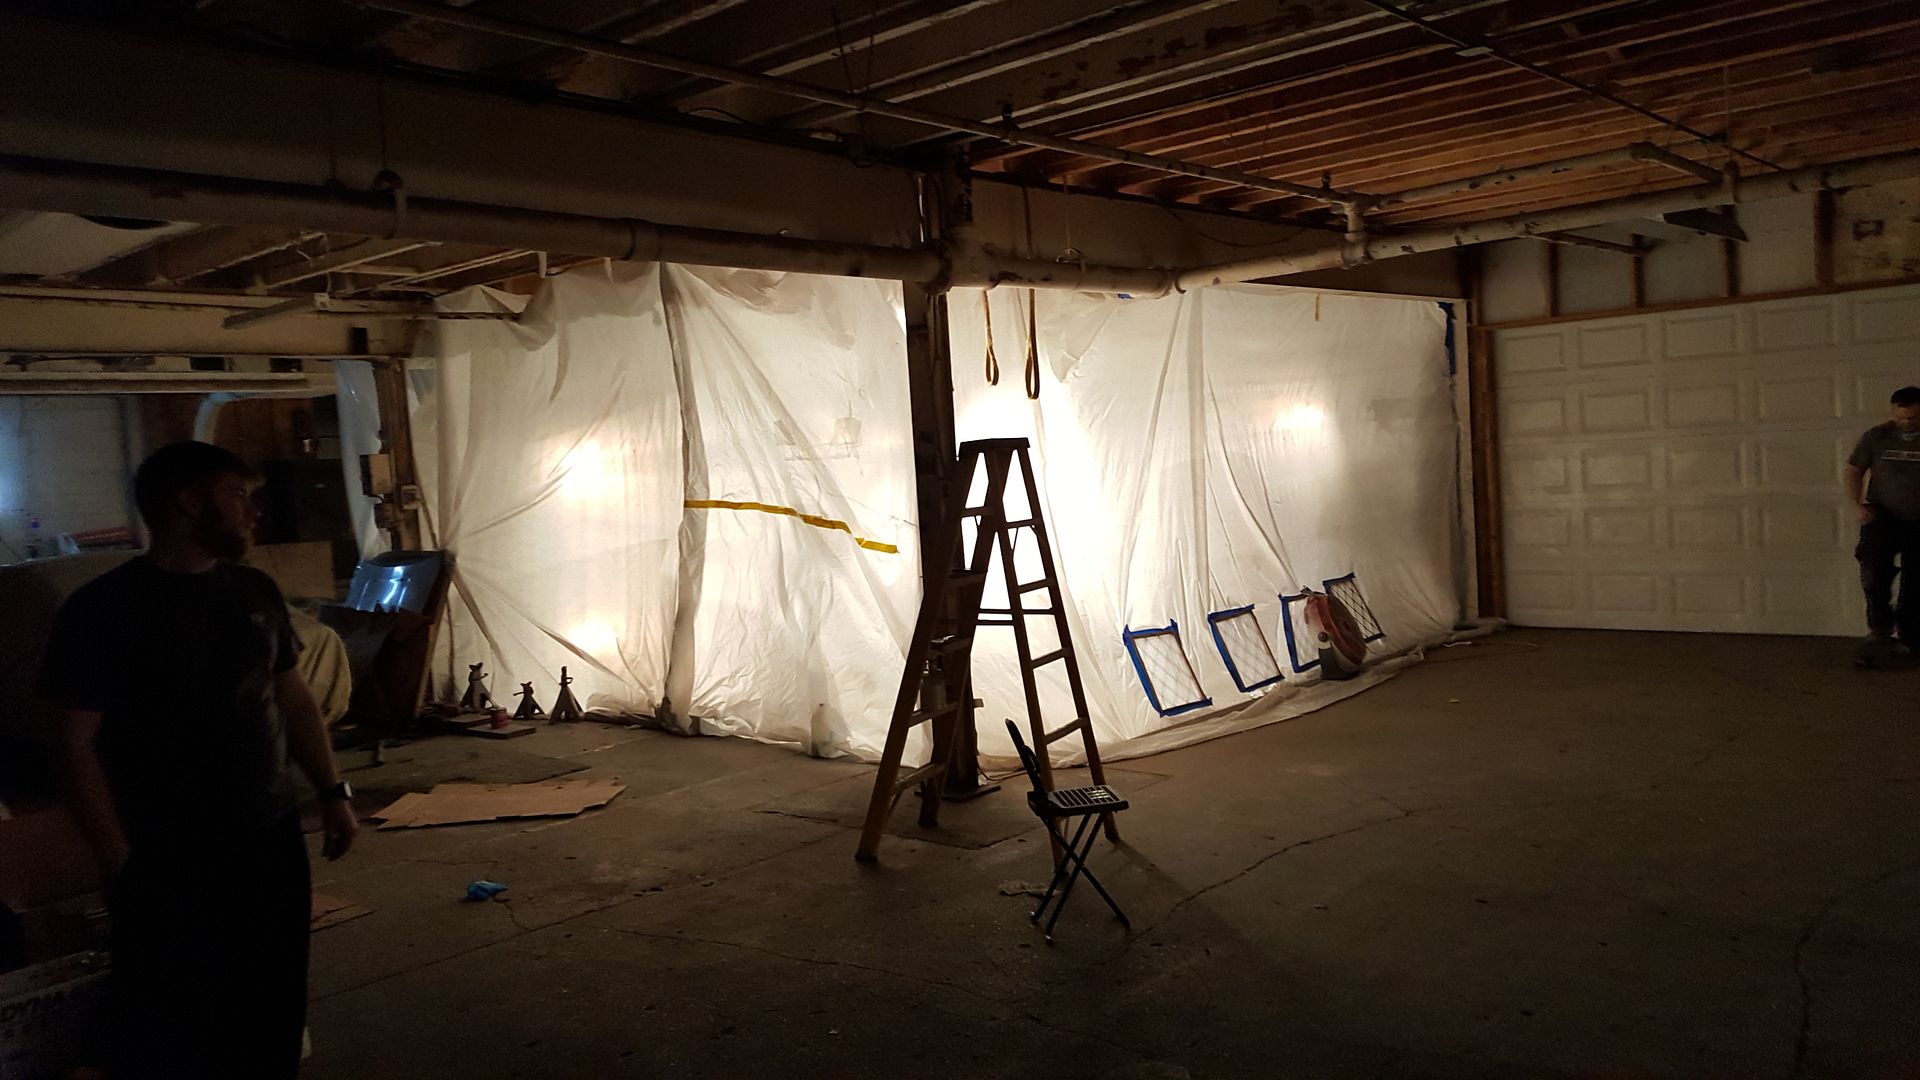
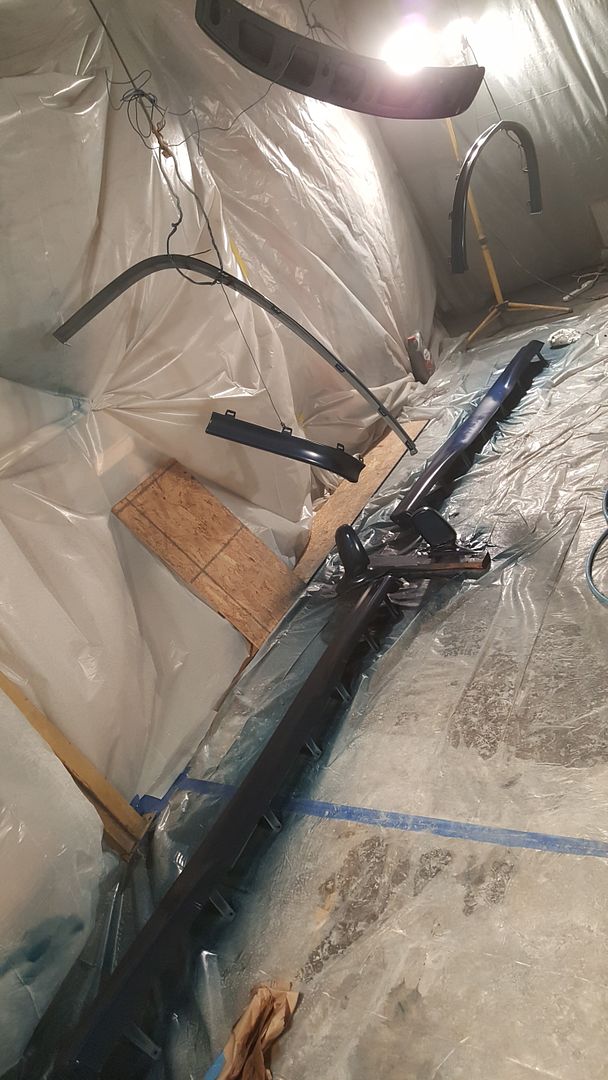
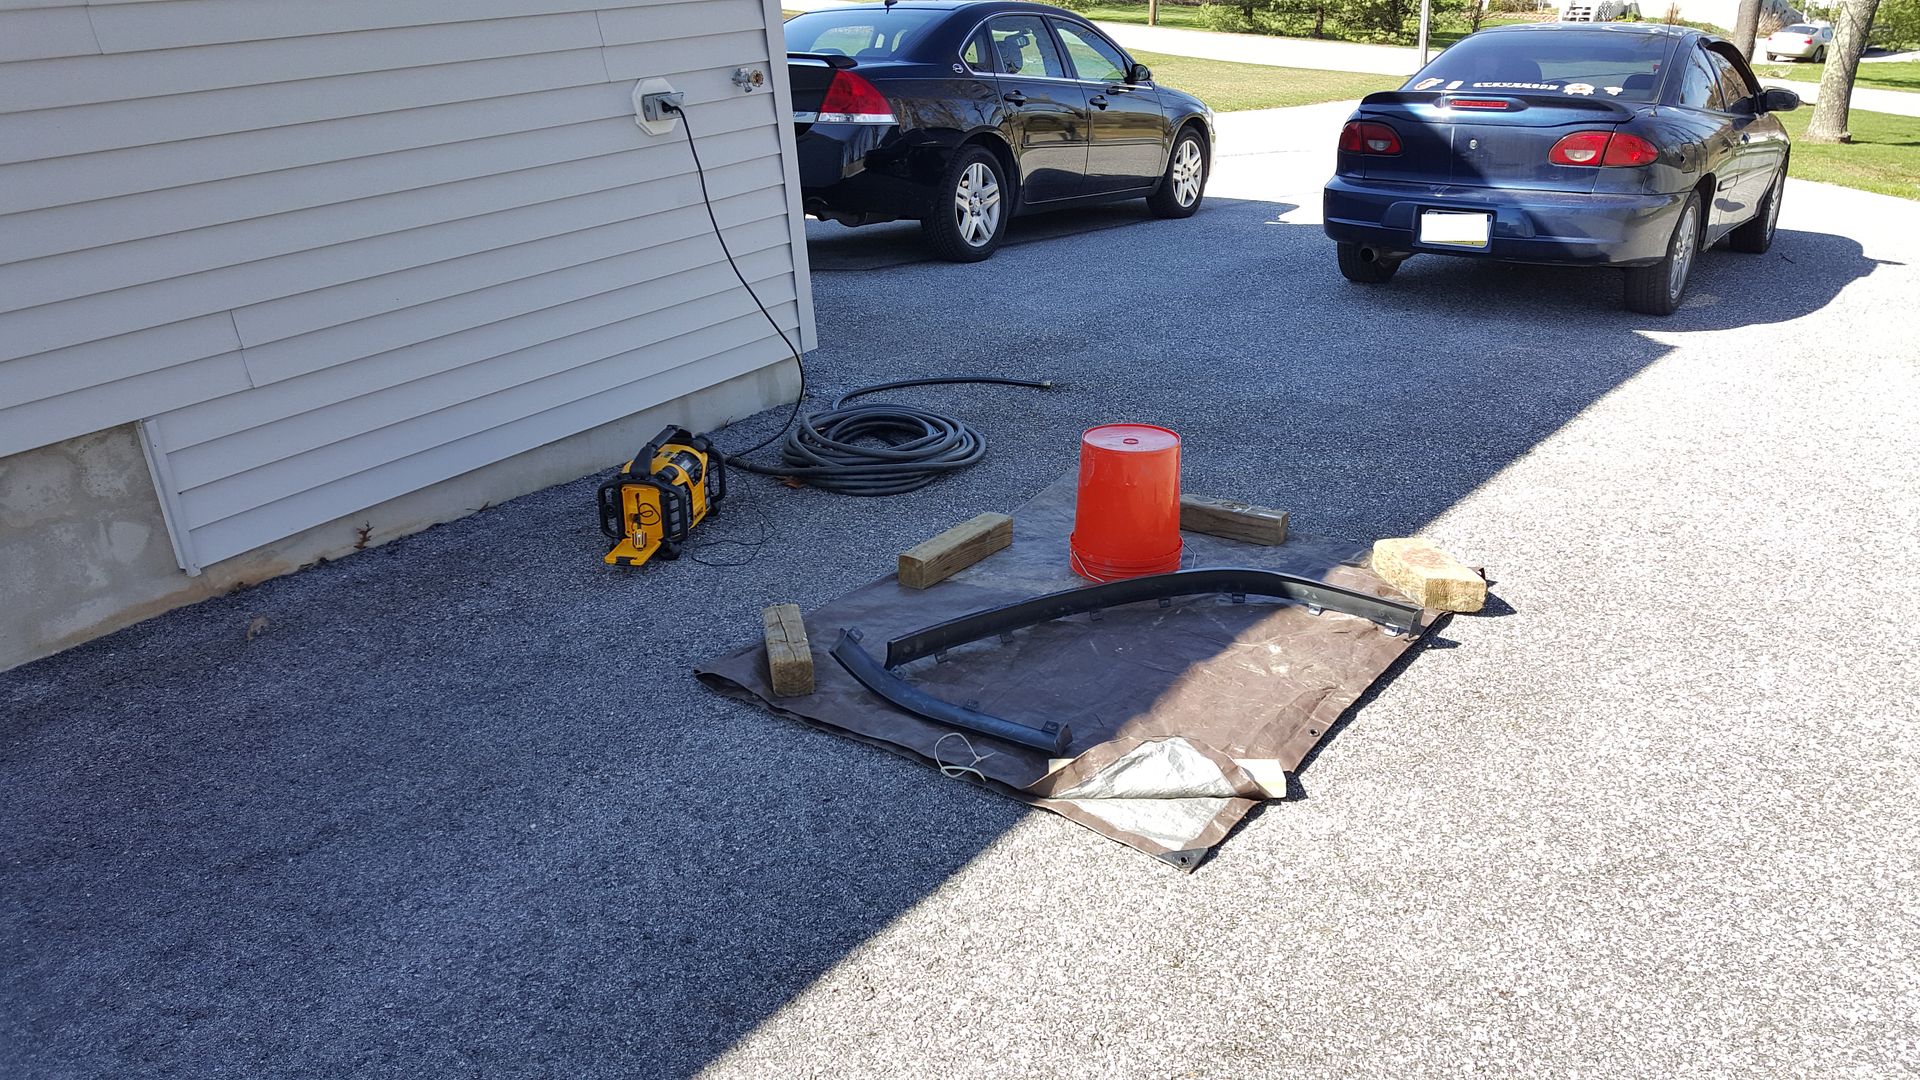
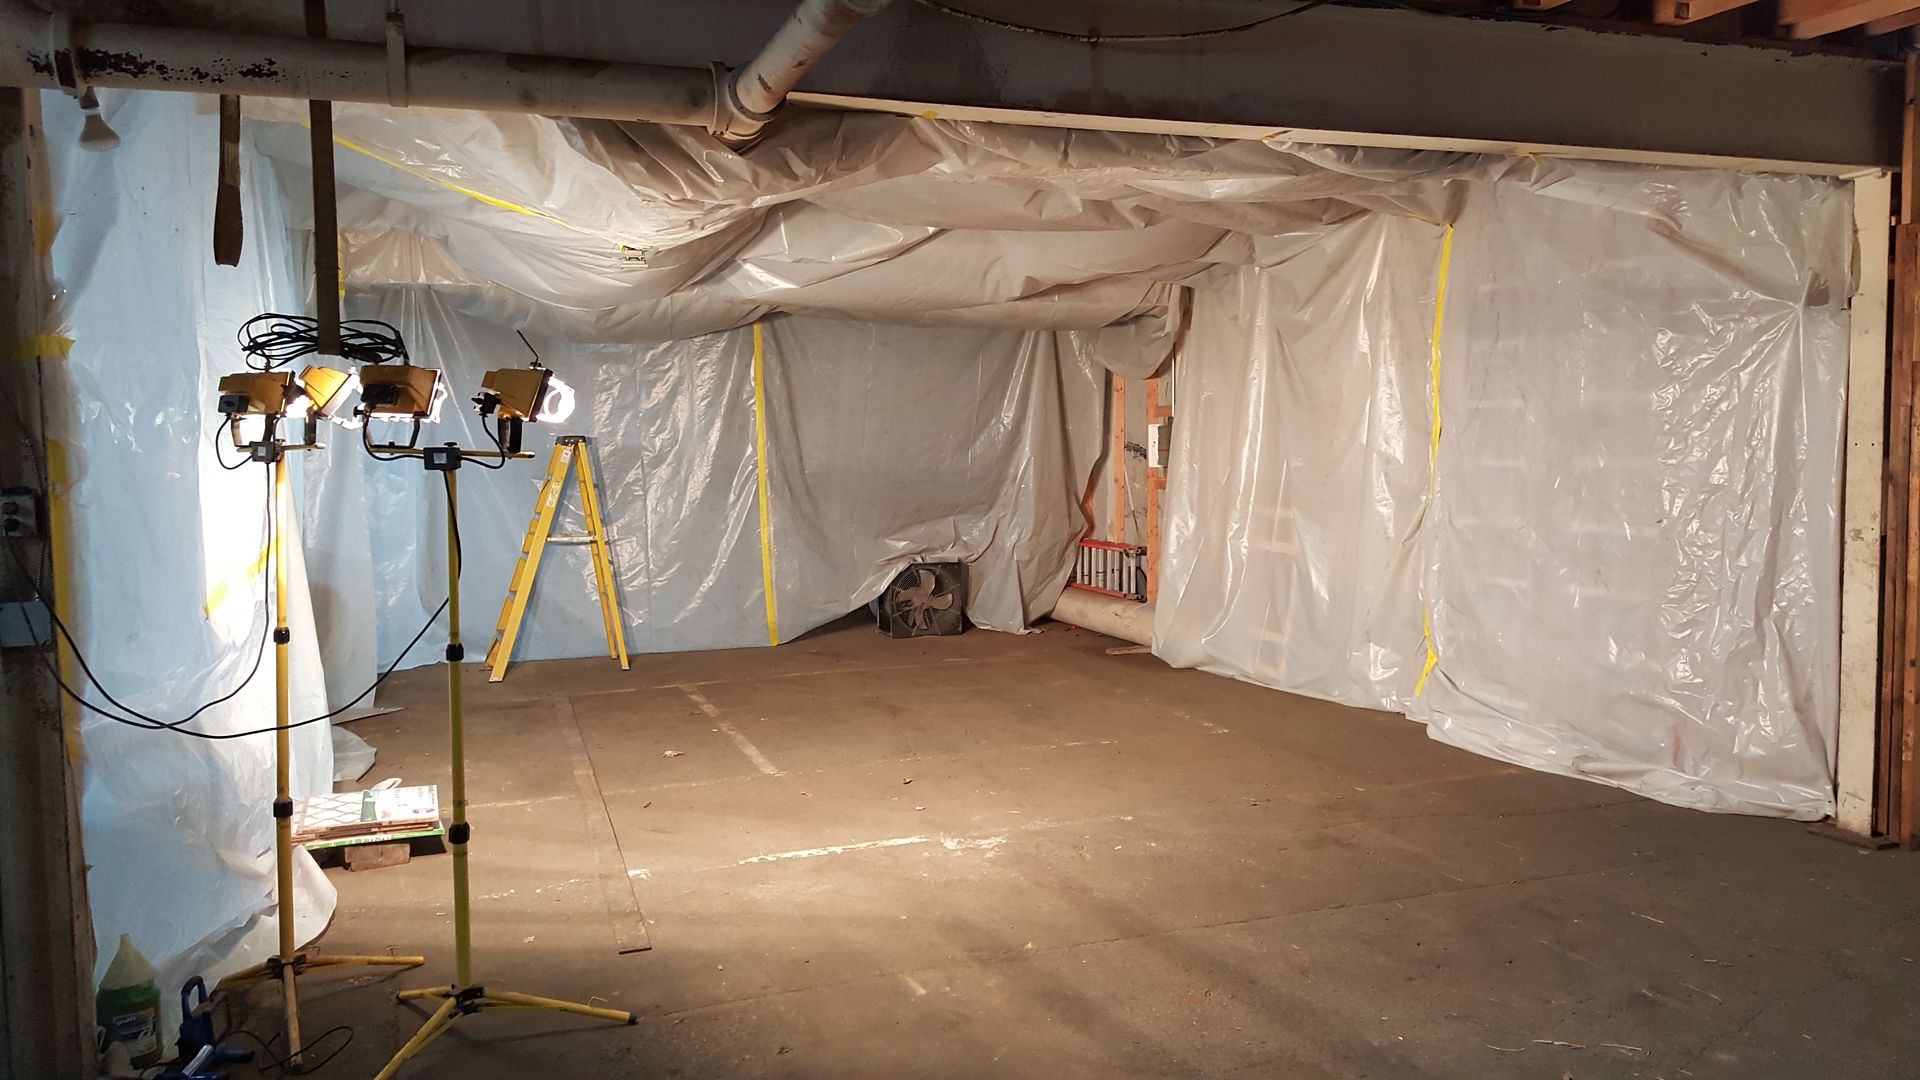
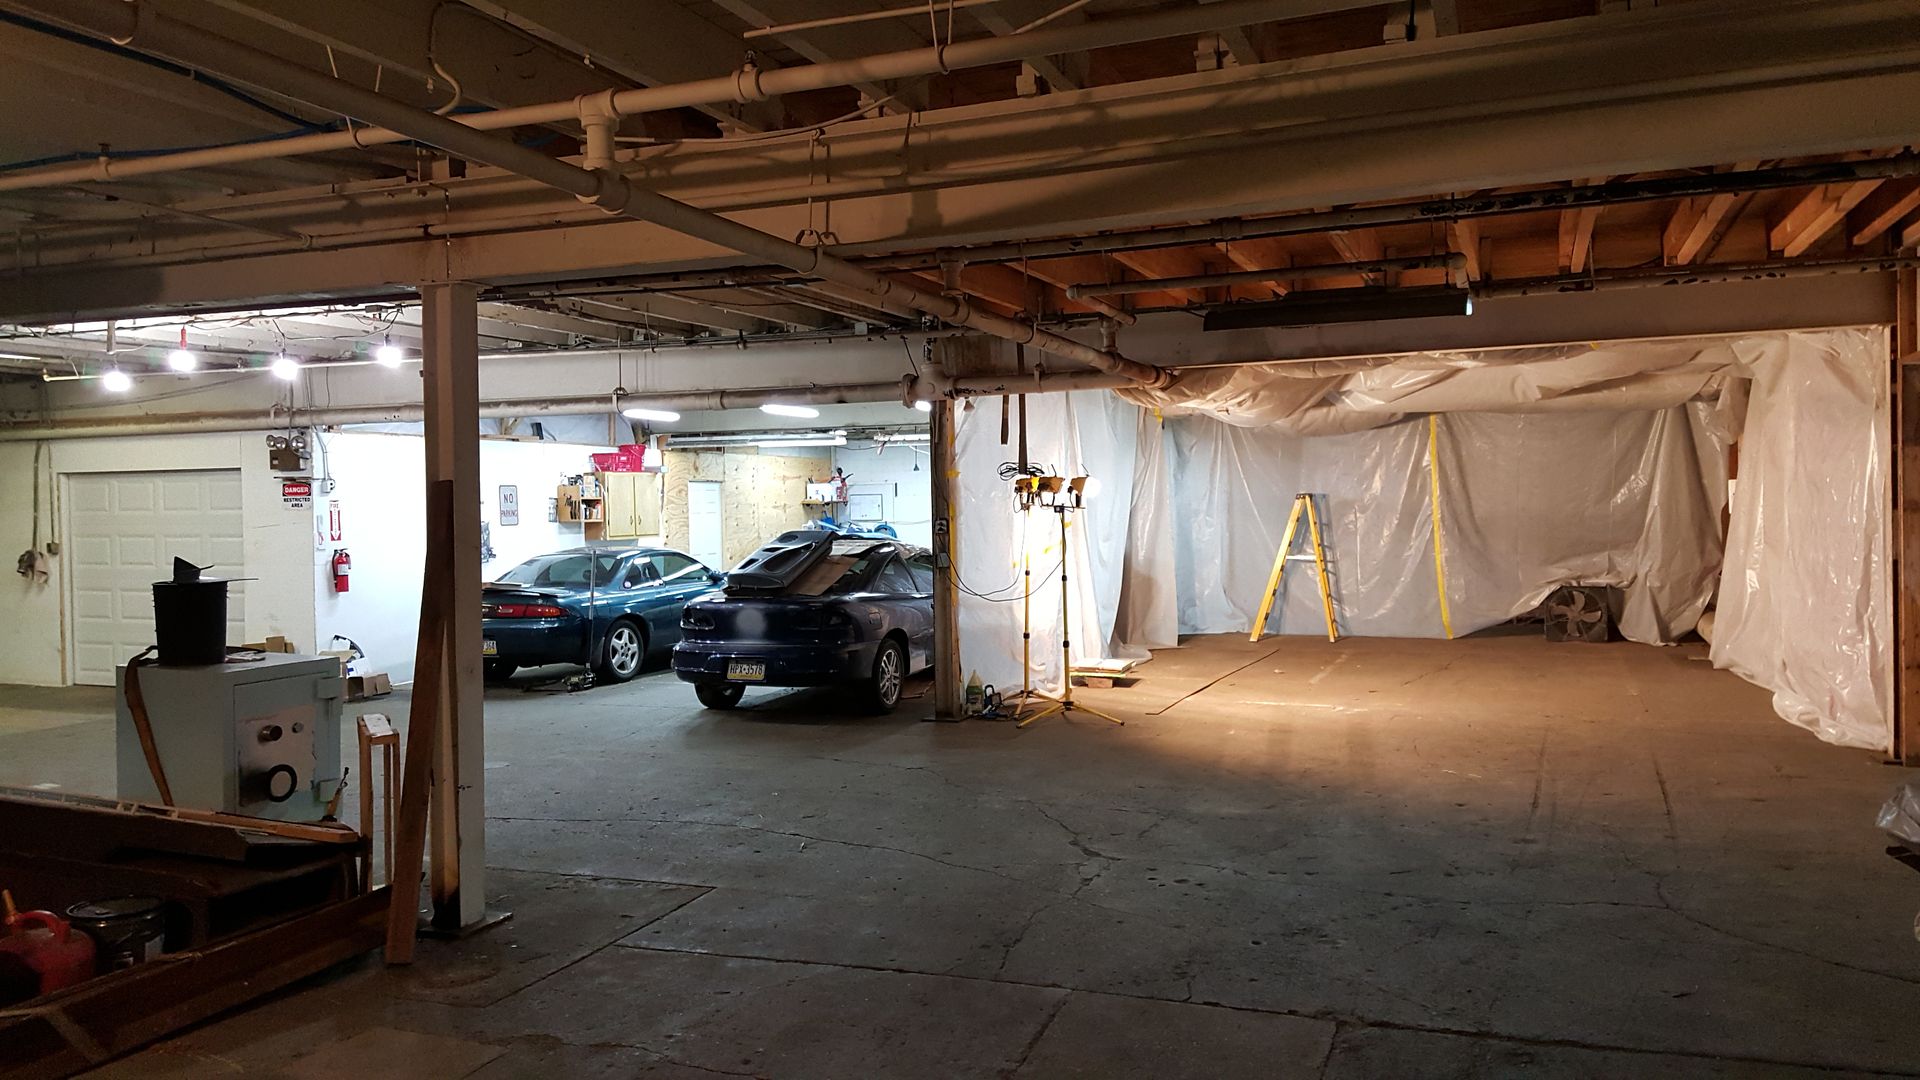
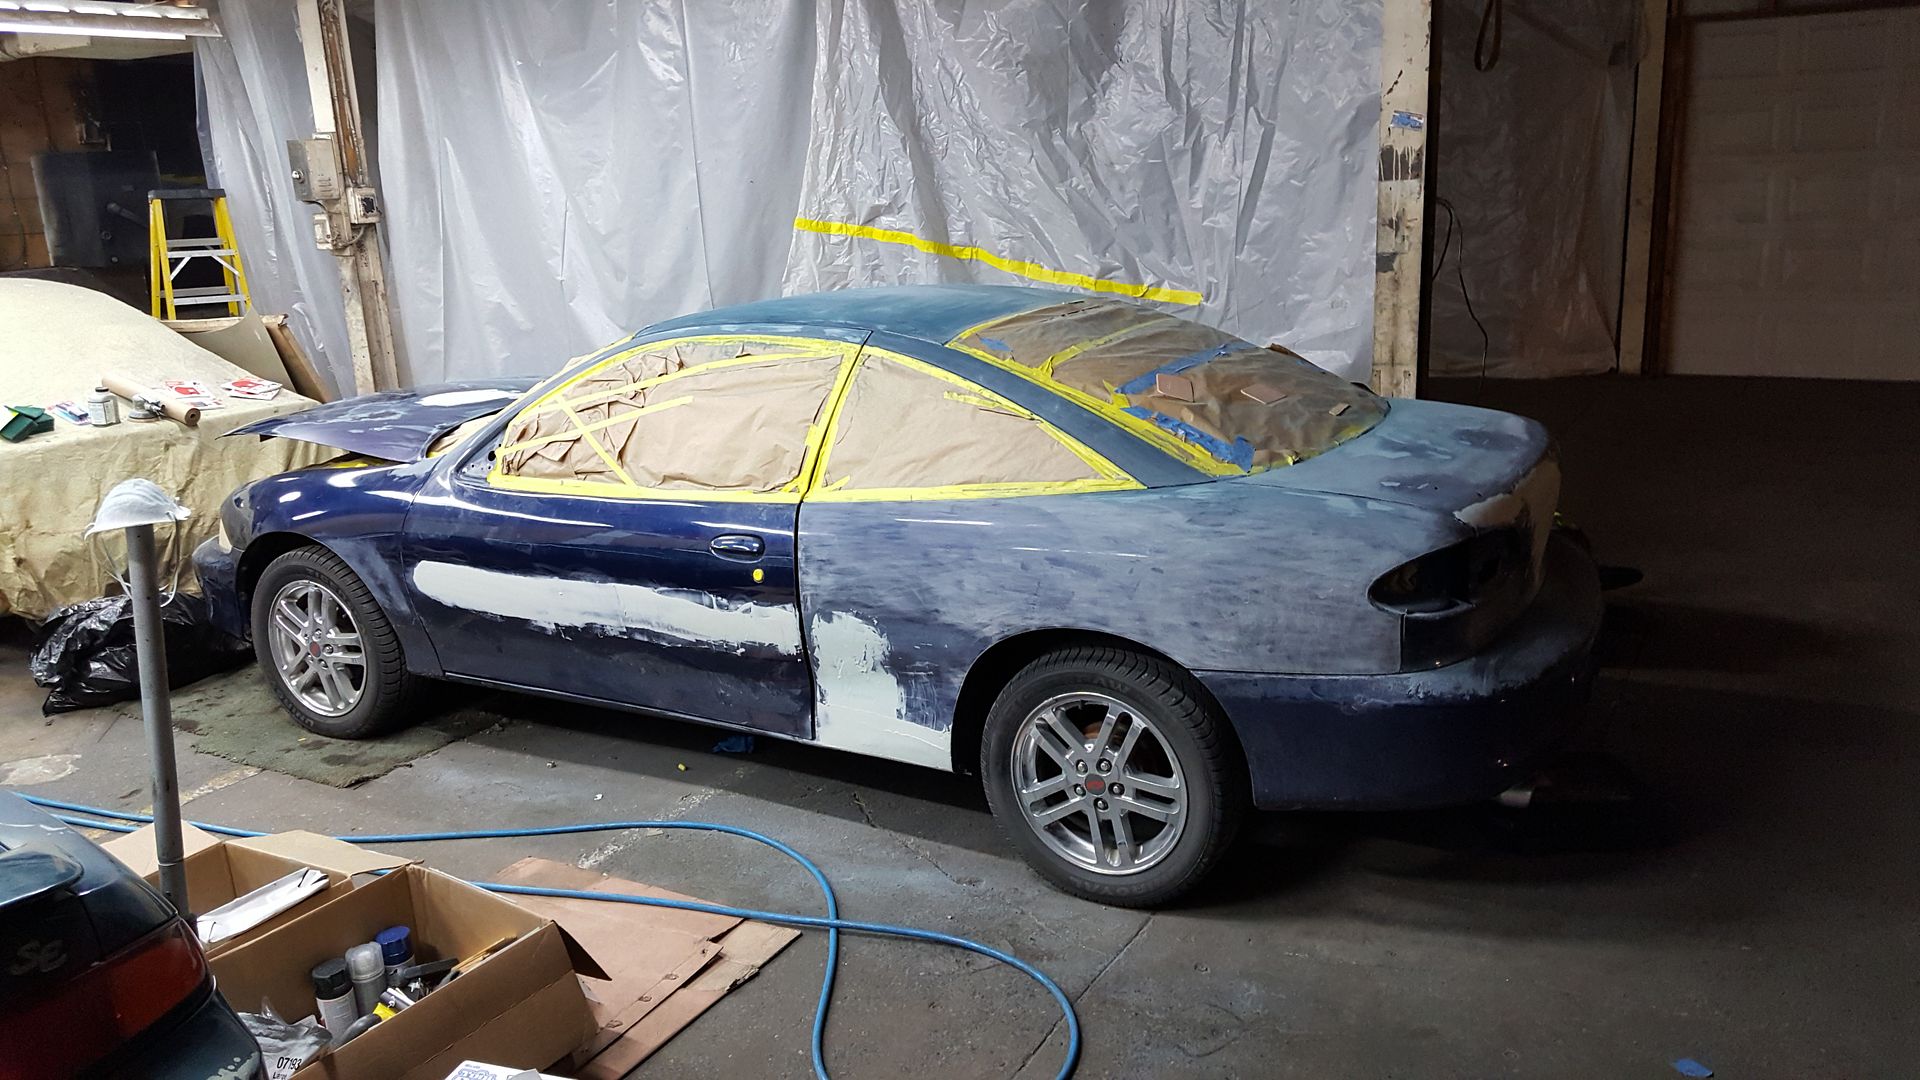
This week has been a lot more getting the area ready for the car than getting the car ready for paint... which is ironic for me because I felt that the body work should consume the majority of my time. However, making the paint booth by hanging plastic and setting up the fans and lights and all of that stuff takes way longer than you might think. Anyway, here's some pics.
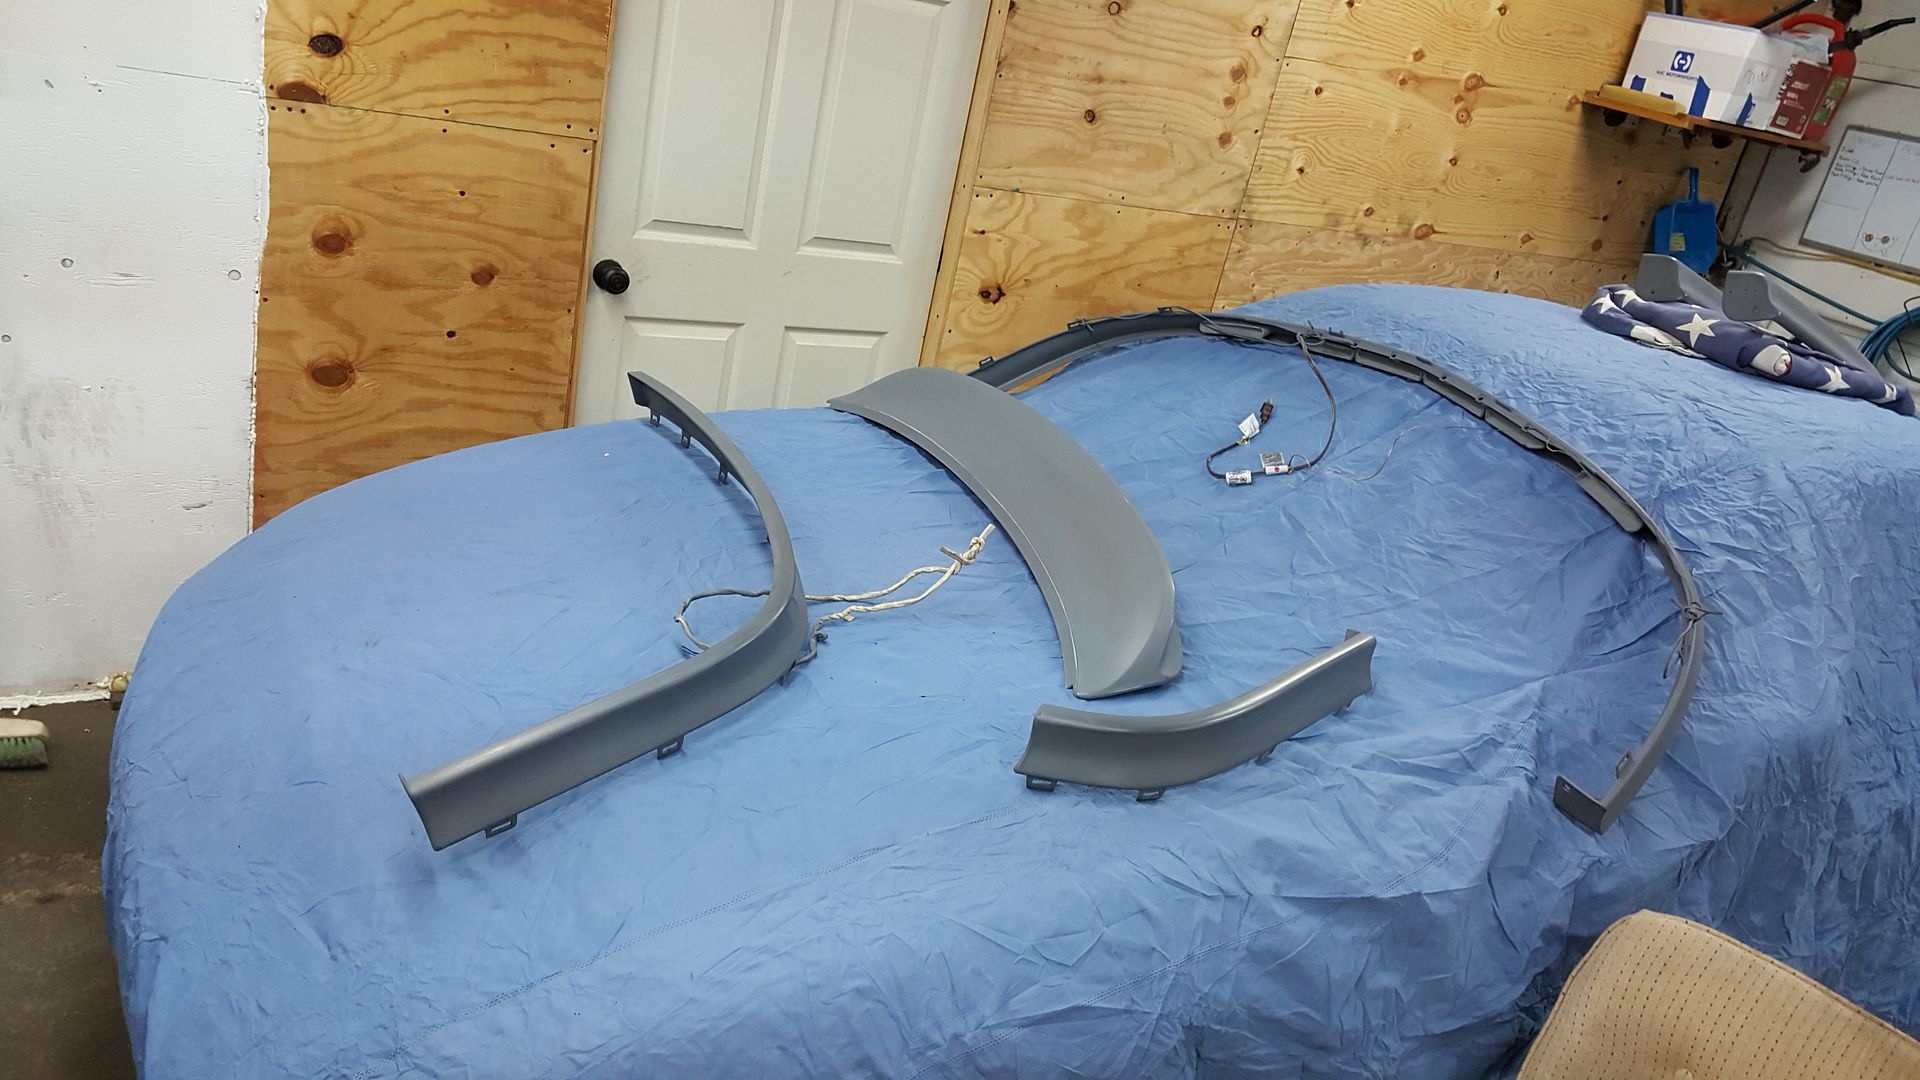
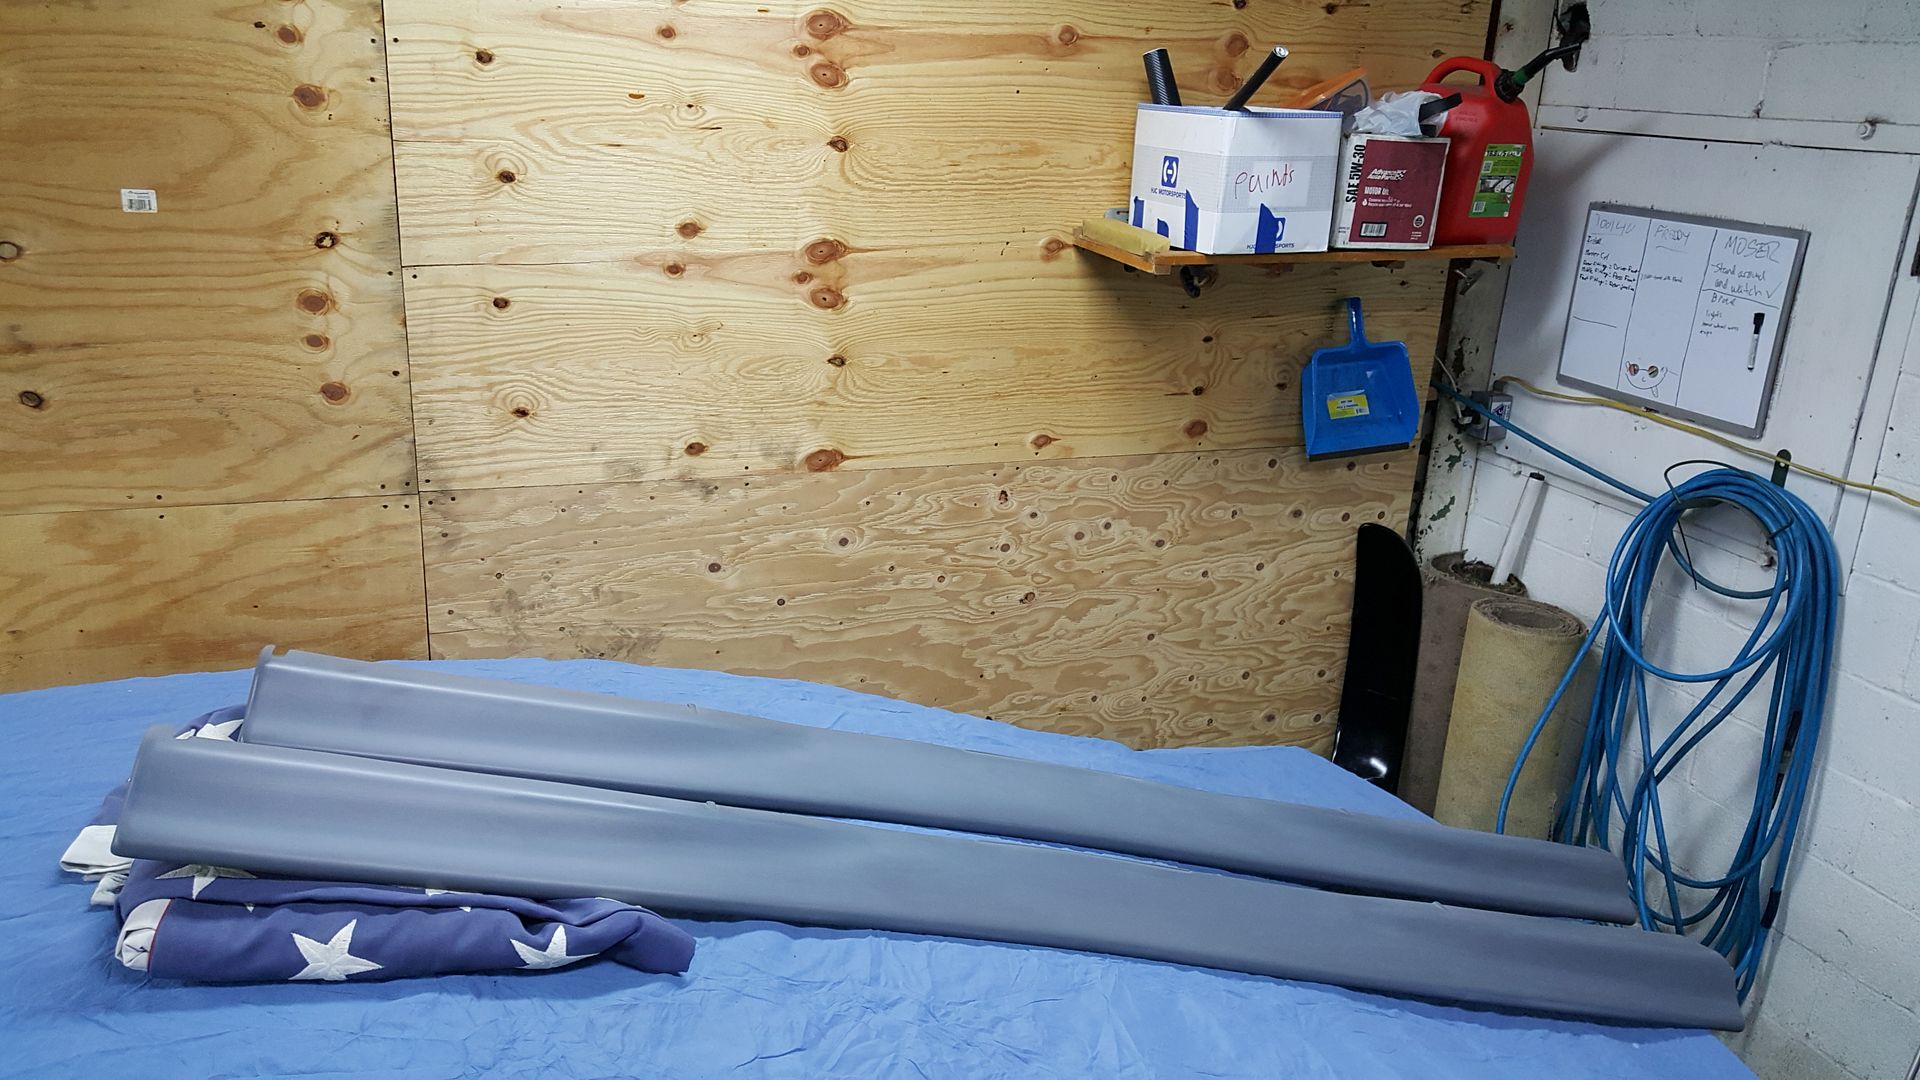
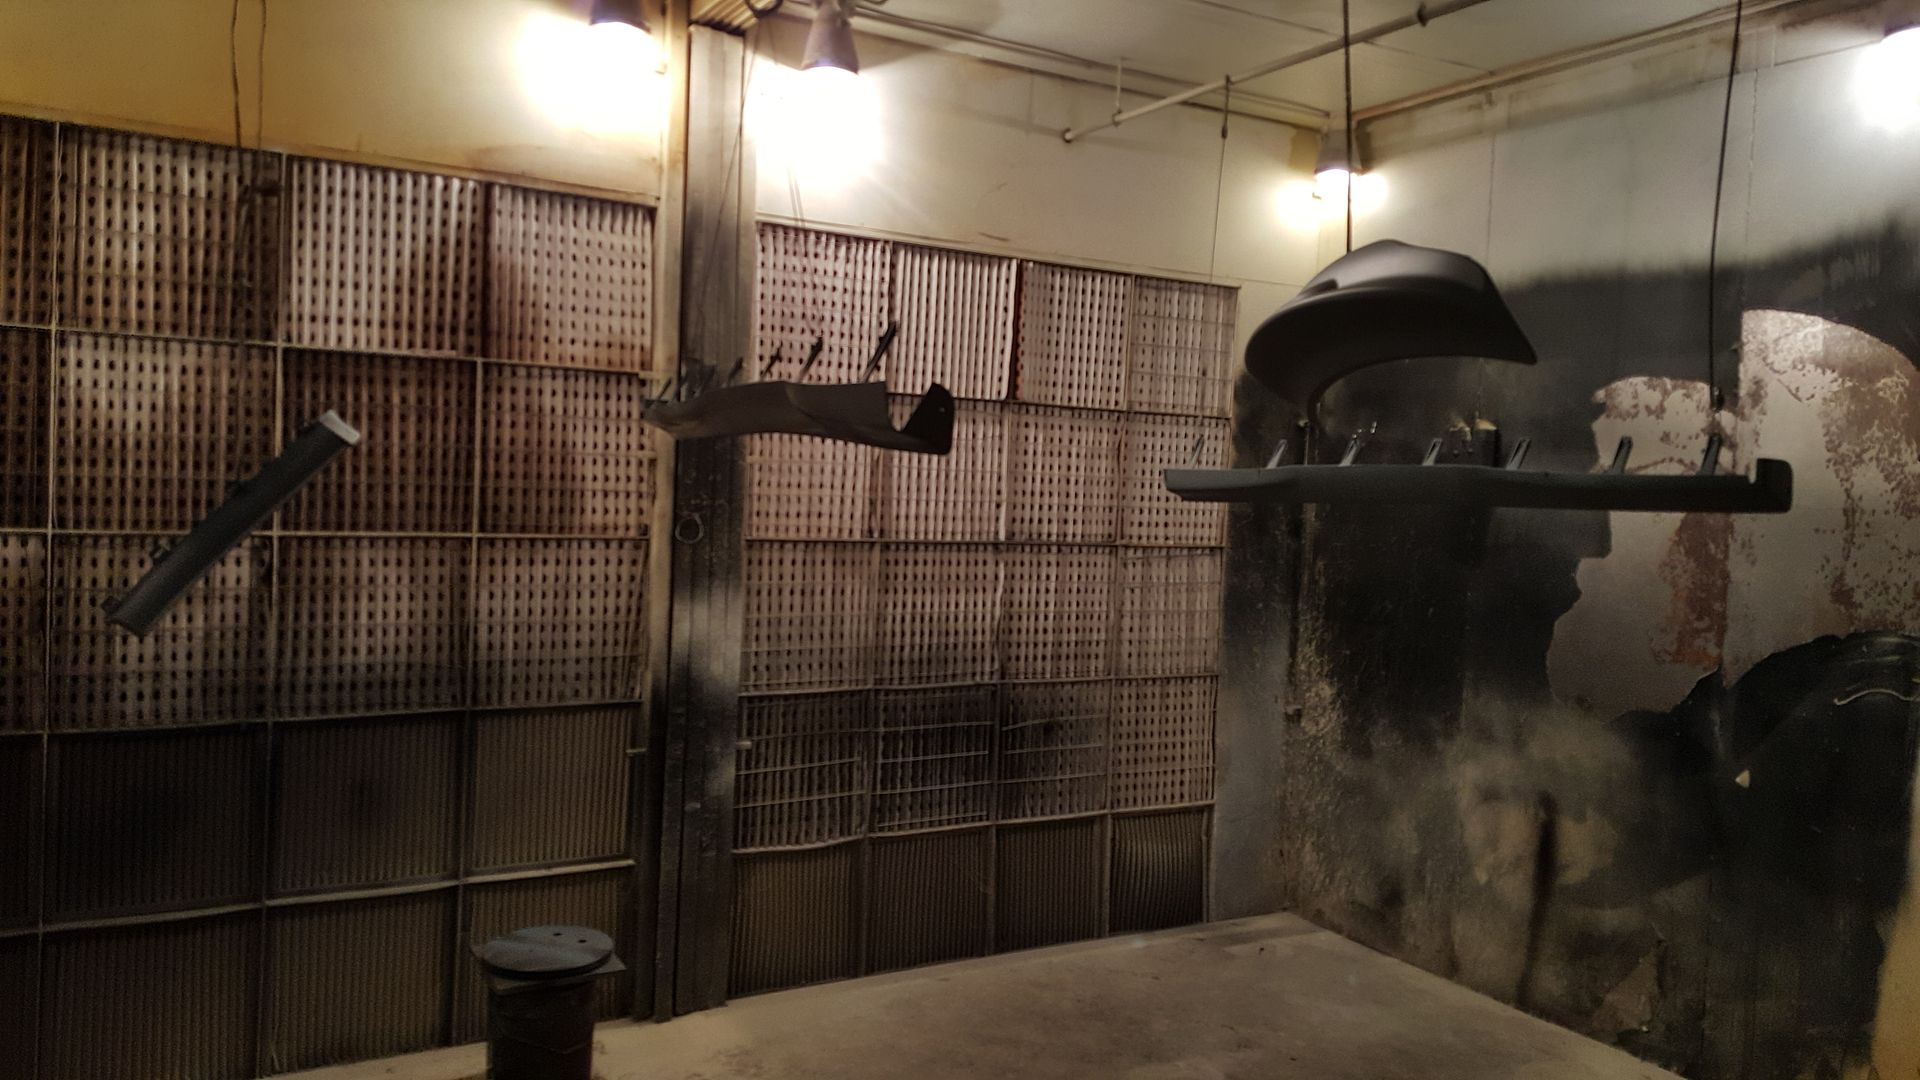
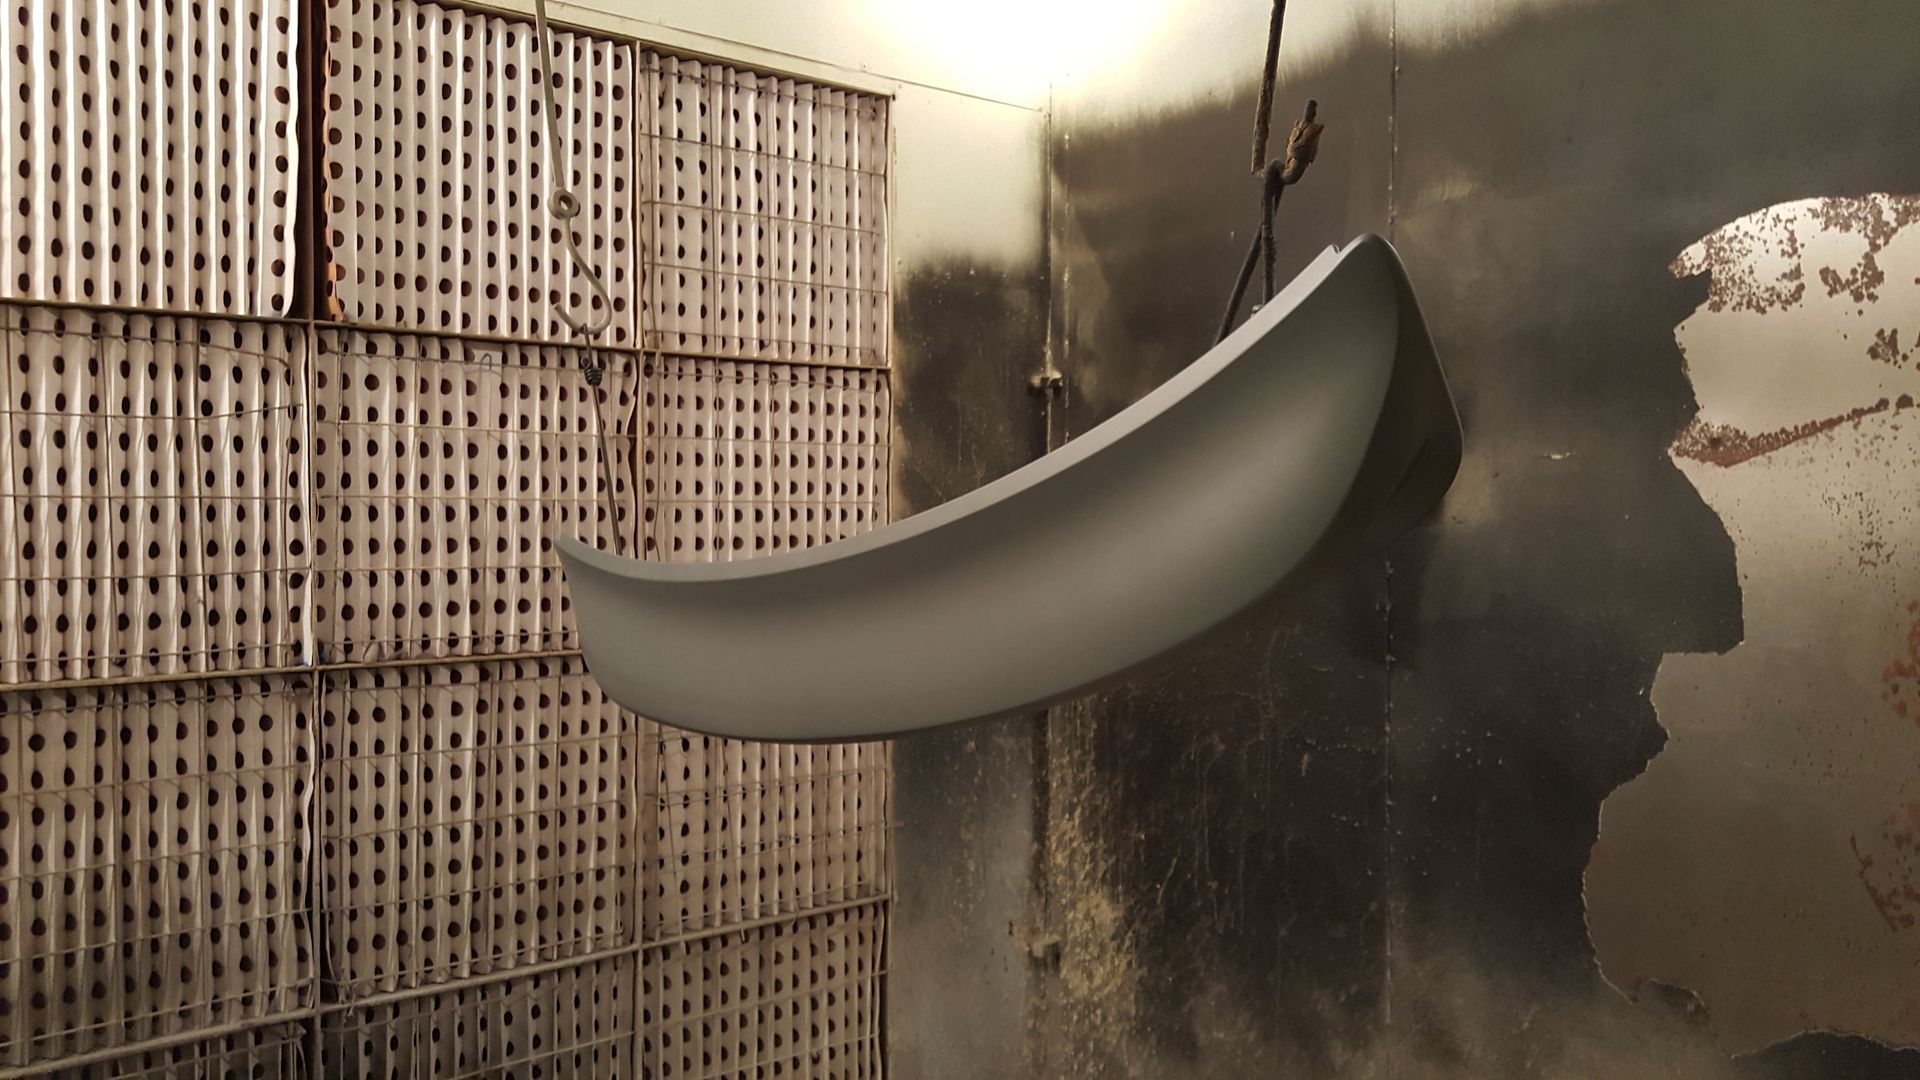
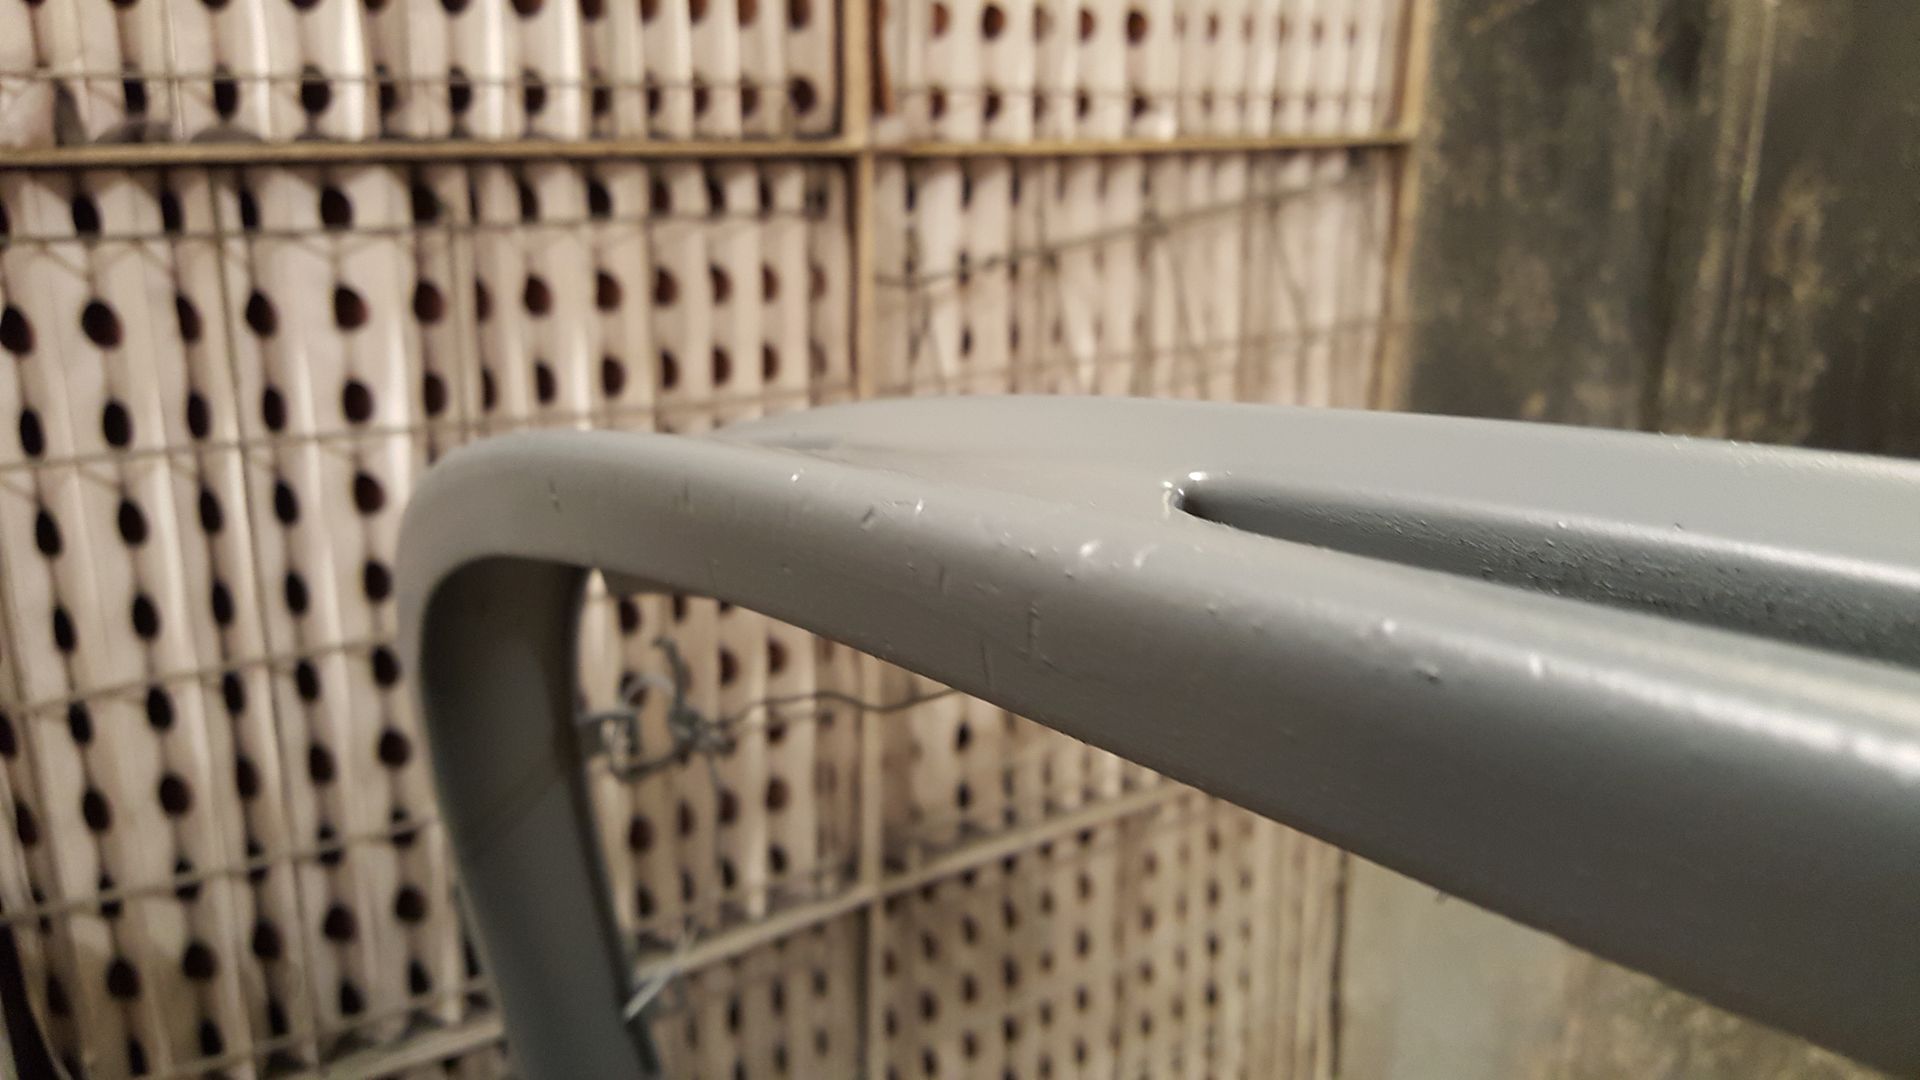
The primer was clumping a bunch the first time I tried to sand it (the day after priming it) so I did my best and then re-primered most of the stuff that needed it. I let it hang dry for 3 days, mostly because I was so busy with other stuff I forgot about it, but also because I wanted to be sure it would be completely cured before sanding. Got it all down last night and sanded it one more time with 400 grit. Some minor clumping but that's just because I put it on thick. So the lowers/lips/spoiler are done finally and ready for paint.
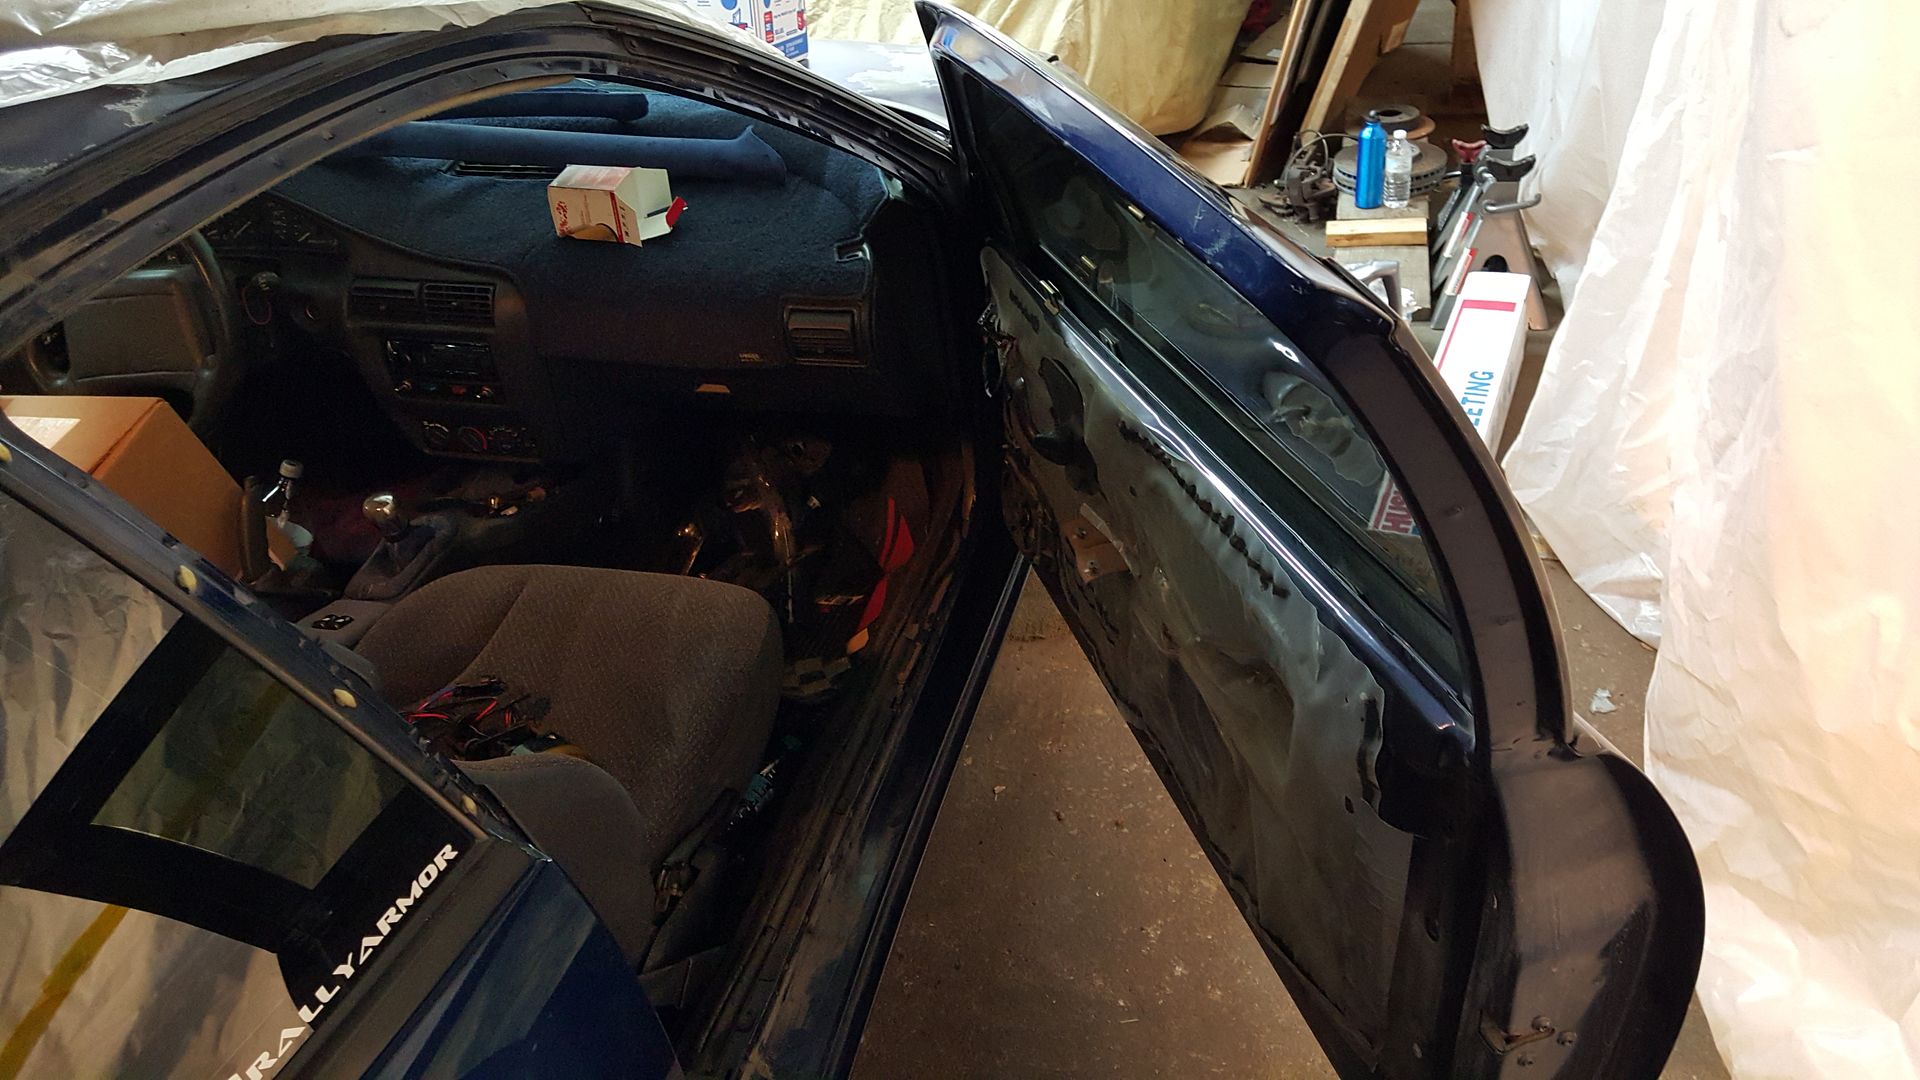
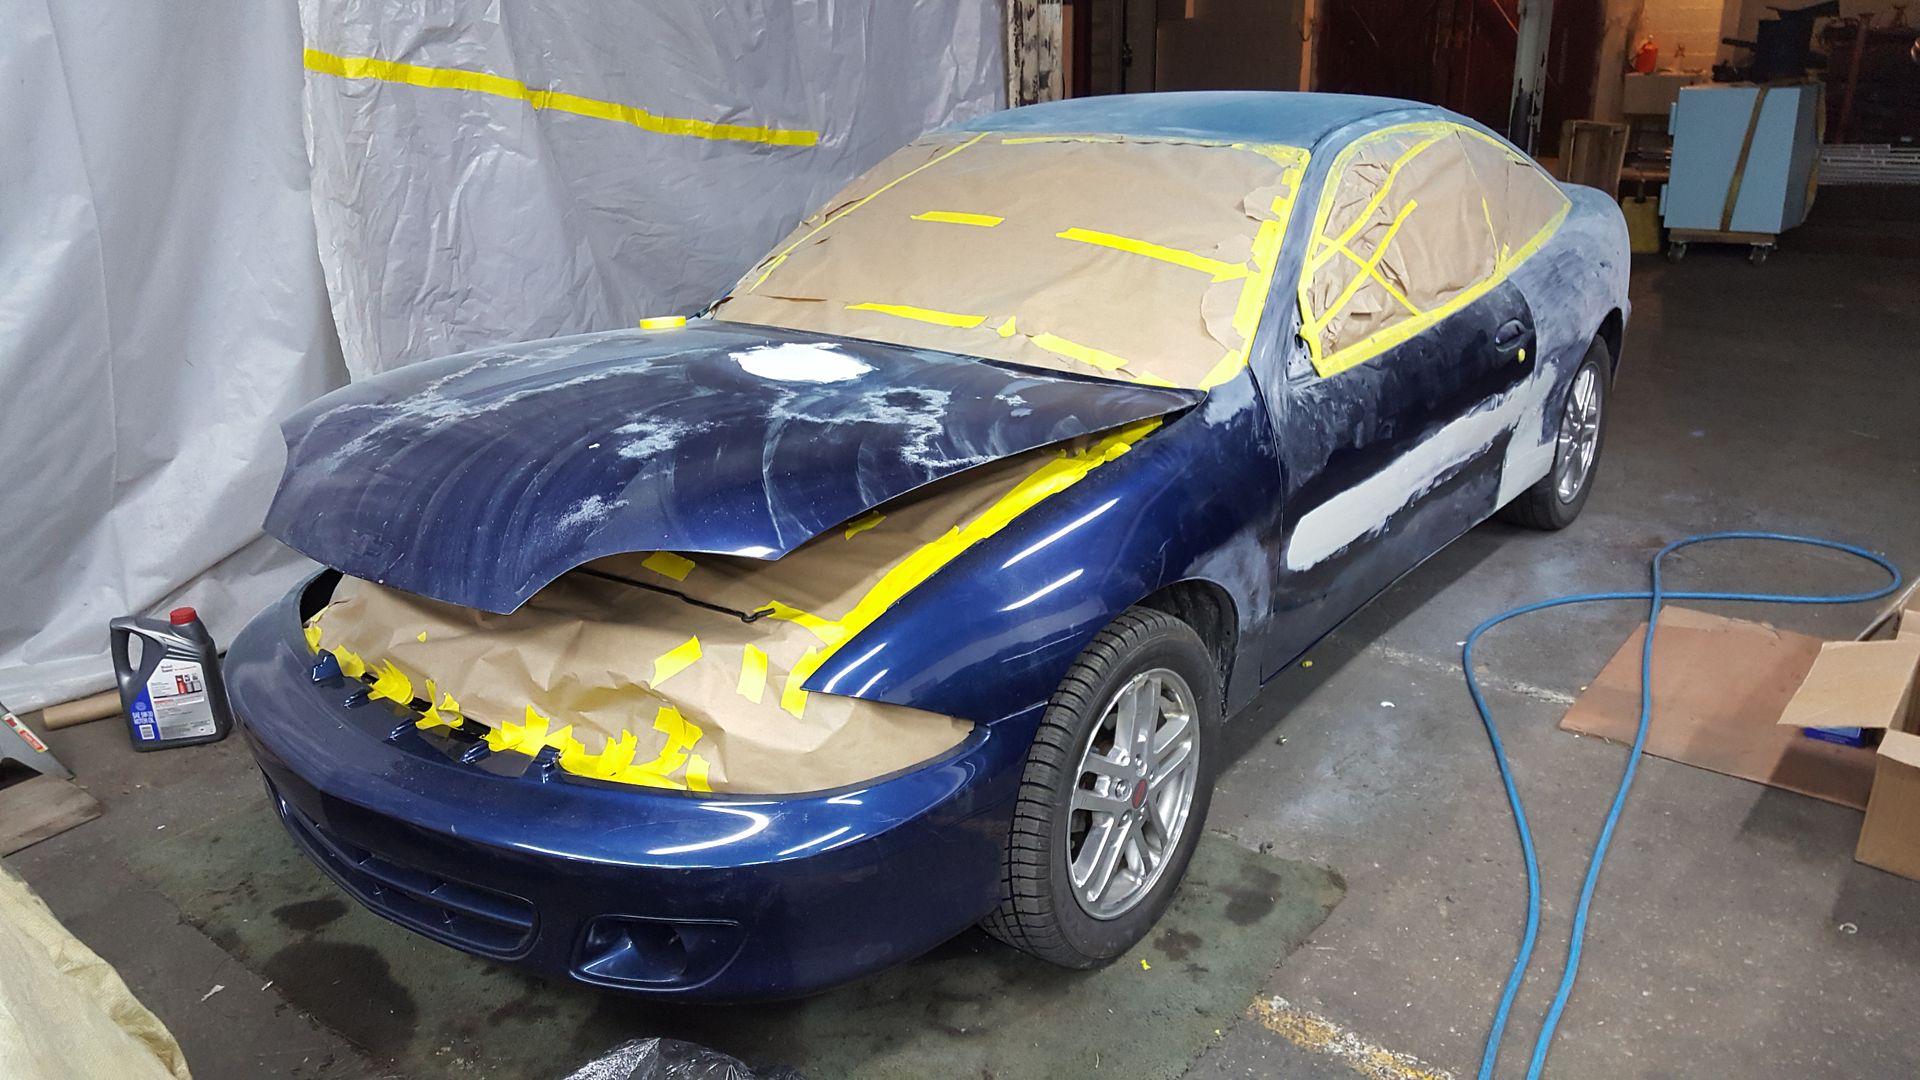
Currently the lights, mirrors, door panels, and weather stripping has been removed and I put a bunch of plastic in the trunk behind the light holes. I'm basically trying to squeeze all the body work into two nights, roughly 12 hours or so. It's going to be a challenge but I've got plenty of help and tools that should expedite the process.
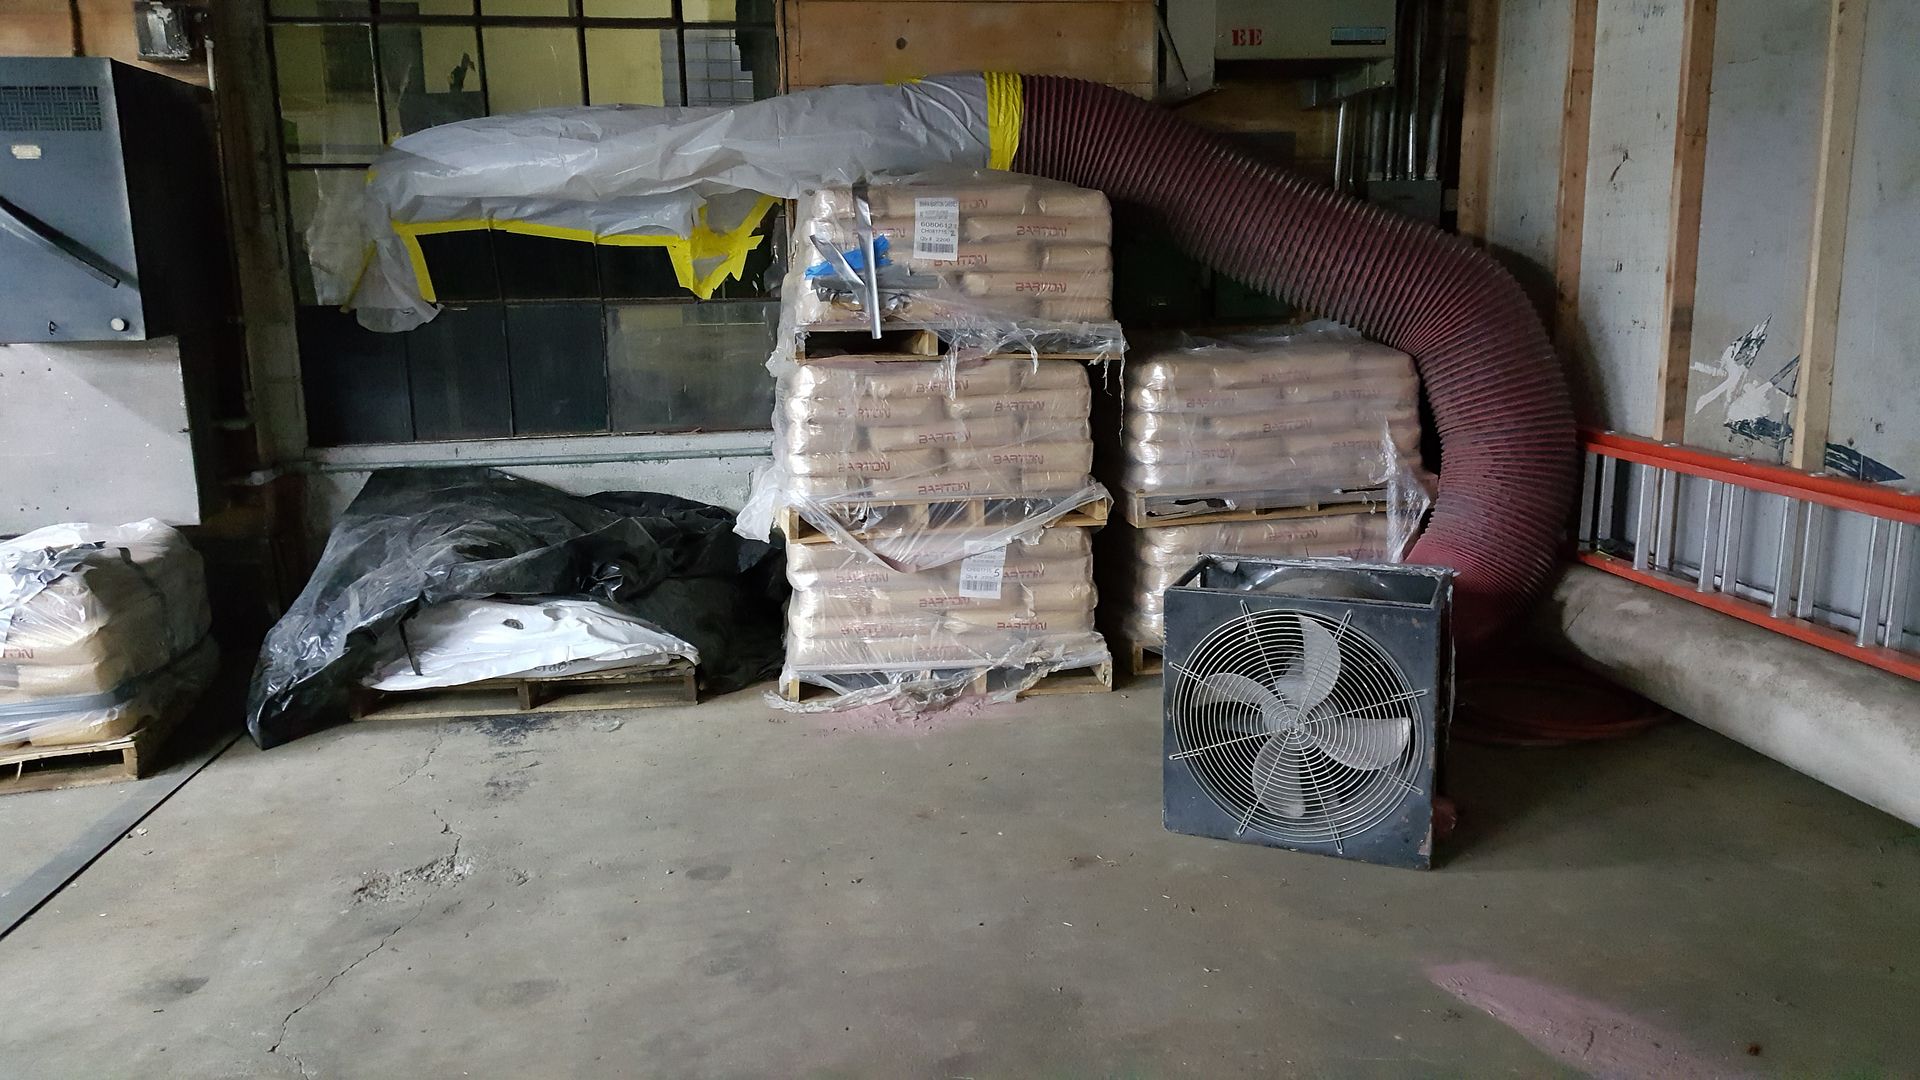
Got an industrial exhaust fan to suck air out of our makeshift paintbooth from a friend of a friend that has a space in my buddy's place where we're painting. Made adapters to route the exhaust out a nearby window. This, combined with the plastic ceiling sealing everything electrical out, will nearly eliminate the risk of an explosion from the fumes when spraying. Should help keep us from breathing the stuff too.
Shoutout to my good friend Freddy for all the help and letting me use his warehouse space. You can find him on his YouTube channel
Poormanmods. He's got some awesome DIY videos. Definitely check him out. More to come either later tonight or tomorrow.
2002 Blue LS Sport Coupe 5-speed
My Paint Restoration Project -->
http://www.j-body.org/forums/read.php?f=11&i=170933&t=170933
It's coming along nicely and fast too. Took me all summer last year to do what u did lol. Then again i wasnt fortunate to have a welder and help or a place to do it in for that matter. Keep up the good work. Did u treat under the rocker too? Got my own to start shortly on a diff cav. Like the homemade paint booth too!
ReD RaiN
T!M8!T wrote:It's coming along nicely and fast too. Took me all summer last year to do what u did lol. Then again i wasnt fortunate to have a welder and help or a place to do it in for that matter. Keep up the good work. Did u treat under the rocker too? Got my own to start shortly on a diff cav. Like the homemade paint booth too!
Thanks man! I was hoping this thread would get a little more exposure honestly (this being my first forum-documented project) but the forum is dead these days.

Either way, this thread has quickly become a great resource to send to people to show them the project in an organized, chronological order. This whole project took a good bit of planning and a lot of extra hands to get it done so fast. Realistically, I think anyone could do this alone in the same amount of time that I have if they had all day to work on it and didn't have to work a full-time job as I have been. And yes the space and the other resources like the welder, exhaust fan, and all that stuff I got extremely lucky to get access to.
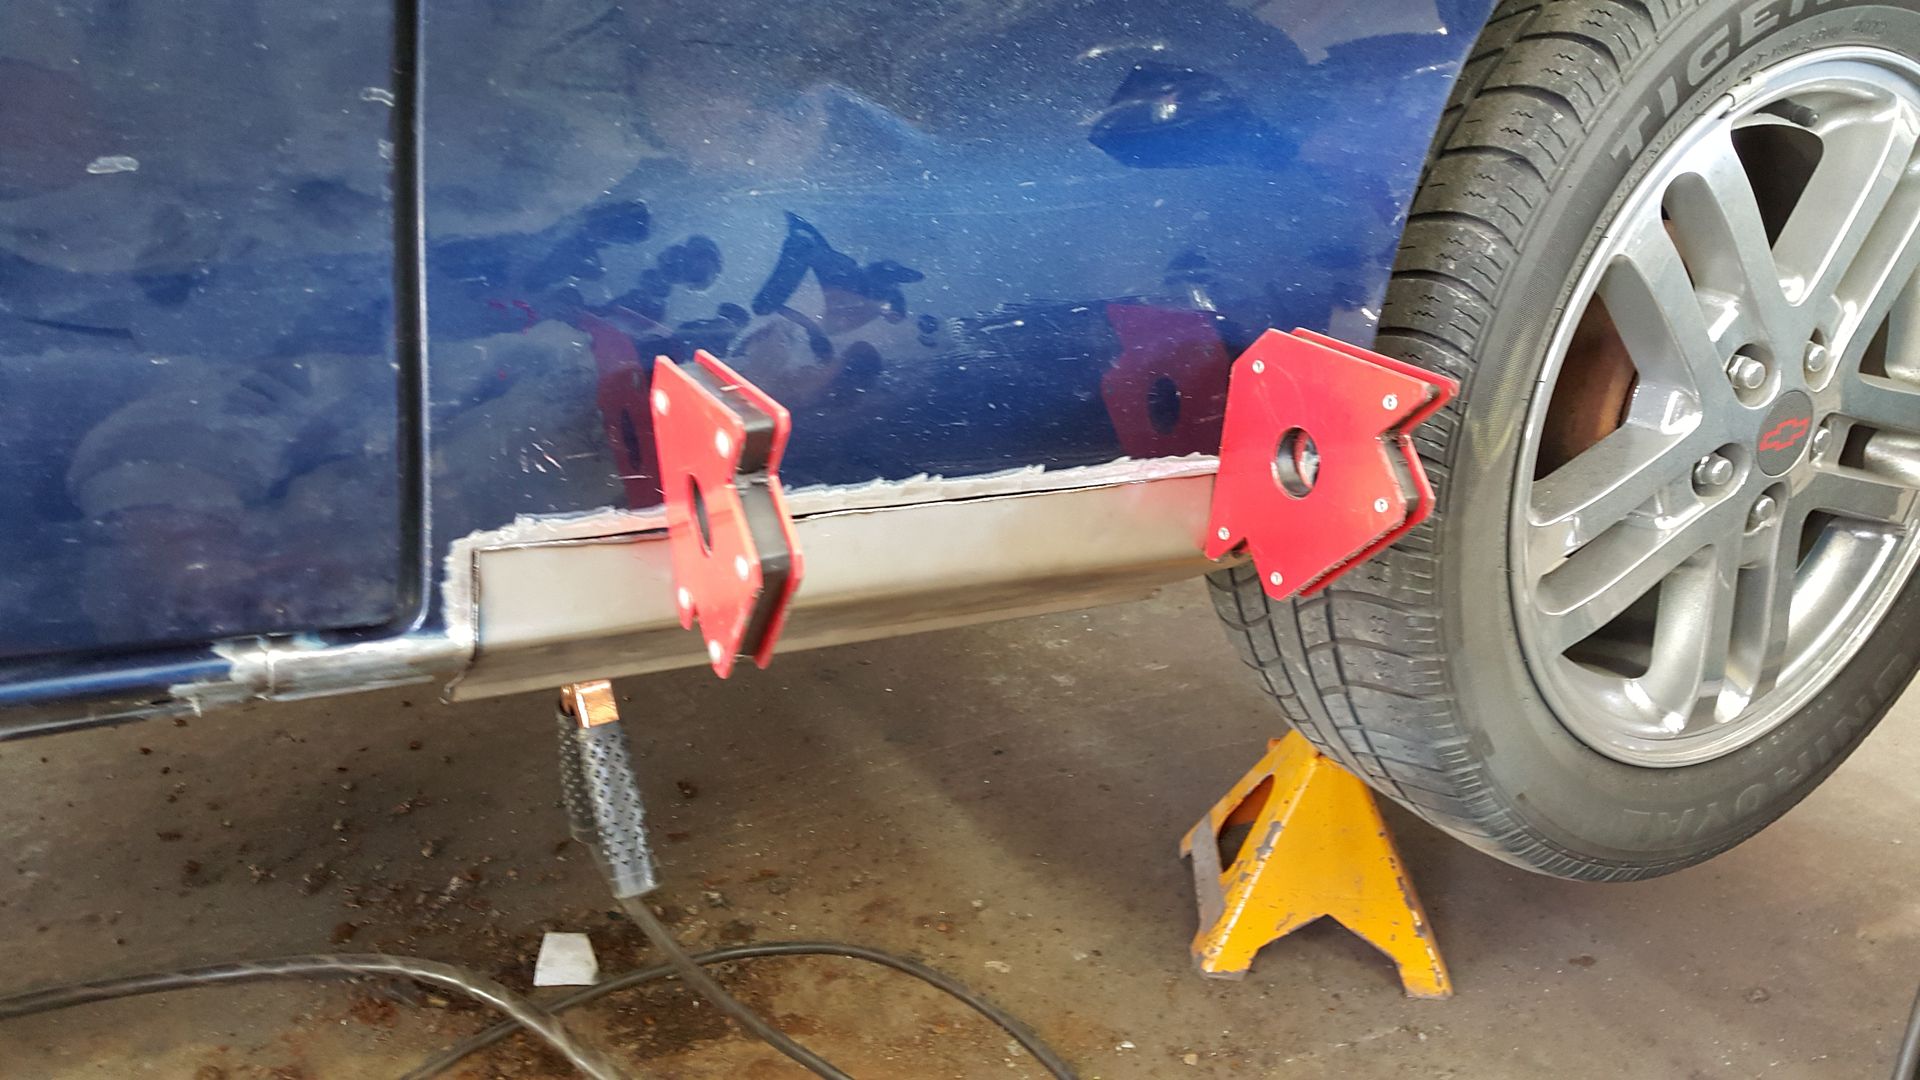
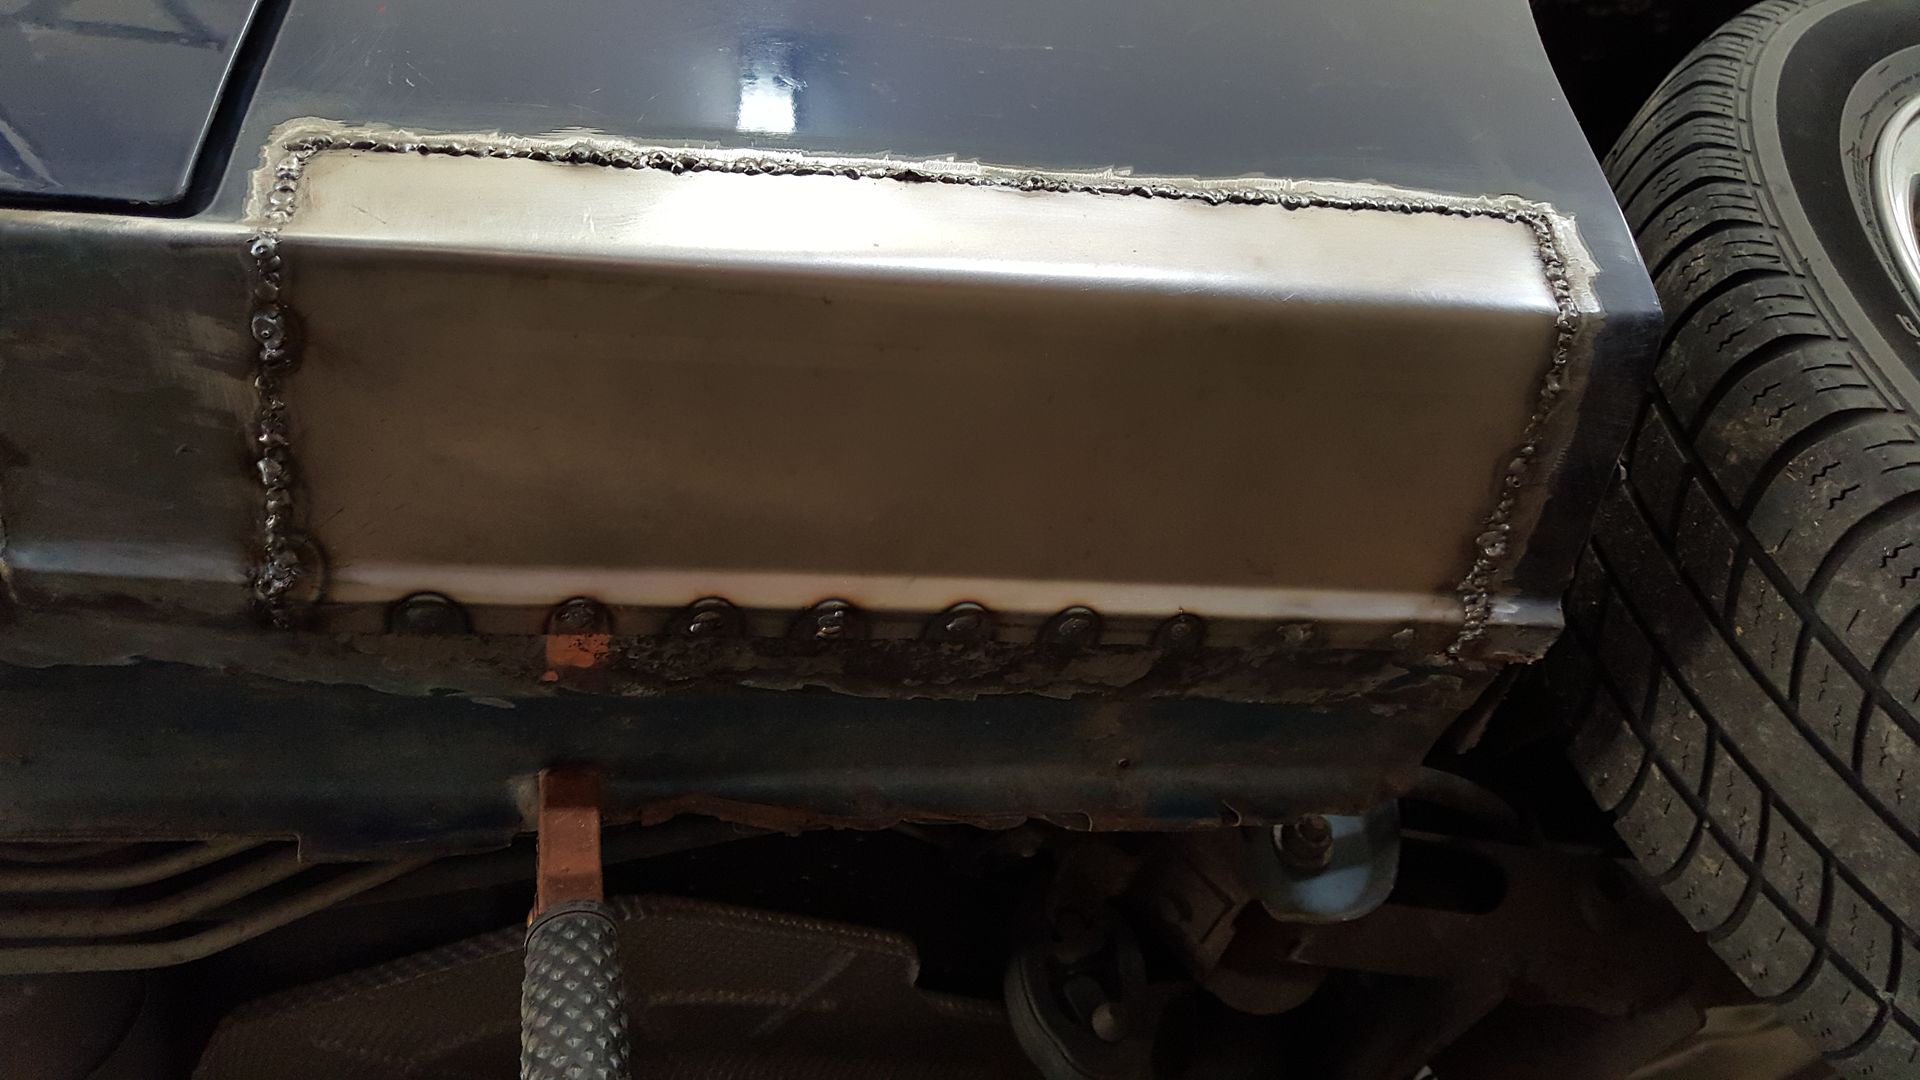
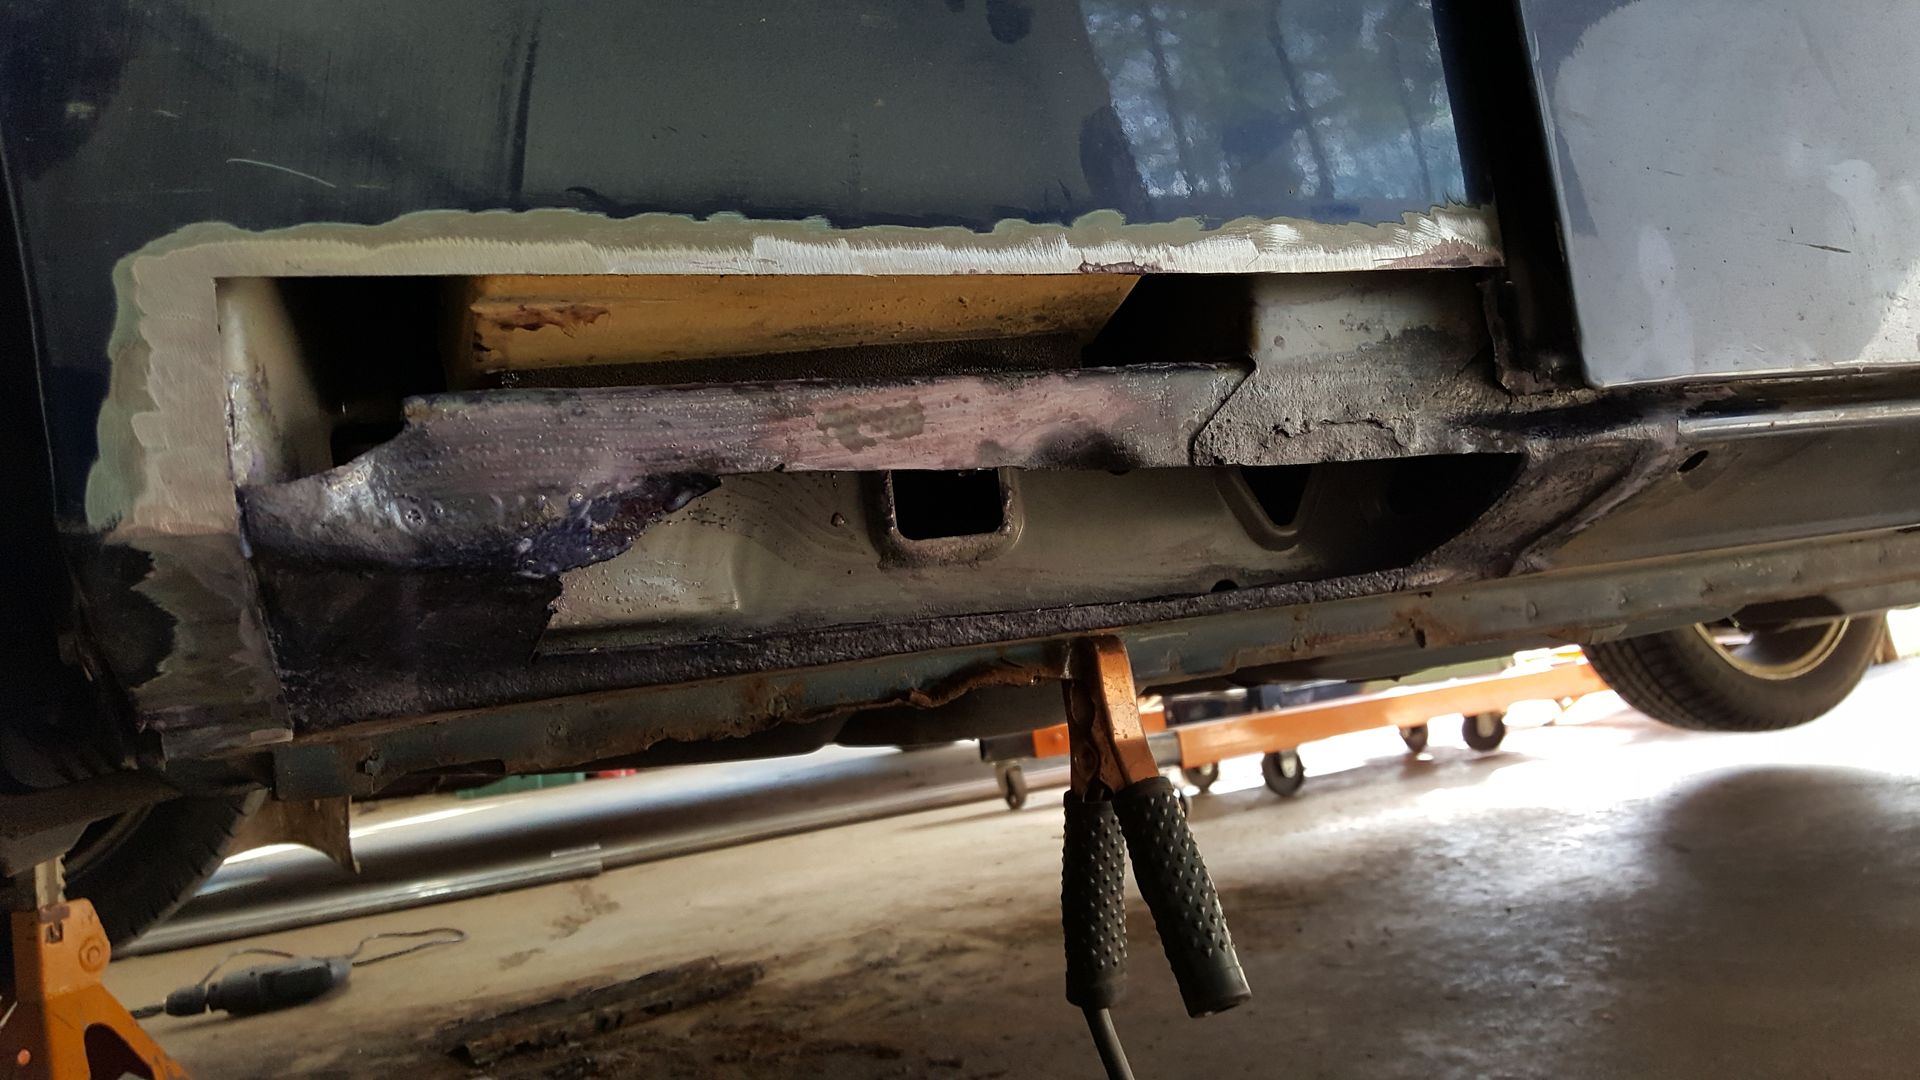
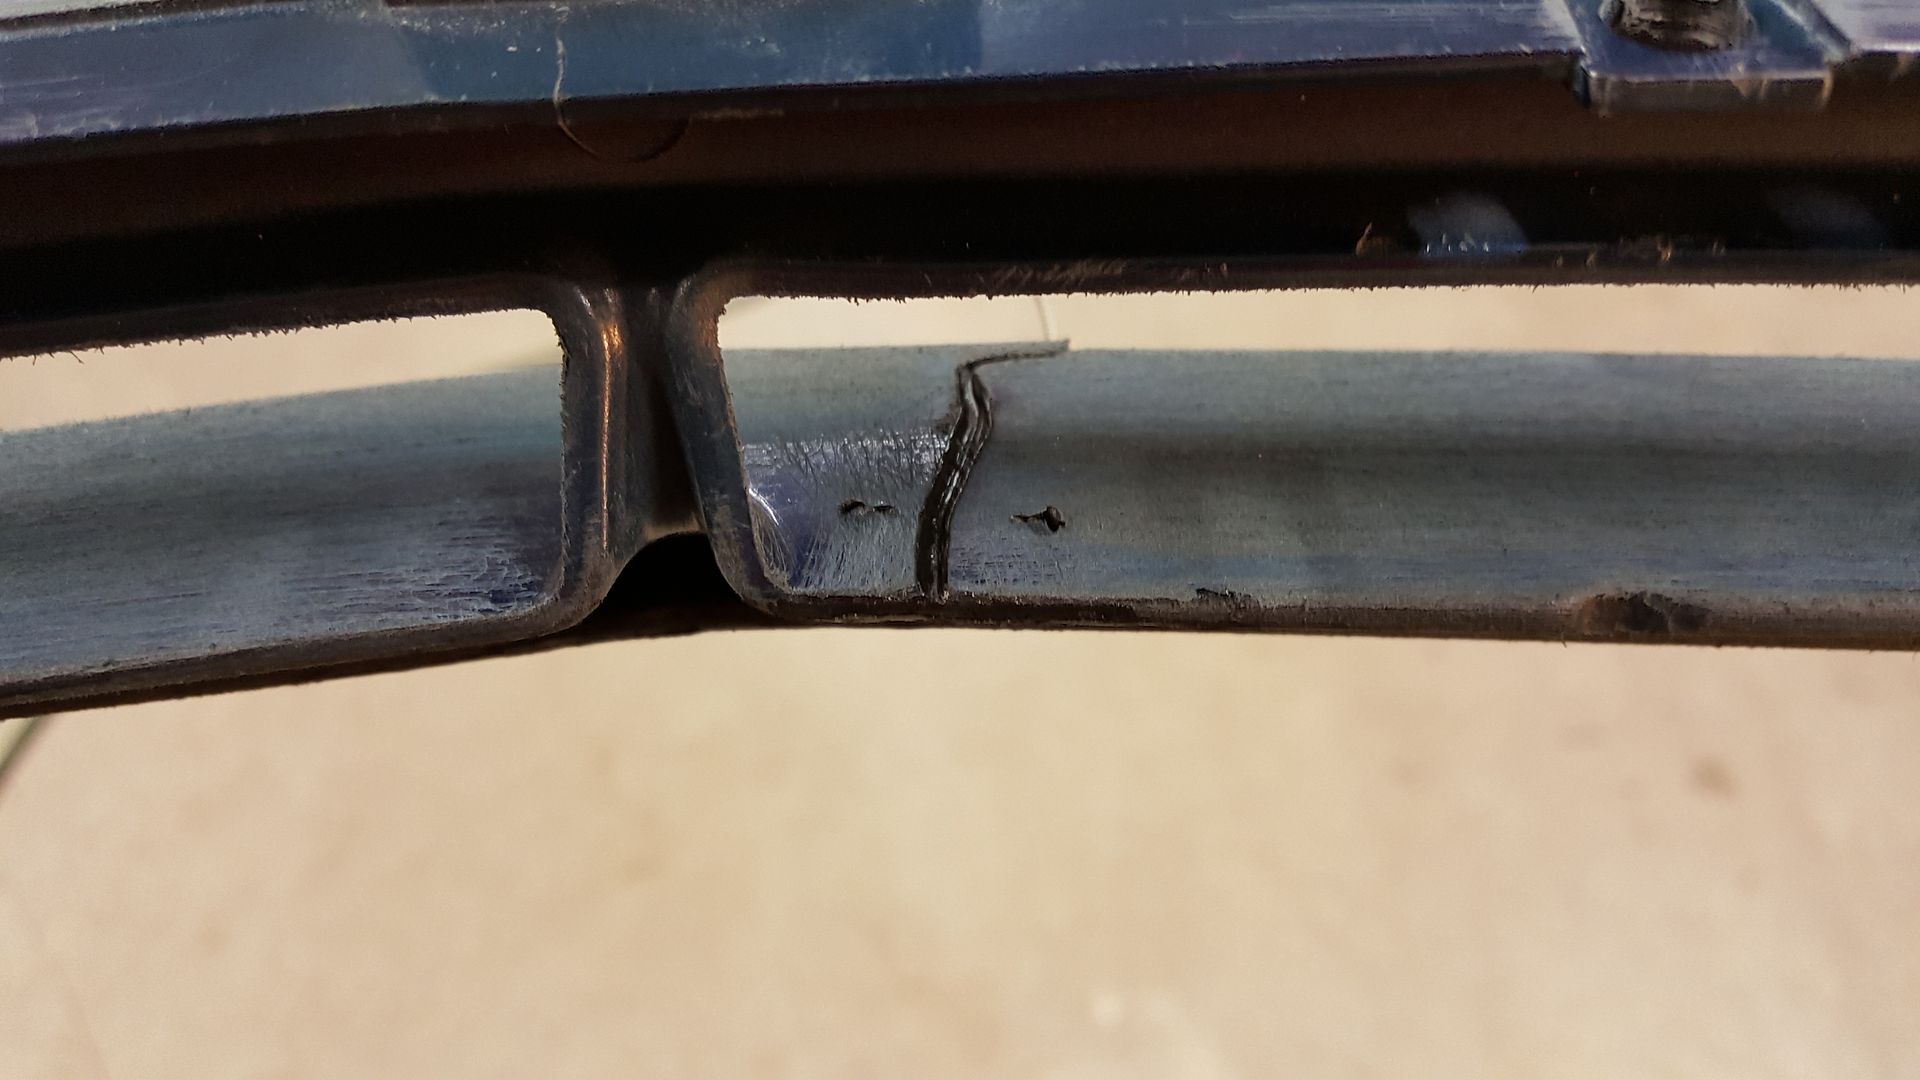
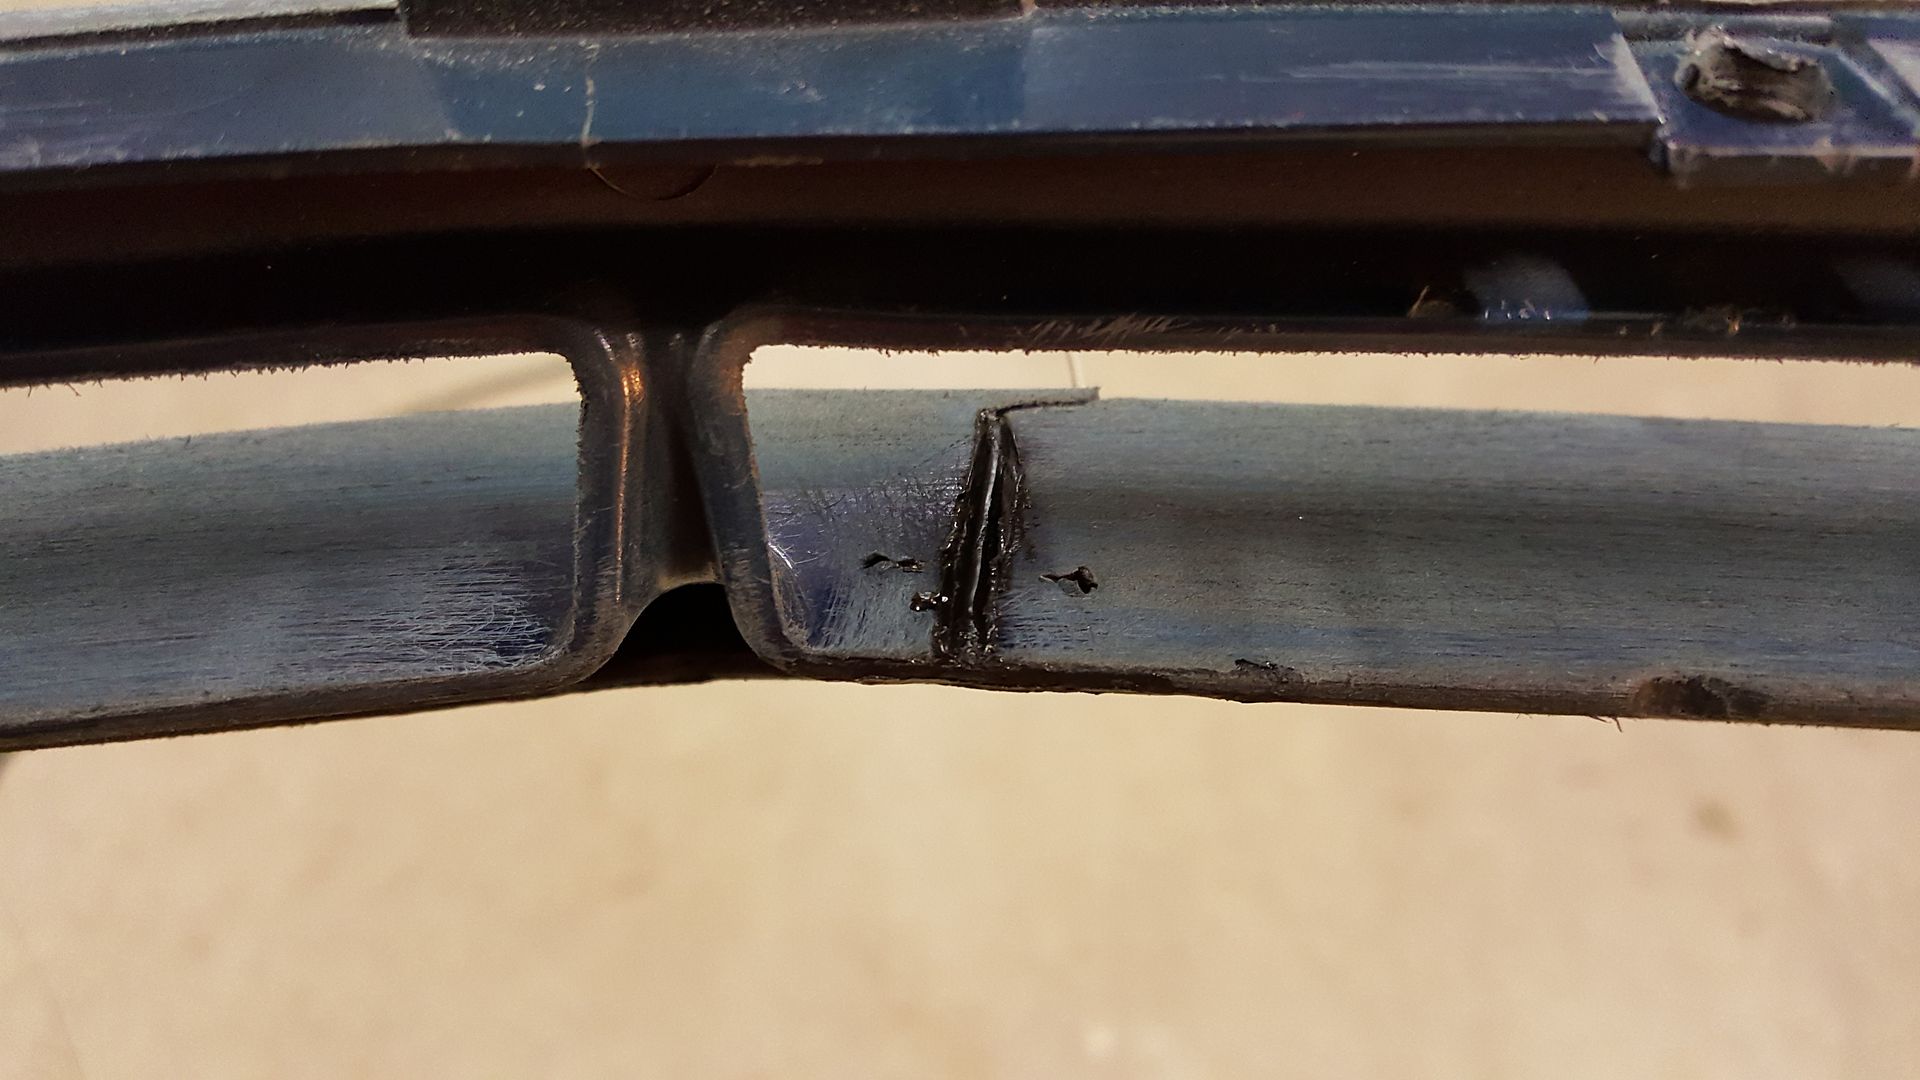
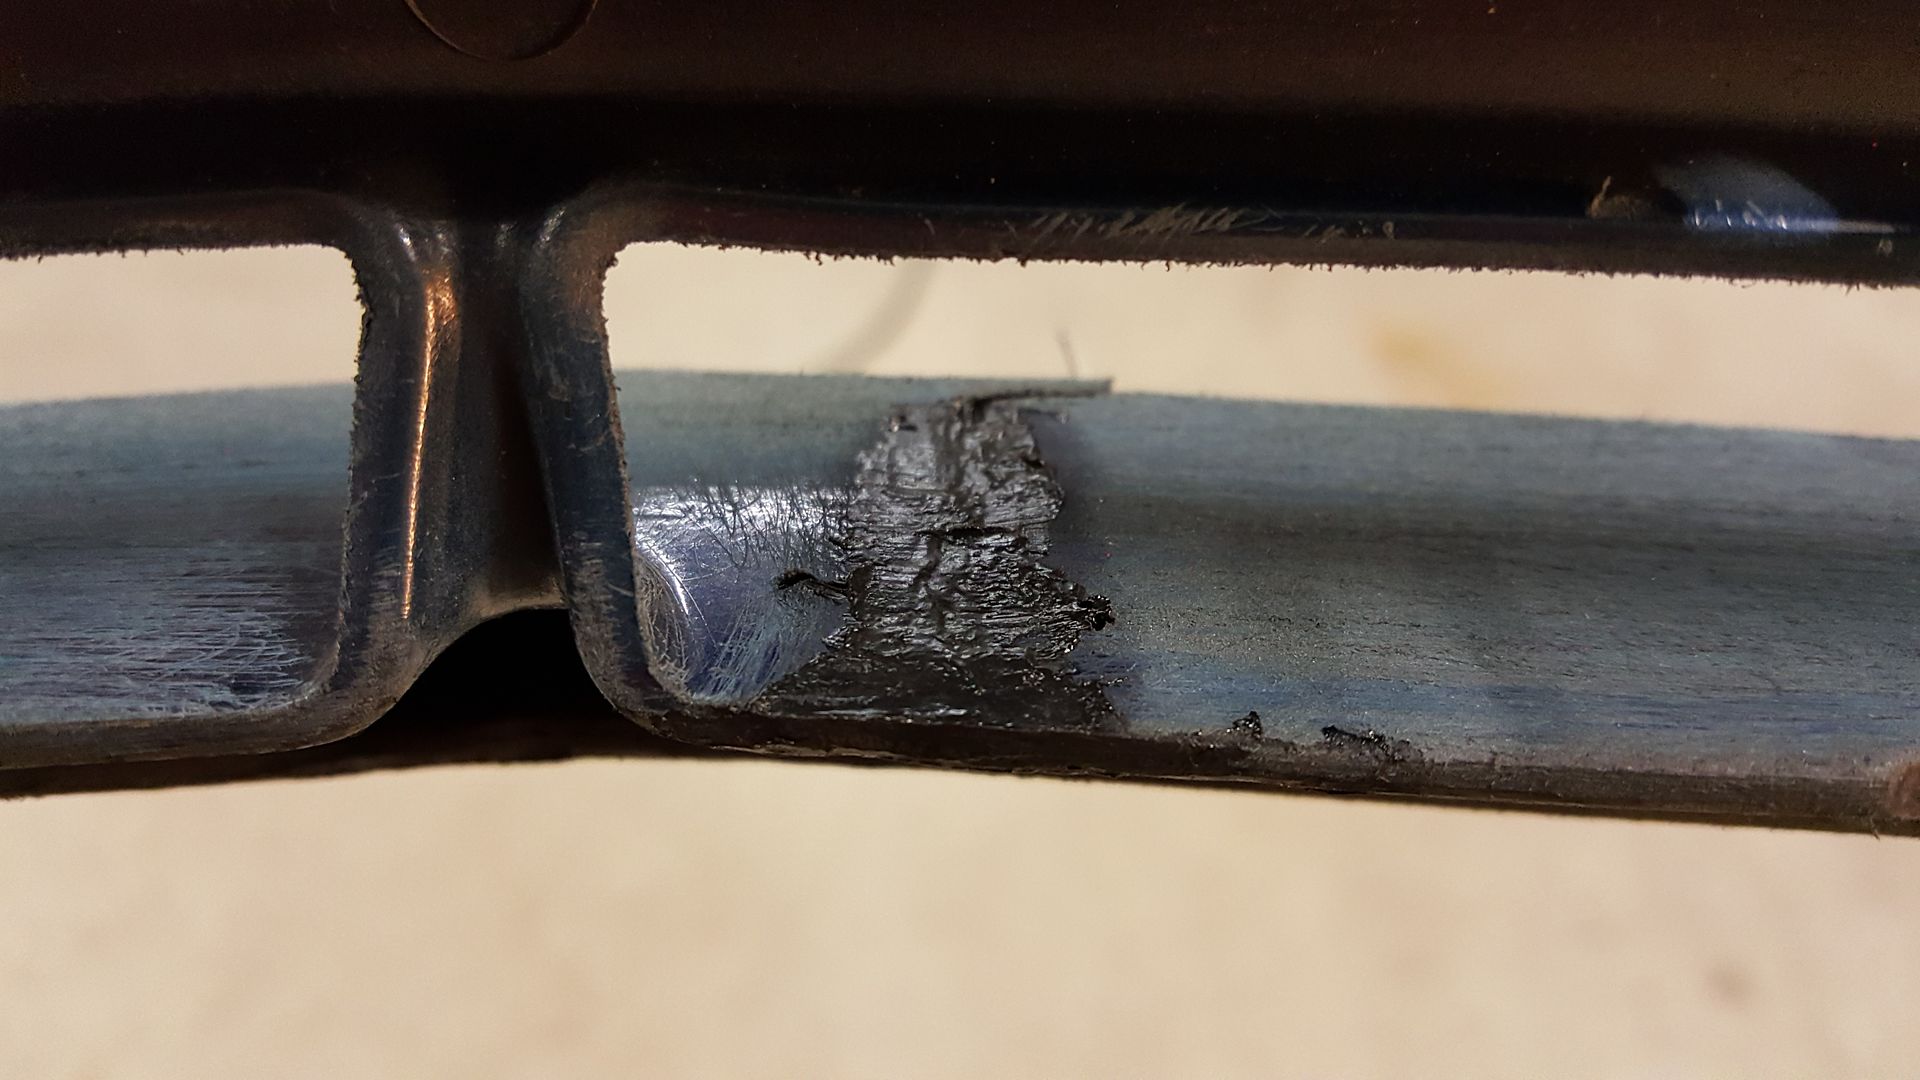
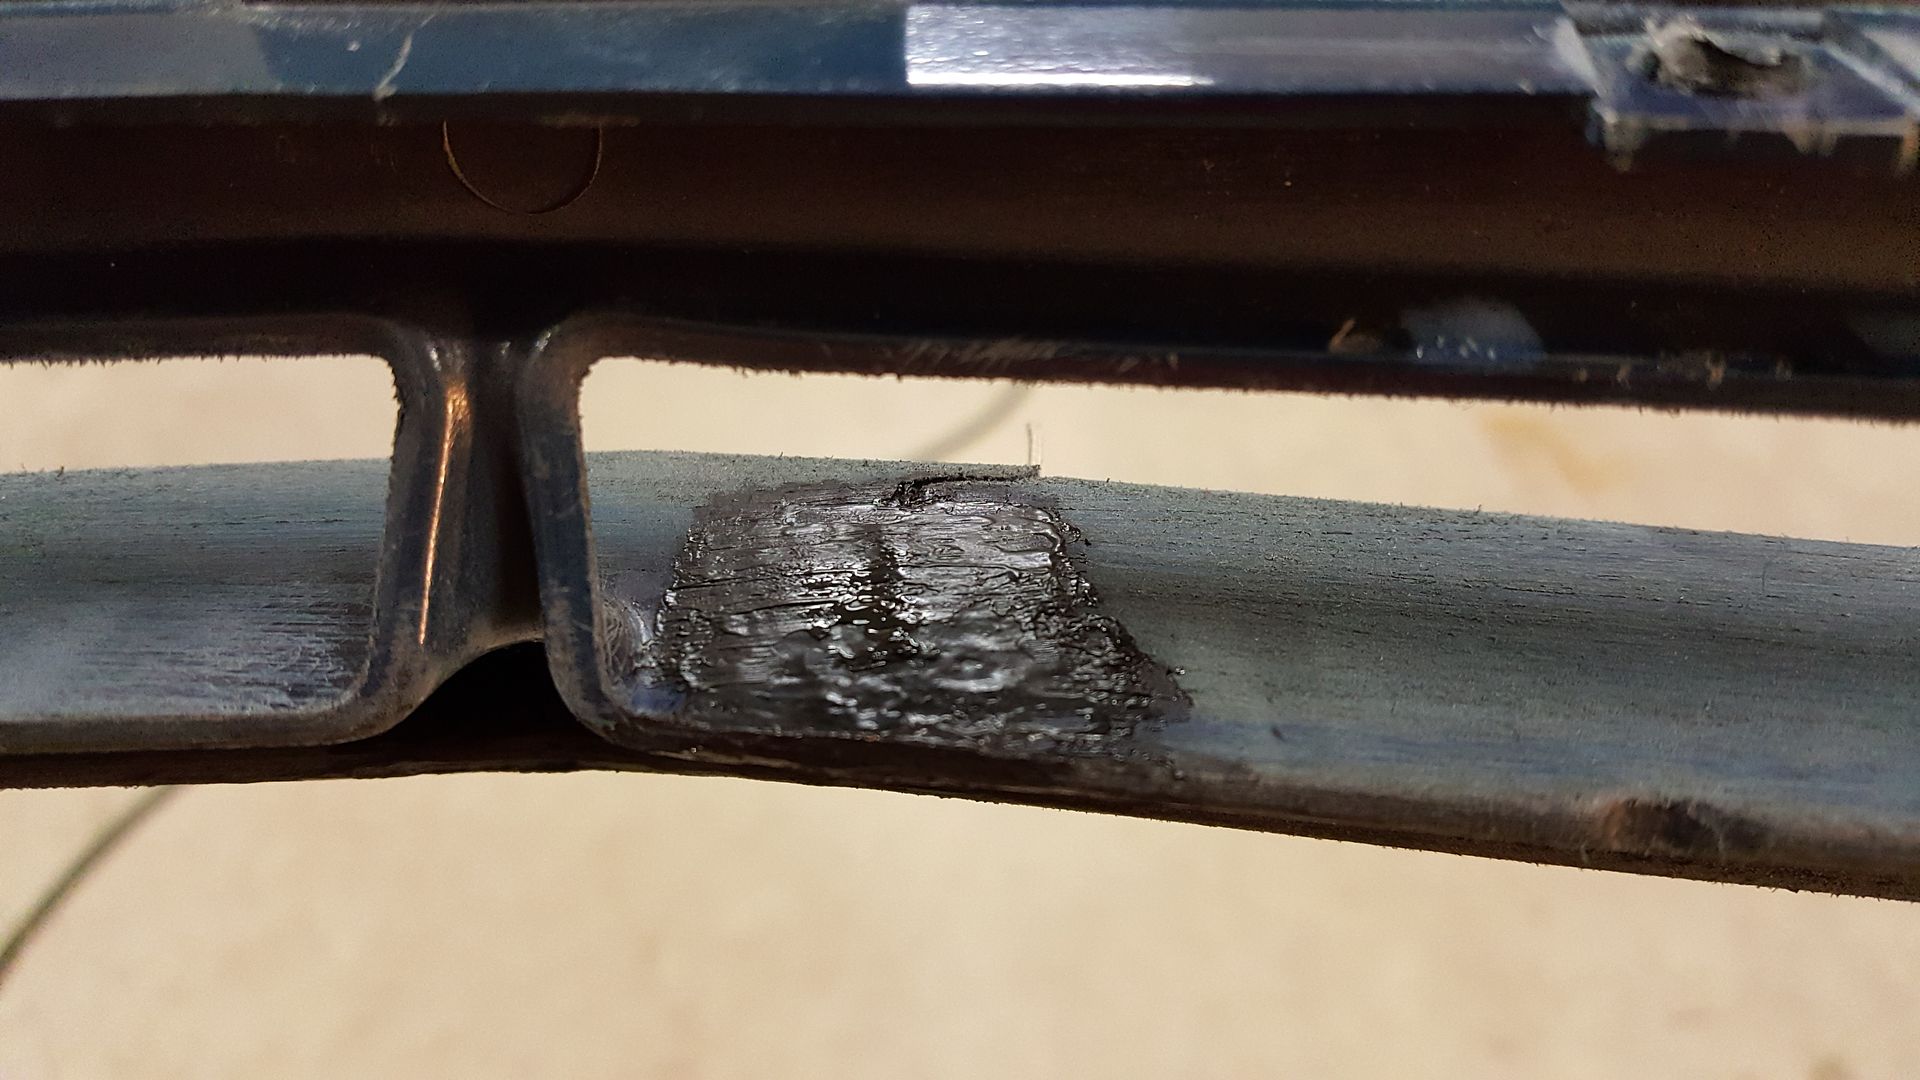
The under side of the rocker panel where the rust was repaired was spot welded. The seam down there is glued from the factory with a caulk-like metal-to-metal seam sealer. My plan was to acquire some of that seam sealer but I ran out of time and home depot didn't have it so I went with a JB Weld for steel. I would have ran around looking for it but I'm working an hour from the shop and even going directly there after work I struggle to get done what I have planned each night. Time just flies by and you really need every minute you can get on a schedule like this. I grinded all the primer off along the seams under the rocker and pressed the JB Weld into the seam and pressed it out smooth by hand the best I could as it solidified. I'll put a picture up of that tomorrow.
Paint booth turned out amazing, way better than originally expected but it took A LOT more plastic than was planned for. The warehouse space has 12ft ceilings with pipes and light fixtures hanging down, and it's 20ft wide and approx 25ft deep. So for a 25' x 20' x 12' I basically used two 12' x 100' lengths of 4mil plastic going from the floor on one side, up and across the ceiling, and down to the floor on the other side. I did this twice with the addition of two 12' x 20' pieces to make the front and back walls. So basically, you need a sh*t load of plastic! And this isn't even a big car.
Prepping is half way done at this point and we're still on schedule for paint tomorrow afternoon.
2002 Blue LS Sport Coupe 5-speed
My Paint Restoration Project -->
http://www.j-body.org/forums/read.php?f=11&i=170933&t=170933
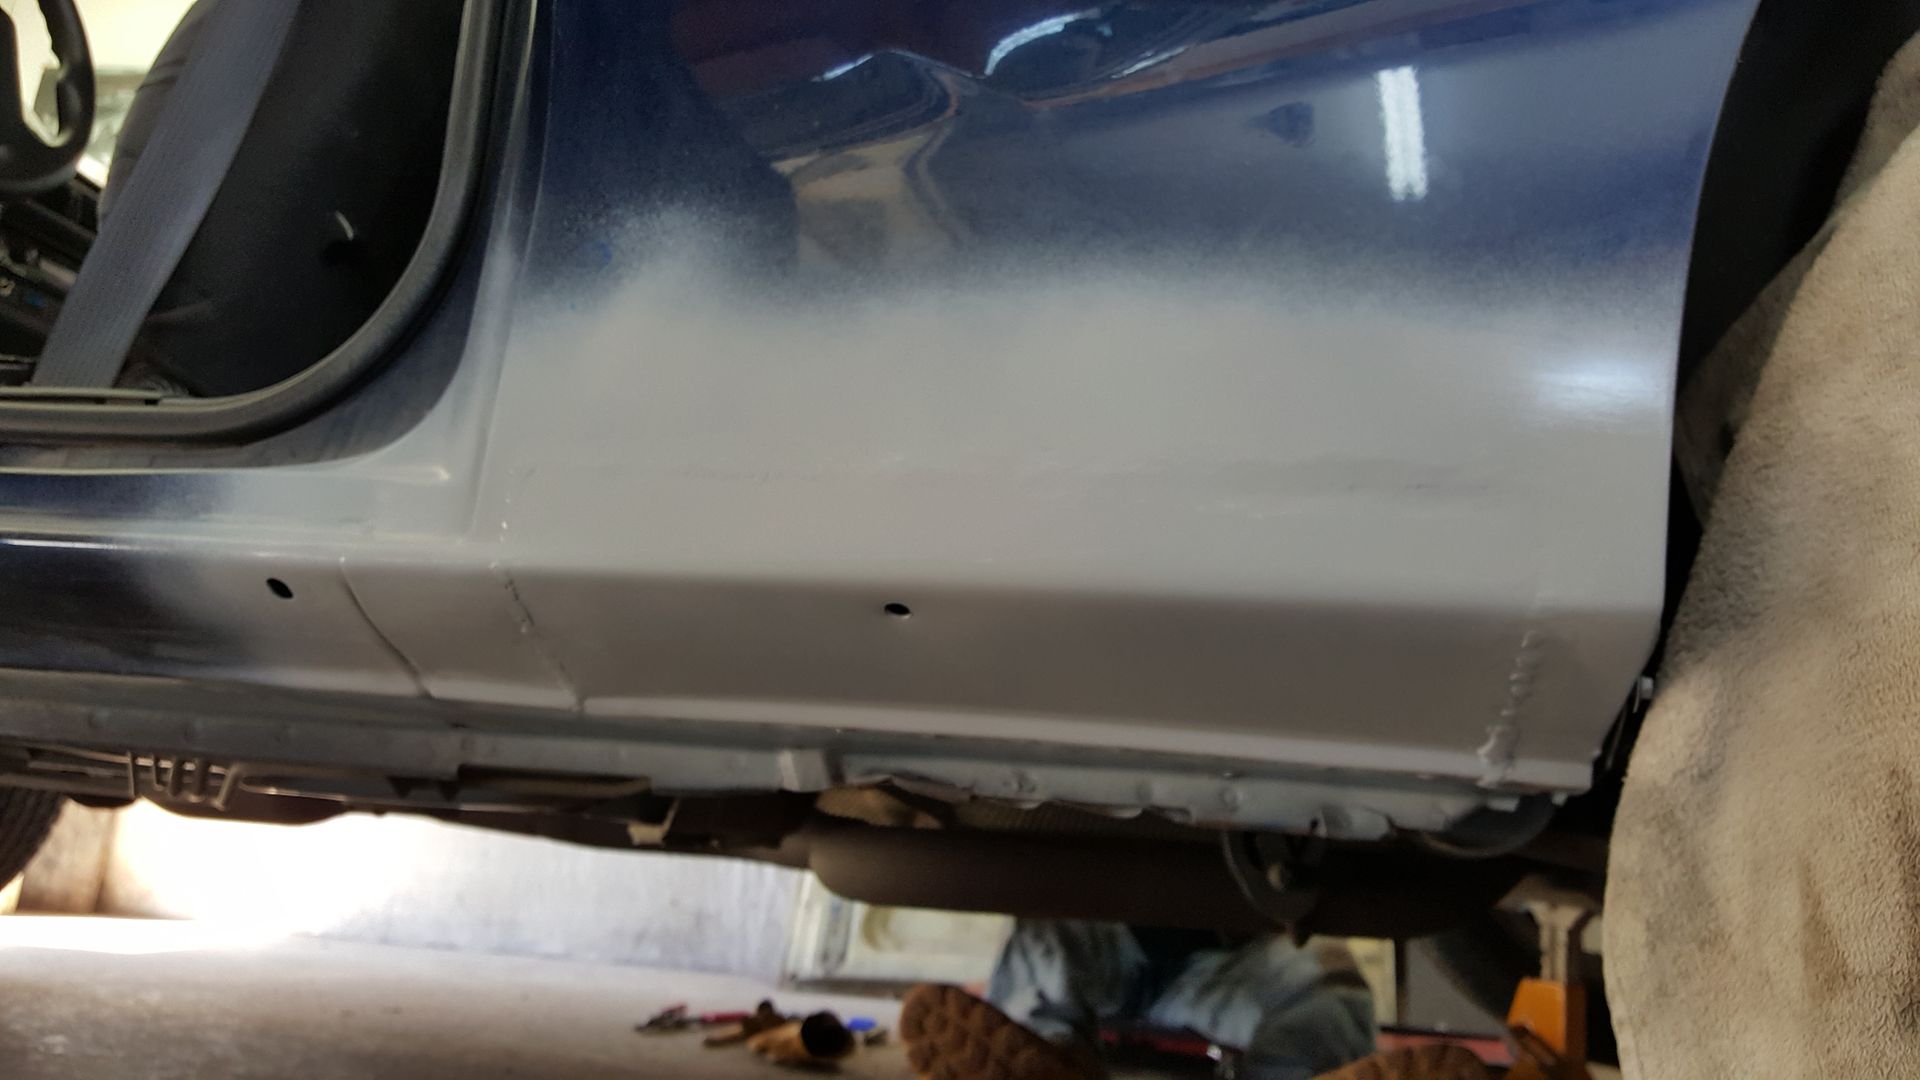
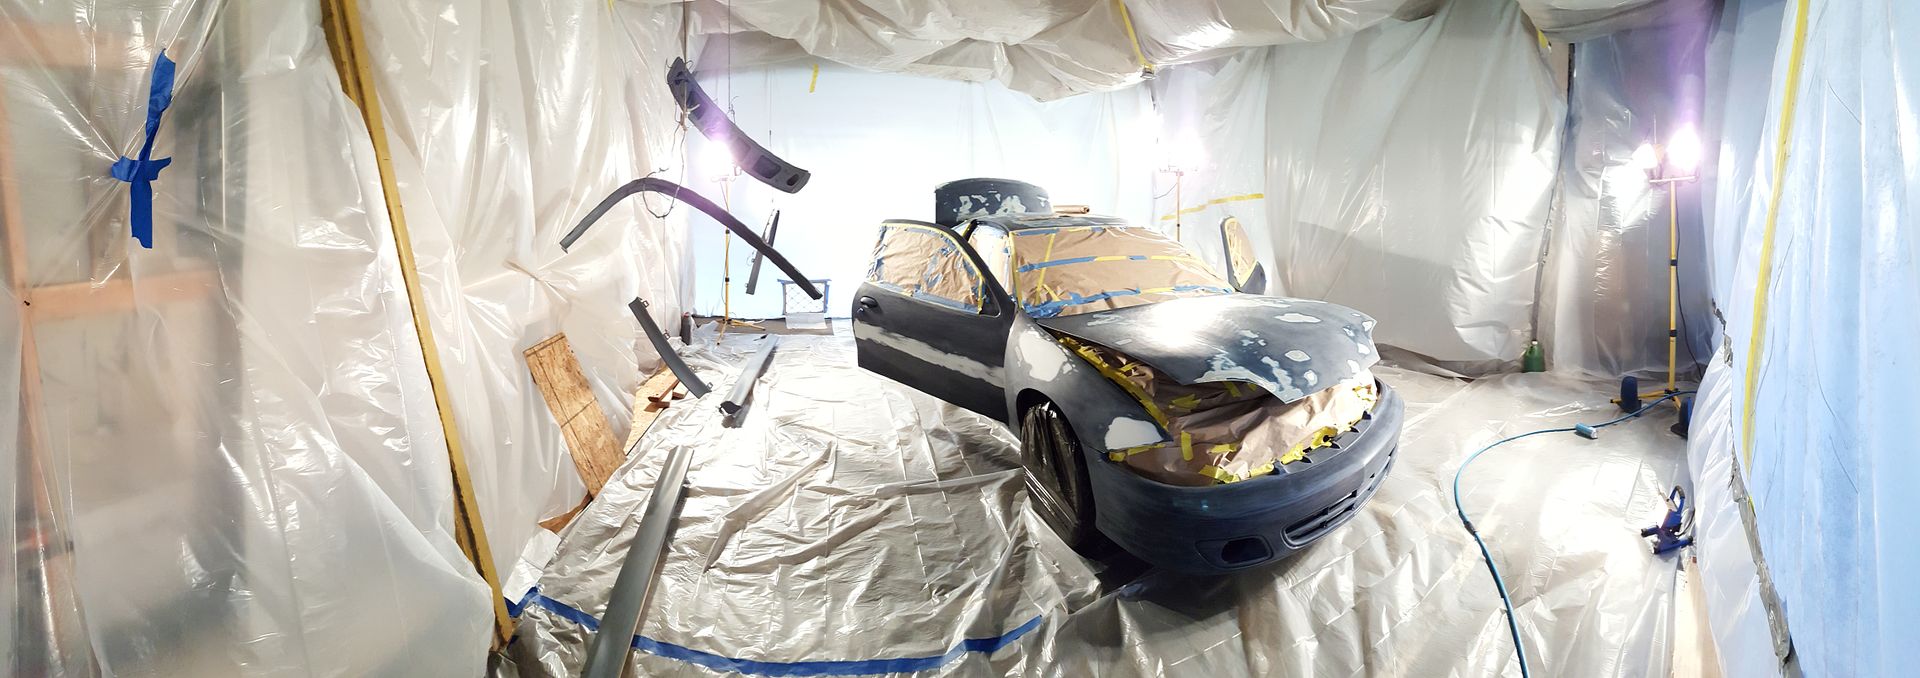
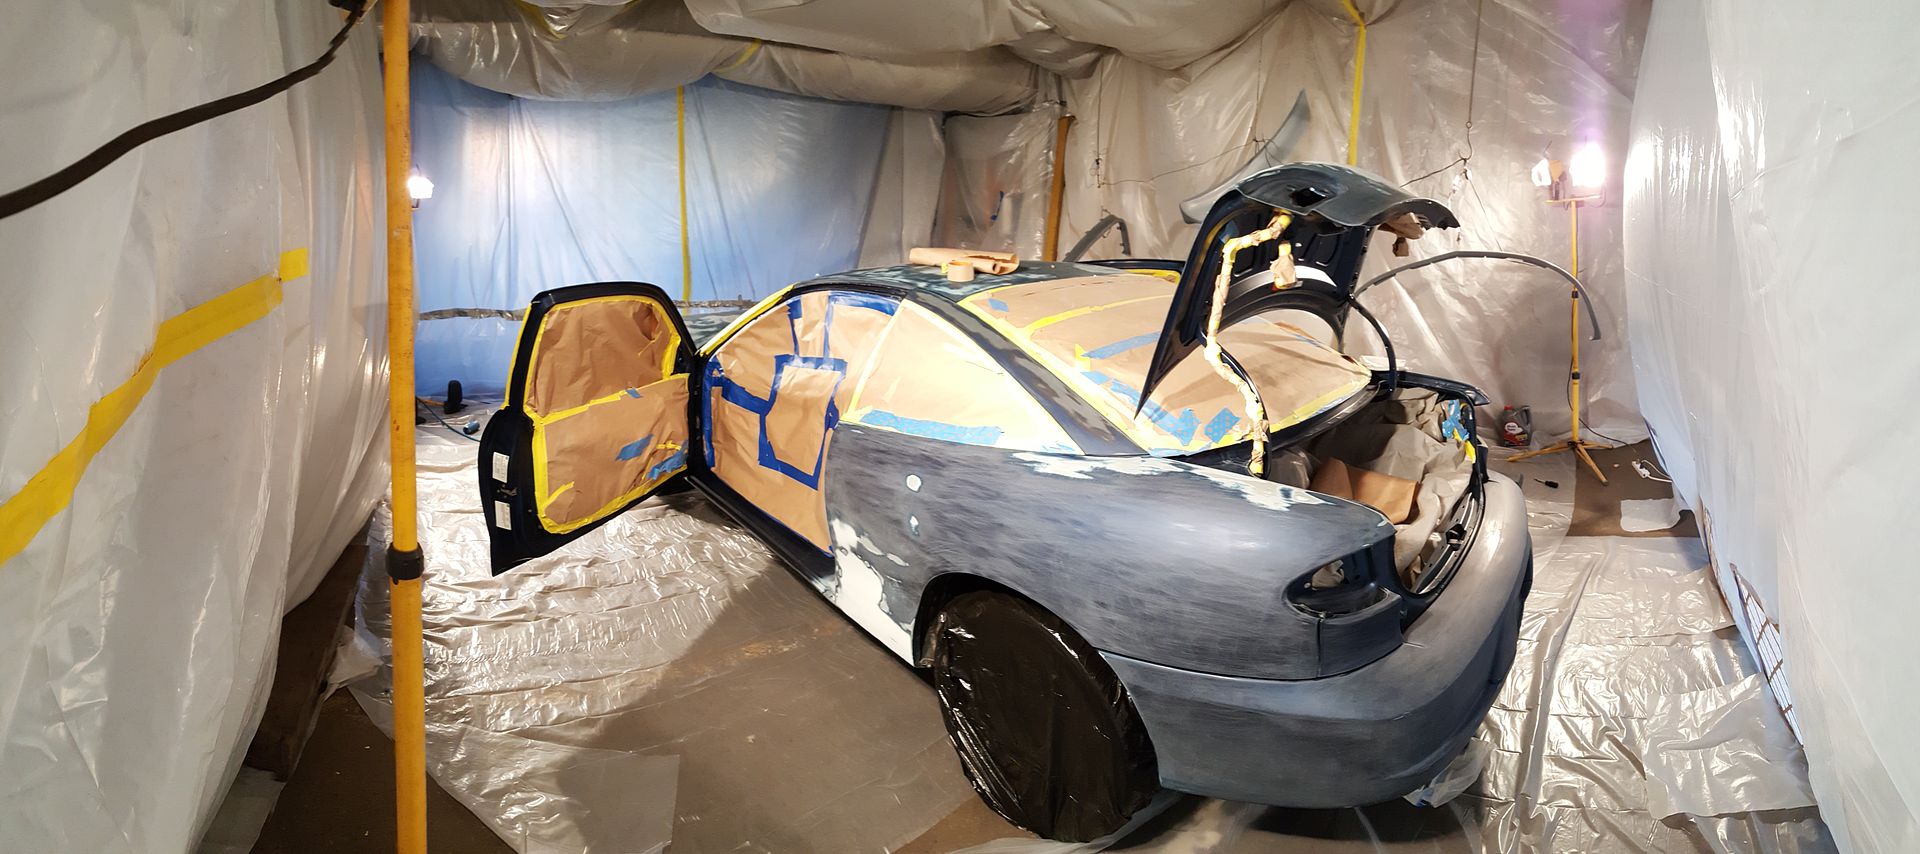
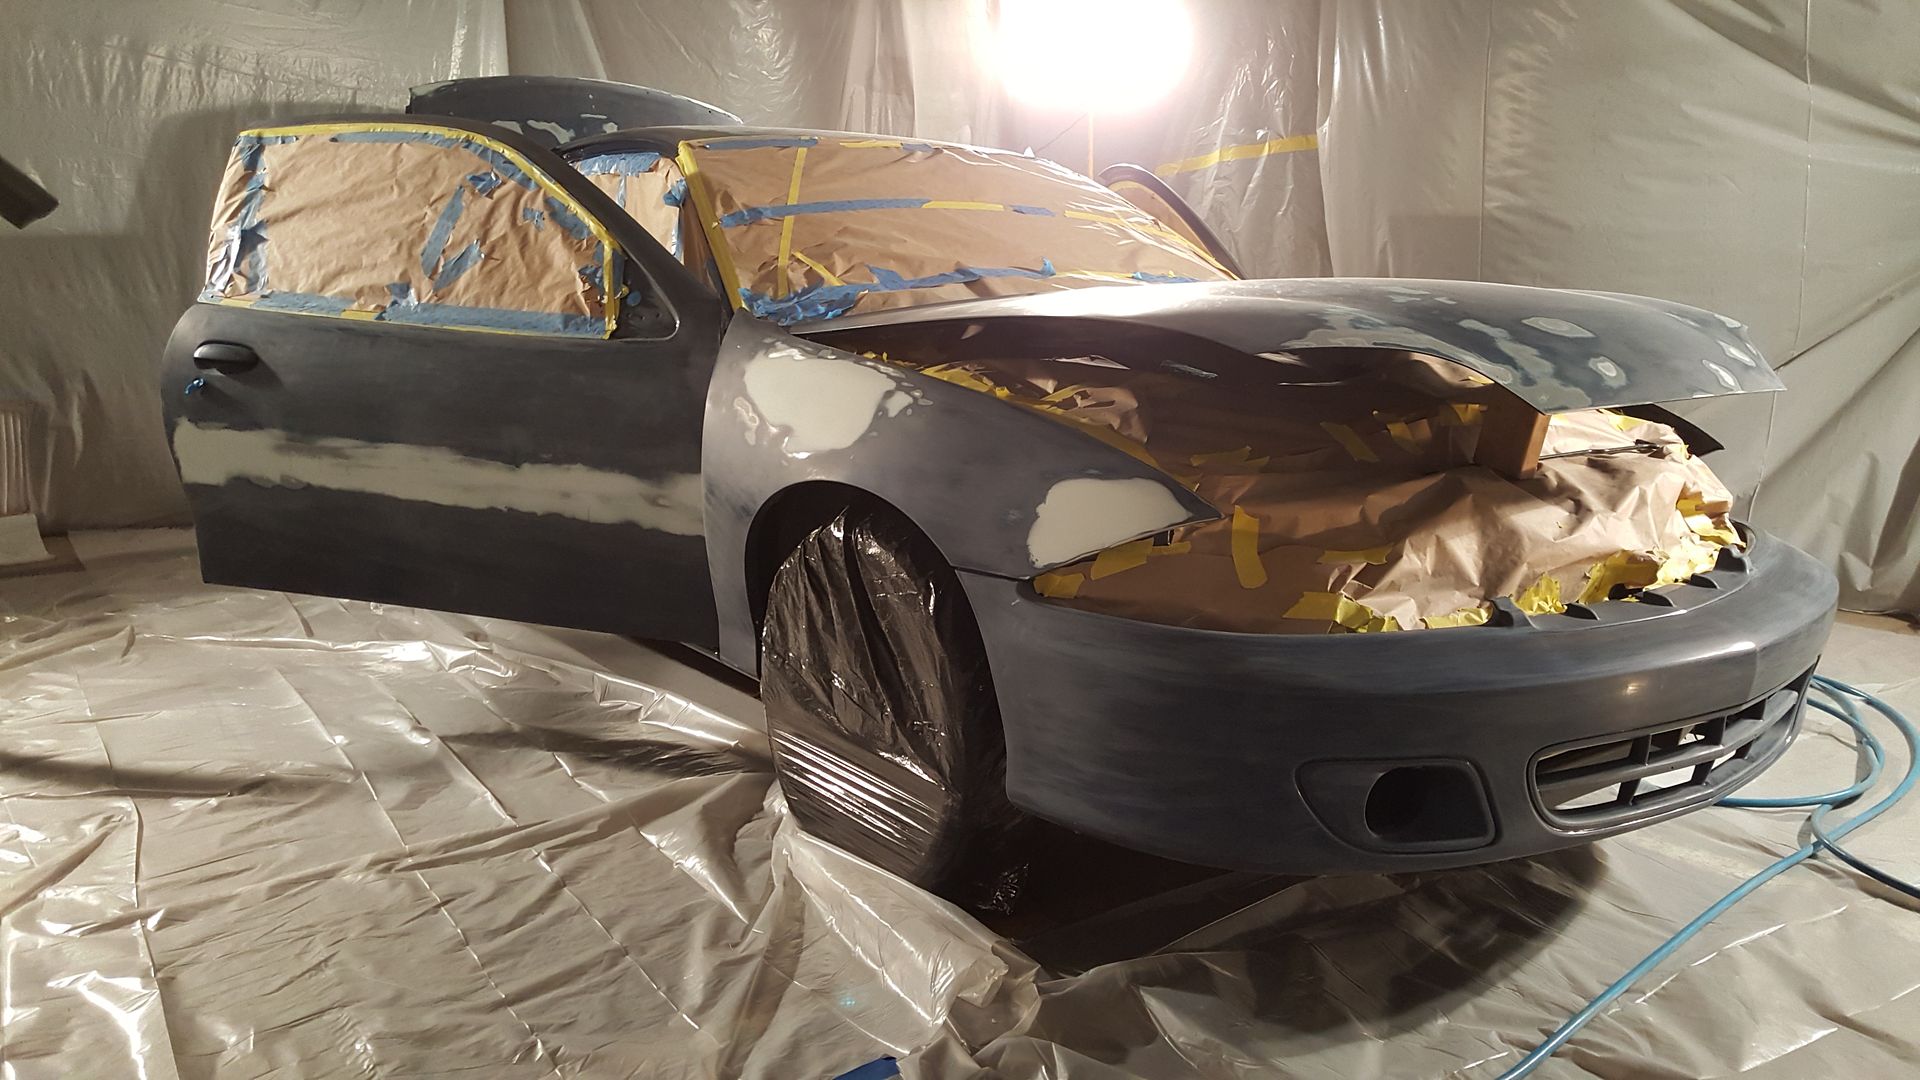
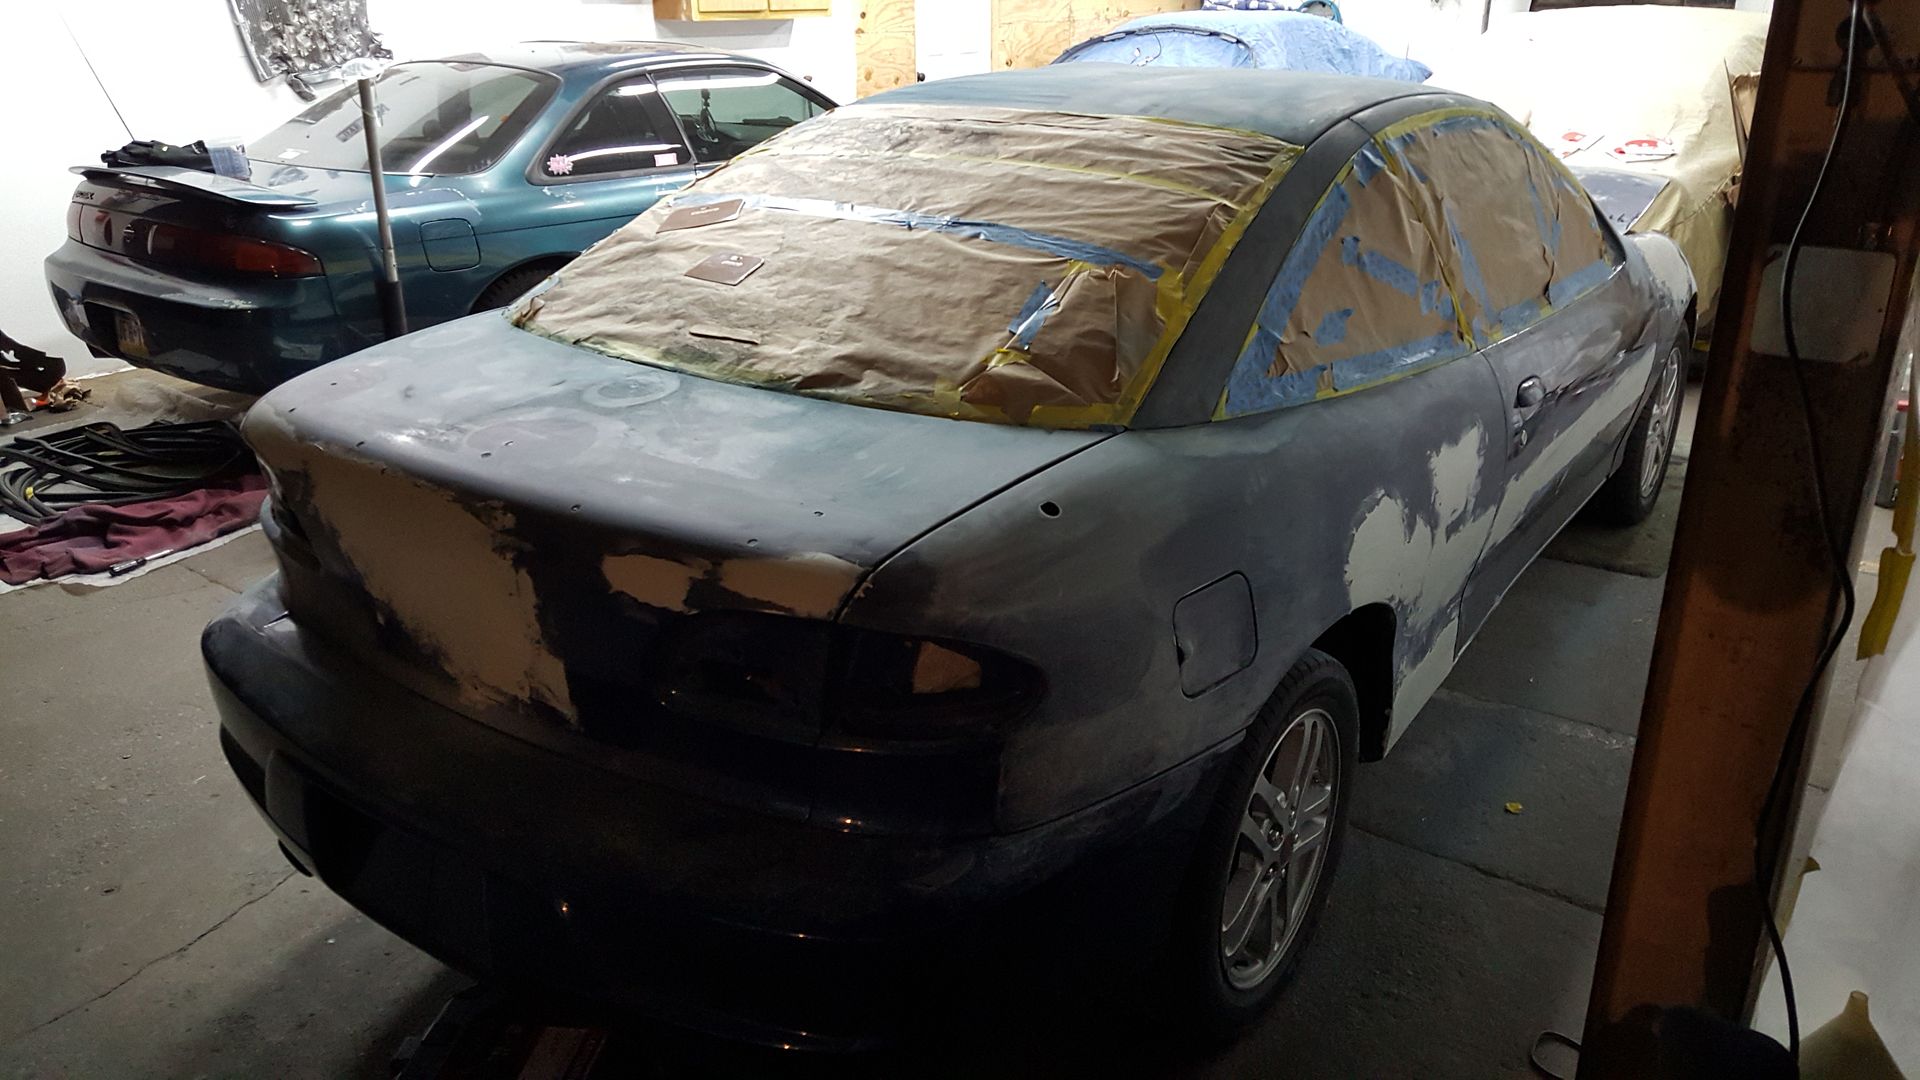
Hard at work last night so I didn't stop to take pictures until we were about to leave. Especially with how dirty my hands were. This was my first attempt ever at body work so I'm not sure how it's going to turn out but I'm thinking it's "not bad" at this point. Should clean up a bit after sanding tonight.
Things I've taken from this that you should remember if you're inexperienced with body work:
- Wear gloves dumbass (the filler will harden on your skin and it bonds pretty well, PITA to get off!)
- If you have long seams that need to be filled, smooth them parallel to the seam. Crossing the seam brings it out rather than filling the low spot
- Probably should wear a respirator or dust mask atleast and avoid the fumes. It's some strong smelling goop that's for sure. A quick headache for me.
- Take 10-15 mins to practice your mixing of hardener to filler before you do it on the car. TRUST ME. You should be mixing 1 part of hardener for 50 parts of filler; that's your goal when eye-balling the amount you add. Lots of Youtube videos on this for the visual learners. You can always add more but if you add too much it will solidify pretty quick, within 15 mins. My first batch hardened up on me and became unworkable. I wasn't wearing gloves either and it was getting stiff and bonded to my fingers before I even realized it.
- After vigorously sanding the area (down to metal where possible) make sure to clean it with a prep solvent (I used SEM prep) to remove dust, dirt, grease, etc. to ensure proper adhesion.
More to come soon.
2002 Blue LS Sport Coupe 5-speed
My Paint Restoration Project -->
http://www.j-body.org/forums/read.php?f=11&i=170933&t=170933
Lookin good!
-Markus
2002 Yellow Cavalier LS Sport *SOLD*
2000 White Cavalier Sedan
Check it out! -->
Flickr

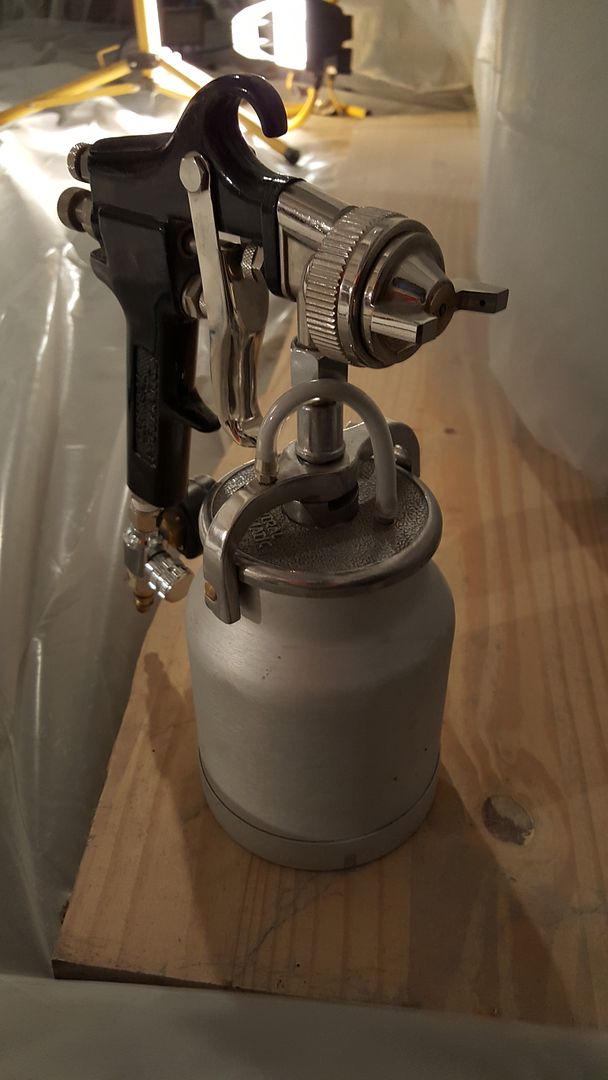
Ended up getting an air separator that plumbs to the tank rather than inline. I actually kept the inline filter as well to drain off excess moisture and to see the moisture coming through the line. That helped a lot and the moisture issue basically went away then.
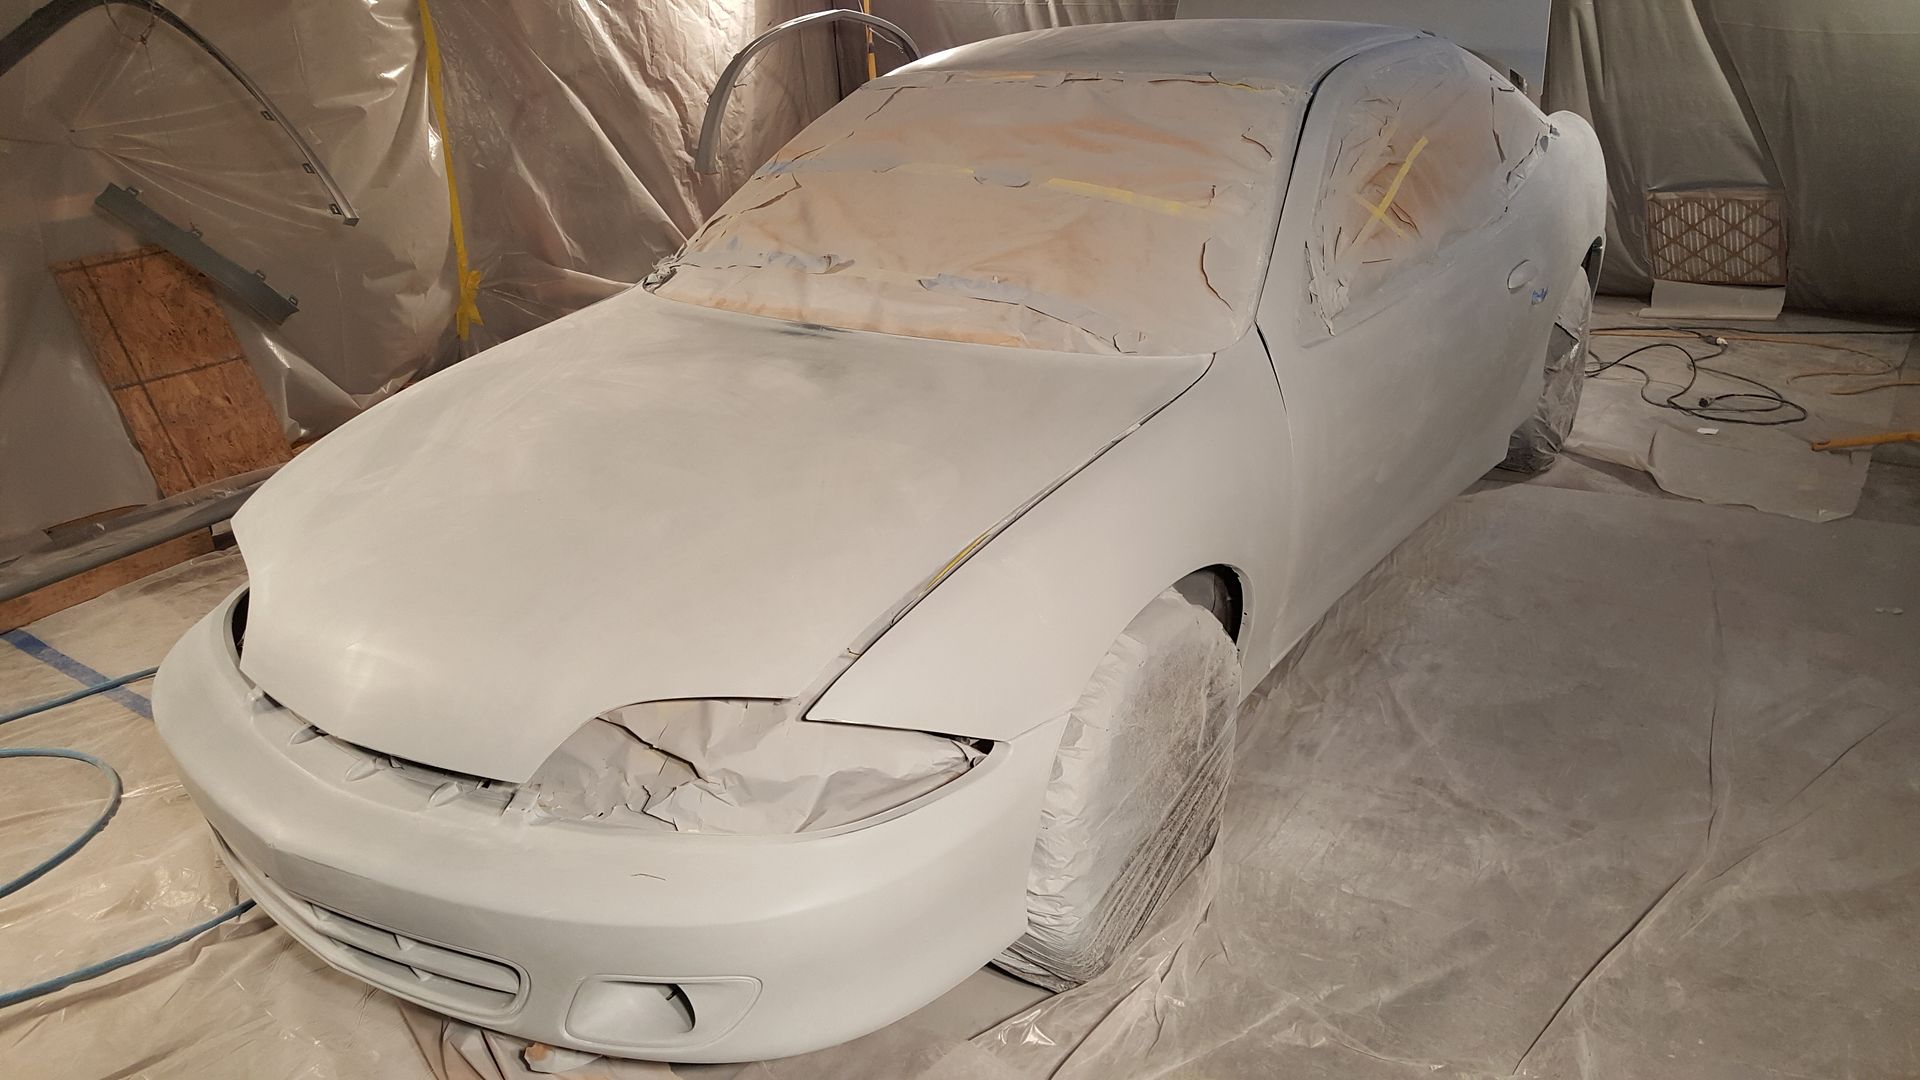
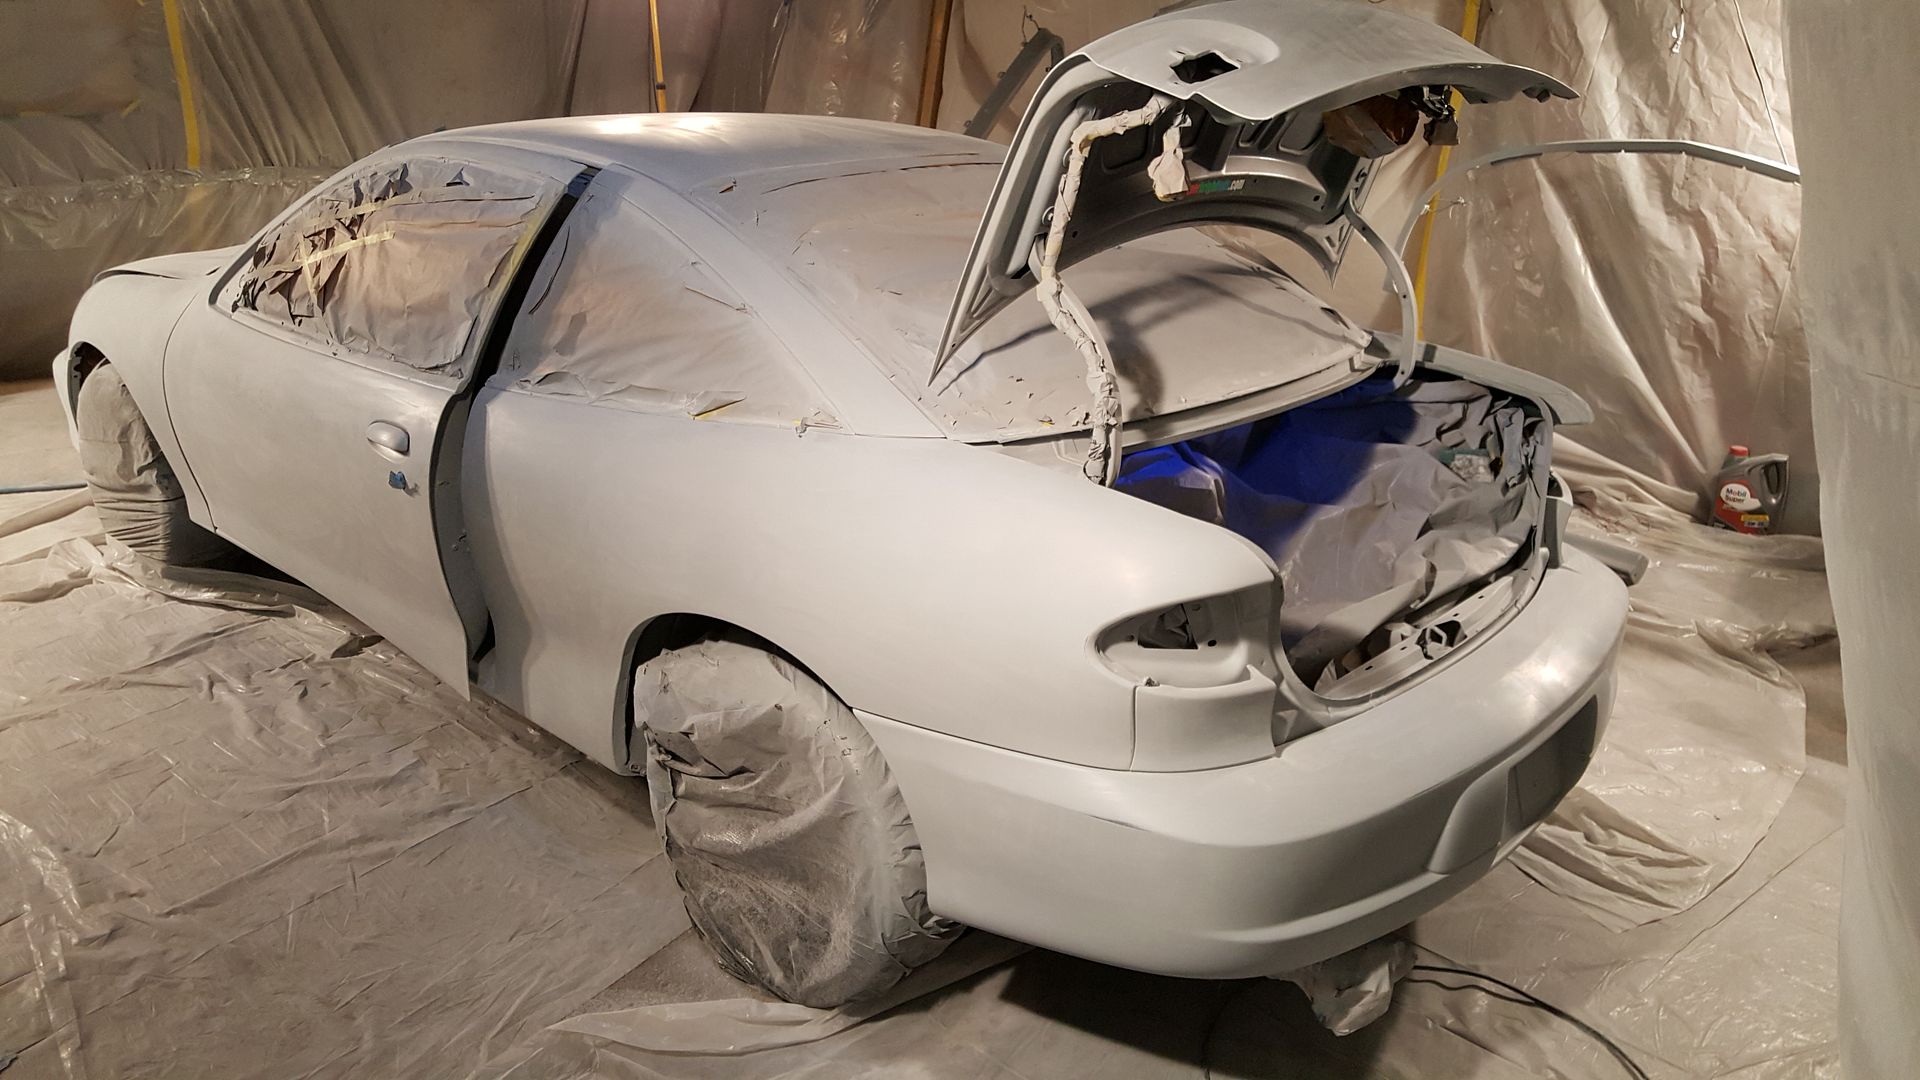
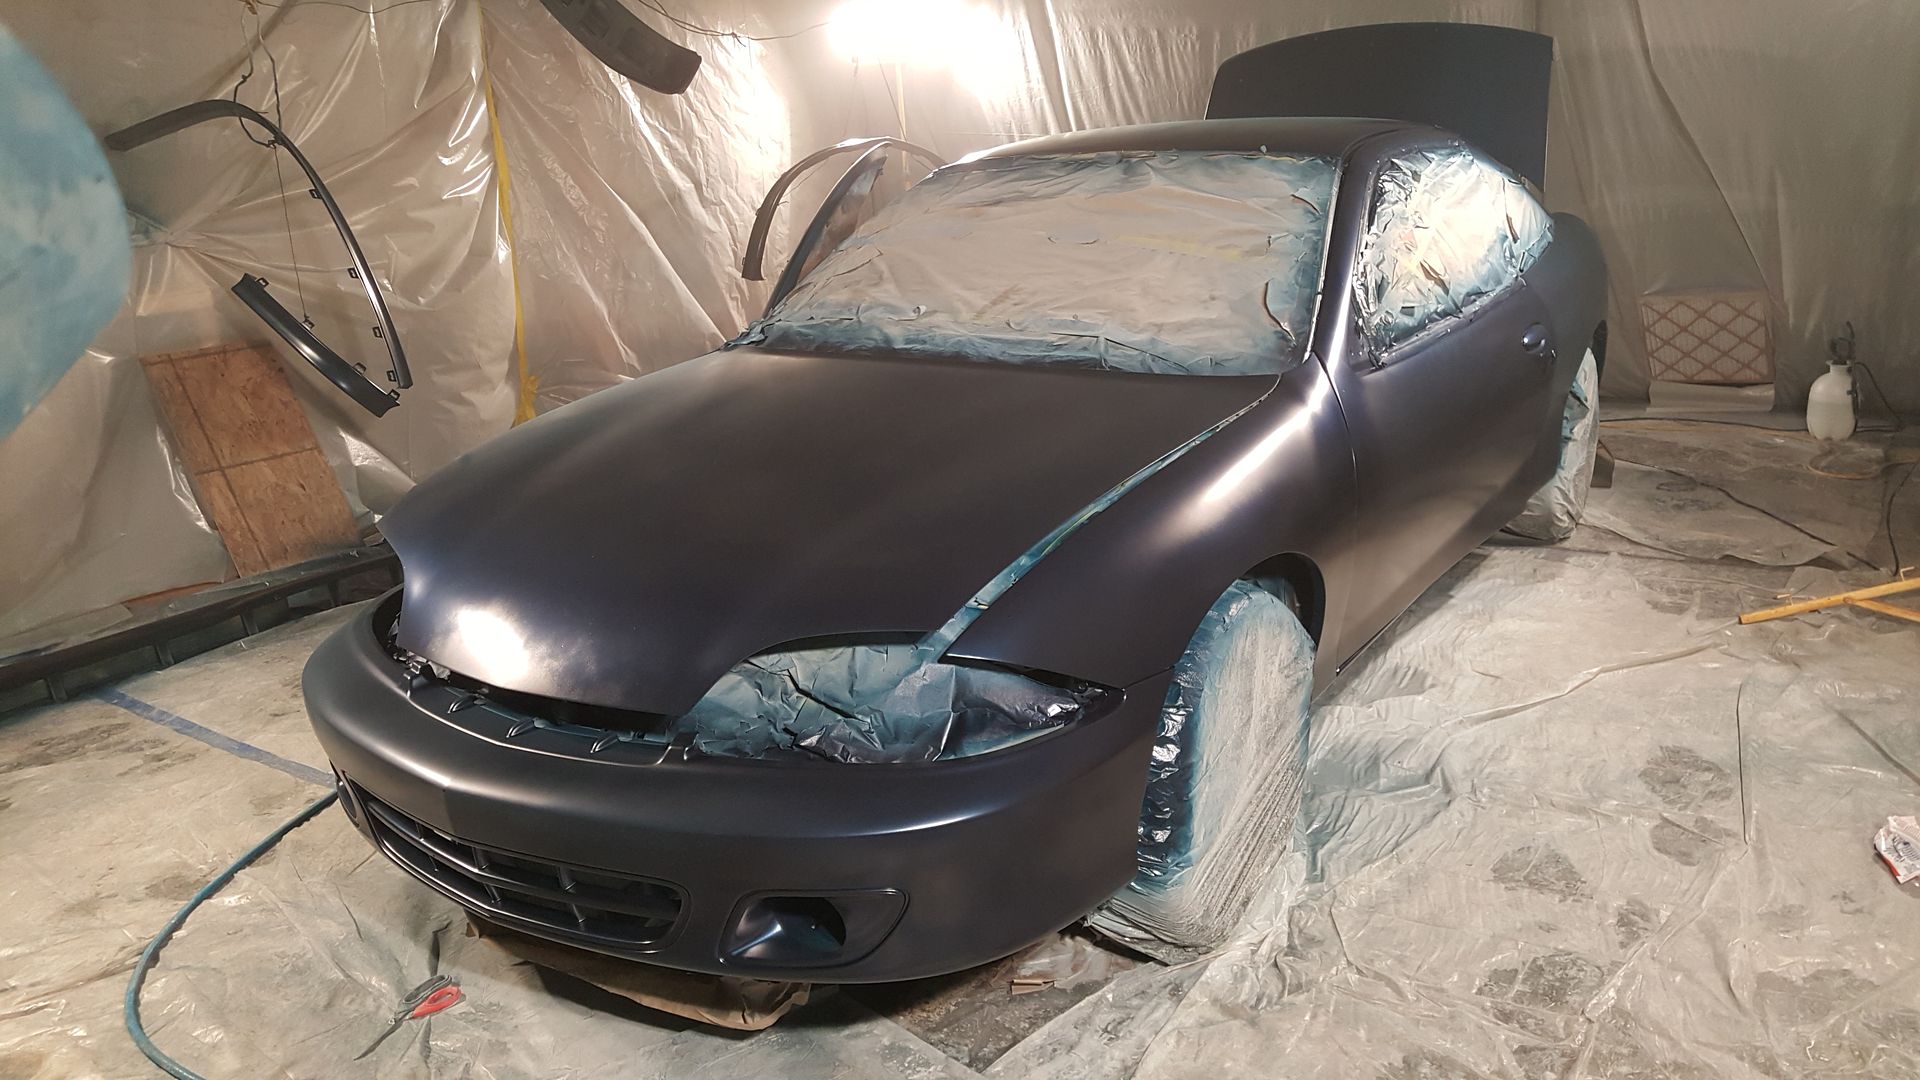
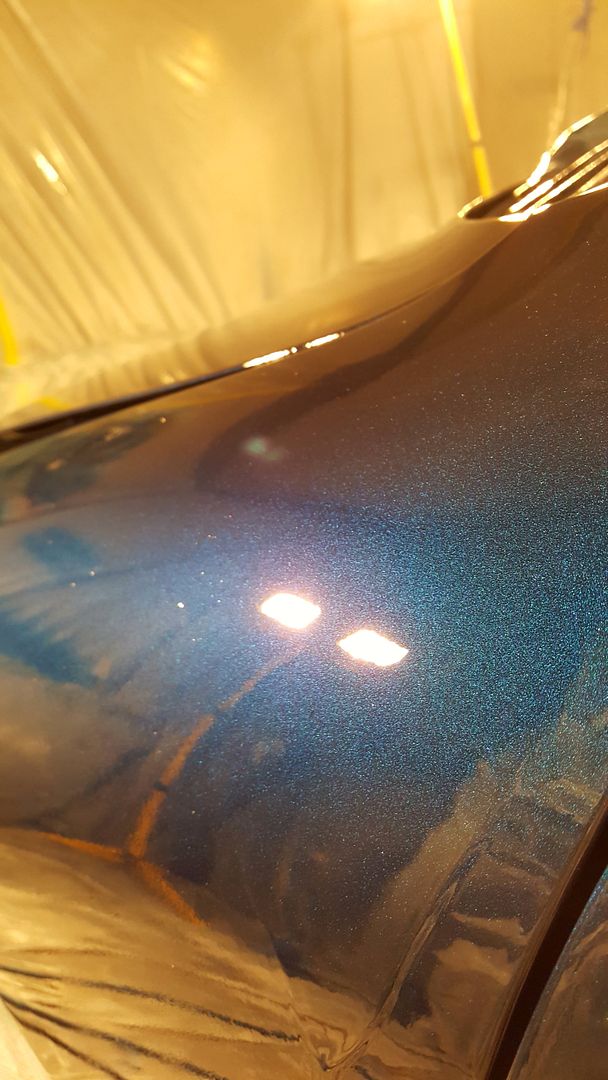
After 3 weeks of work, 4 nights painting over 4 gallons of paint, countless paint repairs during the process, and a few "oh sh*t" moments, the car is finally finished. The booth we made ended up drawing in a bunch of dust and obviously spraying paint made a lot of dust too. We used alot of tack cloths and had to wipe everything down multiple times between coats. I actually ran out of paint and had to order more which set me back even more. All in all, I'm so glad I did this but I'm not planning on doing it again for a long, long time. I'll put up some more pics this weekend after we remove the tape and buff/polish the finish but here's a few teasers.
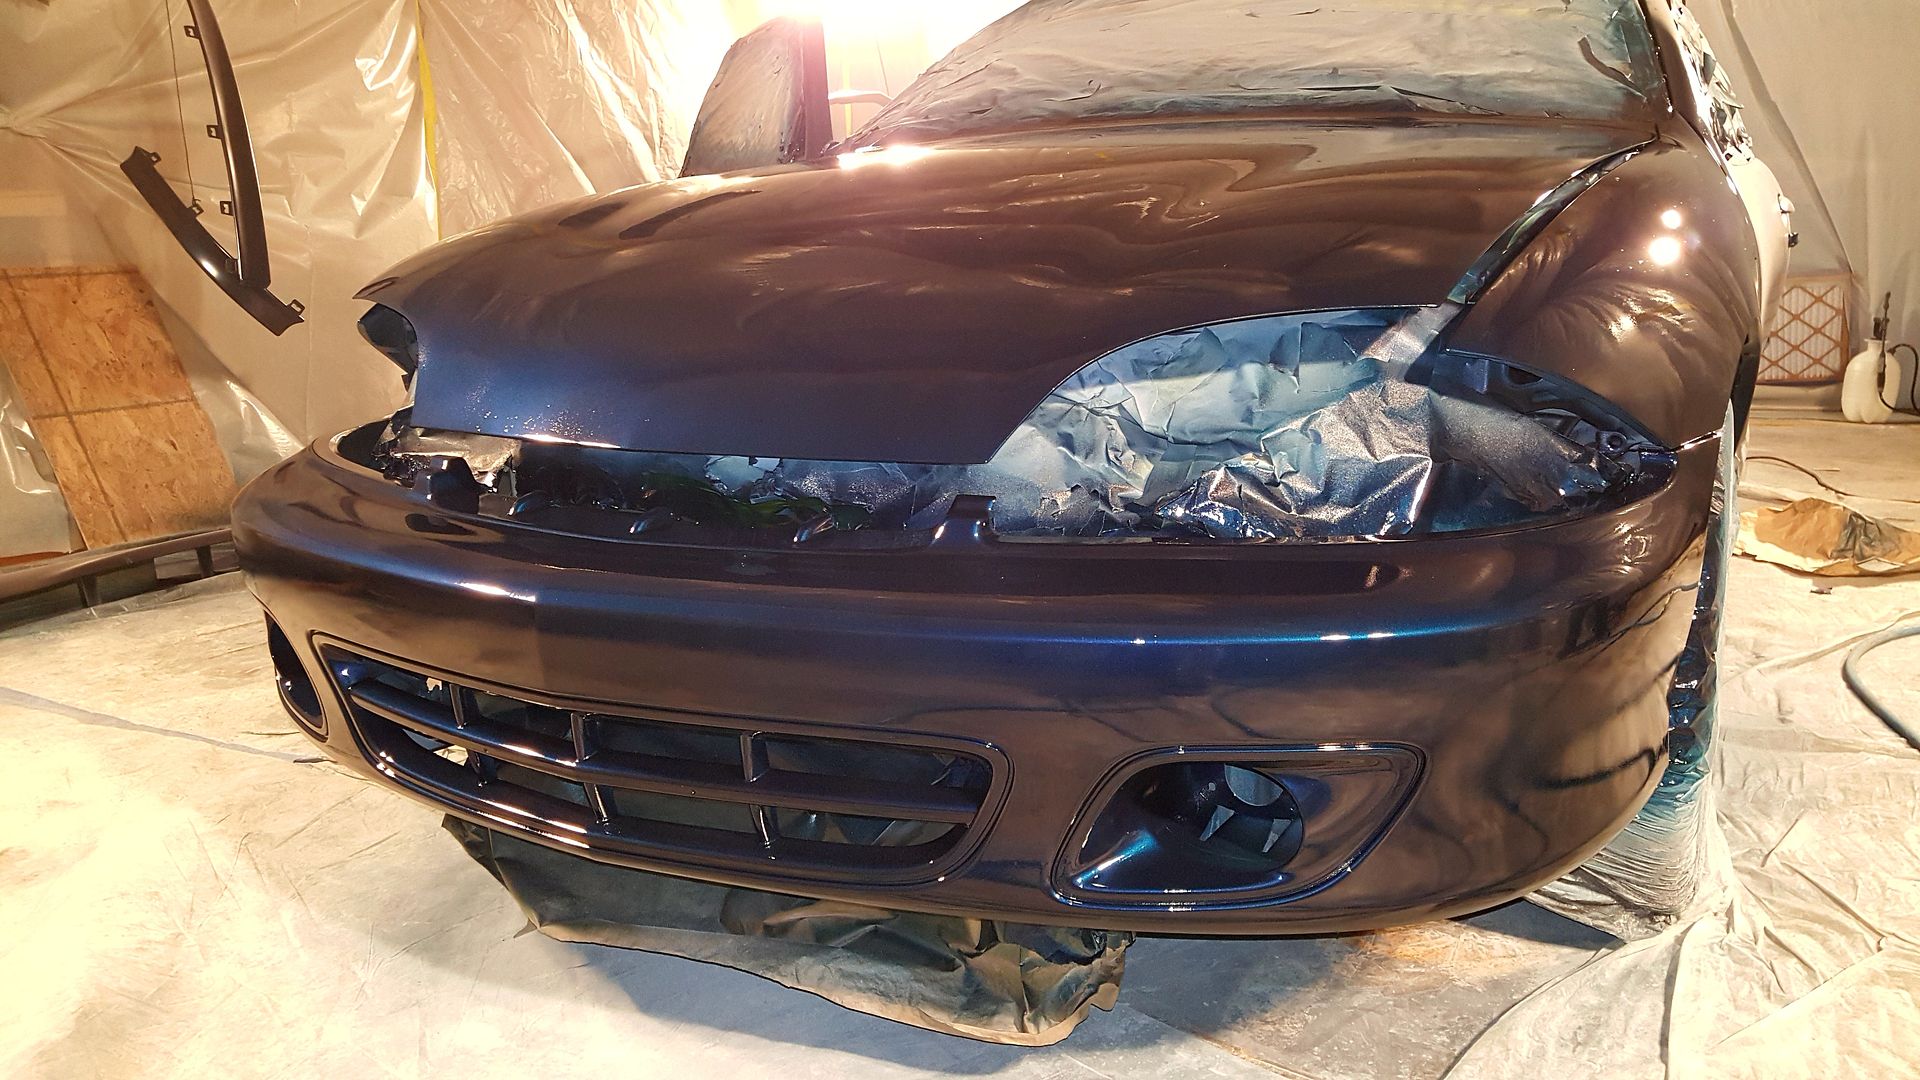
It almost looks dull in this picture because of the dust

2002 Blue LS Sport Coupe 5-speed
My Paint Restoration Project -->
http://www.j-body.org/forums/read.php?f=11&i=170933&t=170933
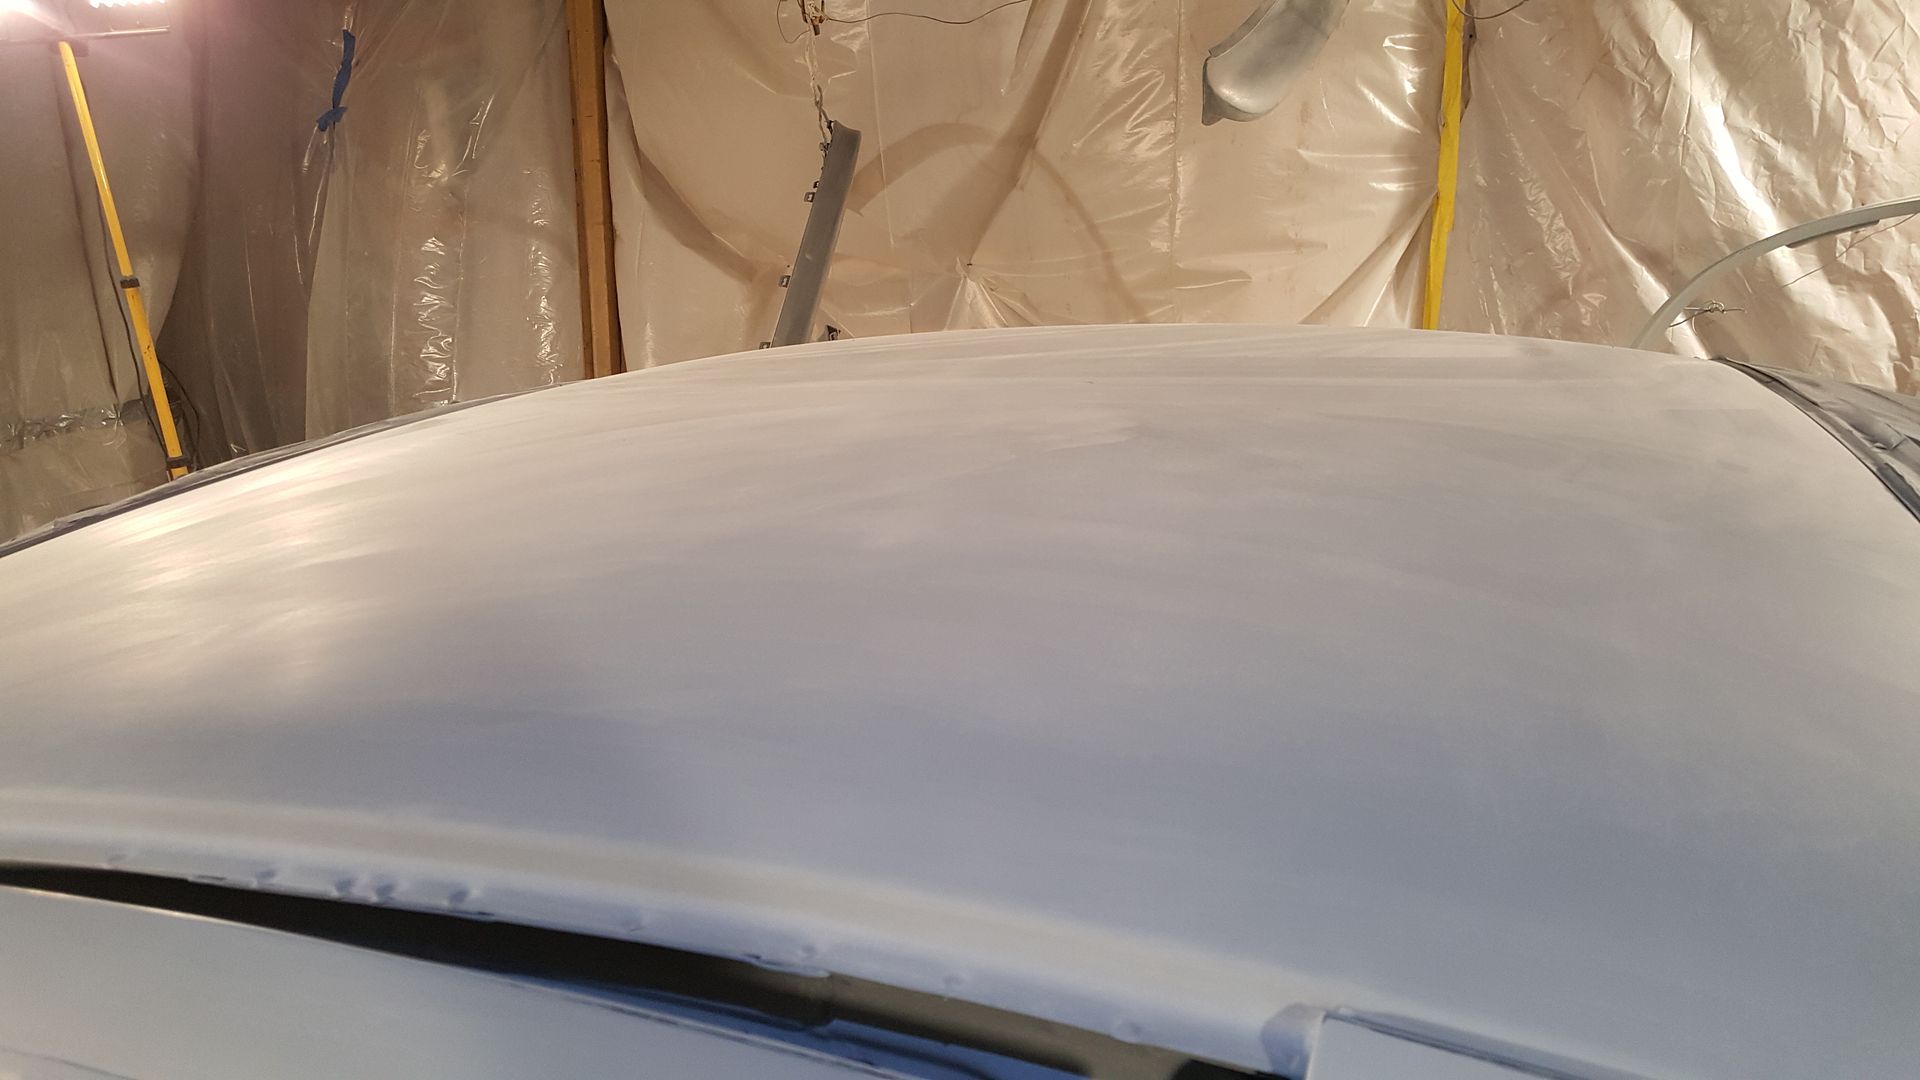
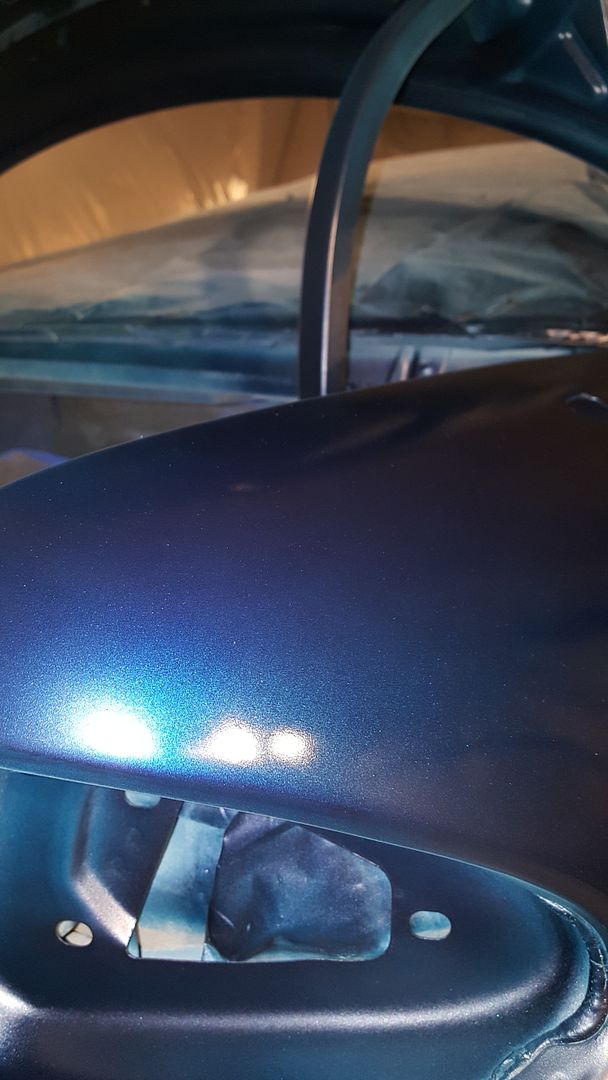
Been hard at work wet sanding and buffing the paint in an attempt to get it to shine properly. It's definitely obvious that this was my first paint job when really looking the car over. So overall good from far, far from good. I'll put up a few more pictures once I get it put back together and outside in the sun.
2002 Blue LS Sport Coupe 5-speed
My Paint Restoration Project -->
http://www.j-body.org/forums/read.php?f=11&i=170933&t=170933
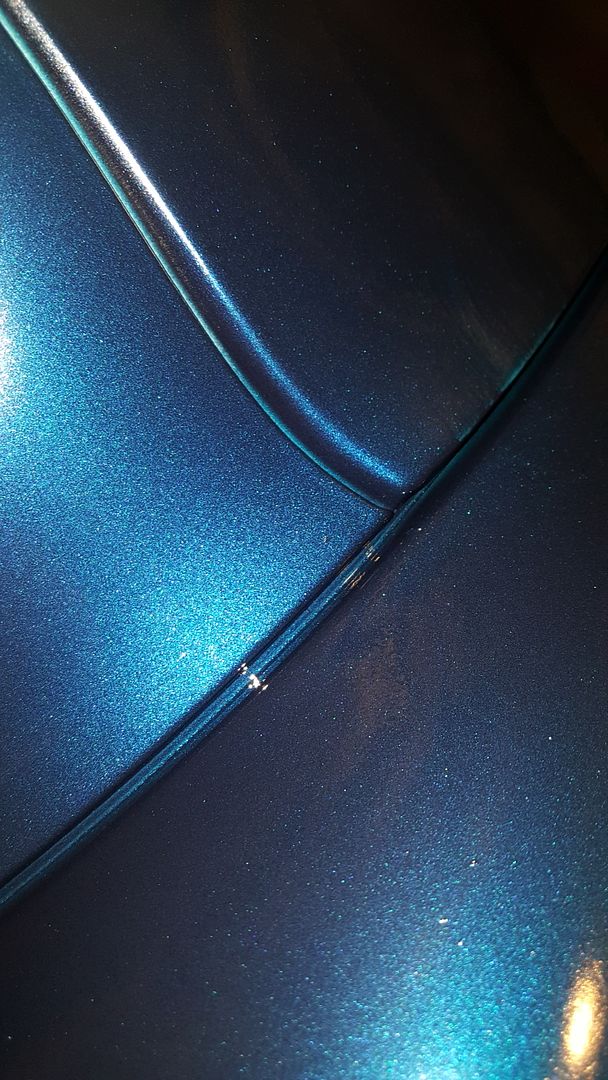
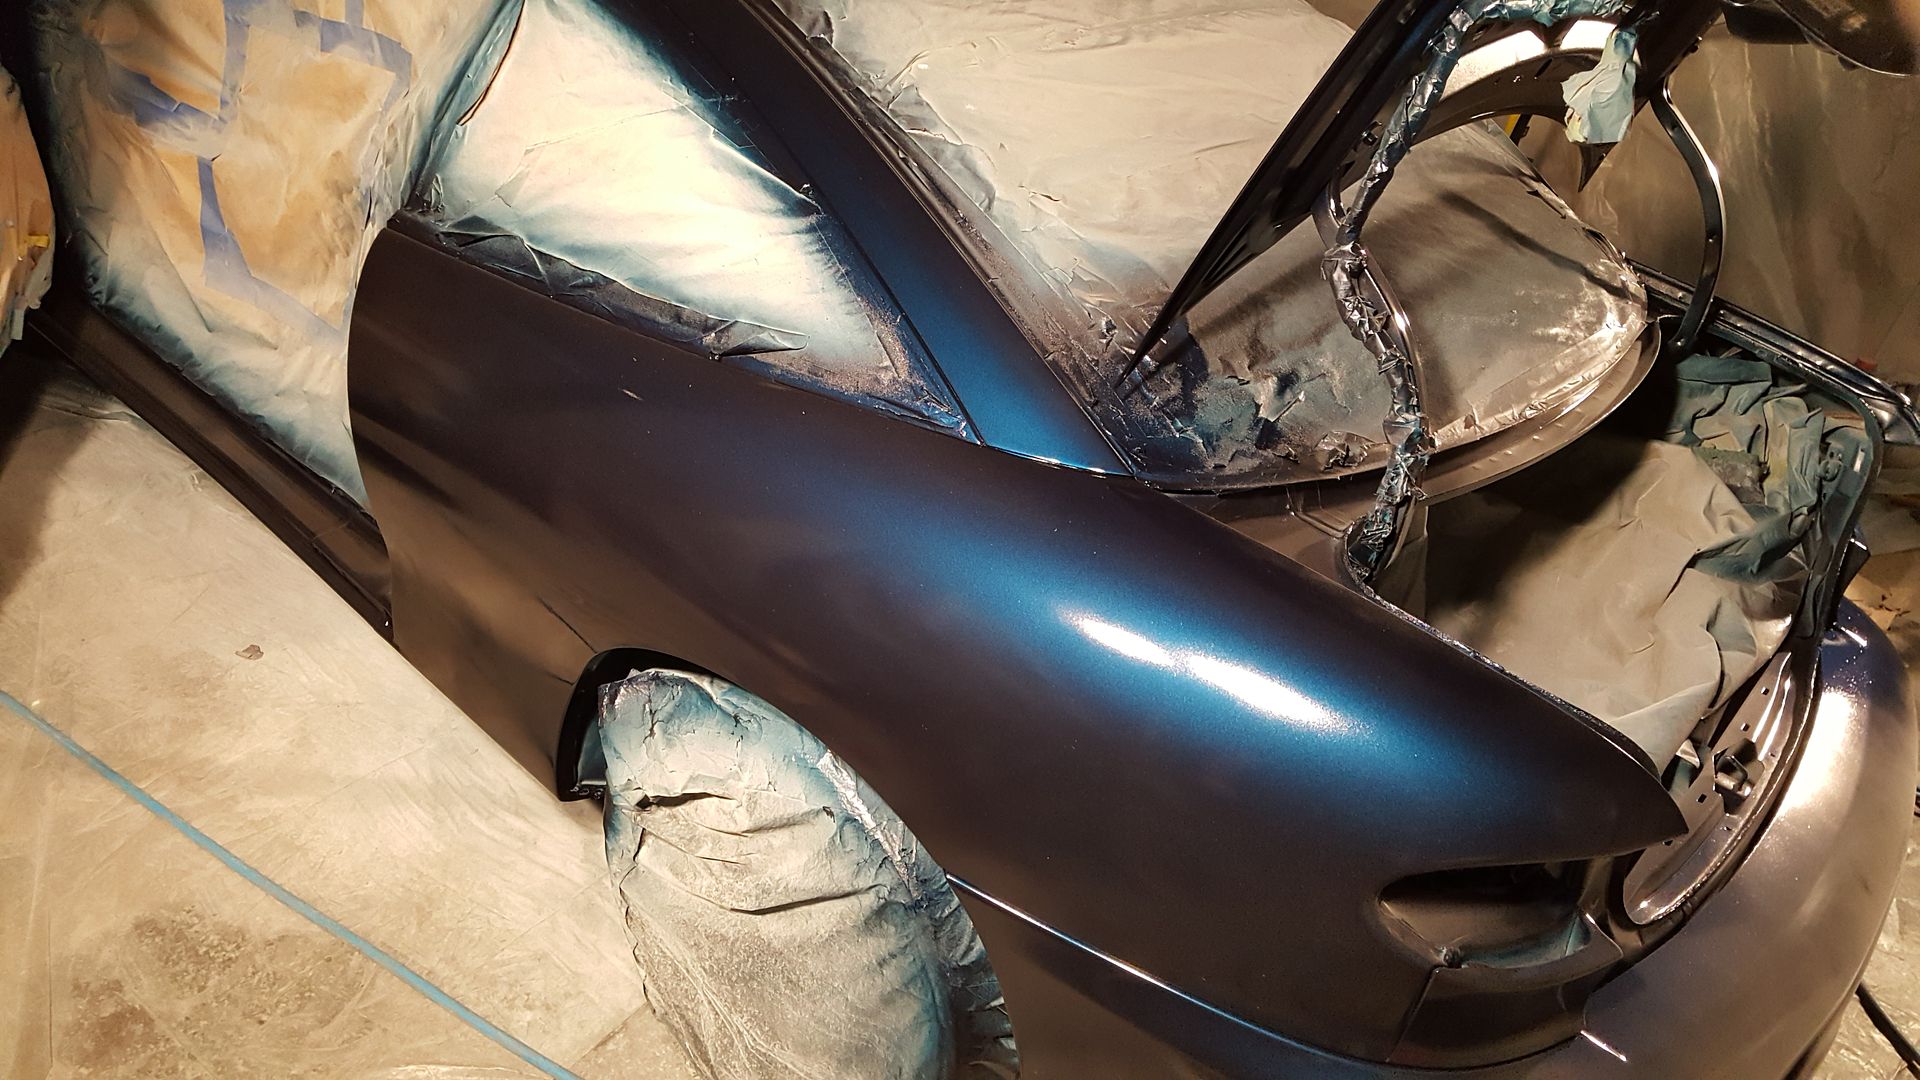
Another round of buffing, some polish, and a few more little tid bits and i'll finally be done! What a project this has been... In the near future I will be doing some secondary weekend-long projects like painting the drums and calipers, wiper arms, rear wheel wells (because they weren't removed like the front so they got oversprayed), and there are a good amount of places where the paint needs more clear or even more color. It's never going to be perfect but with the limited time that I had you can notice where certain things didn't get the time/attention they needed. I'll use this as an opportunity to do paint correction and learn how to work clear coat properly. Still though, the car looks so much better than it did before. Tomorrow I will try and get some pictures in the sun of the completed car but for now here's a couple teasers. Only thing I'm not sure about now is whether to put the red bowties back on or leave it completely debadged? Oh and I'll be installing a 19" LED lightbar to the lower front bumper soon too, that will be interesting.
That driver's mirror was sanded but not buffed FYI
2002 Blue LS Sport Coupe 5-speed
My Paint Restoration Project -->
http://www.j-body.org/forums/read.php?f=11&i=170933&t=170933
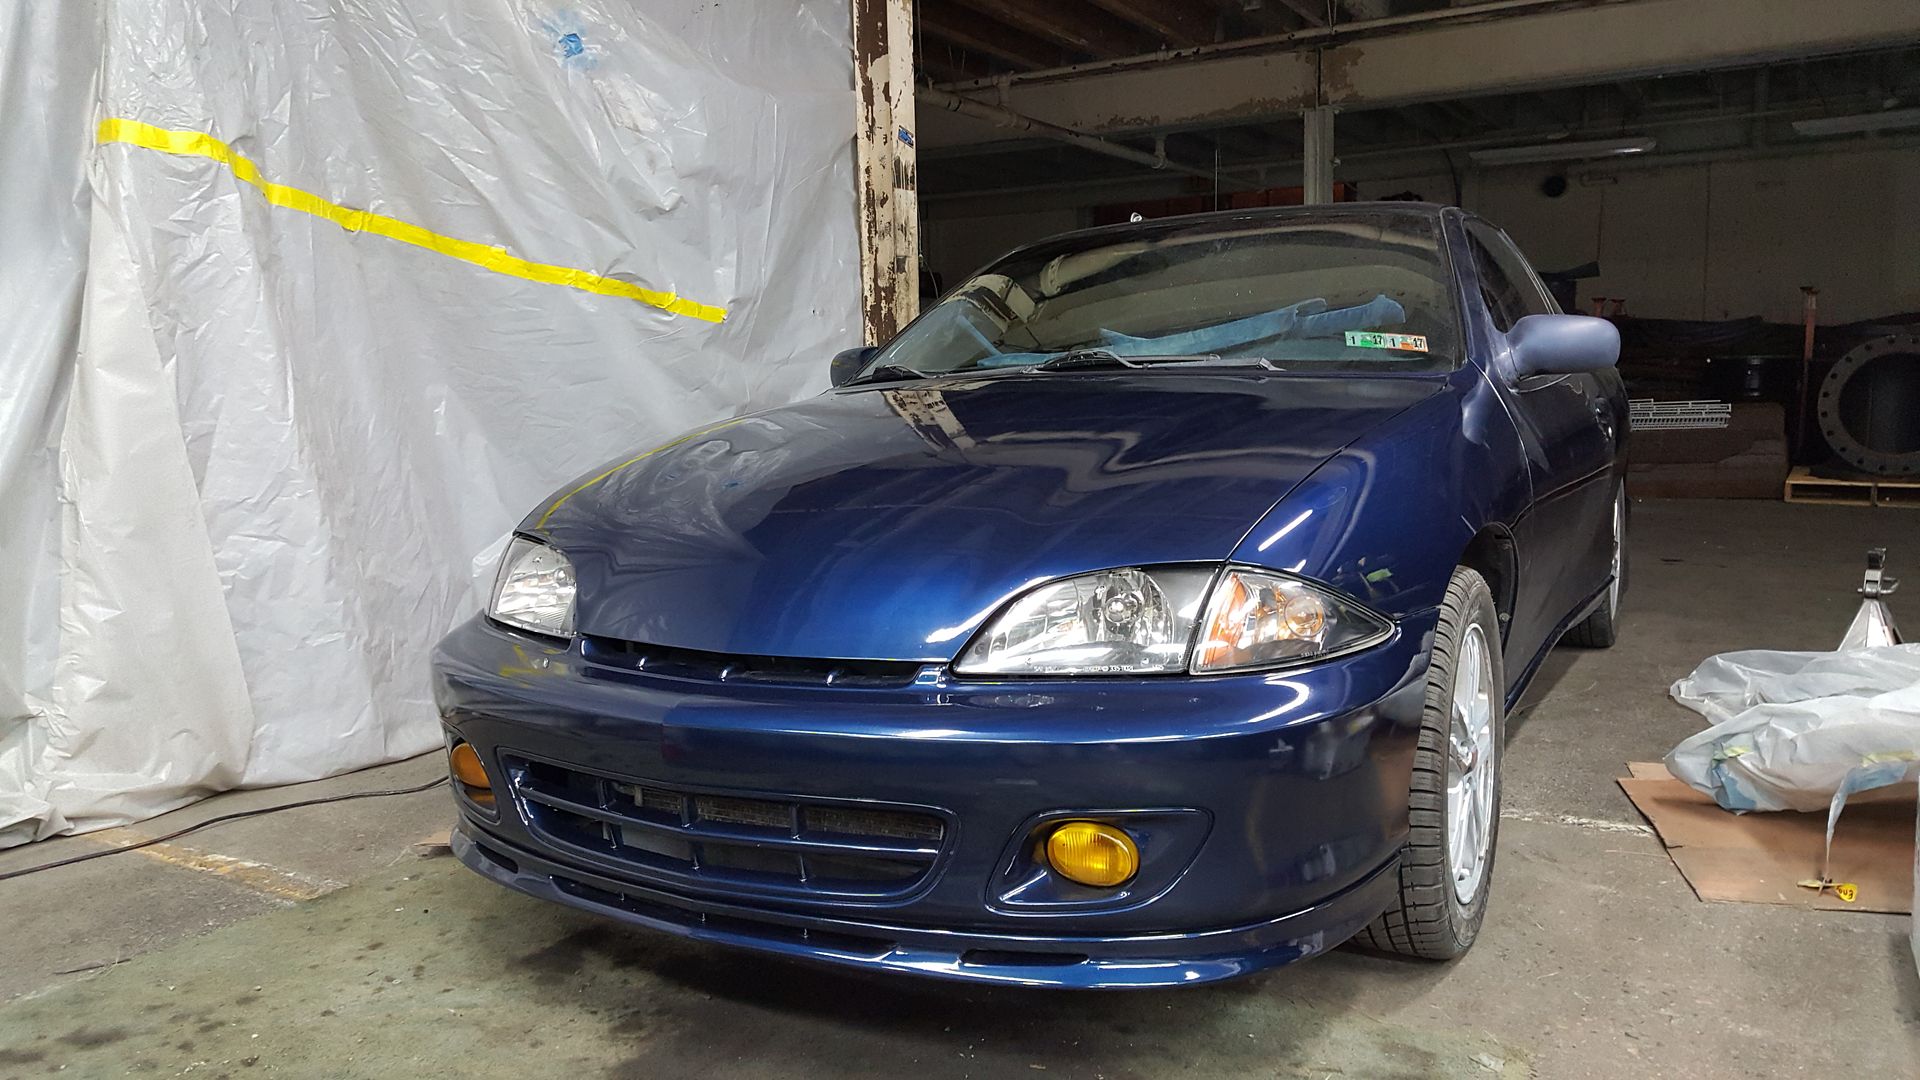
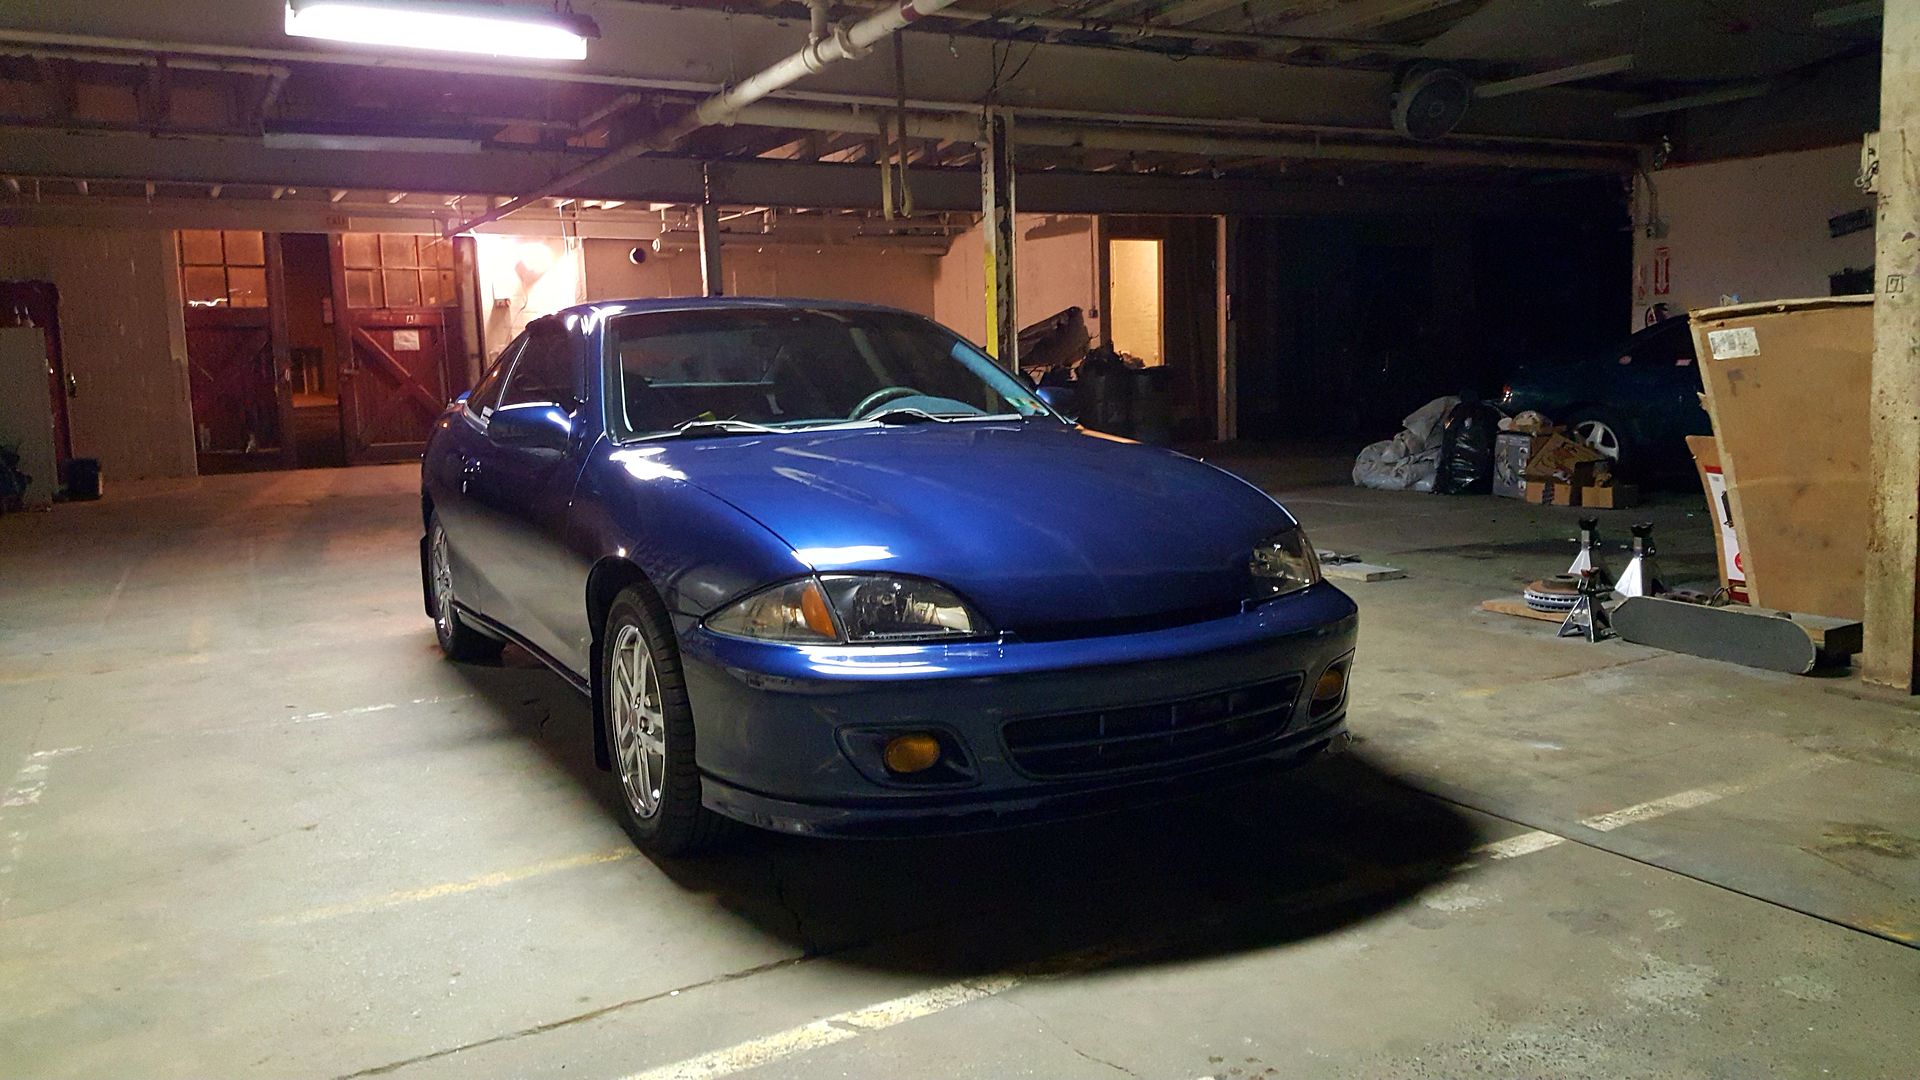
She's finally done. Haven't gotten any good pics in the sun yet but nobody wants to see those anyways, you'll notice all the imperfections lol. Regardless it came out wonderful and it's leaps and bounds above what it was before. Here's the couple shots I got before she rolled out of the garage for the first time in 2 weeks. This is actually the exact spot it sat when it was getting painted. Unfortunately we were borrowing the space so the paint booth had to go
These pics are dark and just suck in general so I'll throw some good ones up next week with the lightbar installed.
2002 Blue LS Sport Coupe 5-speed
My Paint Restoration Project -->
http://www.j-body.org/forums/read.php?f=11&i=170933&t=170933
Good job man. Ppl don't realize the amount of work that goes into restoration. Time is perfection. Wanna do mine next? :p
ReD RaiN
No kidding! And honestly, I'm really not even happy with it overall. Needs more clearcoat everywhere, so much orange peel, mirrors need redone, spoiler needs redone, etc, etc. Ugh. I'm going to get a exact match spray can and do a few things and the rest I'm gonna give it the bird and just drive it. Looking to do Eibach Sportlines and Koni sport yellows here soon along with the lightbar and then move on to buying a Subaru lol.
2002 Blue LS Sport Coupe 5-speed
My Paint Restoration Project -->
http://www.j-body.org/forums/read.php?f=11&i=170933&t=170933
Haha ya i think we all at some point thought bout giving up the cav and yet here we are..spending more and more time with them. Hey how did u go about shaving the trunk? Did u use a back plate or weld a piece over the entire hole or just cut a piece to fit in the hole. Looking to do mine soon.
ReD RaiN
T!M8!T wrote:Hey how did u go about shaving the trunk? Did u use a back plate or weld a piece over the entire hole or just cut a piece to fit in the hole. Looking to do mine soon.
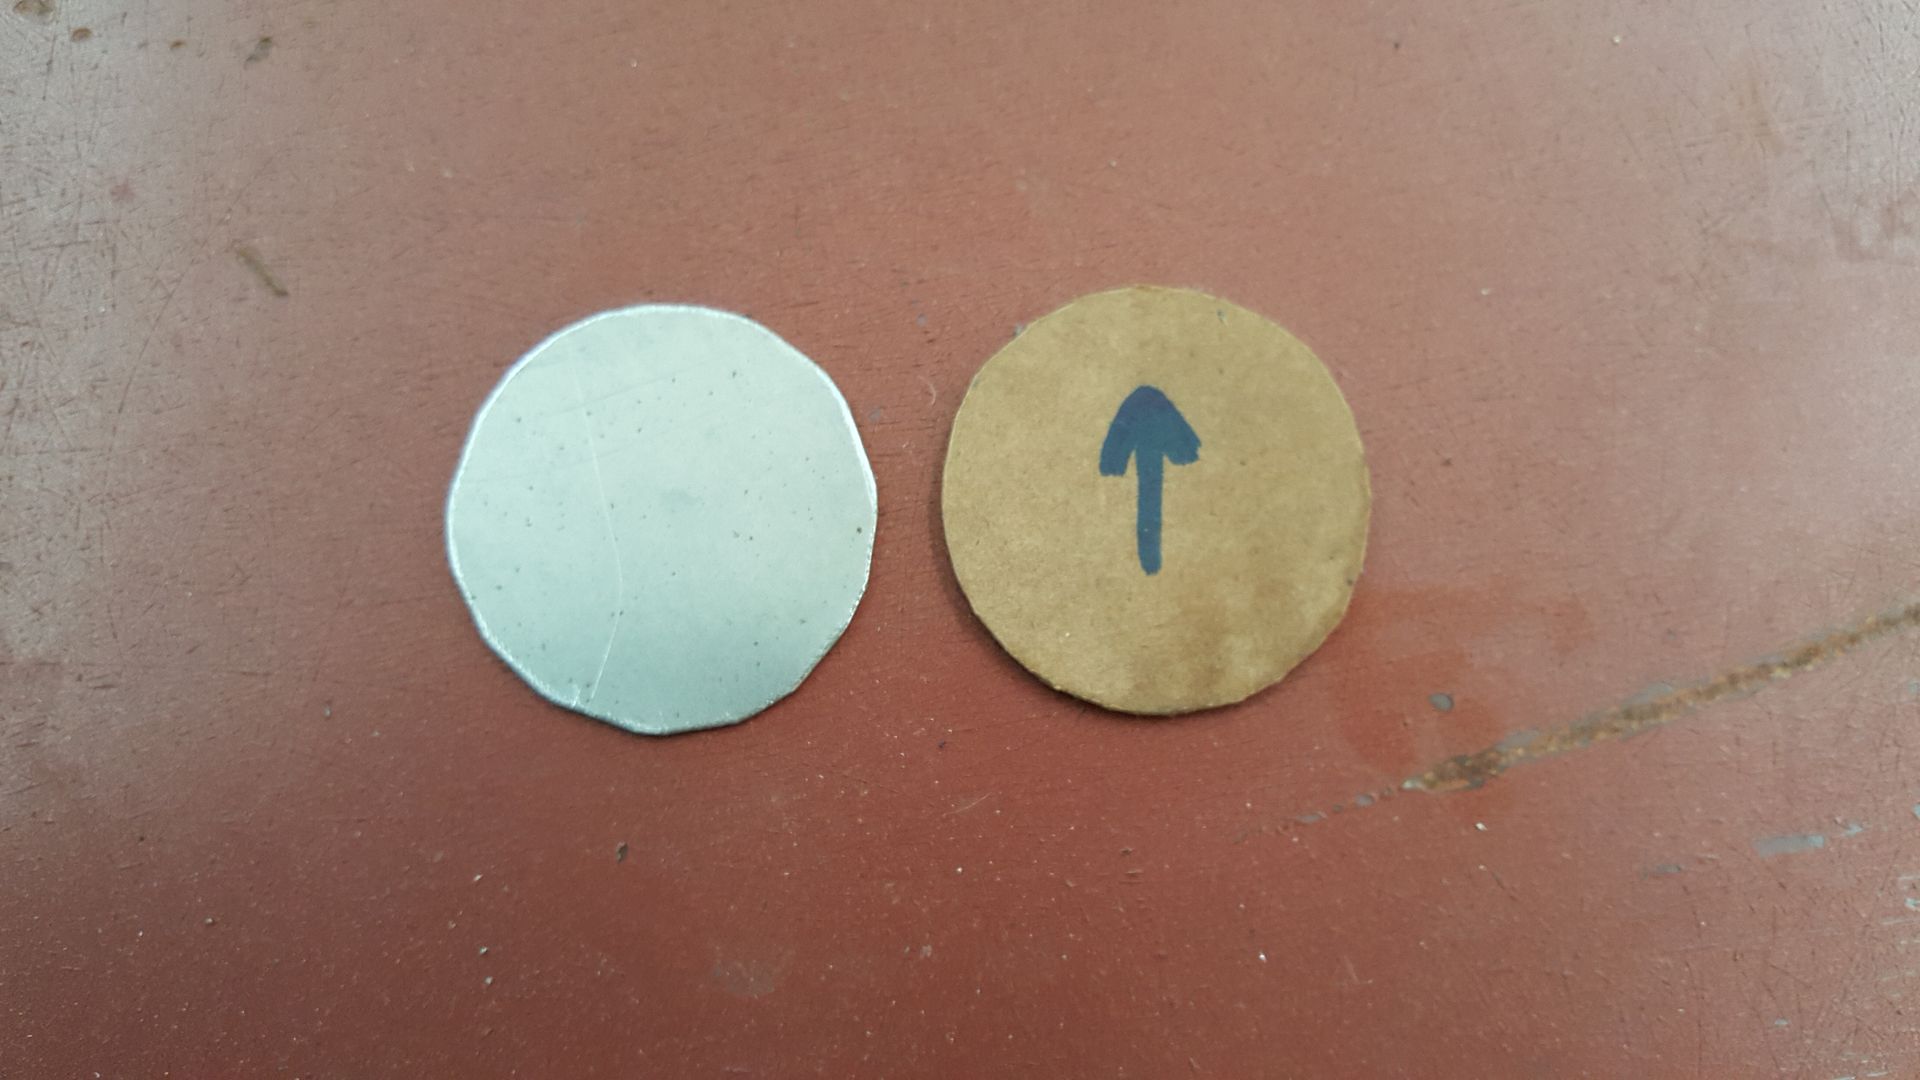
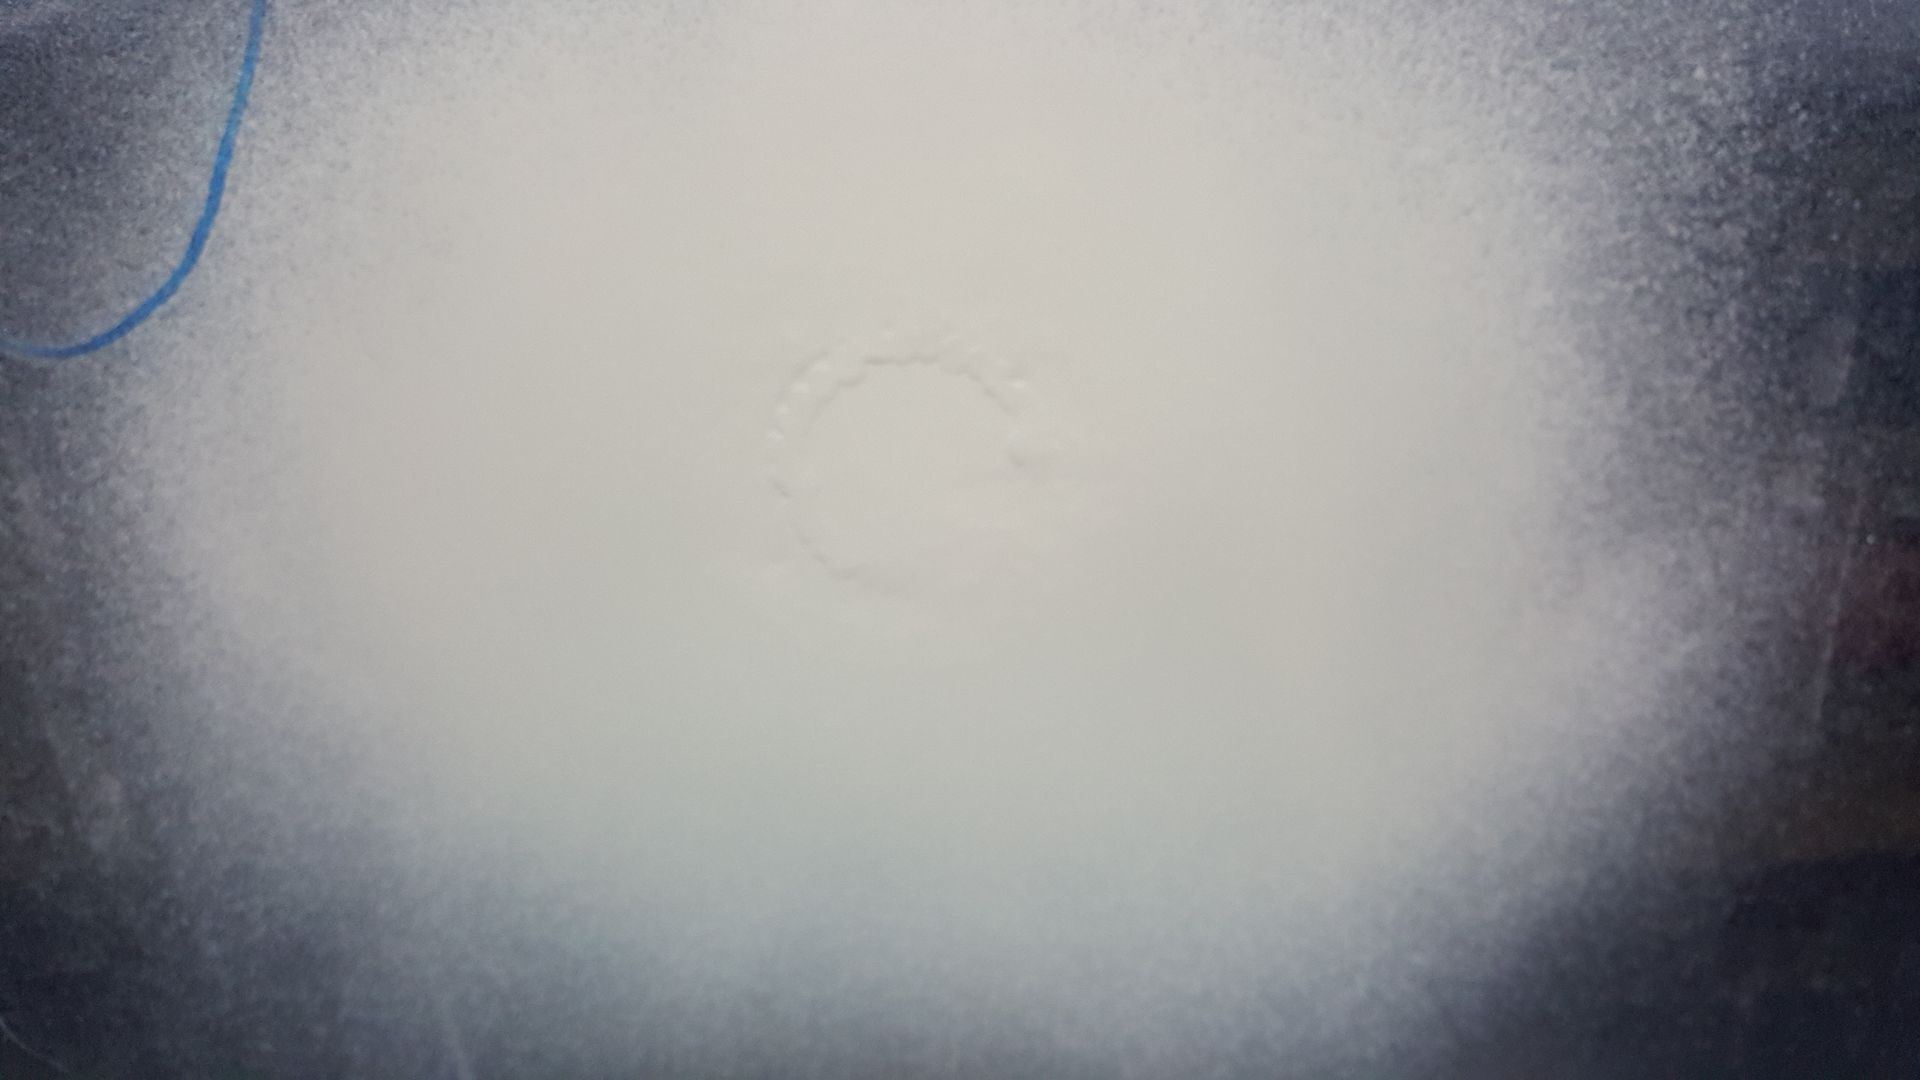
Look back through this thread. There's 3 pics that show it. You remove the clip that holds in the key tumbler, sand down the edges, make a template out of cardboard to cover the hole with a very slight recess into the hole (so it's not a high spot) then transfer to metal (used a scrap piece from the quarter panel repair), tack it in, and weld around it gradually, Body fill, putty, sand it smooth.
Be careful though, when you welds in a star pattern to avoid warping any part of the trunk metal. Take it really slow. My buddy welded it and went too fast and i ended up with a huge dent below the key that wasn't there before. Had to body fill the dent and I wasn't overly happy with how it came out.
2002 Blue LS Sport Coupe 5-speed
My Paint Restoration Project -->
http://www.j-body.org/forums/read.php?f=11&i=170933&t=170933