as some of you may know,
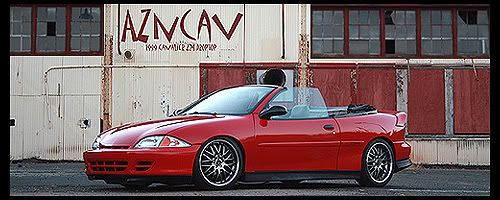
someone slashed my top a few months ago and because of that my top needed replaced. unfortunately i didnt have the $1000 or so to pay to buy a new top and have a shop replace it. i mean, i drive a cavalier after all. so i was lucky enough to find a deal on a used one that another .org member pulled from the yard, as all he needed was the glass. so, $45 and 10 days later, i had a replacement top. the original plan was to have a shop just install it, but even that would have run me almost $500 and i just couldnt swing it, especially considering that the car is only worth twice that. soooo i decided the only choice i had was to tackle this project myself. this is the result.
first off i will say that, while this was a pretty "easy" install, i definitely do not recommend it for mechanic/car newbs. but if youve played around a bit before and know your J pretty well and want to take on a bigger project, this one really wasnt that bad. at least not as bad as i had originally thought. with that in mind, i wont be going through every step, just the very biggest. basically, if you cant strip your own interior w/o a manual for it then you shouldnt be doing a top.
TOOLS NEEDED:
basic wrench/screwdriver/tool set
drill
rivet gun/rivets
staple gun
1/4" & 3/8" stainless steel staples
small tack hammer
contact cement/adhesive (i used gorilla glue...no word on its stability yet)
thread/needle
****ive tried 2 different sites and i can get anything bigger to show up in the post,
so ill also link to the album so you can see the larger pics there
STEP 1:
open your top to a 90* angle so you can take the header bow off. this is in 3 pieces and youll just use a phillips + screwdriver. two smaller pieces with 2 screws and one longer, middle piece with 6. remove all and you can start to peel back the top material from the frame


STEP 2:
drill out the pop rivet that is holding the cable in place. one per side. then remove cable from the small pocket it is in. since my top was toast i cut mine. you do not need to remove the other end of the cable which is held on by a + screw.


STEP 3:
next i went inside to start stripping the black trim panels above the quarters and trunk. first you have to remove two + screws that anchor the headliner. (no pics) afterwards you have access to a few 10mm nuts back there. pull down the deck carpeting to find them. now unfortunately i dont recall how many there were, but i think it was about 2 per side and 2-3 in the rear. C in the pic should count as the rear center section.
then youll have to put the top down some more to see a 7mm bolt per side on the inside frame of the front of the quarter glass. (no pic) remove both and the side sections should be able to come off. pop the trunk and remove two small nuts on the bottom of the trim piece and it can come off too. if the trim pieces dont want to come off, double check the rear deck to see if you missed a bolt.

STEP 4:
now you should be able to see all of the staples holding your top to your tack strip. this piece is notorious for being cracked to hell, but its a discontinued part and one side is out of stock and they wanted $90 for the other side. no, thank you. now you need to remove three + screws per side and then have fun pulling the 100+ staples all around the top.
***note: if you have a two piece top (factory) and do NOT need to replace your glass piece you do NOT need to take its staples out. i was unaware about this until afterwards. oh well.***
if you are somehow able to have a new tack strip, youll need to drill out all of the pop rivets. my stocker was so busted up that i didnt need to do it pretty much fell off in pieces when pulling the staples up.


STEP 5:
now the top should be held on by one mysterious piece around the quarter window. this is the part that im not sure if i did right or not, but i couldnt figure out any other way to do it. basically the screws are hidden behind the furthest most weatherstripping piece. to access the 3 + screws, we had to peel the weatherstripping back carefully, as it was prone to ripping. if you rip it (and most likely unavoidable) and dont have new ones to install, you may want to make sure to use some cement to attach the foam to the metal backing.
once you remove this piece youll again see the top glued to the frame. remove it. (no pic) now your top should be completely off except for one sewn on piece. this is a tricky part because the only way i could find to remove the elastic piece was to unsew it carefully, meaning youll also have to sew it back. at this point your top skin should be 100% free so you can take it all off. now your car just looks totally weird...but at least youre half way done.


STEP 6:
putting it back together is actually easier since you now know where everything goes. basically youll just follow the pattern in reverse, but ill still show a few things as you go so youll be able to match your progress. i actually started by stapling my rear glass back into place. then i tossed the top in general place and decided it would be best to feed the two cables and elastic piece and resew it just to be sure we didnt run into any space constraints for accessibility. to do the cables i had to use a small rod with a hook on it to get the cable to actually feed through. the pocket is very small and the cable isnt thick enough to keep it from bending half way through otherwise.

next i pop riveted the newly glued tack strip back into place. it is imperative that you securely anchor the strip to the body or you run the risk of the top pulling the tack strip out when raising/lowering it, leaving your top loose in the back, allowing for water leakage as well as just looking bad.

at this point i decided it would be best to get a general placement for the front then i started to staple the canvas in place. since i installed a used top i was able to use the creases as a guide so i knew about where to place the material. if youre using a new top, good luck.


now you need to finish stapling the side pieces in place remembering to keep them as taut as possible. since i reused my POS tack strip, i had to staple everything all jabberwockeyed. it works just the same though. you may also need to go through all of your staples at this point with a small tack hammer.

after all the stapling is done youll want to glue the canvas around the quarter window and then reinstall the weatherstripping with the 3 hidden + screws immediately to help keep the canvas in place while the adhesive cures, again remembering to reseal or readhere the foam if you damaged it when removing. then you will need to pop rivet the tension cable back into place (no pic)

at this point everything should be installed except for the front. you will want to lower the top til it is almost latched in order to ensure you have no wrinkles and everything is nice and taut. for some reason i didnt take any pics of this step, but all you have to do is saturate the bottom of the header bow with glue and pull the canvas over the edges, starting with the sides so they can tuck under the front. again, immediately install the metal pieces to help the canvas stay in place.
hopefully youve done everything right and youve just saved yourself a bundle of money. now you can just step back and marvel at your mechanical prowess. ok, actually when i was done i noticed that my quarter windows have a small pinch on both sides, but my old top had the beginnings of that too so its a possibility that its due from using an old top from a yard. either way, it sure as hell beats having a wet seat half the time!


thanks guys, enjoy!


