Porting pics of 2.2 head - Performance Forum
Forum Post / Reply
You must log in before you can post or reply to messages.
Ok, I've put about 16 hours into this head so far. I still have to finish cylinder 4 and go back and fix little things and polish it all, but here's what I've got.
Stock bowl with casting flaws.
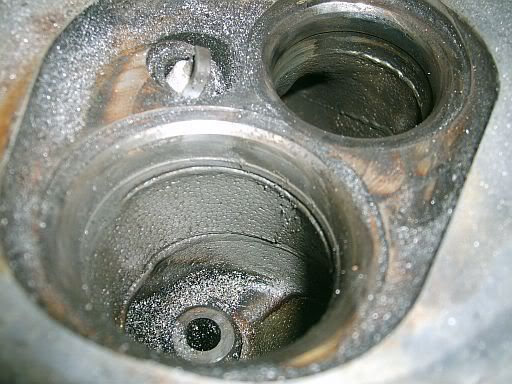
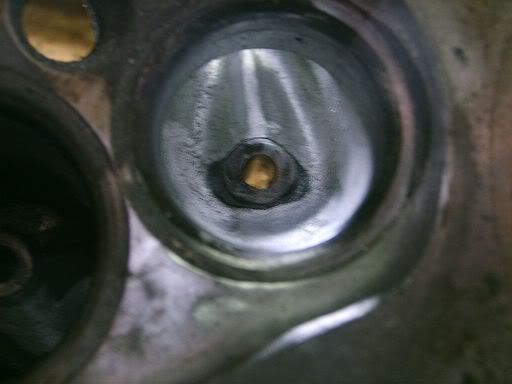
Bowl ported and flaws removed.

Exhaust bowl ported and blended.
Exhaust port ported out vs. stock exhaust port w/vane.
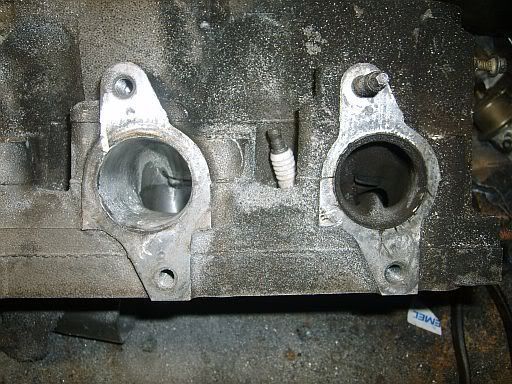
I spent most of my time on the bowls and exhaust side. On the intake side I mostly just removed the casting flaws and did some slight blending.
It's amazing how many flaws and gaps there are at the valve seat and in the bowls. Blending these alone will greatly improve flow characteristics. I still need to go back and work on the sides of the short radius and blend them better.
So far I've spent $18 on dremel stones and that's about it. If anyone else plans on using the typical dremel stone, make sure you get the larger cylinder shape ones. The ones that taper for some reason just don't remove much material at all. If I had the more proper tools for doing this, I would probably be at only 10 hours rather than 16.
/\ private, yon need a password

woops, not sure how it got set to private, it's now public.
i thought removing the vain was bad?
I'm planning going boost in the near future so I went ahead and removed it. It is supposed to be there for exhaust scavenging on n/a motors, but I really doubt its absence will be noticed much in n/a form. I have a pacesetter 4-1 header so we'll see if maybe that keeps things moving well.
I'll report back on that when I get the head back together and on the car.
Gotta LN2-pwrd dime, so... BUMP!
Go beyond the "bolt-on".
lol, don't you think you could have maybe cleaned it a little before starting work? that sucker's ridin dirtayyyyyyy
Arrival Blue 04 LS Sport
Eco
Turbo
Megasquirt
'Nuff said

lol, well, there was a reason why I didn't clean it before...so I could easily tell where I hadn't got to!
I'm finishing up tonight and then I'll get the finished pics up.
I'm kind of disappointed there isn't much room to unshroud the valves. If you look at the pics, the edge of chamber is nearly right at the edge of the firing ring for the headgasket.
Hahahaha i guess grease is cheaper than machinists blueing lol....
In addition to the casting flaws, it looks like those plugs could use a serious indexing too

Arrival Blue 04 LS Sport
Eco
Turbo
Megasquirt
'Nuff said
Try adding a 30* back-cut on the backside of the valve head above (Below?) the mating margin (If you hadn't). Especially on the exhaust valve. This will give you an increase of flow at low lift. Not to mention how it will help increase economy (From David vizards book: Performance With Economy. Thanks, Mr. Vizard!).
Go beyond the "bolt-on".
Also try blending the backside of the valve into the seat face to gain more power (Didn't know if you knew it, but it's out there anyway).
Go beyond the "bolt-on".
86svo wrote:lol, well, there was a reason why I didn't clean it before...so I could easily tell where I hadn't got to!
I also use this logic, lol.
 fortune cookie say: better a delay than a disaster
Nickelin Dimer wrote:Also try blending the backside of the valve into the seat face to gain more power (Didn't know if you knew it, but it's out there anyway).
Are talking about the actual valve itself or blending the bowl?
As for doing a 30* cut, I don't trust myself to be quite that steady on the valves, I'm planning to take it to a local shop to have them do that.
So is this the first time you have done a port and polish? I am really interested in learning to do them myself since I have an ln2. I realises it is easy to screw it up so I would just grab a head or two from the junk yard but I would love any tips you might have.
Great work I always have respected the guys that A) can do this and B) do it rather than pay someone to.
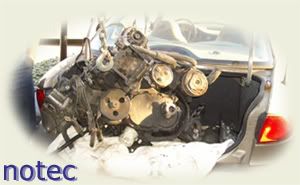
I've ported a few heads before this one, but in all honesty, the ln2 head is going to be fairly difficult to trash. Going by the pics of the cut up head OHV Notec put up, there is plenty of meat to take out in the ports and runners without hitting a water jacket.
I would recommend for the first timer to take it slow, go through and remove all the flaws first, then start to blend things as best you can. You can remove and blend a lot of the valve boss which will be quite helpful. Also, where the injector notch is on the ln2 head, there is a huge indentation there (you'll see what I mean) definitely smooth that down. This will help keep the fuel flowing smoothly for better atomization. If you plan to stay n/a, leave the vanes in, smooth them down and open up the areas on either side of the vane.
The polishing aspect is really for one main reason, not to increase flow, but rather to prevent carbon build-up. It is an extremely important part of the entire process. I would buy the abrasive kit from one of the DIY websites as they will have a wider variety of bits and polishing stones.
All in all, just take it slow, it's not too difficult if you take your time. I would recommend buying a book on head porting to help guide you along as well. You should be able to find something at your local Barne's and Noble's or library.
Wow great to know. I think you r right i need to beef up on understanding the process a bit more.
keep at em 86svo, also i sent you a pm back in reply to the one you sent me. Also make sure you put up the finished pics because i wanna see them.

86svo: I meant the backside of the valve to the stem, for clarity's sake.
Go beyond the "bolt-on".
just remember to polish up those exhaust ports.....mirror finish if you can...

well I finished everything but I ended up dropping the camera and breaking it as I was taking the final pics

.
Nickelin Dimer: I thought that's what you were referring to, I just didn't have the time as this is my daily driver and the fiancee was getting agitated with having to take me to work everyday
As to what my Funky Bottoms was referring to, I definitely did that. It is as near a mirror finish as you can possibly get....need to keep that carbon buildup at bay!
wish i'd had done this when my head was off...looks good.

Fallen I Am, Cursed And Destined To Burn -Dimmu Borgir
Just a further related thought: The vane found on the floor of the pre-'98 heads was placed there to induce turbulance in efforts to reduce the reversion flow of gases that would dillute the air/fuel charge entering the cylinder, thus requiring less additional fuel necessary to achieve proper light-off in the engine's factory intended N/A app. If this vane were shaped like a peak with curved side that rose from the valve side of the port to the manifold mounting surface, and flatly dropped off perpendicularly (At, say... A 90* angle?) to the port floor it would still be able to create the turbulance desired to prevent dillution but be less restrictive to the outward (forward) flow of gases. Now, combine that with a header with A.R. (Anti-reversion) cones inserted into the primaries at the head flange and you'll have further reduced reversion dillution, resulting in even less fuel necessary for light-off.
The plus about the A.R. cones is that they also allow for the builder to go with a larger primary diameter then they would have for the same application, which in itself further helps free-up the engine's breathing and allow more usable RPMs. Not to mention the decreased fuel consumption that will be result from needing less fuel. And-just to expound a 'lil further on this-combine all this with a 4-2-1 (Tri-Y) header and the total fuel necessary should really go down... In theory. Not to meantion a broad torque curve & the amount of useable torque that will result.
Of course this is all just what I have in mind for my truck's tu-tu, so forgive me if I just put it out there for other LN2 builders to see as we all seem to be in the same boat... More or less.
Go beyond the "bolt-on".
that's some great info! Seems like you've definitely done a bit of research with this topic huh?
Forum Post / Reply
You must log in before you can post or reply to messages.

