this needs to be a sticky!
it was at the very bottom of page 3 and that just isnt going to work

sticky

All show, coming soon ---> GO
I am bringing it back from the dead!!!!!
I DEMAND A STICKY!! lol
But seriously though....why the hell isnt this a sticky??
"Hondas are like tampons, every pussy has one!!!"
STICKY!!!!!!!!!!!!!!!!!!!!!!

Freak of Nature(1loudcavy) wrote:i love these threads that come back from the dead 
LOL Depends on what ones and what it consist of. Yet just like the people before me have asked and have said before....(Takes deep breath)...
THIS NEEDS TO BE A STICKY!!!!!
Too much info here for this to be sent back to the grave.
I agree on the fact that this should be stickied. Many noobs and myself included would have missed this if it wasn't brought back from the depths of beyond page 1 lol.
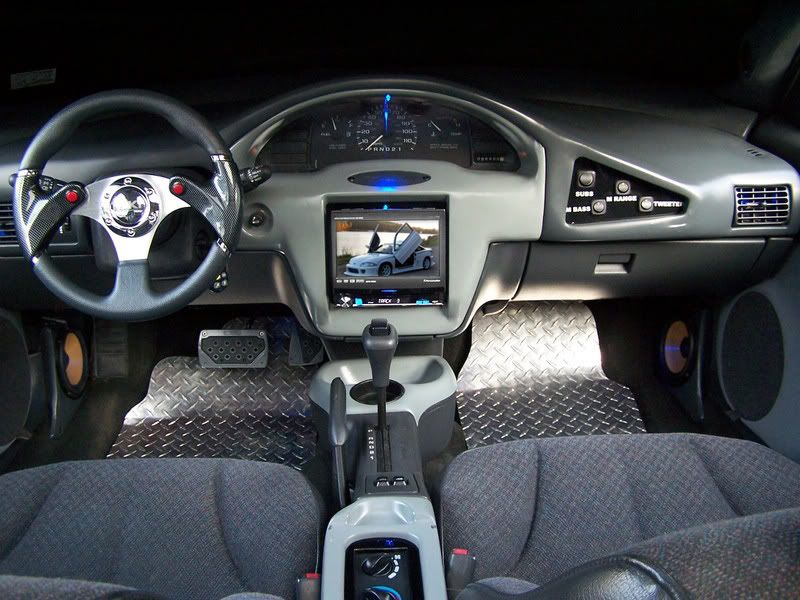
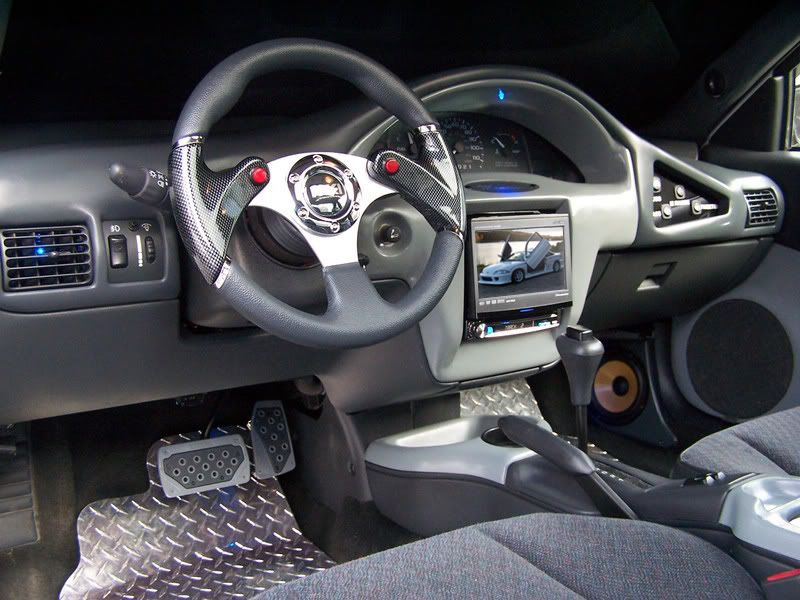
On another note, I love everything about that car except the steering wheel, seems like there wasn't much thought put into it.
Help support the JBO! CLICK HERE!
STICKY IT ALREADY JEEZ!!!!!!!!!!!!!!!!!!!!!!!!!!
Daniel Simoes wrote:I agree on the fact that this should be stickied. Many noobs and myself included would have missed this if it wasn't brought back from the depths of beyond page 1 lol.
On another note, I love everything about that car except the steering wheel, seems like there wasn't much thought put into it.
likely more thought then you think, it was a sound quality car. and was likely cut like that to have less things for the sound to bounce off of and interfere with.
http://www.flickr.com/photos/sndsgood/ https://www.facebook.com/#!/Square1Photography
Nice work I like it alot. How much time do you have into it??? Makes me wanna custom do my dash. But dunno if I have the patience or time.
________________________________
never let anything slip away
All of my how to articles can be found in 2010 back issues of DomesticDriver magazine, or online at
Car Audio & Electronics magazine in the how to section.
Including Beginners Tips for Remote Starter Install
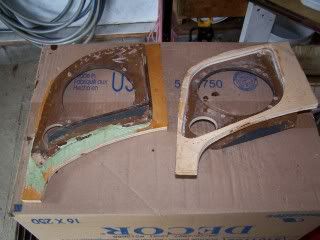
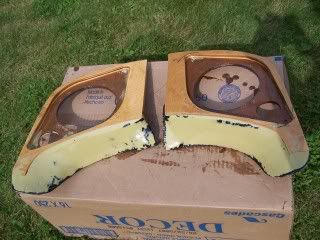
Kick Panel Pods
Here are the kicks I built for Sound Quality competitions. Typically you will find that serious competitors tend to aim speakers straight across at one another, rather than aim them at a listening position. The reason for doing this is that by aiming speakers at a listener, you will run into directional issues causing bias or identification of which speakers are closer to you, thus skewing your sound to that speaker. In order to create the illusion of wider and deeper sound stages the speakers have to be off axis to the listener. This is also a big part of creating the illusion of imaging.
1. Cut out the side pieces to create the proper angle to aim your baffle board straight across the car.
2. Cut out an outer ring to house your grill piece.
3. Solidly mount the new enclosure and stretch fleece across the kick panels trim.
Fabrication tip: Router a recessed lip around the edges for stapling the fleece into the enclosure, this will create a smoother transition and make the sanding easier in the end. Lay down plastic wrap or tape on your interior parts before fiberglassing.

4. Finish with fiberglass and a smooth layer of body filler.
5. Sand smooth and lastly carpet the enclosures.
Competition tip: Lightly stuff your enclosure with Angel Hair pillow stuffing from Walmart. This will help to fool the speakers that they are in a larger enclosure which adds deeper and richer sound to the low-end. Also, be sure to take photos of how neatly your terminals are terminated for the judges to see.
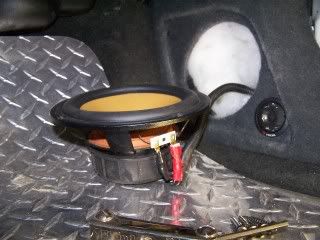
Here is the finished product. Installed are a component set of Focal Midrange drivers and a tweeter. The pods also have a show quality grille upholstered in tweed which matches the seats as well as the midbass drivers grille.

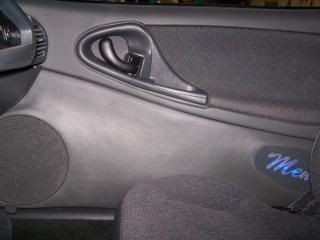
Current Doors. Smoothed out shapes, upholstered, and dyed graphite.
Current STEERING WHEEL for the haters

Here is a video tour of the car. In its current form from Fall 2010.
youtube Punxsutawney Phil Mennitti
Thanks for the sticky.

^CLICK ME TO SEE HOW I BUILT EVERYTHING^ How To in Interior Forum