All machining and block work done by "Dovor Cylinder of Orlando". Everything else was done by me. I put the engine in the car. I did the timing on the engine and I had to replace the stock hydraulic lifters with solid performance lifters. I had to have them machined to fit correctly, which was a very tedious project. This involved repeatedly having them machined. I did all the suspension and chassis upgrades. I also did all the work for the rear disc modification. I did all the wiring and anything else not mentioned.
It is a LSJ block with 2.2L crank, pistons, rods and LSJ cylinder head. The stock oil cooler I removed, and tapped the ports with a 3/4" tap (no drilling needed). I put hose barb fittings on and ran high pressure hoses. I removed my AC condenser and mounted a tube and fin oil cooler. Then ran the hoses to it. I used a Cavalier Oil pan to mount on the lower engine mount. The PCM and harness are for the L61. It is running on HPtuner from John Higgens. I am running NGK 4644 spark plugs at 0.28" gap with a MSD DIS2 wired through the stock ICM and coil pack. The BCM and interior wiring is still original 2002 with 2200 engine. I added a 3 pod guage cluster with fuel pressure, boost and oil pressure. This car has taken almost 7 years to get complete. Mostly needing time to save up the money for it. In June of last year is when I actually installed the engine and then I had to get minor details worked out.
Full Car Modifications:
Engine:
*LSJ Engine Block:
* Long block work - "Dovor Cylinder Head of Orlando"
* Polished 2.2L (L61) Crankshaft - "Dovor Cylinder Head of Orlando"
* Weisco Forged Pistons (L61) - 10.5:1 -
* Eagle Forged Rods -
* Clevite Racing Main Bearings
* Clevite Racing Rod Bearings
* Clevite Racing Balance Shaft Bearings
* GM Racing Hardened Oil Gear -
* LSJ 2.0L Cylinder Head:
* Stage 3 Port & Polish - "Dovor Cylinder Head of Orlando"
* Competition Cams - blower grind -
* BLE Performance Lash Adjusters (lifters) (machined by C-W Machining Inc.)
* GM Nuetral Balance Shafts -
* GM Racing Valves - 1mm oversized -
* GM Racing valve springs & retainers -
* GM Racing Adjustable Timing Gears -
* Cometic Head Gasket -
* ARP Head Bolts -
* LSJ - M62 Supercharger:
* Ported inlet & adaptor plate - "Dovor Cylinder Head of Orlando"
* 75mm LS1 Throttle Body -
* Hahn Racing Turbo Setup (500hp) (designed for Cobalt)
* Hahn Racing Super20G Turbo
* Quick-Mount V-band Turbo Exhaust Housing and MaxFlow Downpipe System
* Billet Blow-Off Valve System
* Garret Intercooler
*Ignition
* MSD DIS2 - 62112
* Fuel Delivary:
* Racetronix LS1 F99 Fuel Pump Conversion
* Aeromotive Fuel Pressure Regulator - 13109
* Semiens #60 Fuel Injectors
* -8 AN Braided Fuel Line (main line)
* -6 AN Braided Fuel Line (return lines)
* Cooling Upgrades:
* Dual Pass Intake Endplate
* Heat Exchanger - 28"x7"x3.125"
* F23 - 5spd Manual Transmission:
* TeamGreen LSD Insert
* Driveshaft Shop - 300hp Axles
* SPEC Stage 3+ Clutch kit
* B&M Short Throw Shifter
Suspension/Wheels/Brakes:
* Chassis Upgrages:
* Aluminum Subframe Brace
* Polyurethane Transmission Mounts
* Poly. Upper Engine Mount
* Poly. Lower Engine Mount
* Suspension Upgrades:
* GM FE2 Front Swaybar
* GM FE2 Strut Tower Brace
* GM FE2 Rear Axle Bushings
* Addco Rear Swaybar
* Vibrant Rear Strut Tower Brace
* Polyurethane Control Arm Bushings
* Polyurethane Swaybar Endlink Bushings
* Polyurethane Swaybar Bushings
* KYB G2 Gas Struts
* Brake Upgrades:
* Dodge Neon Rear Disc Conversion
* -3 AN Braided Brake Line (all brake line)
When I got the engine back from the machine shop it looked like this:

The supercharger was ported and an adaptor plate was made to install the 75mm throttle body:


I had to make a bracket to have the throttle cable work on the throttle body. I used a 2200 throttle cable and throttle cable bracket. I Cut a few pieces of the bracket off, including the cruise control part of the bracket. I found 2 pieces of metal to attach it to the SC, where the small heat exchanger tank normaly was.


For the Racetronix LS1 fuel pump install I followed this post:
http://www.j-body.org/forums/read.php?f=2&i=451704&t=434889&p=1
To run -8AN main fuel line and -6AN return line I removed the 2 hoses off the top of the fuel pump and left the middle one for venting. I bought 2 quick disconnect to -6AN fittings and 1 -6AN female to -8AN male fitting. I used the quick disconnect hoses that connect at the fuel rail, and cut off the end on 1 side. I hose clamped the thicker hose to the out port on fuel pump and the thinner hose on the return port.
pics of the hoses and fittings:

I then bought -8AN to 1/2"npt fitting to attach the hose to the fuel rail. I ordered this for the other side:
http://www.ottperformance.com/store/pc/LSJ-Fuel-Rail-Fitting-9p22.htm
I then got -8AN adaptor and ran another -8an from fuel rail to the Aeromotive FPR. Then a -6AN from FPR back to the pump.
The BLE lash adjuster (lifter) installation was a major PITA.
http://www.horsepowerfreaks.com/partdetails/BLE/Engine/Lifters/Solid/13168
The BLE solid lifter says it is "fully adjustable" and shows pictures of adjustable lifters. It is completely wrong. When I recieved the BLE lifters; they were obviously alot taller than stock lifters. I had a tool and die machine shop (not a automotive machine shop) measure the difference. The BLE lifters were 0.091" longer than stock lifters. I had the machine shop cut down the BLE lifters to height of the stock lifters. Here is a pic of the stock hydrualic and BLE solid after having shortened to the same height:

After that I installed them and had no clearance between the cam and rollers. There needs to be a clearance of 0.005"-0.007" between the cam and roller. This fact is from the GM Ecotec Build Book page 69. When grinding down solid lifters to fit the math for correct clearance is: to remove 0.0025" off the bottom of the lifter to gain 0.001" clearance at the cam and roller (follower). Then I went back to the machine shop and had 0.0175" removed from every lifter; which equals 0.007" clearance at the cam.. I would install them and the cams and would check for clearance. I repeated this 9 times, and luckily all exhuast came out with a clearance of 0.005". I left the exhuast in the head and removed the intake lifters. I had the machine shop remove 0.0125" (equals 0.005" clearanceat cam) and checked clearances 2 more times. The intakes were not so easy; I had to then take specific lifters out and have each one shortened to different lengths. I had to make sure I and the shop keep them labeled and seperate. The BLE lifters cam in plastic tubes I marked tubes for the specific lifters. I asked the shop to keep them in same tubes. In the end I removed approximately 0.150" of the BLE lifters to get them to the right specifications. "Fully adjustable" my butt.
To install the cam gears and all of timing I have All data sheets GM techs use:
http://www.j-body.org/forums/read.php?f=11&i=152254&t=152254#152254
adjustable cam gears:

I hooked up the MSD dis 2 box to the stock ignition coil. To do so you need 2 connectors that run between the ICM and coil pack of a L61. You have to remove the pins from inside the connector and repin to run 3 wires. Or buy 2 NAPA EC144 or AcDelco PT787. This means you have a bigger space between the coil pack and ICM. The connector has 6 pins but only 4 are used. Here is a diagram of connector:

Then just connect the wires appropriately.

To deal with the space issue between the ICM and coil pack; I refabricated the plastic spacer used between the main harness connectors at the firewall. With longer screws I made wall between the ICM and coil pack to cover the wires.

I included both the upgraded Cobalt heat exchanger with dual pass endplate and option b tank. I also included a small Garret intercooler and mounted it to the bracket that mounts the heat exchanger. Then just mounted the heat exchanger and the intercooler on the car as one piece. Lster after the pics I got a 650cfm - 8" push fan and mounted it in front of the heat exchanger. My turbo piping is 2.75" from turbo to intercooler. After the intercooler is my 50mm B/O valve. Then 3.5" from intercooler to supercharger. I have ran 1 pipe under the engine on passenger side. Then with a 90 and 180 degree; bent it around the front bumper frame. Also around the frame on the other side and up to the SC. I had to move my battery to the trunk and cut off alot of the battery tray to get the piping up to the SC.


Also, I put a Grand Am dual cooling fan in and I believe they both can run off the same relay since the Grand Am I took it off was set up on 1 relay with same relay part number. I am getting 2 more 650cfm 8" fans and mounting them on the heatexchanger also. I wired 2 fans on 1 relay and the third fan and heat exchanger pump to a second relay. The wiring on the fans goes:


For the LSD install, I followed this post for 2.4L(LD9) transmission. The only difference from this and an ecotec getrag; is after you remove the seal from inside the bellhousing, there is a large allen wrench nut that needs to be removed instead of the 2 10mm bolts. This nut is very hard to remove. If you remove the small cover on the opposite end of the bellhousing you will find 2 other allen wrench holes. One of those will turn when you attempt to loosen the nut on the bell housing side. Use a breaker ratchet or torq wrench with the correct allen wrench socket on both sides. The wrench on the bell housing is the one you want to loosen. Use the other one on the other side as a stop from spinning. I stood on the transmission to steady it and one torq wrench braced against the floor, and I had a friend stand on the bell housing torque wrench to loosen the nut. It is torqed on very hard; it will sound like it is breaking as it loosens. Don't worry it is not.
Here is how to for LD9 transmission:
http://www.quad4forums.com/forums/showthread.php?t=7762
My LSD insert:

For the rear disc conversion I basically followed the previous "how to" post. To add to the post; I would suggest cutting the main big hole first. The best thing to do would be measure the hole out equally 2.5" diameter. Mark the whole circle and then have a machine shop cut the hole out. Then the rest you have to do on your own.
Use your cavalier rear hub assembly (bearing with wheel studs) and attempt to match up the cavalier hub and neon bracket. Visually see where the material is that needs to be removed to have the hub rest flush in the bracket. You can remove material from the inside of the neon bracket and the base of cavalier hub (don't grind thruogh the cavalier hub bolt holes). With a decent electric die grinder (not a dremel) I have done it with a dremel as well and it took 5 times longer. Continue to remove material and check fitment repeatedly till complete. Once the hub base fits in the bracket; then drill the 4 outer holes you use to mount it to the axle. Using a die grinder; I cut the main hole and grinded out the material and drilled 4 holes for the mounting bolts; the grinding took about 5-6 hours for each bracket.
Rear disc how to:
http://www.j-body.org/forums/read.php?f=3&i=92768&t=92768
To run the -3AN braided I drilled and tapped the stock proportion valve holes to the calipers to 1/2"x20. I bought 1/2"x20 to -3AN daptor fittings and -3AN female to -3AN male 90 degree. I got 3', 5', 12' and 15' steel bradided lines. Finally some 7/16' banjo to -3AN adapter fittings and some copper crush washers to mount to caliper.
My rear discs:

I also installed rear sway addco rear sway bar. This is pretty simple bolt on. You can kinda see the braided -8AN fuel line.

I bought a 2"X1"X33" aluminum bar and mounted on the subframe with 2 bolts on either side.

Once the car was finished and I started it; it did not run very good at first. Then John Higgens came and HPtuned it and made it run good so I could put break in miles on the engine. John helped with quite a few questions and brainstorming ideas that I had. Thanks to him this went a bit easier. At around 700 miles I began having exhuast leak problems around the v-band clamp. I think I have dealt with it. I currently have 800 miles on the engine as soon as I hit 1000; I will arrange the final tuning with John, and get a dyno on it.
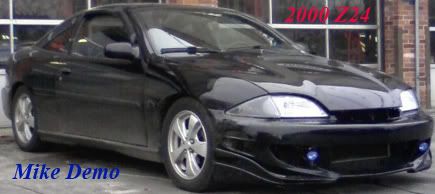
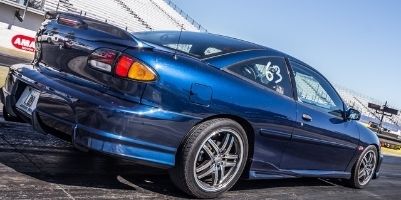
Here is a pic of it finished. I double exhuast wrapped the intake pipe to block the heat from the turbo. I do have a ram air hood to help blow the heat down.

Here's it's basic main voyage after dealing with little issues after John tuned it. When I left I got on 441 and was at a light with a 4 door 2008+ Jaguar. The old man really tried but could not pass my car. I never went over 5000 RPM, and he could not move pass the middle of my car. This continued to 80 mph; when he gave up. I wish my wife would have been riding with me and taping, but then wouldn't be able to video the engine and car.
http://www.facebook.com/video/video.php?v=1743067213638&saved#!/video/video.php?v=1747294599320
I do randomly get a multiple misfire code. The engine has no change in performance when it happens. I have tried running no MSD box no change and have tried diffrent spark plug gaps starting at stock and now at 0.25". I have easily built 17lb of boost before getting to 5000 RPM in any gear except 1st. I have only seen 13lb in 5th on the highway. I have not yet attempted to "off the line" it and see what the turbo does with alot of SC boost before. Dyno coming in a few weeks.


