Neon disc swap how to - Page 22 - Suspension and Brake Forum
Forum Post / Reply
You must log in before you can post or reply to messages.
Cinny wrote:heres the easy way to get the right thread caliper bolts. buy them when you buy the calipers. should be 7/16th either way.
(7/16-20 vs. 7/16-24)

anybody have an idea what my problem is??
1998 Chevrolet Cavalier
5-spd
BlkCav wrote:So spent the whole afternoon working on the ebrake, and have some concerns
after watching josh's video, it doesnt seem to work properly putting the little arm that actuates the pads on the cable further down pushed up against teh spring/cable. i coudlnt do it, the spring was way to taut and the engagement for the ebrake would have been way too early, as the difference in the acutal cavalier end and where that is would cause issues IMO
so i modified the arm, the end to be specific, removed the U and managed to get the cable to stay on there without any issues.
did i do that correctly? did i miss somthing from josh's video? i was still having some problems tightening up the bearing, there's no room in there to tighten everything up. Any body have a pic of what their ebrake looks like? i'm not reaind through 21 pages again lol.
i also sourced pads/hardware from an older intrepid, seems they were exactly the same to the neon rears.
it sounds like you did it right, but I'm not comfortable with you saying that you could not tighten up the hub the axle. I think you should have tightened, and torqued up those bolts and then assembled your springs.and you should have plenty or room buy putting a wrench on the back side and tightening through the hole in the hub face,
well i took it all apart and just put them back on without the shoes, basically the bottom portion of the ebrake shoe was in the way to properly get a socket in there, i could do it if i had more time, but it was getting late.
i had to cut up the ebrake actuator to get it through the hole on the end of the cable, thats what i'm most worried about.... on josh's video he put the actuator between the ebrake 'end' and the spring, he pulled the spring back by hand, wich in my case, i couldnt do even with needle nose pliers
1998 Chevrolet Cavalier
5-spd
I dont mean to ask stupid questions but have you tried to pull the force balancing assembly to give some slack in the cable? That was the only I could get slack in the line aswell.
i could have done that, but oh well, i modified the actuator arms to fit into the jbody ends, and with enough enginuity they 'snap' in, so they wont be going anywhere!
i just have to tighten up the left side a bit at the star wheel, but it seems to hold the car without any issues!!
SUPER EASY TO DO!!!
the reaon i couldnt tighten things up as well, is because i replaced the stupid torx bolts with the highest grade bolt with a head for a socket (bearing swaps have never been easier!!)
very happy with the setup!
1998 Chevrolet Cavalier
5-spd
ok, i have another question. everything is on, all the fittings are correct now, nothing leaks, but whenever I pull my ebrake handle all the way up, and I mean as far as the handle can go, and it still dosen't grab. I'm still able to turn the wheels. We adjusted the pads inside the assembly as far as they could go, still allowing us to get the rotor on. Is there another way to adjust the ebrake? Or did we do something wrong?
Yup. Now, assuming that you have the 95-02 cables (03-05 are too long), you will notice on the back of the neon bracket there is a rubber grommet. Take that out, and from there you can adjust the star wheel with a screwdriver. Its a little tight, and you have to realize which way you're going (either tightening or loosening). Eventually, you can find a medium point where your ebrake doesn't drag your wheel too much when free spinning, and your ebrake will hold your car when engaged. it'll take some trial and error, but u can do it with the wheels on in fact. that's what the rubber grommet is there for.
-----------------------------------------------------------------------
-----------------------------------------------------------------------
- Sold my beloved J in April 2010 -
i installed everything correctly, but my spring kinda pushes against the star wheel, is this normal?
it does work normally tho
1998 Chevrolet Cavalier
5-spd
Yeah, that spring is really close.......normal, wont hurt anything.
Wow there is alot fo good information in here. a ton.
____________________________________
Primer Counts as Custom Paint Right?
BTW: This is my Sig.
Kardain wrote:Actually, they are, just didn't come with crush washers but I have some from the Neon calipers...
Earl's PN 592032 -- Caliper adapter: -3 to 10mmX1
This is for the cavalier braided brake line to neon caliper correct? Also I cant find the PN #592032 on summit racings online catalog. Help with this would be very helpful.
Thanks a lot guys
Edit botton needed.
It came up with 3 or 4 different adapters I just couldnt tell which one i needed.
ive already posted the part numbers for earls in the past in this post. they're in here somewhere.
-----------------------------------------------------------------------
-----------------------------------------------------------------------
- Sold my beloved J in April 2010 -
well merry christmas to you too..................
Quote:
well Merry Christmas to you too..................
Your present is in this post for those brave enough to look for the info !
There is a reason this post is sticky, its because all the information you need is right here, and people are more willing to help those that have looked and read, but don't understand the information presented to them. you being a member since 2004, you should know this by now.
Viper98912 wrote:Viper98912 wrote:In case anyone is wondering, it is not absolutely necessary to change out the RPV's. i didn't, and some others havent, and there have been no problems. So if you're wondering about plumbing using the stock hardlines, you can purchase the rest of the hardware you need from Earls plumbing, which can be found on summitracing.com.
Part numbers you'll need are
(2) EAR-989534ERL - the hardline fitting adapter
(2) EAR-997634ERL - the 7/16" banjo fitting (you will use the stock banjo bolt on the caliper)
(2) EAR-63010126ERL - the 26" SS line (you can also try using the 24" line, but it might be a little tight for comfort)
Now if you also say, hell, might as well upgrade the front lines too while i'm at it (instead of buying the Russell kit and only using half the kit), you'll need
(2) EAR-989534ERL - the hardline fitting adapter
(2) EAR-997631ERL - the 10mm banjo fitting (you will use the stock banjo bolt on the caliper)
(2) EAR-63010114ERL - the 14" SS line
Do not forget that you will also need to get new crush washers (2 per caliper, 7/16" for the back and 10mm for the fronts).
Enjoy 
Here ya go bud, in case you were too lazy to search for it the first two times I posted it.
-----------------------------------------------------------------------
-----------------------------------------------------------------------
- Sold my beloved J in April 2010 -
Good stuff. I got mine all on and it works pretty well. I need to take it back apart and straiten out the passenger side baking plate. There is a kink in it and it is rubbing on the rotor. I havent hooked up the e-brake yet. I dont have the actuator for the passenger side. Not sure if i lost it or if it wasn't included. Oh well.
Josh, Did you ever make the spacer to go behind the bearing? If not, I will get one machined with your dimensions. Shouldnt be to much. Also, do you have any spare e-brake parts I could purchase from you? I need the hardware for the passenger side. I have the shoes, and a pin, but nothing else. Not sure where they went. If not, no biggie. I will just have to crawl my lazy ass to a junk yard.
Thank you fellas.

Go Go OG Traction!!
Club 136! (OG Nick) wrote:Also, do you have any spare e-brake parts I could purchase from you? I need the hardware for the passenger side. I have the shoes, and a pin, but nothing else. Not sure where they went. If not, no biggie. I will just have to crawl my lazy ass to a junk yard.
Thank you fellas.
Why not pick up the parts kit at your local parts store? Under $20.


Club 136! (OG Nick) wrote:Good stuff. I got mine all on and it works pretty well. I need to take it back apart and straiten out the passenger side baking plate. There is a kink in it and it is rubbing on the rotor. I havent hooked up the e-brake yet. I dont have the actuator for the passenger side. Not sure if i lost it or if it wasn't included. Oh well.
Josh, Did you ever make the spacer to go behind the bearing? If not, I will get one machined with your dimensions. Shouldnt be to much. Also, do you have any spare e-brake parts I could purchase from you? I need the hardware for the passenger side. I have the shoes, and a pin, but nothing else. Not sure where they went. If not, no biggie. I will just have to crawl my lazy ass to a junk yard.
Thank you fellas.
Ya man, I got a crap load of that stuff......pm me.
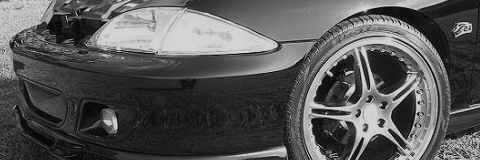
Viper98912 wrote:I've found brembo part number 27206, which MIGHT be the 1/2" thick solid disc in 5x100 form (all the other 1/2" thick discs are 5x114). 27207 is the regular 3/8" thick disc everyone has on here. Someone might want to try this out if anyone wants slightly thicker discs.
after talking with someone, it looks like YES, brembo 27207 might not only be a thicker rotor that is 5x100, but is 1.5 mm SHALLOWER than the 27206 "neon" rotor. Meaning, that not only do you have a thicker rotor to absorb more heat and look nicer, but might also solve the rubbing issues where everyone needs to put a set of washers to space out the rotors from the hub. now, i THINK that this rotor is 57.1mm, and has the same exact internal brake drum setup, but i'm not 100% sure. Someone should REALLY try this out.
27206 is approx 0.35" thick, while the 27207 is 0.47" thick. You can also gain by having a 1.5mm shallower rotor and maybe not needing washers or a spacer anymore! Can be found on buybrakes.com for whoever wants to venture out
If this is successful, score another point for me since July 07. I wouldve done this myself, but I went with a 11.25 vented setup *cough*
-----------------------------------------------------------------------
-----------------------------------------------------------------------
- Sold my beloved J in April 2010 -
BlkCav wrote:well i took it all apart and just put them back on without the shoes, basically the bottom portion of the ebrake shoe was in the way to properly get a socket in there, i could do it if i had more time, but it was getting late.
i had to cut up the ebrake actuator to get it through the hole on the end of the cable, thats what i'm most worried about.... on josh's video he put the actuator between the ebrake 'end' and the spring, he pulled the spring back by hand, wich in my case, i couldnt do even with needle nose pliers
by the way, grinding down the lever and using it with the original loop hole is EXACTLY how i had mine, and it worked perfectly for me. if that makes u feel any better.
-----------------------------------------------------------------------
-----------------------------------------------------------------------
- Sold my beloved J in April 2010 -
Viper wanted me to add this to the post...
"ps - all other dimensions appear to be the same, and iirc, there was enough room within the neon caliper for a slightly thicker rotor when the piston is pushed all the way in"
Looking for these rotors has almost killed me lol.
-Chris-
-Sweetness-
-Turbocharged-
Slowly but surely may some day win this race...
CORRECTION TO THE ABOVE POST BY VIPER... he mixed the part #'s up
after talking with someone, it looks like YES, brembo 27206 might not only be a thicker rotor that is 5x100, but is 1.5 mm SHALLOWER than the 27207 "neon" rotor. Meaning, that not only do you have a thicker rotor to absorb more heat and look nicer, but might also solve the rubbing issues where everyone needs to put a set of washers to space out the rotors from the hub. now, i THINK that this rotor is 57.1mm, and has the same exact internal brake drum setup, but i'm not 100% sure. Someone should REALLY try this out.
27207 is approx 0.35" thick, while the 27206 is 0.47" thick. You can also gain by having a 1.5mm shallower rotor and maybe not needing washers or a spacer anymore! Can be found on buybrakes.com for whoever wants to venture out If this is successful, score another point for me since July 07. I wouldve done this myself, but I went with a 11.25 vented setup *cough*
-Chris-
-Sweetness-
-Turbocharged-
Slowly but surely may some day win this race...
Forum Post / Reply
You must log in before you can post or reply to messages.