3400 swap - Part 2 - Photos & Media Forum

Forum Post / Reply
You must log in before you can post or reply to messages.
3400 swap - Part 2
Friday, July 13, 2007 9:46 PM
When I 
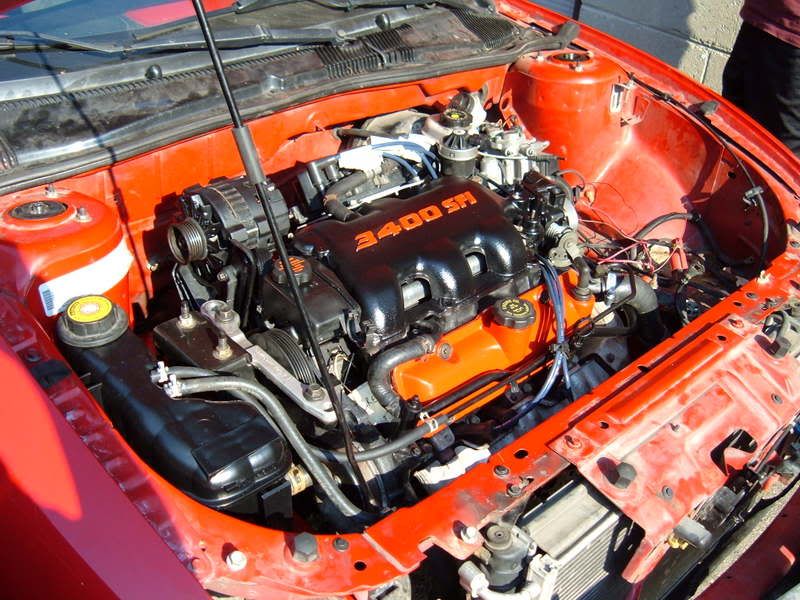
last left off, the car looked something like this:


In the meantime, here’s what I’ve done. note I’'m saving the goodies for last

The BC guys and the JBNW crew have had an up to date thread going… So without further adieu

July 1:

Got the trans back together. When I went to move it to clean it up some, there were bits of the input shaft bearing laying on my workbench, so get to take it apart again….


July 2:

$92 later from GM, the input bearing, seal, and rear cover seal are on order, should be here Friday or Monday. Also included are the fascia brackets.

Decided to test some of the wiring starting with the starting system. Took a few tries, but got the starter to tap (didn't try to fire it up since 1: I don't have the fuel pump feed hooked up yet, 2: no trans, and c: no down pipe installed yet).

Nothing burned up, so I guess that’s a good thing

July 3-6
Tried to troubleshoot why the fuel pump isn’t kicking on… “Last good, first bad” leads to the PCM. Either a) the PCM is toast or 2) the theft protection is kicking on. I'm banking on the latter and working on other stuff till I get the BCM wired in.

Since I’ve been working on wiring, nothing new in the picture department.

July 6: Got the new throttle cable, so I get to mark another thing off my list. Disassembled the trans in prep for the new input shaft bearing.

That’s it for now...

July 7:

Fuel pump = solved. There's a wire to the PCM labeled Ignition 0 (hot in Acc, run, crank). On the N-bodies, ACC and Lock are reversed, I think. That wire is the PCM wake up wire. Need to run a tap from that to one that is hot in run/crank on the J harness...

Just have 4 or 5 wires to go in the harness.

Also, hooked up the low-beams, need to get new sockets for the highs.

July 8:

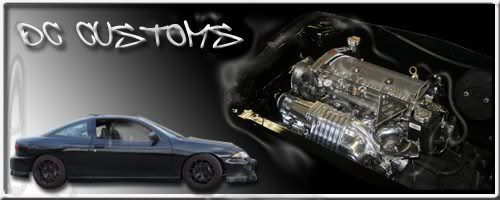
Not really planned as an engine swap day, but ended up being one. De-stickered the car, mostly. BOOSTED hooked up the JBNW crew w/ some new banners, so I scraped all the stickers off the side windows and placed this one on the rear:

From this (old pic)


It was about time to retire the JBO sticker anyhow… it was starting to crack/peel

To this:


Hooked up the last of the wires as well (I hope). Electronically, she's ready to fire up... mechanically, no.

Need to get looming for this:


And this:


Installed the front bumper for the last time. It doesn’t quite line up 100%, but enough for my liking.


Ordered new sockets for the high beams, meanwhile soldered in the lows, so can’t put the headlights back in until I get the new sockets…

July 9

Trans is back together less the roll pin for the fifth gear fork. Stopping off at the hardware store tomorrow to go get one.

July 10

Installing the trans is a pain the rear… its definitely a 2 person job.

http://www.youtube.com/watch?v=ZUaX0f7Kumo <-- 3.68MB

I had run the first part of the theft relearn 14 min or so prior.... Working on getting the VATS disabled.

July 11

Recruited my dad to help w/ the trans, and its in. Just need to get it up into the mount brackets…


My project supervisor:


He sleeps on the roof of the car while I’m working on it.

July 12:

Lights work


So that's it for now... I'll get another post going for the next batch of updates.

And before anyone mentions anything... I know my front rotors are on backwards. Its intentional. Research has led that it will not impact performance any and in fact, may extend pad life by having them with the slots facing the rear.


Edited 1 time(s). Last edited Friday, July 13, 2007 9:48 PM


Re: 3400 swap - Part 2
Friday, July 13, 2007 10:27 PM
Looking awsome dude, definately keep us updated man.
Although I wish you would get rid of the engine cover, looks sooooooooooooooooo much better without it...

See?


Re: 3400 swap - Part 2
Friday, July 13, 2007 11:46 PM
daaaaamn... all that wiring... makes me fear my future swap... though it will be alot easier... great job... get it done and to the track!


Re: 3400 swap - Part 2
Saturday, July 14, 2007 7:20 AM
you've got 1 cat power


Re: 3400 swap - Part 2
Saturday, July 14, 2007 7:33 AM
Sweeettt..


~2014 New Z under the knife, same heart different body~
______________________
WHITECAVY no more
2012 numbers - 4SPD AUTOMATIC!!
328 HP
306 TQ
Re: 3400 swap - Part 2
Saturday, July 14, 2007 8:02 AM
ahhhhh that wiring makes me cringe....not that you did a bad job, it just looks like some of the nightmares im seen at work...what a pain in the ass lol.


Good job man, this should be bad ass


Re: 3400 swap - Part 2
Saturday, July 14, 2007 8:47 AM
sweet...... I should have let you in on the I@!#$zu secrete...... dont order parts from GM for that trans..... go to a Isuzu dealer (about half the price usually, and its the same part..... comes in the very same package)


SPD RCR Z - '02 Z24 420whp
SLO GOAT - '04 GTO 305whp
W41 BOI - '78 Buick Opel Isuzu W41 Swap

Re: 3400 swap - Part 2
Saturday, July 14, 2007 10:48 AM
lookin good man. can I borrow the cat if I ever do the swap?


Re: 3400 swap - Part 2
Saturday, July 14, 2007 10:31 PM
gtpsunfire: I agree that it can look nice without the cover, but for now, I'm not planning on removing the UIM. When I get it running and the 3500 heads on there, I may reconsider.

lemur: unfortunately that cat is on his last legs... he's about 15 years old now

Brian - nearest Isuzu dealer is 75 miles away, Chev dealer is right down the road from my work, so with the cost of gas and whatnot... Part of the $92 was Synchromesh (haven't found the Pennzoil version anywhere) and fascia brackets.

Rosario, its really not as bad as it looks, some of the wires are longer than others, so they are folded over in oddball spots. And yes, pain in the ass is right

Sunb1rd: my to-do list. Once that's done, its off to the track. Got 3 head-to-heads lined up already (Boosted cavi, Grand Prix GTP, S2K):

Quote:

1a) Big priority - Disable/bypass/wire in BCM for Passlock <-- Going to try HPT next weekend
3) Not a priority: Get V6 cruise module and wire in.
6a) install new gauges
8 ) lenghten new PS lines
8a) Order dual cooling fan (junkyard special) <-- I'm going to see how far I can get away with using 1 fan for now
10) install downpipe, cut back existing exhaust and get a temporary exhaust pipe (one of those bendy ones), reinstall CV axles
12) drink beer
13) top off all fluids, install battery, turn key and cross fingers *note* get vid camera ready <-- see 1a)
13a) calibrate new speedometer
14) set appt to get actual exhaust pipe welded in (I don't know how to weld )
15) set appt for alignment (since the front suspension has been taken apart about half a dozen times now)
16) order harness bar and rebolt down driver's and passenger harness
18 ) adjust e-brake (not functioning at the moment)
19) drink more beer
19a) buy hood
20) Success
21) Maaco special the car. nothing pretty, just needs to be all one color since the bumper and hood will be primer


And what's done so far:

Quote:

1) start on harness extension (now that its not raining, I've started that)
2) once complete finish mapping out J PCM, C100, and underhood fuse panel to LA1 PCM/Fuse connector and start splicing
4) Remove 2.2 throttle cable (read: grab and yank) and install 3400 throttle cable
5) Install LSD insert
6) Remove dash, instrument cluster, tear apart IC and install new gauges (partially done)
6b) put trans back together and install,
7) rebend AC lines <-- going to use a compressor from a 95 Skylark, no need to rebend the lines. Thanks to gtpsunfire for the tip
9) extend Evap tank vacuum line
11) order new bumper, hood, grilles, front side marker lenses
12) drink beer
19) drink more beer


------
For today:

Pulled the car off the stands so I could clean up a bit. It was odd seeing the car on all 4 wheels. Its only temporary, I need to put the PS lines back on, put the new CV seals in and get the axles in... cut down the downpipe and get the temp one jimmyrigged up, fab up the lower mount, get a shorter bolt for one of the trans mounts, torque down the subframe and strut-to-spindle bolts, put on the front left subframe brace, loom the wiring, as well as complete my to-do list

The fender gap should settle a bit once there’s some mileage put back on… the springs have had no weight on them for 3 months.


Where the pile of trash is on the right is where the car used to be.


Dismantled the cluster so I can place out where the gauges are going to be (as well as a couple idiot lights) -- All Cyberdyne


Left to right:

Small one: CEL
Water Temp
Small one: Left turn
Speedo
Center, top to bottom:
-Unknown
-High beam indicator
-Brake
Tach
Small one: Right turn
Fuel


Re: 3400 swap - Part 2
Saturday, July 14, 2007 10:56 PM
lookin good man, and as for the pennzoil its usually at autozone, ive also found ams oil syncromesh, napa, when the pennzoil was no where to be found and its workin great.


Re: 3400 swap - Part 2
Sunday, July 15, 2007 7:32 AM
Dude, for the power steering lines, I used a 2.4 line from the rack and the 3400 one fromthe pump which snakes down under the alternator and bracket. Right after that, the line is seperated from factory and is the exact same thread as the 2.4. I will try find some pics and show you.
Also, Im gonna need to talk to you about a coupleother things, I will pm you for those though.


Re: 3400 swap - Part 2
Sunday, July 15, 2007 7:44 AM
Kardain wrote:

Left to right:

Small one: CEL
Water Temp
Small one: Left turn
Speedo
Center, top to bottom:
-Unknown
-High beam indicator
-Brake
Tach
Small one: Right turn
Fuel

This might come off as a dumb question, but are you planning on mounting your gauges to the lens?

I would personally make a flat piece that goes across where the original gauge face was, and mount them all to that. Granted you may have some clearance issues, but the extra work would pay off in a very clean looking install. You could keep the clear lens in the front for a factory-installed appearance.


Re: 3400 swap - Part 2
Sunday, July 15, 2007 9:06 AM
Quote:

I would personally make a flat piece that goes across where the original gauge face was, and mount them all to that. Granted you may have some clearance issues, but the extra work would pay off in a very clean looking install. You could keep the clear lens in the front for a factory-installed appearance.


Exactly what I was going to do, just wanted to lay out the pieces first to see if they even would fit (and so I didnt' lose the screws)


Re: 3400 swap - Part 2
Sunday, July 15, 2007 9:24 AM
wiring nightmare!


Re: 3400 swap - Part 2
Sunday, July 15, 2007 11:50 AM
Very nice...


___________________________________________________________________

Mitsu TD06-20g |3" Downpipe w/ Cutout | 61mm Bored TB |
HP Tuners | Innovate WB02 | Spec Stage 3 | TurboTech Upper | Full Addco Sways | Sportlines & Yellows |
Re: 3400 swap - Part 2
Sunday, July 15, 2007 1:07 PM
gtpsunfire wrote:Dude, for the power steering lines, I used a 2.4 line from the rack and the 3400 one fromthe pump which snakes down under the alternator and bracket. Right after that, the line is seperated from factory and is the exact same thread as the 2.4.


I'm going to be using 3/8" steel brake line and high pressure compression fittings to lengthen the hoses. My dad has some of each left over after he did the tri-carb manifold on his Monte Carlo. Free = good

Just need to deep clean the crap off the P/S lines first.


Re: 3400 swap - Part 2
Sunday, July 15, 2007 1:56 PM
Kardain wrote:...My dad has some of each left over after he did the tri-carb manifold on his Monte Carlo...

Sweet. Got any pictures of that?


Re: 3400 swap - Part 2
Sunday, July 15, 2007 3:49 PM
Quiklilcav wrote:
Kardain wrote:...My dad has some of each left over after he did the tri-carb manifold on his Monte Carlo...

Sweet. Got any pictures of that?


Sure do:

Its an Offenhauser (or however its spelled) manifold w/ 3 250cfm 2bbl carbs on a progressive linkage.

Electric choke has been added as well.


Its been unusually bright today, so if they didn't turn out well, I can get better ones.

As for the PS lines, I'll mark it as done. The feed line didn't route as I'd liked it to, but it works. That's due to the small bend right before the fitting on the pump side of the line. Had to cut it at a straight point, which forced me to route that line over the corner of the cover. When I get a chance, I'll probably redo that one


Edited 1 time(s). Last edited Sunday, July 15, 2007 4:20 PM


Re: 3400 swap - Part 2
Wednesday, July 18, 2007 9:37 PM
updates man... updates.

get ahold of me... email or PM or phone.


Desert Tuners

“When you come across a big kettle of crazy, it’s best not to stir it.”


Re: 3400 swap - Part 2
Thursday, July 19, 2007 8:37 AM
Looking awesome man. Are you ever going to make it up to mission to race?


- Paul

Re: 3400 swap - Part 2
Thursday, July 19, 2007 5:05 PM
Jarett: not a whole lot on the update front... mainly been cleaning up the wiring. Waiting till this weekend to try to disable the theftlock (using HPT) before I continue any further... if that doesn't work, plan C is using a 1998 3.1 ECU, plan D is MegaSquirt, plan E is find a cliff and push it off Have to sort out the DLC wiring first. OBDII scanner doesn't read the computer.

Paul: If I can get it running (see above), I'll put it on my calendar


Re: 3400 swap - Part 2
Thursday, July 19, 2007 6:25 PM
so when you have this done, can we switch cars so you can put a 3400 in mine? really?!!? AWESOME, Thanks!! lol


Re: 3400 swap - Part 2
Thursday, July 19, 2007 8:50 PM
Jason... um... this is not a swap that I really want to do again, but I can give pointers along the way (as well as any wiring diagrams that are needed )

I think I need an exorcist:


Read the vehicle description...

Poor car.... I feel sorry for it in a way

actually, that's just a generic vehicle description.... scanner didn't recognize the PCM 100%


Re: 3400 swap - Part 2
Thursday, July 19, 2007 10:21 PM


so far so good, keep it up


Re: 3400 swap - Part 2
Friday, July 20, 2007 7:21 AM
You have a 96 Vette Horray.

And the tri carb is sweet.

And the car is looking good I am still thinking about the swap i want to see how everything turns out first though. I found everything i need to do it. Keep up the good work!


Forum Post / Reply
You must log in before you can post or reply to messages.


Start New Topic Advanced Search