Well the AFPR is taking a back burner like many other things for now, since Im working on the motor first and foremost lol.
I put in a brand new thermostat, installed the thermostat housing/piping from the water pump to the thermostat. So the L61 housing is bolted on and sitting proper on the LSJ, no modifications were required obviously. And I gain a second coolant sensor location.
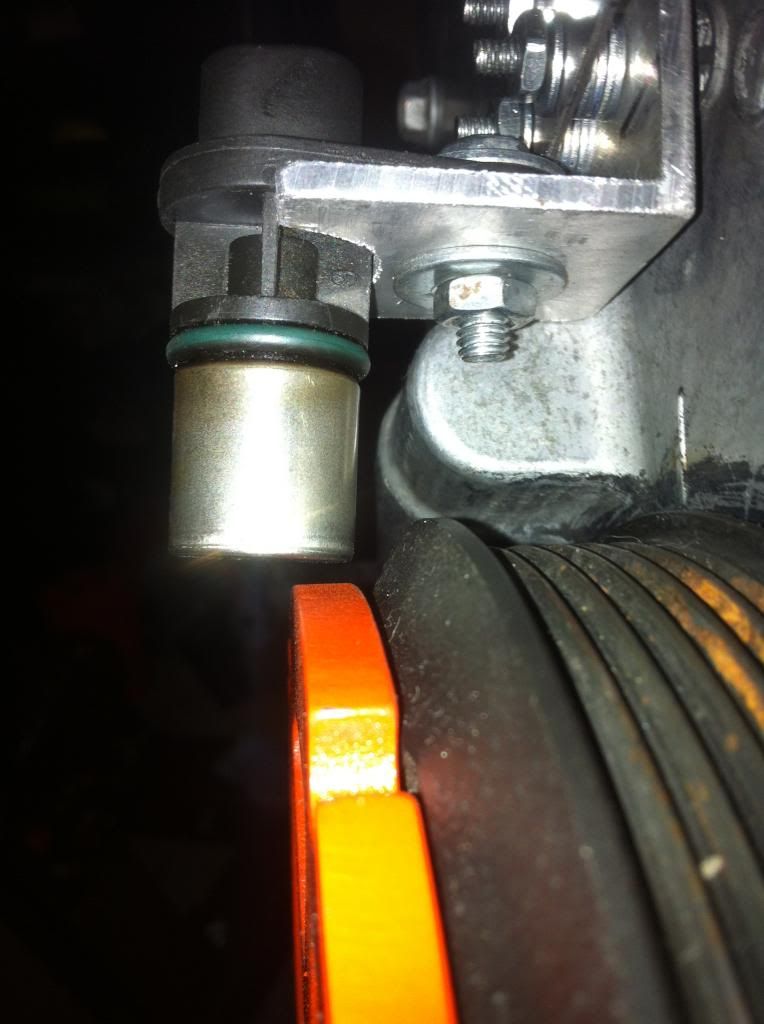
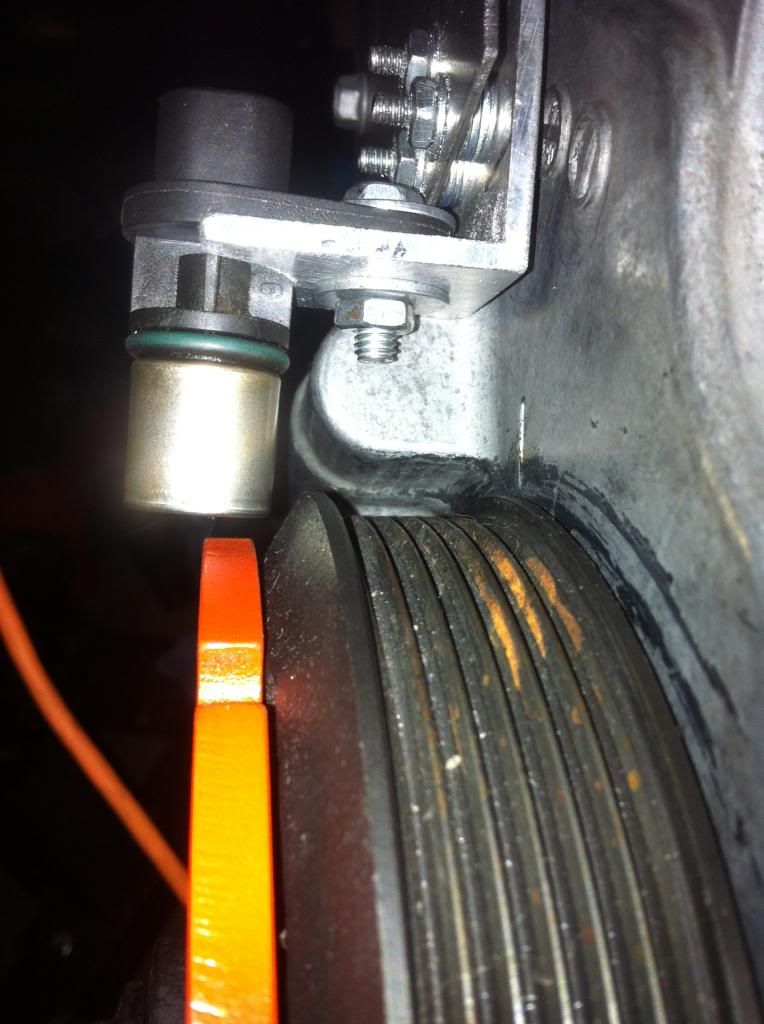
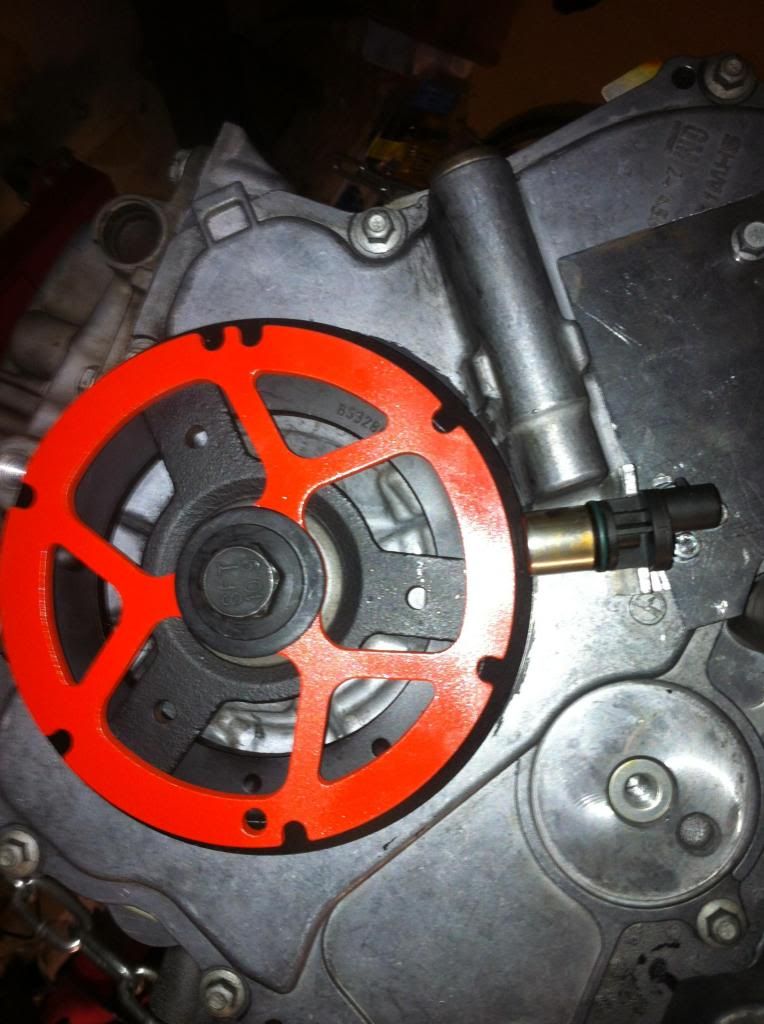
I rebuilt the bracket out of angle aluminum, and got it all rigged up again. The next step is figuring out the trigger wheel alignment before tightening down the crank bolt.
I put the L61 timing cover and pulley back on the 2.2 sitting on a crate. With the CPS removed I was able to watch the notches in the crank as I turned it.
I had the mark on the timing cover lined up with the timing mark on the crank pulley. I noticed where the notches were located through the CPS hole. Rotated the crank and watched the notches.
I then looked at the LSJ with the timing cover mark lined up with the mark on the crank pulley. I had the trigger wheel lined up to replicate the location of the notches on the L61 relative to the lined up marks on the timing cover/crank pulley.
The crank pulley and timing notch lined up is TDC for cylinder 1. The notch just right of the double notch (on both the TW and the crank in the L61) is just right of the CPS (looking at the front of the engine, like a clock).
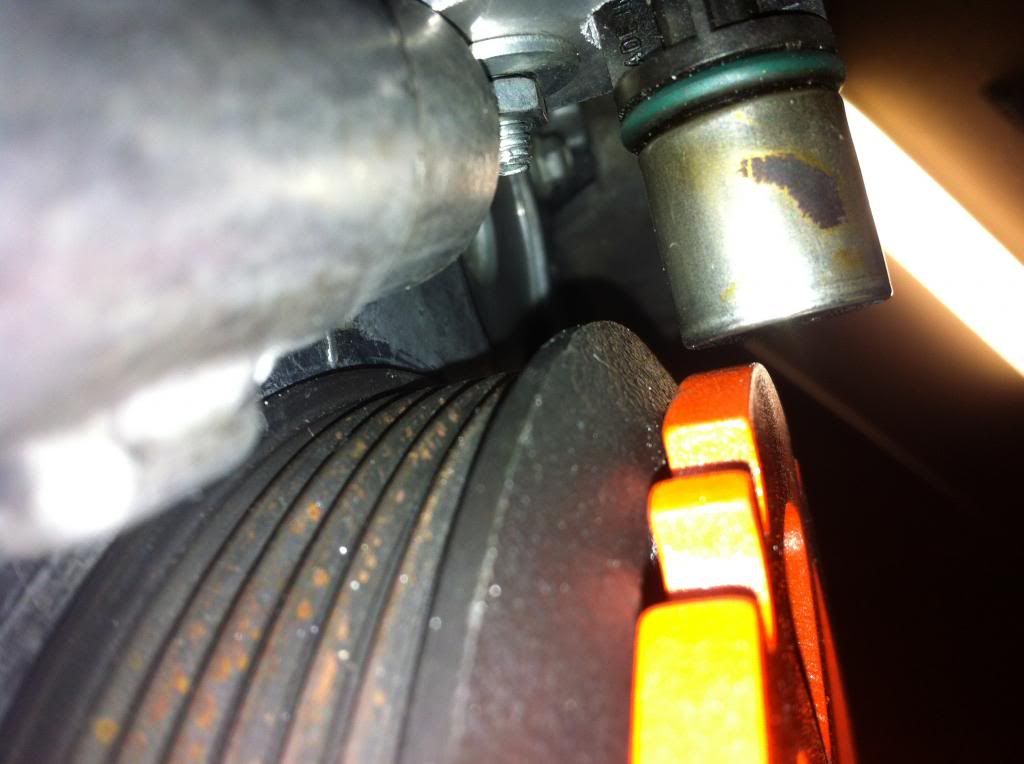
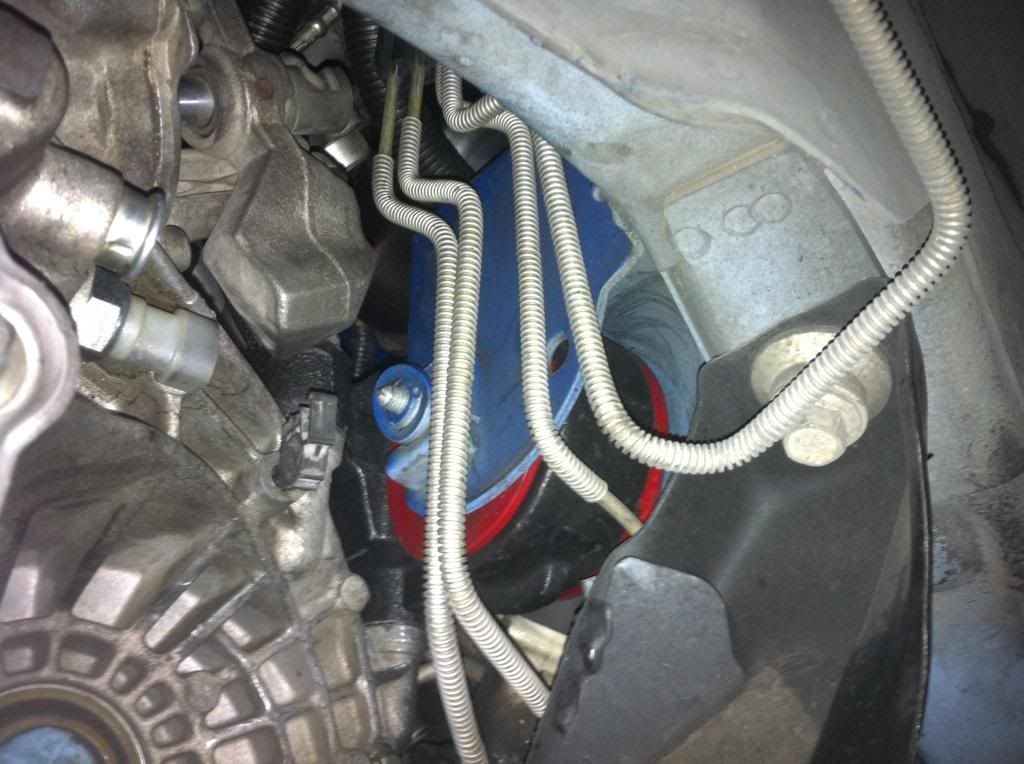
The only thing now is to ensure the CPS is going to read the notches properly as it is still verrrry slightly past the center of the sensor (see pics). But I think it should be fine and its clear of the crank pulley and is exactly 1/8" from the trigger wheel. The bracket and sensor do not move at all..its very sturdy.
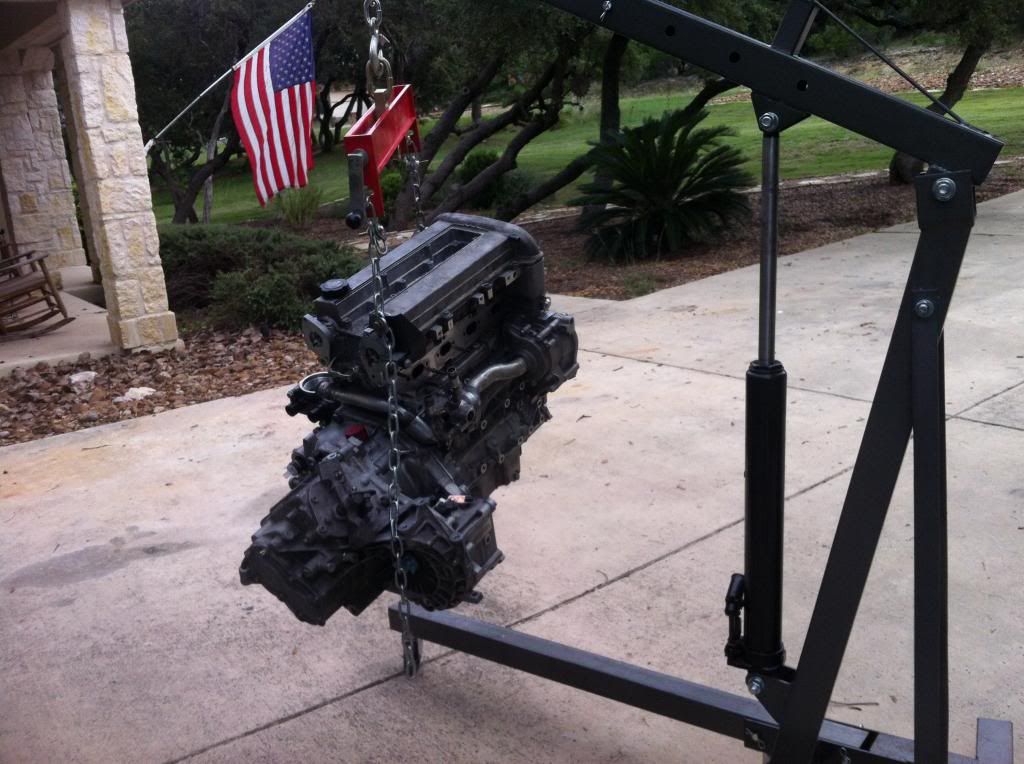
So if this is good to go...The engine is ready for install after a good check over of everything... O.o
04 Cav. 2dr. 5spd. My DD. 'Nuff said.
Nevermind...so I did it the way PJ did after all except he actually ahd the TW on the 2.2 while lining up the nothces through the CPS hole while I was doing them side by side.
Ill put the TW on the 2.2 and just mark it properly so it, the timing cover, and crank pulley all have a reference point.
Going to do this today after work hopefully. Maybe drop her in?
Edited 1 time(s). Last edited Wednesday, September 25, 2013 8:44 AM
04 Cav. 2dr. 5spd. My DD. 'Nuff said.
I think Matt(evilution) ran into this. I'd get in touch with him and ask.

"In Oldskool we trust"
yeah i contacted matt on FB but hadnt heard back. Im thinking Ill be okay since thats exactly what PJ did. Im just trying to cross my t's and dot my i's before it goes in..id rather not remove it again lol
snow, I still have my a/c compressor attached in the engine bay as i did not want to have to recharge it. So i cant fully assemble it out of the bay unless i remove that. Everything else is out though.
04 Cav. 2dr. 5spd. My DD. 'Nuff said.
blu04DD wrote:The only thing now is to ensure the CPS is going to read the notches properly as it is still verrrry slightly past the center of the sensor (see pics). But I think it should be fine and its clear of the crank pulley and is exactly 1/8" from the trigger wheel. The bracket and sensor do not move at all..its very sturdy.]
When you stick this motor in and tune it you will want to do a case learn, that should clean that up for you.
That setup looks much better, good progress. Sucks you'll have to remove the CKP to install your belt, but some sacrifices must be made for the greater good.

Snowman wrote:Can the belt be put on?
lol now I see what you were asking..haha Yeah that may pose a problem. I don't think the belt will slip through an 1/8" spot...damnit.
The other thing Im worried about is shredded belts...they can destroy stuff. If a belt goes out I may be replacing a censor too, not to mention it might not be able to be driven home where at least without a belt I can limp the car home or to a garage...
Hmm....guess theres not going to be any easy way around that. Ill just do a test run once the motors in through the passenger wheel well and see how it is going to work.
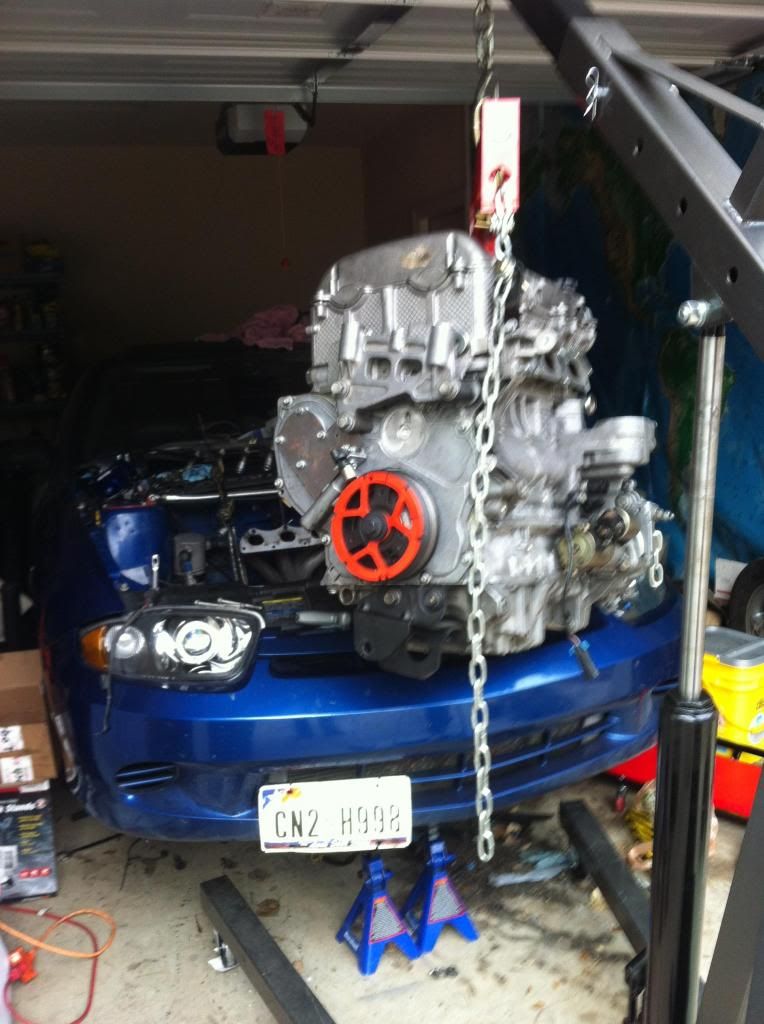
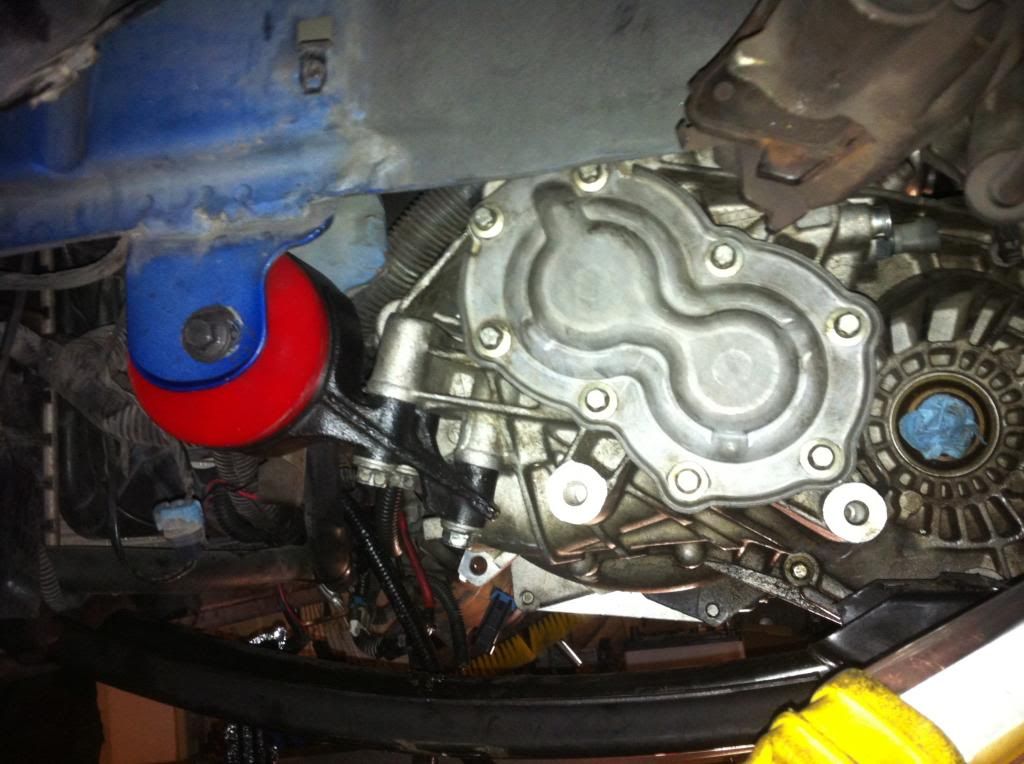
On another note....Engine is done. Everything is bolted up and good to go. Tranny, etc. All Im missing is the oil cooler adapter fittings (the ones I bought weren't right) and Im in the middle of modifying the spark plug cover to fit my ICM. However I had to hack off the bolt holes for the spark plug coil pack so it would fit inside the LSJ valve cover. But the battery on my saw died so Ill finish that up tomorrow.
Thanks for raining on my parade with the belt issue...

04 Cav. 2dr. 5spd. My DD. 'Nuff said.
roadside assistance is your friend, and not expensive thing to have. you may even have it included on your insurance policy

Good progress man, looking good. Its getting there faster than my hybrid build. I still gotta finish porting head, seat valves and fully assemble head, finish supercharger rebuild which is completely ripped apart and than put engine together along with make cps bracket and cam block off plate
FuzzMASTA9
yeah...I need that cam block off plate *cough*cough but someone hasnt sent it yes *cough

I also need to buy all the fluids and new spark plugs, basically all the 'tune up' stuff. Gotta figure out which plugs are best for the LSJ with my set up too, having the 2.8" pulley and stage 2 injectors, Im guessing the 1 step colder plugs if i recall from reading up on the CSS.net forum.
cinny, I have road side on both my insurance and cell phone (most dont know its available for CHEAP through your cell provider and covers you, not just the car so its anyones vehicle you're in). But I dont like relying on other people. if i can id prefer to fix it and get it home where I can repair it myself and not wait hours for a flatbed truck to show up only to say 'well its only covered for 15 miles, you have to pay for every mile beyond that'.
oh and today is my last full day of work, tomorrow i have my exiting meeting and hand in my military card (im contractor). Ive been working for the Air Force since early 2007..going to be an interesting change of pace not having a job for a short while (hopefully not more than a week to a few weeks max). Ill miss my team and I enjoy working with the military personel...but I guess its more time to wrench on the cav, right? lol
04 Cav. 2dr. 5spd. My DD. 'Nuff said.
Dude I'm a contractor too! For the Army though. I know what you mean about cool teams working with you.
I would say 2 steps colder. I hear that there is the least amount of knock on step 2's. It's what I got in my head right now, and can't wait to fire up the beast finally!
Nice work! I like the color of the Crank Position Wheel.
Did you say my car looks slow??
I'm running 2 steps colder on a 3.1 and noticed a lot less knock than with 1 step colder. Although, it may be different for the lsj.
"In Oldskool we trust"
Go 2 steps colder, NGK BKR8EIX or number itself is 2668 for LSJ, thats what I bought for mine but mine will be 2.8" pulley and 60# injectors
FuzzMASTA9
well I was working on the small things today after work. I tried removing my inner and outer tie rods. Outers came off easy, dremeled through the inner tie rods inner clamp, popped right off. Infact my tie rods for being 205,000 miles old were in EXCELLENT shape! But, since I have them and its all off, figured wth. So I go to remove the inner tie rods with the tool I have, and the hole in the tie rod removal tool isnt large enough. so I cant fit it down to the nut that's on it to loosen it. So I used drill bits, grinding bits, and even a curved file...I could not get it to shave enough out to get the tie rod in there...that @!#$ is like hardened steel or something!
so I decide to go work on the spark plug cover. damn saw wasn't liking that aluminum very much and it was a pita just to get like a 4in cut out of it. At the same time im being EATEN ALIVE by f*cking mosquitos.
so I finished early and gave up. Im getting OFF!, large shop fans, and some better tools for cutting metal. My grinding tools and saws don't seem to be up to the task. I cant find any quality dremel style griding tools for boring out holes. What are you guys using to bore holes out in steel and aluminum? I even bought some steel dremel bits specifically for that and its more of a finishing tool, not meant for cutting out large areas (say you have a 3/8" hole you drilled and need to bore it to a 1/2" or something).
04 Cav. 2dr. 5spd. My DD. 'Nuff said.
Just use a 1/2" drill bit! lol
Did you say my car looks slow??
I have a carbide grinding bit, fits in a drill or an air grinder works great on steel, use wd40 when doing aluminum or it will clog it up

Bought it on the Matco truck, like 30-40 bucks
snowman, that's a lot like the one I bought for the dremel, but its a lot smaller (cylindrical but longer and narrower). That looks like its got a bit more grinding power to it though.
Im about to head to Harbor Freight now. Ill look for some of those. But I still hate that the stupid inner tie rod tool didn't fit the cav oem tie rods..I mean I don't HAVE to use the tool, but I bought it for that purpose and now I cant take it back since I molested the piss out of the inside of it haha.
04 Cav. 2dr. 5spd. My DD. 'Nuff said.
I know the one I have is hardened so it will last longer, it's awesome, IMF thinking the Dremel isn't for something as stout as what you are grinding
Well I bought about $100 worth of crap so something will get at this tie rod removal tool lol. And some better stuff to cut my metals with. And OFF! So I should be good to go...
04 Cav. 2dr. 5spd. My DD. 'Nuff said.
In the past week I've spent about 400 on stupid little $#*!, I feel your pain brother.
"In Oldskool we trust"
Snowman wrote:Is it in yet?
if I had a nickel for every time I heard that..
"In Oldskool we trust"
^ hahaha...
on another note...not. Its been raining really hard here and I have to run the engine from one garage bay to the other and I didn't want to have it exposed to heavy down pour.
I got my CPS connector extended to plug in and the spark plug cover is finished. so its ready. I also just left my inner tie rods in because they're in really good condition still and I could not get them out. That grinding bit I bought was shredded up in a heart beat by the tie rod tool, I gave up on that. New outer tie rods will be going on though.
my parents move back to the states starting Monday, so on top of losing my job Friday Im also getting the house ready for their return. Then having to find another place to rent/purchase I just have a lot of stuff going on. Trust me, the car needs to be done. They're already houding me about it in the garage and all my crap in there and they're not even back yet!
Im just so frustrated lately and I really need a long vacation....
04 Cav. 2dr. 5spd. My DD. 'Nuff said.
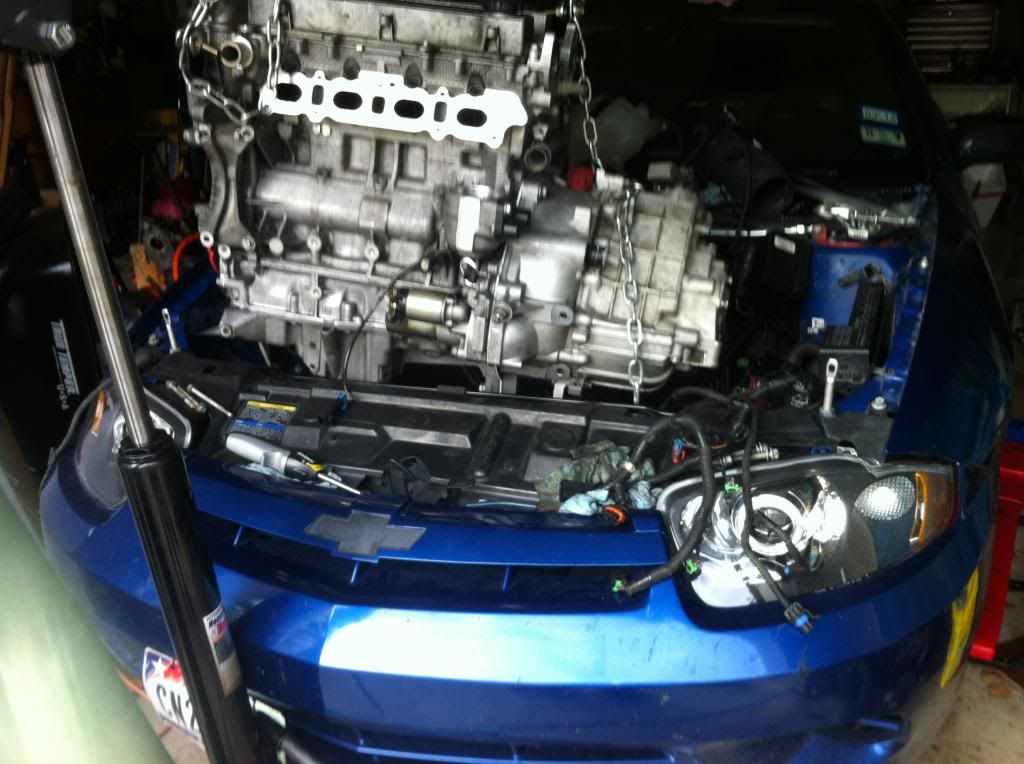
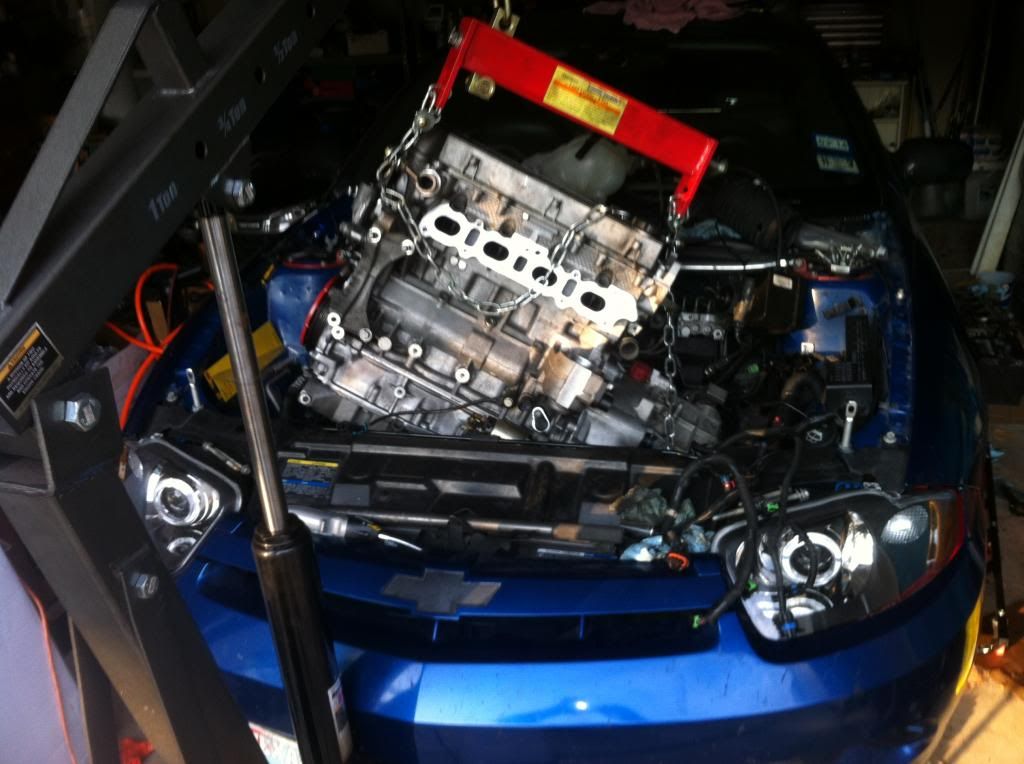
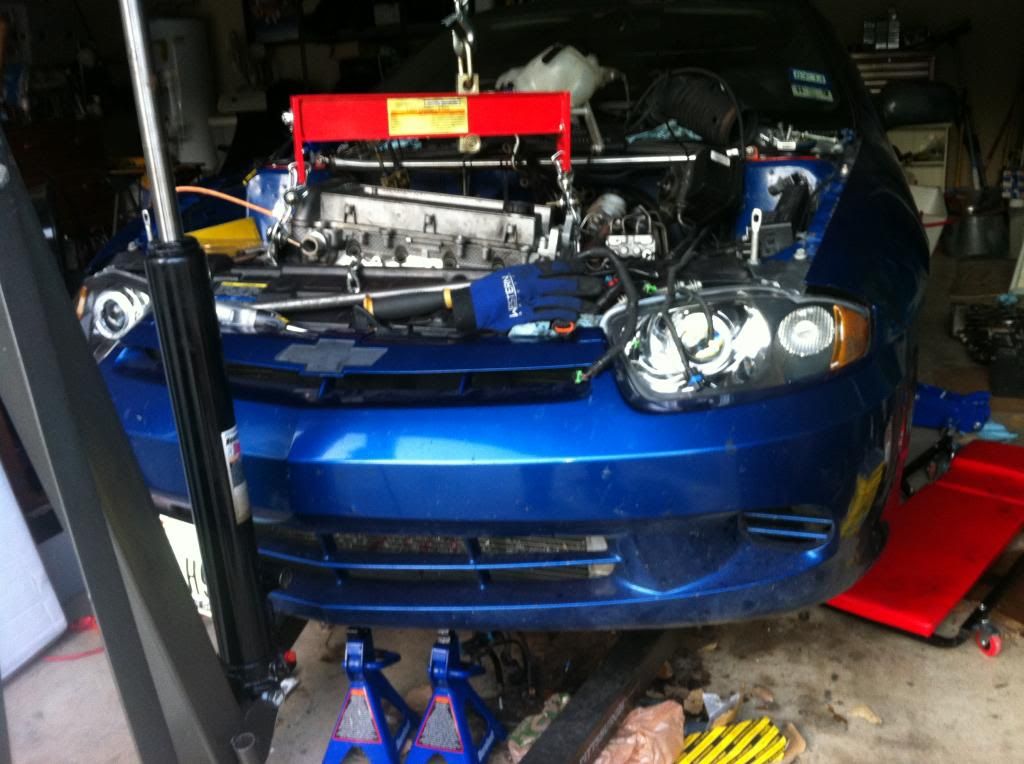
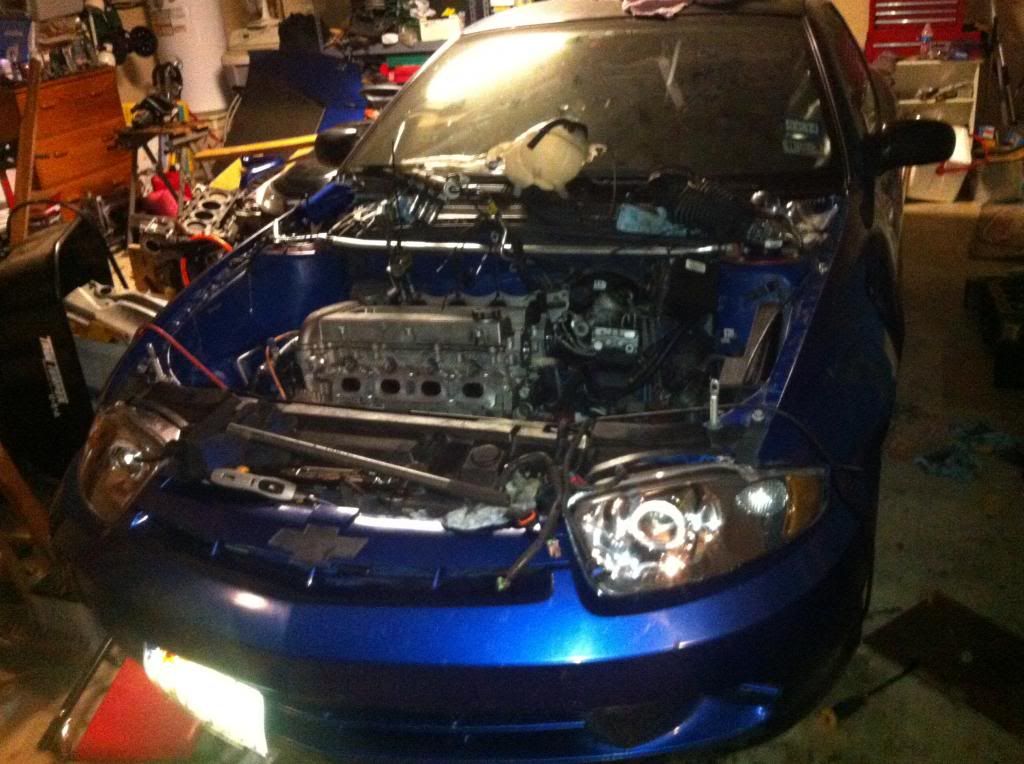
So...yeah. I decided to just get sh!t done today. I didn't hesitate and got the motor in. It wasn't too bad getting it IN, the problem I had and what took HOURS was getting the tranny mounts to bolt in. It must have been the angle of the motor on the leveler or something, but I just could not get them in for the life of me. Then I rescued a few dogs (some neighbor dogs) that fell into a big water hole in a construction site next door, later last night so that distracted me for an hour or so. Got back to work and finally after much frustration, its in and the tranny and motor mounts are good. Im going to probably hold off on hooking things up and getting a lot done (today) since my parents fly back to the states early evening. I have to finish cleaning the house and getting the garage cleared out at least on the one side now that I can store the engine hoist and stand. So Im excited to have the LSJ in there.
Things Im waiting on or need to make: oil cooler adapter fittings, cam sensor block off plate, spark plugs, transmission fluid, oil, bleed the clutch system, install drilled/slotted rotors up front, install outer tie rods and sway bar end links, remove the mechanical oil pressure gauge line and find a suitable location for the AEM oil pressure gauge Ive had for a long time, start charging the battery. Then lots of misc little things like notify my tuner so we can schedule a time for him to do his HPTuner thing!
Things still to install but will be for another day in the near future that have been sitting in the house: Devils Own meth kit, Corvette ebony leather seats, black suede/blue stitching after market steering wheel, TTR Kbrace, Saturn rear disc conversion, LSS sides (need to be painted arrival blue) and an 02 LS rear lip (not sure if I want to use it really..)
On to the progress pics, then off to bed for me only to get up in a few hours to start house work!
(oh and the cam cover is the temporary one so I didn't scratch the gloss black one during install).
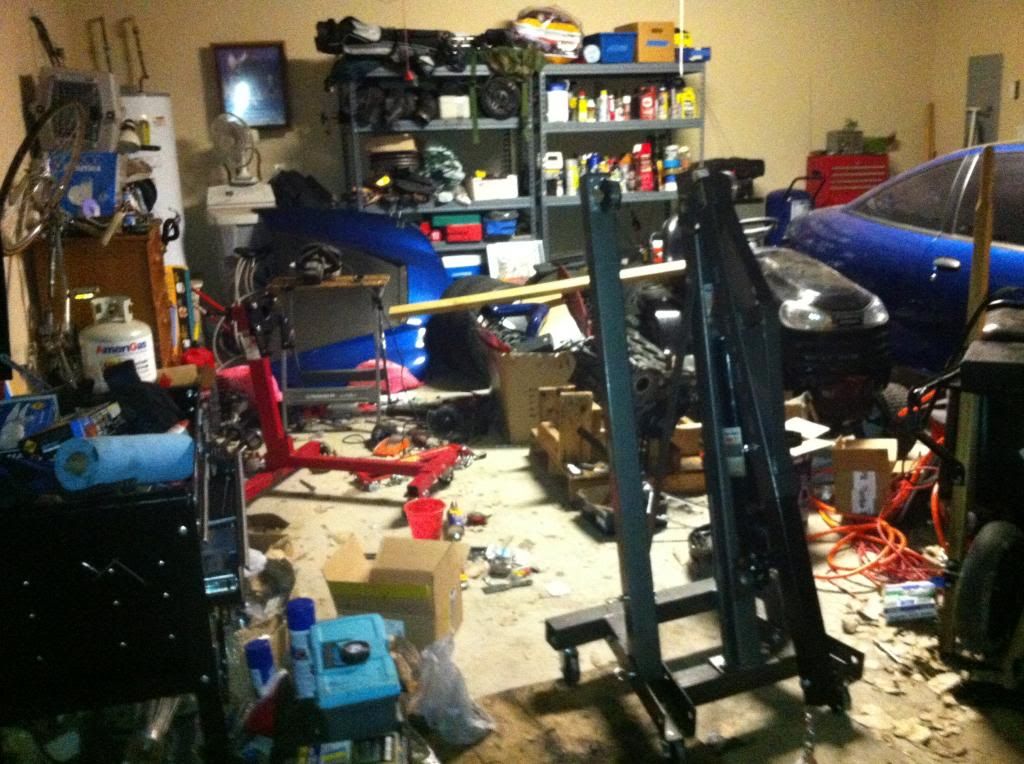
and the mess to clean up today after I wake up lol...
04 Cav. 2dr. 5spd. My DD. 'Nuff said.