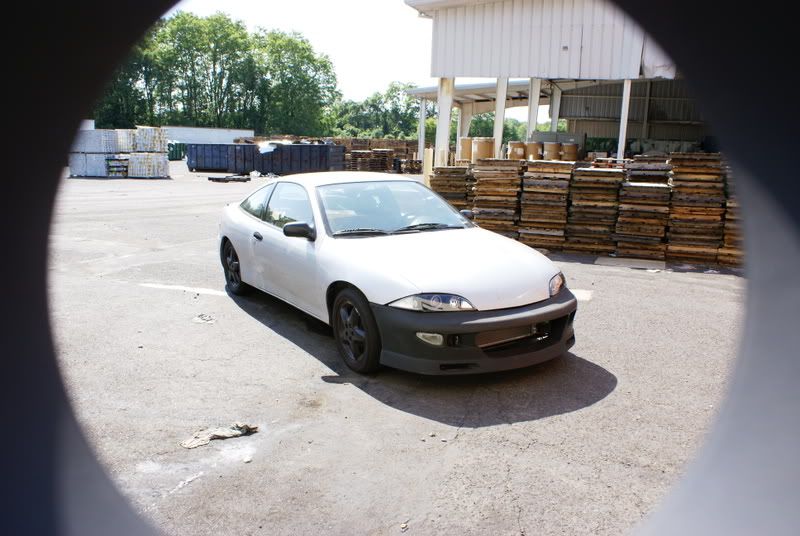
Luis Marroquin wrote:just a thought, but why is your car in what looks like a warehouse? is that your shop and are all your tools there?
yea thats the manufacturing plant I work at. Its a handy place to have access to during off hours for vehicle modification

all my tools are there as well as my stockpile of extra parts, and access to the machine shop and a bunch of power tools and specialty tools
perks of the job

Looking great so far PJ. I sure hope all the effort pays off in the end for you.
I see a HO Eco mani.
nice!
can't wait to see some numbers.
Desert Tuners

When you come across a big kettle of crazy, its best not to stir it.
PJ its looking Great.
PRND321 Till I DIE
Old Motor: 160whp & 152ft/lbs, 1/4 Mile 15.4 @88.2
M45 + LD9 + 4T40-E, GO GO GO
just to bring everyone up to date.
I'm mocking up coolant hoses, and the griffin radiator is temporarily installed at the moment. I still need to get fans for it.
I'm also putting a much smaller battery in the skwirl, rewiring everything (for the stand alone) and I just got my A1000 fuel pump in the mail yesterday

AND I got my beater back on the road so I'll be able to work on the car whenever I choose so progress should be coming very rapidly.
I'm waiting on some more AN fittings to get my fuel hoses finished up and my AFPR mounted. Then I can go from there. I have an idea of what I want, but I'm basically building it as I go, and making sure that it will be easy to change settings or replace parts should I ever need to in the future.
too late..... mess made already
 LE61T PTE6262 Powered
awesome. when does the IF front get paint?

Riddle me this... riddle me that...
not sure. was thinkin about spray bombing it just to make it somewhat match. but primary concern is the mechanical then the electronics. if i have time or money left over I'll have the bumper painted. I may buy some stuff and spray it myself since i'm beginning to venture into light body work
DaFlyinSkwir(LS61) /PJ/ OEM+ wrote:not sure. was thinkin about spray bombing it just to make it somewhat match. but primary concern is the mechanical then the electronics. if i have time or money left over I'll have the bumper painted. I may buy some stuff and spray it myself since i'm beginning to venture into light body work
With all that you know about these cars... im nervous about wtf you are gonna come up with if you really get into body work too
---------------------------------------------------------------
Tristatetuners.com
IGOTBANNED.NET
OceanStateDubs.com
Dam dude, that's killer. Looking good man, can't wait until the car's running.
Project Resurrection is in full swing!
been working a little here and there on the car. I got a lot going on this week tho so I won't be able to get much done. Next week I hope to have the car assembled even further than it is now (I have to order some more parts in order to ensure they fit properly and don't interfere with anything else). Thats the only thing holding me up. I'd rather wait to mount the parts in good locations than rush and have to do it all over again.
the more I see the car the more I want to work on it TRUST me lol. I need a few more parts to do some final mock up and then I should be in great shape..
the last step is the wiring of the stand alone. JOY.
Just my opinion i say you leave it black.. all though it would look good silver i think the skwirl's got to have a black bumper. it looks very uneak.. or at least thats what i think of it.. just my $.02 any way.

Yea the mis-matching paint gives it the beater/hack job look(no offence), which is good in a way. You line up next to an 240sx or something and they are thinking "POS cavalier". Basically leave the skwirl unpainted and you'll have one of the ultimate sleeper cavys.

so onto today's work thus far:
I decided to drop the skwirl's fuel tank today to get it ready for the external pump conversion with the aeromotive A1000 pump.
I did quite a bit of research and came up with this:
GM build book - Cobalt Phase5
in that book, on page 69 it details how to modify the factory fuel sender assembly. I took the idea from that and implemented it on the Jbody fuel sender.
how to modify the factory Jbody fuel sender for an external fuel pump:
-remove the fuel tank
-remove the fuel pump/sender assembly
-disconnect the lower assembly from the upper by prying the sub sections apart. be sure NOT to break anything. There's a few hoses and wires that need to be retained, along with the float that provides your fuel gauge with the proper level in the tank.
-remove the pump itself from the lower assembly.
-remove the FEED hose (larger of the two brownish accordian-like hoses)from the upper assembly, but retain the nipple (ie. DON'T DAMAGE IT)
-remove the small black hose from the fuel pump but KEEP IT and DO NOT break it.
At this point, we'll pause for a moment... I notice a lot of people have problems with 1/2 tank and below 'fuel cut' well after looking around I came up with this:
ZZPerformance fuel pump venturi discussion
paraphrase of the above:
Quote:
Hmm.. What is that small black tube?
Scott told me that it was a return tube and not important for operation. Steered me down the wrong path for quite a while. But what IS that tube really? You can see it connects to a white cylinder and at the bottom of that cylinder is THE sock that dips down to the very bottom of the fuel tank. I had an assumption about what it might be so I broke that piece out of the stock assembly.
Sure enough.. Its another pump. A venturi pump to be exact. Not only is it a pump but its an entire canister level regulating system. This pump soley provides means for sucking from the bottom of the fuel tank.
Its an ingenious way of scavenging the tank as a venturi pump is not effected by sucking air or foam through it. Our rollervane electric pumps are cooled from fuel flowing through them and its very bad to suck up air because they can burn up. Plus since the pumps are positive displacement, any air that is sucked up by the stock pump can get forced through it and into the fuel lines.
A venturi type pump (also known as a jet pump, scrubber, or eductor) works by jetting a liquid or gas through a converging and diverging diffuser throat. A vacuum is created at the nozzle entrance by the motive fluid entraining the static fluid in its stream. Its a very interesting principle that I will not be going in to great detail as I could devote an entire thread to that principle alone. Theres plenty of information on the web.
Now we know that a vacuum is created in the blue areas of the diagram. The venturi pump will now suck from the bottom of the tank until the level in the canister rises to a point where the float lifts. When the float lifts, fuel will be sucked from the canister and returned to the canister primarily. This is because the float is higher up than the entrance to the fuel sock and has less restriction (no sock on the float). The whole time this is happening, the stock pump is sucking from the canister and providing fuel to the engine. As the engine consumes this fuel, the level of the canister will drop, the float will close, and the venturi will suck from the tank again.
In this regard, the stock pump suction port is maintained submerged at ALL times and the venturi is constantly scavenging the bottom of the tank to keep the canister full. In this manner a stock fuel assembly is VERY efficient at getting every last ounce of fuel out of the tank.
Without the venturi line being connected, the canister is gravity fed only and makes it very difficult for Any fuel to get into the canister unless the level of the tank is relatively high.
The venturi line MUST be connected to the high pressure outlet for proper operation.
so this small black tube must be connected to the feed line. I think a small Tee will do the job.
I also drilled a hole in the bottom of the assembly to help with filling as per GM's suggestion. In retrospect it may accomplish nothing since the bottom of the assembly sits flush with the bottom of the tank...
Whether or not this will interfere with the proper operation of the venturi has yet to be seen. But overall, the goal for the fuel set up is to have the stock tank able to be sucked almost dry (just like stock) while having a fuel pump able to flow 600gallons of fuel per hour and support 800hp.
continuing...
-Drill a hole in the bottom of the lower assembly to provide extra flow for the upgraded fuel pump.(this step may be removed or revised)
-Reassemble the upper and lower fuel sender assemblies, and attach the fuel feed hose and connect the small black hose from the bottom sock to the feed hose with a small tee.
-as an extra precaution, cut the BLACK and YELLOW wires as close to the connector as possible. These are terminals B and C. On the opposite connection (the one outside the assembly, you will cut these wires (terminals B and C(since they'll be used for the external pump anyway)) thus eliminating any open electricity inside the fuel tank. The small blue wires MUST be retained however, since they are the voltage to and from the float, providing your fuel level gauge with the proper input.
-reinstall the assembly in the tank
-reinstall the tank
-next is to mount and hook up the external fuel pump. Follow the wiring diagram for your external pump of choice.
Now you have a TRUE externally mounted upgraded fuel pump. And whereas the sound may be aggrevating to some, it appeals to others. Also, if you have a fuel pump failure, it will be MUCH easier to replace and service.. or upgrade in the future.
I have pictures I will upload later, since I'm at work photobucket is blocked.
Nice
~2014 New Z under the knife, same heart different body~
______________________
WHITECAVY no more
2012 numbers - 4SPD AUTOMATIC!!
328 HP
306 TQ
well unfortunately that didn't work out
after reading the ZZP article closer, it turns out the venturi needs to be tee'd into the OUT side of the pump. since my pump is external, running a hose all the way back inside the tank to feed the venturi just isn't possible.. the seal of the fuel tank would be compromised
so I did some more modification to the cup and removed the inner support for the stock pump. Now I have a giant empty mass. I ran a 5/16" hose from the nipple on the upper section of the sender assembly to the bottom of the cup.. taking care not to make it so long that it can get stuck on the wall or floor of the cup and cut itself off from the fuel inside.
I'm hoping I won't have a fuel cut, but I have a feeling I will. I'll make plans further if the need arises, for now the sender is back in the tank, the tank is mounted back into the car.
I also cut the wires that would normally feed electricity into the sender to power the pump, and instead those wires will be utilized for the aeromotive (with a relay and larger gauge wire for the A1000 of course)
so now the only thing getting power in the tank is the float.
All I have to do now is run the hoses from the intake feed line to an aeromotive filter, to the A1000, then from the A1000 to the factory lines (or something similar to this)
I just tested the A1000 with a 19volt battery and it works (suction and all). Fuel system is almost complete
so your going for how much here?? 2000whp??

Riddle me this... riddle me that...
What is the A1000 rated at?
Caution: I have an odd sense of humor, so don't be offended by the things I say
MMMM, HIDs

Wow, why so much, safety margin?
Caution: I have an odd sense of humor, so don't be offended by the things I say
MMMM, HIDs
Must be. Otherwise, overkill city!
Caution: I have an odd sense of humor, so don't be offended by the things I say
MMMM, HIDs